
Related Manuals for Microsens MS400870M Series


Summary of Contents for Microsens MS400870M Series
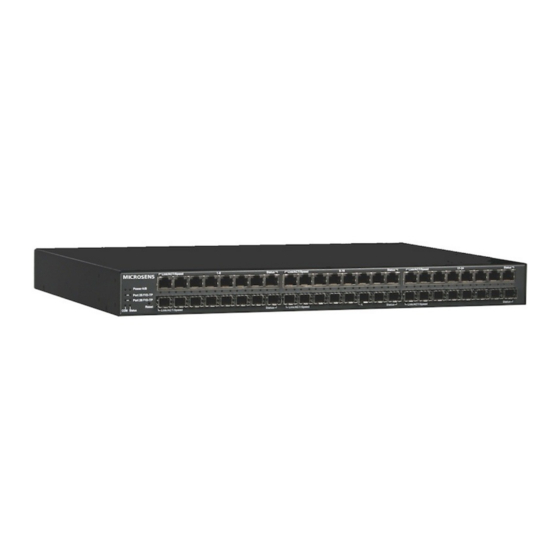
- Page 1 MS400870M ” 24 Port GBE SFP Switch 19 24X10/100/1000T Combo 100/1000X SFP Network Management User’s Guide Version 0.96...
-
Page 2: Copyright Statement
Trademarks Contents subject to revise without prior notice. All other trademarks remain the property of their respective owners. Copyright Statement Copyright 2008, All Rights Reserved. This publication may not be reproduced as a whole or in part, in any way whatsoever unless prior consent has been obtained from Company. -
Page 3: Revision History
Revision History Manual Version Modification Firmware Version Date 0.95 Add CLI and Web interface 1.07.00 2009/06 0.96 Modify quick keys 1.07.00 2009/06 Note: This User’s Manual is written or revised according to the officially-released Firmware version. The content of this Manual is subject to change without prior notice. -
Page 4: Table Of Contents
2.6.12 SKA command mode ..................48 2.6.13 Multicast command mode .................. 49 2.6.14 Switch command mode ..................50 2.6.15 VLAN command mode ..................50 3. SNMP NETWORK MANAGEMENT................. 53 4. WEB MANAGEMENT ...................... 54 4.1 System Information ....................56 4.2 User Authentication ....................57... - Page 5 4.2.1 RADIUS Configuration ..................59 4.3 Network Management ....................60 4.3.1 Network Configuration ..................60 4.3.2 System Service Configuration................61 4.3.3 RS232/Telnet/Console Configuration ..............62 4.3.4 Time Server Configuration ................... 63 4.3.5 Device Community ....................64 4.3.6 Trap Destination ....................65 4.3.7 Trap Configuration ....................
- Page 6 4.4.11.5 IGMP Filtering .................... 116 4.4.12 Static Multicast Configuration ................117 4.4.13 MVR ......................... 119 4.4.13.1 MVR Settings .................... 120 4.4.13.2 MVR Group ....................122 4.4.14 SKA Configuration ................... 123 4.4.14.1 DHCP Option 82 Settings ................124 4.4.14.2 DHCP Port settings ................... 126 4.4.14.3 Filter Configuration ..................
- Page 7 4.6.2 Update ....................... 166 4.6.3 Load Factory Settings ..................167 4.6.4 Load Factory Settings Except Network Configuration ........168 4.6.5 Backup Configuration ..................168 4.7 Save Configuration ....................169 4.8 Reset System ......................170...
-
Page 8: Introduction
There are 4 models in MS400870M Series. Descriptions and interface figures are provided below: MS400870M-1A – 24 dual speed combo ports plus 2 Giga combo port managed Switch fixed 1 AC MS400870M-2A – 24 dual speed combo ports plus 2 Giga combo port managed Switch fixed 2 Redundant AC –... -
Page 9: Management Options
Local Console Management Local Console Management is done through the RS-232 DB-9 Console port located in the back of the MS400870M Series Switch. Direct RS-232 cable connection between the PC and the Managed switch is required for this type of management. -
Page 10: Management Software
Monitor the status Reset the system You can use CLI as the only management system. However, other network management option - SNMP -based management system is also available. You can access the text-mode Console Program locally by connecting a VT100 terminal - or a workstation running VT100 emulation software - to the Managed Switch RS-232 DB-9 Console port directly. -
Page 11: Management Preparations
1.4 Management Preparations After you have decided how to manage your Managed Switch, you are required to connect cables properly, determine the Managed switch IP address and, in some cases, install MIB shipped with your Managed Switch. Connecting the Managed switch It is very important that the proper cables with the correct pin arrangement are used when connecting the Managed switch to another switches, hubs, workstations, etc. - Page 12 MIB for Network Management Systems Private MIB (Management Information Bases) is provided for managing the Managed switch through the SNMP-based network management system. You must install the private MIB into your SNMP-based network management system first. The MIB file is shipped together with the Managed Switch. The file name extension is “.mib”...
-
Page 13: Command Line Interface (Cli)
2. Command Line Interface (CLI) This chapter introduces you how to use your MS400870M Series CLI, specifically in: Local Console Telnet Configuring the system Resetting the system The interface and options in Local Console and Telnet are the same. The major difference is the type of connection and the port that is used to manage the Managed Switch. -
Page 14: Remote Console Management - Telnet
2.2 Remote Console Management - Telnet You can manage the Managed Switch via Telnet session. However, you must first assign a unique IP address to the Switch before doing so. Use the Local Console to login the Managed Switch and assign the IP address for the first time. Follow these steps to manage the Managed Switch through Telnet session: Step 1. -
Page 15: Navigating Cli
2.3 Navigating CLI The Command Line Interface (CLI) of MS400870M Series is divided into three different modes. After you enter the authorized username and password, you start from the User mode. The commands available depend on which mode you are currently in. Enter a question mark (?) at the system prompt to obtain a list of commands available for each command mode. - Page 16 history command. While in User Username: Logout logout mode, enter logout command. While in User Console> The ping test from mode, enter the the Managed Switch ping ping command to another network and followed by unit. target IP. While in User Console>...
- Page 17 mode, enter the have been used. history command. While in Enable Console(ip)# Configure IP mode, enter the ip addresses of the command. Managed Switch. While in Enable Username: Logout logout mode, enter the logout command. While in Enable Console# The ping test from mode, enter the the Managed Switch ping...
- Page 18 command you would like to view its current setting. Config While in Enable Console(config)# In Enable mode, mode, enter the users can access the Enter Switch‟s advanced configure Config command. features, such as mode VLAN, Rate limit, QoS, etc. When in Config Console(config- Configure LACP mode, enter the...
-
Page 19: General Commands And Quick Keys
mode, enter the of each port. port command. When in Config Console(config-qos)# Set up the priority of mode, enter the packets within the qos command. Managed Switch. When in Config Console(config-rstp)# Set up each port and aggregated ports‟ rstp mode, enter the rstp command. -
Page 20: Listing Command
In each mode, users can enter show command to view a list of commands, view each command‟s current setting, and view system information. The following explains how “show” command is used in MS400870M Series. Show system When you enter “show system” command in each mode, you will be informed of system information. - Page 21 Company Name: This shows the company name or related information. System Object ID: This shows the predefined System OID. System Contact: This shows the system contact information. System Name: This shows the system name or related descriptions. System Location: This shows the system location. Model Name: This shows the product model name.
- Page 22 Show a Command’s Current Settings In User, Enable and Config mode, you can type “show” and followed by the command listed above to view its current setting. For example, if you type “show qos” in User mode (Console>), then the current setting of qos command will be displayed. Within QoS, the rate limit configurations can be set.
-
Page 23: Usage Help
edited. For example, when you are in Console(console)# and have changed the setting of time-out function, you can type “show” after “Console(console)#” prompt, then you can verify the currently-configured setting of time-out function. 2.3.2.4 Usage Help When entering a command without the required parameter, the system will remind users of the command‟s syntax and parameter. -
Page 24: Conventions
2.3.2.6 Conventions In CLI, some conventions are used consistently to express uses of a parameter. Common conventions are described below. Conventions Descriptions < > Required parameters or values are in angle brackets. Optional parameters or values are in square brackets. For example: [qce_id] or [etype <etype (0x600-FFFF)>... - Page 25 Boot up message Root directory (Default username: admin without password) In “Console>”, enter the question mark (?) to show all commands available for User mode. The screen shows as follows: Command Description Run OAM 802.1ag CFM loopback, linktrace, delay measurement test. enable Enter the Enable mode.
-
Page 26: Enable Mode
2.5 Enable mode In order to manage the Managed Switch and set up required switching functions, enter the enable command after the “Console>” and then press ? for a list of commands available for use. Command Description Backup configuration file via FTP or TFTP. backup Run OAM 802.1ag CFM loopback, linktrace, delay measurement test. -
Page 27: Cfm Command Mode
2.5.2 CFM command mode Ethernet Connectivity Fault Management (CFM) is an end-to-end and service-to-service Ethernet layer operations, administration and maintenance (OAM) 802.1ag protocol. It includes practical connectivity monitoring, fault verification and fault isolation for large Ethernet metropolitan-area networks (MANs) and WANs. As its name implies, IEEE 802.1ag focuses on the connectivity fault management which provides the following four features on each Virtual Local Area Network (VLAN) basis. -
Page 28: Console Command Mode
Prompt Command & Parameter Description Console(cfm)# loopback <domain_name> Run loopback test. <assoc_name> <target mepid | mac address>[-n number(2- For Example: 100)] [-s size(1-255)] [-p Console(cfm)#loopback domain assoc priority(0-7)] [-d drop 00:01:02:03:04:05 -n 100 -s 255 -p 3 -d true eligible(true|false)] linktrace <domain_name>... -
Page 29: Service Command Mode
IP packets sent by the Switch. This address is required when the Switch and the network management station are on different networks or subnets. The default value of this parameter is 0.0.0.0, which means no gateway exists and the network management station and Switch are on the same network. - Page 30 <community> <trap_id>: 1~10 <trap_ip>: The specific IP address of the network management system that will receive the trap. <community>: up to 20 characters. NOTE: If you would like to edit the settings of a trap destination, you can enter the command...
- Page 31 snmp)#. For example: If you want to edit settings of the trap destination “2”, you can use the following commands to enter the editing mode. Console#service Console (service)#snmp Console (service-snmp)#trap-dest 2 Console (snmp-trap-dest_2)# delete <trap_id> To delete a registered trap destination. Console(snmp-trap- state <enable | disable>...
-
Page 32: Syslog Command Mode
2.5.6 Syslog command mode Prompt Command & Parameter Description Console(syslog)# mode <enable | disable> To enable or disable syslog. Set up the first syslog server IP. server-1 <ip_addr1> server-2 <ip_addr2> Set up the second syslog server IP. server-3 <ip_addr3> Set up the third syslog server IP. 2.5.7 System command mode Prompt Command &... -
Page 33: User Command Mode
FTP or TFTP server. <username>: Enter the username for Firmware upgrade via FTP. If you use TFTP server to upgrade Firmware, you do not need to specify username. <password>: Enter the password for Firmware upgrade via FTP. If you use TFTP server to upgrade Firmware, you do not need to specify password. -
Page 34: Config Mode
secret <secret> The word or characters to encrypt data sent to RADIUS server. The word or characters are up to 31 characters. port <port> The RADIUS service port on RADIUS server. <port>: The port number is between 1025 and 65535. For example: Console(user-radius)#port 1812 retry-time <retry_time>... -
Page 35: Aggr Command Mode
Configure Multicast VLAN Registration (MVR) settings. port Configure the status of each port. Set up the priority of packets within the Managed Switch. Set up each port and aggregated ports‟ RSTP status. rstp Configure Secure Customer Connections (SKA) settings. multicast Configure static multicast settings. -
Page 36: Cfm Command Mode
key <port_list> <key> Specify the key value to the selected ports. <port_list>: 1~26 <key>: The range of key value is from 0 to 255. For example: Console(config-aggr-lacp)# key 1-4,10-15,18,19 role <port_list> <active | To set up whether LACP ports are active or passive>... - Page 37 For example: Console(config-cfm-dom)#delete mydomain Console(config- level <level> To specify maintenance domain level for the cfm-dom_domain registered domain name. name)# <level>: 0~7 For example: Console(config-cfm-dom_mymy)#level 7 To specify MHF for the registered domain mhf <default | explicit | none> name. <default | explicit | none>: Three options are available for this function.
-
Page 38: Dot1X Command Mode
lower active MD-level on the port. None: No MHFs can be created for this VID. For example: Console(config-cfm-assoc)#add myassoc 1 4 none delete <assoc_name> To delete a registered association name. For example: Console(config-cfm-assoc)#delete myassoc Console(config- loopback <target mepid | To configure loopback test settings. cfm)# mac_address>[-n number(2-100)] For Example:... -
Page 39: Igmp Filter Command Mode
Auto: This requires a dot1x-aware client to be authorized by the authentication server. Accesses from clients that are not dot1x‑aware will be denied. For example: Console(config-dot1x)#state 1-4,10-15,18,19 auto authentic <port_list> This will automatically send out authentication message to selected clients. <port_list>: 1~26 For example: Console(config-dot1x)#authentic 1-4,10-... -
Page 40: Igmp Command Mode
filter <port_list> <profile_name> This allows information of specified IPMC <profile_name>… Profile to pass-through. <port_list>: 1~26 <profile_name> This field for IPMC Profile name is from the entry registered in IPMC Profile option. For example: Console(config-igmpfilter)# filter 1-4 mypro 2.6.5 IGMP command mode Prompt Command &... -
Page 41: Mirror Command Mode
Console(config- learning <port_list> <auto | To set up each port‟s MAC learning function. mac)# disable> <port_list>: 1~26 For example: Console(config-mac)# learning 1-4,10-15,18,19 auto Console(config- add <mac-addr> <vlan_id> <port Specify a destination MAC address in the packet and the VLAN where the packets with the mac-static)# | filter>... - Page 42 Setting VLAN Port Egress mode in MVR Receive port. In a normal condition, Un-tag multicasting stream forward to receive port. (Optional) Limitation Receiver ports on a switch can be in different VLANs, but they should not belong to the multicast VLAN.
-
Page 43: Port Command Mode
2.6.9 Port command mode Prompt Command & Parameter Description Console(config)# port <all | port_list> state <enable | Port State: Enable or disable the current port disable> state. port <all | port_list> media <copper | fiber> Preferred Media Type: Specify copper or port <all | port_list>... - Page 44 UDP or TCP port number between 0~65535. dscp <dscp0-63)>: Specify a DSCP value between 0 and 63. tos <tos_list(0-7)>: Specify a TOS priority value from 0~7. tag_prio <tag_prio_list(0-7)>: Specify a tag priority value between 0 and 7. <high | medium | normal | low>: Specify one priority level to classify data packets.
- Page 45 weight <port_list> <weight> To specify queuing weights for ports that are set up as weighted. <port_list>: 1~26 <weight>: 1, 2, 4, 8 for queues 1 through 4 respectively. For example: Console(config-qos)# weight 2-5,10,12 1:2:4:8 Console(config- ingress <port_list> <bit_rate> To enable or disable ingress filter and specify the bit rate of selected ports.
-
Page 46: Rstp Command Mode
2.6.11 RSTP command mode Prompt Command & Parameter Description Console(config- sys-prio <sys_prio> Each interface is associated with a port (number) in rstp-sys)# the STP code. And, each switch has a relative priority and cost that is used to decide what the shortest path is to forward a packet. - Page 47 <port_list>: 1~26 <path_cost>: 0~200000000 For example: Console(config-rstp)# path-cost 1-4,10-15,18,19 100000 priority <port_list> <priority> To specify each port‟s priority. <port_list>: 1~26 <priority>: 0:0 1:16 2:32 3:48 4:64 5:80 6:96 7:112 8:128 9:144 10:160 11:176 12:192 13:208 14:224 15:240 For example: Console(config-rstp)# priority 1-4,10-15,18,19 8 edge <port_list>...
-
Page 48: Ska Command Mode
2.6.12 SKA command mode SKA refers to Secure Customer Connections. In this menu, it provides DHCP snooping, DHCP option 82, DHCP layer 2 relay and customer port (Port number 1~22) filtering functions. DHCP Option 82 Guidelines The Managed Switch can add information about the source of client DHCP requests that relay to DHCP server by adding Relay Agent Information. -
Page 49: Multicast Command Mode
<port_list> 1~24 <unlimited | dhcp | fix-ip>: Unlimited: Non-Limited (Static IP or DHCP assigns IP). Fixed IP: Only Static IP (Create Static IP table first). DHCP: DHCP server assigns IP address. For example: Console(config-ska)#sourceguard 1-4,10- 15,18,19 dhcp Console(config-ska- mode <enable | disable> To enable or disable snooping. -
Page 50: Switch Command Mode
For example: Console(config-multicast)# delete 224.0.1.0 4094 24 2.6.14 Switch command mode Prompt Command & Parameter Description Console(config- max-frame <num> Specify the maximum frame size between switch)# 1518 and 9600 bytes. The default maximum frame size is 9600bytes For example: Console(config-switch)#max-frame 9600 mac-aging <aging_time>... - Page 51 settings from one VLAN to another. This allows VLAN to accommodate network moves, changes and additions with the greatest flexibility. Prompt Command & Parameter Description Console(config-vlan- add <port_list> <name> Add a new port-based VLAN. port-base)# <port_list>: 1~26 <name>: up to 15 characters For example: Console(config-vlan-port-base)#add 2 myvlan delete <name>...
- Page 52 VLAN ID will be assigned to untagged frames received on the interface. The default setting is 1. <port_list>: 1~26 <pvid>:1~4094 For example: Console(config-vlan)# pvid 1-4,10-15,18,19 1 egress <port_list> <normal | To specify normal or untag to each port. untag> <port_list>: 1~26 <normal | untag>...
-
Page 53: Snmp Network Management
The system built-in management module also supports SNMP management. User must install the MIB file before using the SNMP based network management system. The MIB file is on a disc or diskette that accompanies the system. The file name extension is .mib, which SNMP based compiler can read. -
Page 54: Web Management
Managed Switch and set up the IP address for the first time. (The default IP of the Managed Switch can be reached at “http://192.168.0.1”. You can change the Managed Switch‟s IP to the needed one later in its Network Management menu.) Follow these steps to manage the Managed Switch through a Web browser:... - Page 55 User Authentication: View the registered user list. Add a new user or remove an existing user. Network Management: Set up or view the IP address and related information of the Managed Switch required for network management applications. Switch Management: Set up switch/port configuration, VLAN configuration and other functions.
-
Page 56: System Information
4.1 System Information Select System Information in the Main Menu and then the following screen shows up. Company Name: Enter a company name for this Managed Switch, up to 55 alphanumeric characters. System Object ID: View-only field that shows the predefined System OID. System Contact: Enter contact information for this Managed switch, up to 55 alphanumeric characters. -
Page 57: User Authentication
M/B Version: View-only field that shows the main board version. Serial Number: View-only field that shows the serial number of this product. Date Code: View-only field that shows the Managed Switch Firmware date code. Up Time: View-only field that shows how long the system has been turned on. Local Time: View-only field that shows the local time of the device. - Page 58 Current/Total/Max Users: View-only field. Current: This shows the number of current registered users. Total: This shows the total number of users who have registered. Max: This shows the maximum number available for registration. The maximum number is 10. Account State: Enable or disable this user account. User Name: Specify the authorized user login name, up to 20 alphanumeric characters.
-
Page 59: Radius Configuration
Read & Write: Full access right but cannot modify user account & system information and load factory settings. Read Only: Allow to view only. Access Denied: Completely forbidden for access. NOTE: To prevent incautious operations, a user cannot delete, modify user name and enable or disable the account states. -
Page 60: Network Management
4.3 Network Management In order to enable network management of the Managed Switch, proper network configuration is required. To do this, click the folder Network Management from the WEB main menu and then the following screen page appears. Network Configuration: Set up the required IP configuration of the Managed Switch. -
Page 61: System Service Configuration
IP packets sent by the Managed Switch. This address is required when the Managed Switch and the network management station are on different networks or subnets. The default value of this parameter is 0.0.0.0, which means no gateway exists and the network management station and Managed Switch are on the same network. -
Page 62: Rs232/Telnet/Console Configuration
SNMP Service: To enable or Disable the SNMP Management service. Web Service: To enable or Disable the Web Management service. 4.3.3 RS232/Telnet/Console Configuration Click the option RS232/Telnet/Console Configuration from the Network Management menu and then the following screen page appears. Baud Rate: 9600 bps, RS-232 setting, view-only field. -
Page 63: Time Server Configuration
Console/telnet. Specifying “0” means an inactive connection will never be disconnected. 4.3.4 Time Server Configuration Click the option Time Server Configuration from the Network Management menu and then the following screen page appears. Time Synchronization: To enable or disable time synchronization. -
Page 64: Device Community
4.3.5 Device Community Click the option Device Community from the Network Management menu and then the following screen page appears. Up to 10 Device Communities can be set up. Click New to add a new community and then the following screen page appears. -
Page 65: Trap Destination
Managed Switch’s user table. 4.3.6 Trap Destination Click the option Trap Destination from the Network Management menu and then the following screen page appears. State: Enable or disable the function of sending trap to the specified destination. -
Page 66: Trap Configuration
Destination: Enter the specific IP address of the network management system that will receive the trap. Community: Enter the community name of the network management system. 4.3.7 Trap Configuration Click the option Trap Configuration from the Network Management menu and then the following screen page appears. -
Page 67: Mal-Attempt Log Configuration
SFP Abnormality Tray: Enable or disable the Managed Switch to send SFP abnormality trap. 4.3.8 Mal-attempt Log Configuration Click the option Trap Configuration from the Network Management menu and then the following screen page appears. When DHCP snooping filter unauthorizes DHCP packets on the network, the Mal-attempt log will allow the Managed Switch to send event notification message to Log server. - Page 68 1. Switch Configuration: Set up frame size, address learning, etc. 2. Port Configuration: Enable or disable port speed, flow control, etc. 3. Link Aggregation: Set up port trunk and LACP port configuration. 4. Rapid Spanning Tree: Set up RSTP switch settings, aggregated port settings, physical port settings, etc.
-
Page 69: Switch Configuration
14. CFM Configuration: Set up CFM maintenance domain, maintenance association, maintenance end point list, maintenance end port settings, loopback testing and linktrace testing. 15. Access Control List Management: Set up access control list ports and rate limiter. 4.4.1 Switch Configuration Click the option Switch Configuration from the Switch Management menu and then the following screen page appears. -
Page 70: Port Configuration
0180C200000X: Select either “Not Filter” or “Filter”. When “Filter” is selected, packets from the address 0180C200000X will be filtered or dropped. 0180C200002X: Select either “Not Filter” or “Filter”. When “Filter” is selected, packets from the address 0180C200002X will be filtered or dropped. 0180C2000010: Select either “Not Filter”... -
Page 71: Link Aggregation
Description: Enter the unique description for this port. 4.4.3 Link Aggregation Link aggregation is an inexpensive way to set up a high-speed backbone network that transfers much more data than any one single port or device can deliver without replacing everything and buying new hardware. -
Page 72: Trunk Mode Configuration
4.4.3.1 Trunk Mode Configuration Click the option Trunk Mode Configuration from the Link Aggregation menu, the following screen page appears. There are two fields for you to set up packets according to operations. Source MAC Address: Enable or disable packets according to source MAC address. Destination MAC Address: Enable or disable packets according to destination MAC address. -
Page 73: Port Trunking
4.4.3.2 Port Trunking Click the option Port Trunk Configuration from the Link Aggregation menu and then the following screen page appears. The Managed Switch allows users to create 13 trunking groups. Each group consists of 2 to 16 links (ports). Click New to add a new trunking group and then the following screen page appears. -
Page 74: Lacp Port Configuration
Group Name: Specify the trunking group name of up to 15 alphanumeric characters. Port Members: Select the trunk group to which a port belongs. - Must have 2 to 16 ports in each trunking group. - Each port can only be grouped in one group. - If the port is already set On in LACP Port Configuration, it can‟t be grouped anymore. - Page 75 This allows LACP to be enabled or disabled. When it is On, LACP is enabled. Configure Key Value: Select “Key Value” from the pull-down menu of Select Setting. Ports in an aggregated link group must have the same LACP port Key. In order to allow a port to join an aggregated group, the port Key must be set to the same value.
-
Page 76: Rapid Spanning Tree
Select “Role” from the pull-down menu of Select Setting. Active – Active LACP ports are capable of processing and sending LACP control frames. This allows LACP compliant devices to negotiate the aggregated link so that the group may be changed dynamically as required. In order to utilize the ability to change an aggregated port group, that is, to add or remove ports from the group, at least one of the participating devices must designate LACP ports as active. -
Page 77: Rstp Switch Settings
To provide faster spanning tree convergence after a topology change, an evolution of the Spanning Tree Protocol: Rapid Spanning Tree Protocol (RSTP), introduced by IEEE with document 802.1w. RSTP, is a refinement of STP; therefore, it shares most of its basic operation characteristics. -
Page 78: Rstp Aggregated Port Settings
System Priority: Each interface is associated with a port (number) in the STP code. And, each switch has a relative priority and cost that is used to decide what the shortest path is to forward a packet. The lowest cost path is always used unless the other path is down. If you have multiple bridges and interfaces then you may need to adjust the priorities to achieve optimized performance. - Page 79 State: Enable or disable configured trunking groups in RSTP mode. Path Cost: This parameter is used by the RSTP to determine the best path between devices. Therefore, lower values should be assigned to ports attached to faster media, and higher values assigned to ports with slower media. 0 means auto-generated path cost. Priority: Choose a value between 0 and 240 to set the priority for the port interface.
-
Page 80: Rstp Physical Port Settings
4.4.4.3 RSTP Physical Port Settings Click the option RSTP Physical Port Settings from the Rapid Spanning Tree menu and then the following screen page appears. Configure Port State: Select “State” from the pull-down menu of Select Setting. This allows ports to be enabled or disabled. When it is On, RSTP is enabled. Configure Port Path Cost: Select “Path Cost”... - Page 81 This sets up each port‟s path cost. The default value is “0”. Configure Port Priority: Select “Priority” from the pull-down menu of Select Setting. You can choose Port Priority value between 0 and 240. The default value is “0”. Configure Port Edge: Select “Edge”...
- Page 82 Set the port to “enabled” or “disabled”. When it is On, Port Edge is enabled. Configure Port Point2point: Select “Point2point” from the pull-down menu of Select Setting. Set up the Point to Point setting. The default setting is “Forced True”.
-
Page 83: Configuration
4.4.5 802.1X Configuration On 802.1X security-enabled networks, there is a need for non 802.1X supported devices to gain limited access to the network, due to the lack of the proper 802.1X software or incompatible devices, such as computers running Windows 98 or lower operating systems, or the need for guests to gain access to the network without full authorization or local authentication on the Switch. -
Page 84: Configure Port Admin State
Mode: Enable or disable 802.1X for the Managed Switch. RADIUS IP: RADIUS Authentication server address. RADIUS Secret: The identification number assigned to each RADIUS authentication server with which the client shares a secret. Reauthentication Enabled: To enable or disable Reauthentication. Reauthentication Period: A constant time that defines a nonzero number of seconds between periodic reauthentication of the client. -
Page 85: Configure Port Reauthenticate
Authorized: This forces the port to grant access to all clients, either dot1x-aware or otherwise. “Authorized” is the default setting. Unauthorized: This forces the port to deny access to all clients, either dot1x-aware or otherwise. Auto: This requires a dot1x-aware client to be authorized by the authentication server. Accesses from clients that are not dot1x‑aware will be denied. -
Page 86: Mac Address Management
This allows users to enable or disable port Reauthenticate. 4.4.6 MAC Address Management Click the folder MAC Address Management from the Switch Management menu and then the following screen page appears. MAC Table Learning: To enable or disable learning MAC address function. Static MAC Table Configuration: To create, edit or delete Static MAC Table setting. -
Page 87: Mac Table Learning
4.4.6.1 MAC Table Learning Click the option MAC Table Learning from the MAC Address Table menu and then the following screen page appears. Auto: To enable the port learning MAC address. Disabled: To disable port learning MAC address. 4.4.6.2 Static MAC Table Configuration Click the option Static MAC Table Configuration from the MAC Address Table menu and then the following screen page appears. - Page 88 Note: The Managed Switch only supports switch-based MAC security and does not support port-based MAC security. The Managed Switch can support up to 128 entries of MAC security list. Click New to add a new MAC address entity and then the following screen page appears. Click Edit to view and edit the selected MAC address entity.
-
Page 89: Vlan Configuration
MAC Address: Specify a destination MAC address in the packet. VID: Specify the VLAN where the packets with the Destination MAC address can be forwarded. Forwarding Port: If the incoming packet has the same destination MAC address as the one specified in VID, it will be forwarded to the selected port directly. - Page 90 Since the destination address and sources address of the packets are listed in MAC address table of specific VLAN (except broadcast/multicast packets), in every VLAN the traffic between two ports will be two-way without restrictions. Click New to add a new VLAN entity and then the following screen page appears. Use Edit to view and edit the current VLAN setting.
-
Page 91: Q Vlan Concept
VLAN Members: If you select “V” from the pull-down menu, it denotes that the port selected belongs to VLAN. Click Delete to remove the selected Port-Based VLAN rule and then the following screen page appears. 4.4.7.2 802.1Q VLAN Concept Port-Based VLAN is simple to implement and use, but it cannot deploy cross switches VLAN. - Page 92 Important VLAN Concepts for Configuration There are two key concepts to understand. The Default Port VLAN ID (PVID) specifies the VID to the switch port that will assign the VID to untagged traffic from that port. The VLAN ID (VID) specifies the set of VLAN that a given port is allowed to receive and send labeled packets.
- Page 93 2. When a tagged frame is received, the VID in the frame tag is used. When Ingress Filtering is “Enabled”, the Managed Switch will first determine, 1. If the ingress port itself is a member of the frame VLAN, it will receive the frame. 2.
-
Page 94: Q Vlan
Unfortunately, not all network devices are 802.1Q compliant. These devices are referred to VLAN-unaware. 802.1Q devices are referred to VLAN-aware. Prior to the adoption of 802.1Q VLANs, port-based and MAC-based VLANs were in common use. These VLANs relied upon a Port VLAN ID (PVID) to forward packets. A packet received on a given port would be assigned that port's PVID and then be forwarded to the port corresponding to the packet's destination address (found in the Switch's forwarding table). -
Page 95: Configure Vlan
Configure VLAN: To create, edit or delete 802.1Q Tag VLAN settings. Tag VLAN Setting: To set up VLAN-Aware, Ingress Filter, Frame Type, Port VLAN ID, Port Egress Mode. 4.4.7.3.1 Configure VLAN Click New to add a new VLAN entity an then the following screen page appears. Click Edit to view and edit current IEEE 802.1Q Tag VLAN setting. -
Page 96: Configure Vlan Aware
VLAN ID: Specify a VLAN ID between 1 and 4094. VLAN Name: Use the default name or specify a VLAN name. VLAN Members: If you select “V” from the pull-down menu in each port, it denotes that the ports selected belong to VLAN. 4.4.7.3.2 Configure VLAN Aware The following screen page appears if you choose Tag VLAN Settings and then select VLAN Aware from the pull-down menu of Select Setting. -
Page 97: Configure Ingress Filter
Click the pull-down menu to select “Enable” or “Disable”. The default setting is disabled to all ports. 4.4.7.3.3 Configure Ingress Filter The following screen page appears when you choose Tag VLAN Settings and then select Ingress Filter from the pull-down menu of Select Setting. Click the pull-down menu to select “Enable”... -
Page 98: Configure Port Vlan Id
Frame Type: Two frame types are available, these are “All” or “Tagged”. The default setting is “All” to all ports. “Tagged” means that the port will only send and receive VLAN-tagged packets. When ports are set to “All”, they will send and receive both VLAN-tagged and untagged packets. -
Page 99: Configure Port Egress Mode
4.4.7.3.6 Configure Port Egress Mode The following screen page appears if you choose Tag VLAN Settings and then select Port Egress Mode from the pull-down menu of Select Setting. Choose either “Normal” or “Untag” option from the pull-down menu for Port Egress mode. The default setting is “Normal”... -
Page 100: Qos Port Configuration
QoS Port Configuration: To set up each port‟s QoS default class, QCL, Priority, Queuing Mode, Queue Weighted. QoS Control List: To create, edit or delete QCL settings. QoS Rate Limiters: To configure each port‟s Policer and Shaper Rate. Storm Control: To enable or disable Storm Control. 4.4.8.1 QoS Port Configuration Select the option QoS Port configuration from the QoS Configuration menu and then the following screen page appears. - Page 101 Click the pull-down menu to choose the class level “Low”, “Normal”, “Medium” or “High”. The default class level of each port is “Low”. Configure QCL: A QCL number is assigned to each port based on the information in the QCL table. Please refer to QoS Control List for QCL settings.
- Page 102 There are eight priority levels that you can choose to classify data packets. Choose one of the listed options from the pull-down menu for CoS (Class of Service) priority tag values. The default value is “0”. The default 802.1p settings are shown in the following table: Priority Level normal normal...
-
Page 103: Qos Control List
Strict: This indicates that services to the egress queues are offered in the sequential order and all traffic with higher priority queues are transmitted first before lower priority queues are serviced. Weight: Weighted Round-Robin shares bandwidth at the egress ports by using scheduling weights 1, 2, 4, 8 for queues 1 through 4 respectively. - Page 104 QCL: Select a QCL number (1~24). QCE Type: View-only filed that shows QCL‟s current QCE type. Type Value: View-only field that shows QCL‟s current type value. Traffic Class: View-only field that shows QCL‟s Traffic Class. Click New to add a new QCL setting and then the following screen page appears. Click Edit to view and edit registered QCL settings.
-
Page 105: Qos Rate Limiter
Current/Total/Max List: View-only field. Current: This shows the number of current registered QCL setting(s). Total: This shows the number of total registered QCL setting(s). Max List: The shows the number of maximum QCL settings that are available for registration. The default number is 12. QCE Type: Click the pull-down menu to select the desired privilege for the QCE type operation. -
Page 106: Storm Control
This allows users to specify each port‟s Policer bandwidth. Configure Shaper Rate: This allows users to specify each port‟s Shaper bandwidth. 4.4.8.4 Storm Control Select the option Storm Control from the QoS Priority Configuration menu to set up the broadcast storm control parameters for ports and then the following screen page appears. -
Page 107: Dscp Remark
When a device on the network is malfunctioning or application programs are not well designed or properly configured, broadcast storms may occur that will degrade network performance and even cause a complete halt. The network can be protected from broadcast storms by setting a threshold for broadcast traffic for each port. - Page 108 This allows you to enable or disable DSCP remarking for each port. The default setting is disabled. Configure 802.1p Remark: Select “802.1p Remark” from the pull-down menu of Select Setting. This allows you to enable or disable 802.1p remarking for each port. The default setting is disabled.
-
Page 109: Port Mirroring
DSCP mapping to Queue: Assign a value (0~63) to four different levels. 802.1p mapping to Queue: Assign a value (0~7) to four different levels. 4.4.10 Port Mirroring In order to allow Target Port to mirror Source Port and enable traffic monitoring, select the option Port Mirroring from the Switch Management menu and then the following screen page appears. -
Page 110: Igmp Snooping
Target Port: Select the preferred target port for mirroring. 4.4.11 IGMP Snooping The Internet Group Management Protocol (IGMP) is a communications protocol used to manage the membership of Internet Protocol multicast groups. IGMP is used by IP hosts and adjacent multicast routers to establish multicast group memberships. It can be used more efficiently when supporting activities, such as, online streaming video and gaming. -
Page 111: Igmp Configuration
IGMP Configuration: To enable or disable IGMP, Unregistered IPMC Flooding and set up router ports. IGMP VLANID Configuration: To set up the ability of IGMP snooping and querying with VLAN. IGMP Settings: To set up the Query interval, response interval of IGMP snooping and enable or disable Fast leave. -
Page 112: Igmp Vlanid Configuration
Query Response Interval: This determines the maximum amount of time allowed before sending an IGMP response report. (Default value 100, One Unit=0.1 second) Fast Leave: The Fast Leave option may be enabled or disabled. This allows an interface to be ignored without sending group-specific queries. The default setting is “Disabled”. Router Ports: When ports are connected to the IGMP administrative routers, they should be set to “Y”. -
Page 113: Ipmc Segment
Snooping: When enabled, the port in VLAN will monitor network traffic and determine which hosts want to receive the multicast traffic. Querying: When enabled, the port in VLAN can serve as the Querier which is responsible for asking hosts whether they want to receive multicast traffic. 4.4.11.3 IPMC Segment Select the option IPMC Segment from the IGMP Snooping menu and then the following screen page with the ability information of IPMC Segment ID, Name and IP Range appears. -
Page 114: Ipmc Profile
Segment Name: View-only field that shows the current registered Name. IP Range: View-only field that shows the current registered IP Range. Click New to register a new IPMC Segment and then the following screen page appears. Click Edit to edit and view the IPMC Segment settings. Click Delete to remove a current IPMC Segment registration. - Page 115 Profile Name: View-only field that shows the current registered profile name. Segment ID: View-only field that shows the current registered segment ID. Click New to register a new IPMC Profile and then the following screen page appears. Click Edit to edit the IPMC Profile settings. Click Delete to remove a current IPMC Profile registration.
-
Page 116: Igmp Filtering
Max: This shows the maximum number available for IPMC Profile. The maximum number is 60. Profile Name: Enter an identification name. This field is limited to 20 characters. Segment ID: Specify the segment ID that is registered in IPMC Segment. 4.4.11.5 IGMP Filtering Select the option IGMP Filtering from the IGMP Snooping menu and then the following screen page appears. -
Page 117: Static Multicast Configuration
Channel Limit: Specify the maximum transport multicast stream. Enable: To enable each port‟s IGMP filtering function. The default setting is “Off” which is disabled. Port: View-only field that shows the port number that is currently configured. IPMC Profile: In IGMP filtering, it only allows information specified in IPMC Profile fields to pass-through. - Page 118 IP Address: View-only field that shows the current source IP address of multicast stream. VLAN: View-only field that shows the specified VLAN ID for current multicast stream. Forwarding port: View-only field that shows the forwarding port for current multicast stream. Click New to register a new Static Multicast configuration and then the following screen page appears.
-
Page 119: Mvr
Current/Total/Max Multicast Nums: View-only field. Current: This shows the number of current registered static multicast configuration. Total: This shows the total number of registered static multicast configuration. Max: This shows the maximum number available for static multicast configuration. The default maximum number is 128. IP Address: Specify the multicast stream source IP address. -
Page 120: Mvr Settings
MVR does not support IGMPv3 messages. MVR on IPv6 multicast groups is not supported. Click the folder MVR Configuration from the Switch Management menu and then the following screen page appears. MVR Port Settings: To enable or disable MRV global settings and create MVR VLAN to indicate the Source and Receive port. - Page 121 MVR: To enable or disable MVR global settings. VID: View-only field that shows the specified MVR VLAN ID for current configuration. Click New to register a new MVR VLAN ID and then the following screen page appears. Click Edit to edit MVR settings. Use Delete to remove a current MVR VLAN ID.
-
Page 122: Mvr Group
Max: This shows the maximum number available for MVR VLAN configuration. VLAN ID: Specify a VLAN ID for multicast VLAN. Port Members: Indicate whether each port is a receive port, source port, or not used. 4.4.13.2 MVR Group Select the option MVR Group from the MVR Configuration menu and then the following screen page appears. -
Page 123: Ska Configuration
Current/Total/Max Group Nums: View-only field. Current: This shows the number of current registered MVR Group. Total: This shows the total number of registered MVR Groups. Max: This shows the maximum number available for registering MVR Group. VLAN ID: Specify a VLAN ID number that is registered in MVR port settings. -
Page 124: Dhcp Option 82 Settings
Select the folder SKA Configuration from the Switch Management menu and then the following screen page appears. DHCP Option 82 Settings: To enable or disable DHCP Option 82 relay agent global setting and show each port‟s configuration. DHCP Port Settings: Customer port (Port 1~22) DHCP snooping setting. Filter Configuration: Customer port (Port 1~22) filtering setting. - Page 125 DHCP Opt82 Relay Agent: To enable or disable DHCP Opt82 Relay Agent Global setting. Opt 82 Port: Each port‟s Agent information. When the symbol “V” is displayed, the port is enabled. Otherwise, it is disabled. Enable (V): Add Agent information. Disable: Forward.
-
Page 126: Dhcp Port Settings
it will receive packets with Agent information and the Managed Switch will forward them. it will receive packets without Agent information and the Managed Switch will add Agent information. When Trust port is set to disabled, it receives packets with Agent information and the Managed Switch will drop them. -
Page 127: Static Ip Table Configuration
DHCP Snooping: Enable or disable DHCP Snooping function. Default DHCP Initiated Time: Specify DHCP initiated time. (4~9999 seconds) Default DHCP Leased Time: Specify DHCP Leased time. (4~9999 seconds) Port Isolation: If port isolation is set to “Enabled”, the customer port (port 1~22) can not communicate to each other. - Page 128 IP Address: View-only field that shows the current static IP address. Mask Address: View-only field that shows the current Mask address. VLAN ID: View-only field that shows the VLAN ID. Port: View-only field that shows the connection port number. Click New to register a new Static IP address and then the following screen page appears. Click Edit to edit and view Static IP Table settings.
-
Page 129: Cfm Configuration
Current/Total/Max Group Nums: View-only field. Current: This shows the number of current registered Static IP address(es). Total: This shows the total number of registered Static IP address(es). Max: This shows the maximum number available for Static ID address registration. IP address: Specify an static IP address that you accept. Mask Address: Specify the subnet mask address. - Page 130 IEEE 802.1ag also defines the following network error status to be conveyed in the CCM. MACstatus Either some remote ND is reporting its interface as not ready to pass both the data packets and BPDU, or all remote NDs are reporting their interfaces as not able to pass ordinary data packets.
-
Page 131: Maintenance Domain
Linktrace Testing: To activate Link Trace route and configuration. Y.1731 Round-Trip Delay Measurement: To activate Link Trace route and configuration. 4.4.15.1 Maintenance Domain Select the option Maintenance Domain Settings from the CFM Configuration menu and then the following screen page appears. MD Name: View-only field that shows the current CFM Service Domain of the Managed Switch. - Page 132 Current/Max Domain: View-only field. Current: This shows the number of current registered Maintenance Domain. Max: This shows the maximum number available for Maintenance Domain registration. The default number is 20. MD Name: Specify a unique ID for a newly registered MD. MD Format: Currently, the only supported MD format is “String”.
-
Page 133: Maintenance Association Settings
4.4.15.2 Maintenance Association Settings Select the option Maintenance Association from the CFM Configuration menu and then the following screen page appears. Select MD: Select the Maintenance Domain that you would like to associate. MA Name: Specify a MA name. Format: Currently, the only supported format is “String”. VID: Specify a registered VLAN ID for MA. - Page 134 Current/Max MA: View-only field. Current: This shows the number of current registered MA. Max: This shows the maximum number available for registering MA. The default number is 20. MD Name: View-only field that show the selected MD Name. MA Name: Specify a name for MA. MA Format: View-only field.
-
Page 135: Maintenance End Point List
4.4.15.3 Maintenance End Point List Select the option Maintenance End Point List from the CFM Configuration menu and then the following screen page appears. MA Name: View-only field that shows the MA Name of the selected MD. MEP LIST: View-only field that shows a list of remote MEP IDs. MEP ID: Specify the remote MEP ID which you want to add or remove. - Page 136 Click “Edit” to edit or update the value of each field. MA Name: View-only field that shows the MA Name of the selected MD. MEP ID: Specify a MEP ID. Direction: View-only field that shows the current Maintenance Point direction. Port: Select a bridge port of the Maintenance Point.
-
Page 137: Loopback Testing
4.4.15.5 Loopback Testing Select the option Loopback Testing from the CFM Configuration menu and then the following screen page appears. Domain: Select a registered MD. Association: Select a current registered MA from the MD. Source MEP: View-only field that shows the current MEP ID. Target MAC/MEP ID: Specify the Target MEP ID or MAC for loopback test. -
Page 138: Linktrace Testing
4.4.15.6 Linktrace Testing Select the option Linktrace Testing from the CFM Configuration menu and then the following screen page appears. Domain: Select a current registered Maintenance Domain. Association: Select a current registered Maintenance Association. Source MEP: View-only field that shows the current MEP ID. Target MAC/MEP ID: Specify the target MAC or MEP ID for linktrace test. -
Page 139: Round-Trip Delay Measurement
4.4.15.7 Y.1731 Round-Trip Delay Measurement Select the option Delay Measurement from the CFM Configuration menu and then the following screen page appears. Domain: Select a current registered Maintenance Domain. Association: Select a current registered Maintenance Association. Source MEP: View-only field that shows the current MEP ID. Target MAC/MEP ID: Specify the target MAC or MEP ID for link trace test. - Page 140 Configuration will be taken. Port number: Select a port number. Policy ID: Select a policy ID from the pull-down menu. Action: Deny or permit the action. Rate Limiter: Disable or enable rate limiter. Port Copy: Send a copy to the desired port. Shutdown: If enabled, the Managed Switch will shutdown interface.
- Page 141 Rate (pps): Select the rate for each Rate Limiter ID. ACL Configuration: Click New to add a new ACL Configuration. The screen page is shown below. Click Delete to remove a registered ACL configuration. Click Edit to view and edit a registered ACL configuration.
- Page 142 MAC Parameters DMAC Filter: Slect the DMAC Filter from the pull-down menu. VLAN Parameters VLAN ID Filter: Select “Any” or “Specific” for VLAN ID Filter. VLAN ID: Specify a VLAN ID. Tag Priority: Select the tag priority from the pull-down mneu. When information conforms to MAC and VLAN parameters, then actions set in “Frame Type”, “Action”, “Rate Limiter”, “Port Copy”, and “Shutdown”...
-
Page 143: Switch Monitor
Action: Deny or permit the action. Rate Limiter: Disable or enable rate limiter. Port Copy: Send a copy to the desired port. Shutdown: If enabled, the Managed Switch will shutdown interface. 4.5 Switch Monitor Switch Monitor allows users to monitor the real-time operation status of the Managed Switch. -
Page 144: Switch Port State
7. 802.1X Monitor: View port status and Statistics. 8. IGMP Monitor: View-only field that shows IGMP status and Groups table. 9. Mac Address Table: List current MAC address learned by the Managed Switch. 10. SFP Information: View the current port‟s SFP information, e.g. speed, Vendor ID, Vendor S/N, etc. -
Page 145: Port Traffic Statistics
Blocking/Listening: Blocking: A Port in this state does not participate in frame relay; thus, it prevents frame duplication arising from multiple paths existing in the active topology of Bridged LAN. Learning: A port in this state prepares to participate in frame relay. Frame relay is temporarily disabled in order to prevent temporary loops, which may occur in a Bridged LAN during the lifetime of this state as the active topology of the Bridged LAN changes. -
Page 146: Port Packet Error
Received Utilization: The ratio of each port receiving traffic and current port‟s total bandwidth. Bytes Sent: The total bytes sent from current port. Frames Sent: The total frames sent from current port. Sent Utilization: The ratio of real port sending traffic ratio to current port of total bandwidth. Total Bytes: Total bytes of receiving and send from current port. -
Page 147: Port Packet Analysis Statistics
RX Jabber Frames: Jabber frames received. RX Oversize Frames: Oversize frames received. RX Dropped Frames: Drop frames received. Collision: Each port‟s Collision frames. TX Dropped Frames: Drop frames sent. Clear All: This will clear all port's counter values and be set back to zero. 4.5.4 Port Packet Analysis Statistics Port Packet Analysis Statistics Mode Counters allow users to view the port analysis history of the Managed Switch. -
Page 148: Lacp Monitor
Frames 1024-1518 Bytes: 1024-1518 bytes frames received. Frames 1519-MAX Bytes: Over 1519 bytes frames received. Multicast Frames RX: Good multicast frames received. Broadcast Frames RX: Good broadcast frames received. Multicast frames TX: Good multicast packets sent. Broadcast Frames TX: Good broadcast packets sent. Clear all: This will clear all port‟s counter values and be set back to zero. -
Page 149: Lacp Statistics
remote system compares the received information with the information received on other ports to determine the ports that can operate as selected ports. This allows the two systems to reach an agreement on the states of the related ports when aggregating ports, link aggregation control automatically assigns each port an operational key based on its rate, duplex mode and other basic configurations. -
Page 150: Rstp Monitor
4.5.6 RSTP Monitor 4.5.6.1 RSTP VLAN Bridge Overview In this option, the RSTP status of the Managed Switch will be shown. RSTP VLAN Bridge Overview allows users to view a list of all RSTP VLANs‟ brief information, such as, VLAN ID, Bridge ID, topology status and Root ID and to obtain detailed VLAN information after selecting. -
Page 151: Rstp Port Status
Root ID: Display this Managed Switch‟s Root ID. Root port: Display this Managed Switch‟s Root Port Number. 4.5.6.2 RSTP Port Status RSTP Port Status allows users to view a list of all RSTP ports‟ information. Select RSTP Port Status from the RSTP Monitor menu and then the following screen page appears. In this page, you can find the following information of a RSTP port: Port Number: The number of the port. -
Page 152: Monitor
In order to view the real-time RSTP statistics status of the Managed Switch, select RSTP Statistics from the RSTP Monitor menu and then the following screen page appears. RSTP Transmitted: The total transmitted RSTP packets from current port. STP Transmitted: The total transmitted STP packets from current port. TCN Transmitted: The total transmitted TCN (Topology Change Notification) packets from current port. -
Page 153: Statistics
In this page, you can find the following information of a 802.1x port: Port: The number of the port. State: Display the number of the port 802.1x link state LinkDown or LinkUp. Last Source: Display the number of the port‟s Last Source. Last ID: Display the number of the port‟s Last ID. -
Page 154: Igmp Snooping Status
4.5.8 IGMP Snooping Status 4.5.8.1 Snooping Status IGMP Snooping Status allows users to view a list of IGMP queries‟ information in VLAN(s) such as VLAN ID, Querier and Queries Transmitted/Received packets. Select IGMP Snooping Status from the IGMP Monitor menu and then the following screen page appears. -
Page 155: Igmp Group Table
The IGMP querier periodically sends IGMP general queries to all hosts and routers (224.0.0.1) on the local subnet to find out whether active multicast group members exist on the subnet. Upon receiving an IGMP general query, the Managed Switch forwards it through all ports in the VLAN except the receiving port. -
Page 156: Mac Address Table
VLAN ID: VID of the specific VLAN Group: The multicast IP address of IGMP querier. Port: The port(s) grouped in the specific multicast group. 4.5.9 MAC Address Table MAC Address Table displays MAC addresses learned when System Reset and MAC Address Learning are enabled. -
Page 157: Sfp Port State
Port: The number of the port. Speed: Data rate of the slide-in SFP Transceiver. Distance: Transmission distance of the slide-in SFP Transceiver. Vendor Name: Vendor name of the slide-in SFP Transceiver. Vendor PN: Vendor PN of the slide-in SFP Transceiver. Vendor SN: Vendor SN of the slide-in SFP Transceiver. -
Page 158: Dchp Snooping
Port Number: The number of the SFP module slide-in port. Temperature (C): The Slide-in SFP module operation temperature. Voltage (V): The Slide-in SFP module operation voltage. TX Bias (mA): The Slide-in SFP module operation current. TX Power (dbm): The Slide-in SFP module optical Transmission power. RX Power (dbm): The Slide-in SFP module optical Receiver power. -
Page 159: Cfm Information
Update: Click “Update” to update the DHCP snooping table. Cli Port: View-only field that shows where the DHCP client binding port is. VID: View-only field that shows the VLAN ID of the client port. CliIP Addr: View-only field that shows client IP address. CliMAC Addr: View-only field that shows client MAC address. -
Page 160: Cfm Stack
IEEE 802.1ag supports fault detection through Continuity Check Messages (CCM). CCM is somewhat like the “keep-alive” message. By default, every 802.1ag-capable network device (ND) sends out “heart-beat” style CCM periodically. Hence, by configuring a list of expected existent remote 802.1ag-capable NDs, the local 802.1ag-capable ND can detect the health status of its connection to the remote ND. -
Page 161: Cfm Statistics
Select a port from the pull-down menu, then the selected port‟s CFM stack status will be displayed. VLAN ID: View-only field that shows the VLAN ID of this selected port. Direction: View-only field that shows which direction CCMs are sent. MAC Address: View-only field that shows the MAC address of this Managed Switch. -
Page 162: Maintenance End Point
Domain: Select a current Maintenance Domain from pull-down menu. Association: Select a current Domain from pull-down menu. MEP: View only shows current MEP ID. 4.5.12.3 Maintenance End Point Select Maintenance End Point from the CFM Information menu and then the following screen page appears. -
Page 163: Remote Maintenance End Points
Association: Select a current Domain from pull-down menu. MEP: View only shows current MEP ID. 4.5.12.4 Remote Maintenance End Points Select Remote Maintenance End Points from the CFM Information menu and then the following screen page appears. Domain: Select a current Maintenance Domain from pull-down menu. Association: Select a current Domain from pull-down menu. -
Page 164: System Utility
Domain: Select a current Maintenance Domain from pull-down menu. Association: Select a current Domain from pull-down menu. MEP: View only shows current MEP ID. Transaction ID: Select a transaction ID from the pull-down menu. Target MAC/MEP ID: When you select a transaction ID, the corresponding target MAC/MEP ID that runs a linktrace testing will be shown. -
Page 165: Event Log
1. Event Log: Event log can keep a record of system‟s log events such as system warm start, cold start, link up/down, user login/logout, etc. They will be kept only when your CPU version is A06 with Boot ROM version A08 or later version. If your CPU or Boot ROM version is earlier than the one mentioned above, all events will lose when the system is shut down or rebooted. -
Page 166: Update
Click Clear to clear all Event log records. 4.6.2 Update The Managed Switch has both built-in TFTP and FTP clients. Users may save or restore their configuration and update their Firmware on-line. Select Update from the System Utility menu and then the following screen page appears. Protocol: Select the preferred protocol, either FTP or TFTP. -
Page 167: Load Factory Settings
Server Address: Enter the specific IP address of the File Server. User Name: Enter the specific username to access the File Server. Password: Enter the specific password to access the File Server. File Location: Enter the specific path and filename within the File Server. Click OK to start the download process and receive files from the server. -
Page 168: Load Factory Settings Except Network Configuration
Click OK to start loading factory settings. 4.6.4 Load Factory Settings Except Network Configuration Load Factory Settings Except Network Configuration will set all the configuration of the Managed Switch back to the factory default settings. However, IP and Gateway addresses will not restore to the factory default. -
Page 169: Save Configuration
Auto Backup: To enable or disable auto backup. The default setting is disabled. Backup Time: Set up the time (24-hr clock) to automatically backup once a day. If the remote server fails or does not exist, this function allows the system to retry around once per minute until the system completes a successful backup or the system times out (next hour). -
Page 170: Reset System
Click OK to save the configuration. 4.8 Reset System After any configuration changes, Reset System can make changes effective. Select Reset System from the Console main menu and then the following screen page appears. Click OK to perform System Reset.
Need help?
Do you have a question about the MS400870M Series and is the answer not in the manual?
Questions and answers