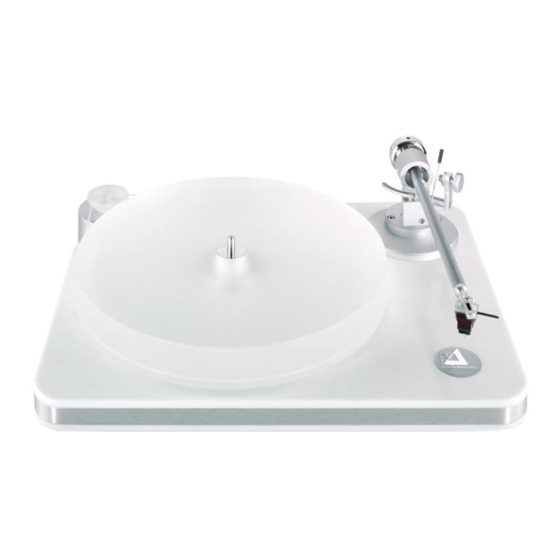
Summary of Contents for Clearaudio Peerformance
- Page 1 Instruction manual © clearaudio electronic GmbH 2007...
- Page 2 Please read this guide carefully so that you can enjoy all advantages of your Performance -turntable. All information given will help to generate best set up and avoid any possible damages. Performance We hope you will enjoy your new clearaudio -turntable. clearaudio electronic GmbH Performance Please read the warnings before connecting your -turntable to the mains supply.
-
Page 3: Table Of Contents
Packaging overview 1. Product overview 2. Packing contents 3. Set-up and operation 4. Tonearm- and pick-up setting 5. Azimuth-setting 6. Antiskating-setting 7. Special directions 8. Maintenance and service Warranty information 9. Technical data Page 3 © clearaudio electronic GmbH 2007... -
Page 4: Packaging Overview
Performance Instruction manual Packaging overview 1. Layer: Motor-unit, top of bearing, belt, pulley, fittings and accessories If ordered as set: satisfy tonearm and/or pickup 2. Layer: Platter 3. Layer: Turntable - chassis Page 4 © clearaudio electronic GmbH 2007... -
Page 5: Product Overview
Performance Instruction manual 1. Product overview The special resonance-optimised construction, the external motor-unit and the patented clearaudio - CMB-bearing-technology guarantees absolute speed stability, pure pleasure in listening and reproduction in accordance to the original. Performance assembled and set up. Page 5... -
Page 6: Packing Contents
Please check the contents according to the following list before you set up your new Performance clearaudio -turntable. Chassis with built-in bearing base Turntable - chassis and tone arm base Top of the CMB - bearing Pulley, incl. fixing screws Motor-unit with attached power cord Page 6 © clearaudio electronic GmbH 2007... - Page 7 2 Silent belts 2mm (1 for replacement) Pair of white gloves allen wrench size 3 Screwdriver ( for fixing the pulley ) Optional: smart stylus gauge aluminium Warranty-certificate ( card ) (no picture) Page 7 © clearaudio electronic GmbH 2007...
-
Page 8: Set-Up And Operation
Please make use of the white gloves enclosed in order to avoid scratches or unwanted fingerprints (platter). Please follow the description step by step: Performance requires a space of at least 42 x 33 cm for positioning. 33 cm 42 cm Page 8 © clearaudio electronic GmbH 2007... - Page 9 The marks (dots) on the platter and the top of the bearing have been carefully measured. Please make sure they align exactly as shown in the picture. Page 9 © clearaudio electronic GmbH 2007...
-
Page 10: Tonearm- And Pick-Up Setting
Tighten the screws of the satisfy-tonearm to the basis using the allen screwdriver enclosed. Pass the cables of the satisfy-tonearm carefully through the basis. Please make sure that the cables will not damaged or bent too much. Page 10 © clearaudio electronic GmbH 2007... - Page 11 Colour code key of the satisfy-tonearm cables: → Left channel (L+) white → Left channel (L -) blue Right channel (R+) → Right channel (R -) → green Page 11 © clearaudio electronic GmbH 2007...
- Page 12 Tighten these screws when you reach the final horizontal position. When the screws are tightened the satisfy-tone arm should be installed on your performance Top view as shown in the top view picture. Page 12 © clearaudio electronic GmbH 2007...
- Page 13 The arrow must point to the centre of the rotation axle of the tonearm. Position the pick-up/cartridge in the aligning area of the template marked by a pattern of lines. Page 13 © clearaudio electronic GmbH 2007...
- Page 14 Check the position again. TIP: For even better and more easy adjustment of the pick-up/cartridge and tonearm we recommend the clearaudio installation gauge (Art.-Nr. AC 005) . The following adjustment is very important: Performance Please check whether your -turntable is in a leveled position using the level-gauge.
- Page 15 6 little grooves fort the belt. Those with a smaller diameter are used for the speed 33 1/3 U/m, those with the bigger diameter are used for the speed 45 U/m. Page 15 © clearaudio electronic GmbH 2007...
-
Page 16: Azimuth-Setting
Now you can adjust the azimuth by turning the headshell gently in the tonearm. When finished, lock the screw again. Page 16 © clearaudio electronic GmbH 2007... -
Page 17: Antiskating-Setting
(medium antiskating) (maximum antiskating) The tonearm is adjusted now. Connect the Power cord of the motor with the power supply. Put a record on the turntable and fix it with the clearaudio clever clamp (enclosed). Performance Your -turntable Is completely set up and ready to play. -
Page 18: Special Directions
Instruction manual 7 Special directions To achieve the full clearaudio warranty, it is necessary that you fill out and send the corresponding part of the warranty registration certificate /card back to clearaudio, within two weeks after purchase. Only if the product is returned in it’s original packing clearaudio can provide the warranty. -
Page 19: Warranty Information
RETAIN YOUR PURCHASE RECEIPT Your purchase receipt is your permanent record of a valuable purchase. It should be kept in a safe place to be referred to as necessary for insurance purposes or when corresponding with clearaudio. IMPORTANT When seeking warranty service, it is the responsibility of the consumer to establish proof and date of purchase. Your purchase receipt or invoice is adequate for such proof. -
Page 20: Technical Data
420 mm x 330 mm x 130 mm Warranty: 5 years* (see No 7) * if the warranty-certificate has been correctly filled out and sent back in time (see No 7). März 07 Page 20 © clearaudio electronic GmbH 2007...


Need help?
Do you have a question about the Peerformance and is the answer not in the manual?
Questions and answers