Table of Contents
Advertisement
Quick Links
Advertisement
Table of Contents

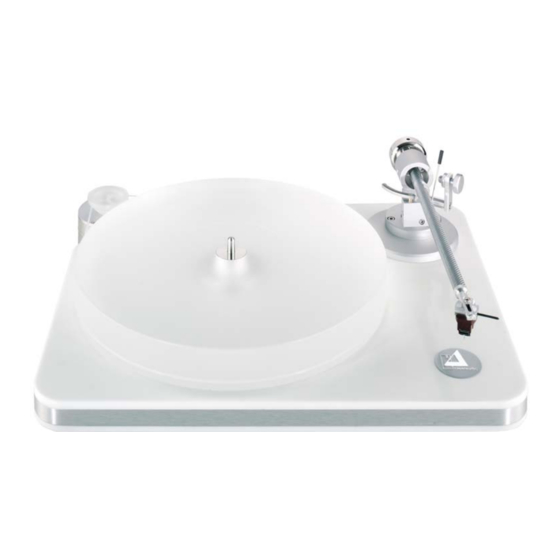
Summary of Contents for Clearaudio Perfomance SE
-
Page 1: User Manual
Performance SE User manual Made in Germany clearaudio electronic Hi-Fi Components GmbH Spardorfer Str. 150 D-91054 Erlangen Tel. +49(0) 1805/059595 FAX +49(0) 09131/51683 www.clearaudio.de www.analogshop.de info@clearaudio.de /clearaudio copyright 2009 Version-1.1_09-06-03_English... - Page 2 , a world class product of clearaudio electronic GmbH. The special resonance-optimised construction, the external motor-unit and the patented clearaudio - CMB-bearing-technology guarantees absolute speed stability, pure pleasure in listening and reproduction in accordance to the original. Thank you very much for your confidence.
-
Page 3: Table Of Contents
Performance SE User manual Contents 1. Packaging overview 2. Packing contents 3. Set-up and operation 4. Tonearm- and pick-up setting 5. Azimuth-setting 6. Antiskating-setting 7. Service 8. Special directions 9. Technical data Warranty information Page 3 clearaudio electronic GmbH 2009... -
Page 4: Packaging Overview
1. Layer (top): Motor-unit, motor-basis (not shown) top of bearing, belt, pulley, fittings and accessories If ordered as set: satisfy tonearm and/or pickup 2. Layer (middle): Turntable - chassis 3. Layer (bottom): Platter Page 4 clearaudio electronic GmbH 2009... -
Page 5: Packing Contents
6-cut pulley for 230V motor or 2-cut Top of the CMB - bearing pulley for 110 V motor, incl. fixing screws Motor stand, made out of stainless Motor-unit with attached power cord steel Page 5 clearaudio electronic GmbH 2009... - Page 6 2 Silent belts 2mm (1 for replacement) Pair of white gloves Allen wrench size 3 Screwdriver ( for fixing the pulley ) Optional: smart stylus gauge aluminium Warranty-certificate ( card ) (no picture) Page 6 clearaudio electronic GmbH 2009...
-
Page 7: Set-Up And Operation
Please follow the description step by step: Performance SE requires a space of at least 16,54 inch x 12,99 inch for positioning. 12,99 inch / 33 cm 16,54 inch / 42 cm Picture 1: Setting up space Page 7 clearaudio electronic GmbH 2009... - Page 8 The marks (dots) on the platter and the top of the bearing have been carefully measured. Please make sure they align exactly as shown in the picture. Picture 4: Congruence of platter and bearing Page 8 clearaudio electronic GmbH 2009...
-
Page 9: Tonearm- And Pick-Up Setting
Pass the cables of the satisfy-tonearm carefully through the tonearm base. Please make sure that the cables will not damaged or bent too much. Picture 6: Passing the Satisfy – tonearm through the tonearm base Page 9 clearaudio electronic GmbH 2009... - Page 10 Colour code key of the satisfy-tonearm cables: Left channel (L+) → white Left channel (L -) → blue Right channel (R+) → Right channel (R -) → green Page 10 clearaudio electronic GmbH 2009...
- Page 11 When the screws are tightened the satisfy-tone arm Performance SE should be installed on your Top view as shown in the top view picture. Picture 10: Exact position of the Satisfy-tonearm Page 11 clearaudio electronic GmbH 2009...
- Page 12 The arrow must point to the centre of the rotation axle of the tonearm. Picture 11: Cartridge alignment gauge Position the pick-up/cartridge in the aligning area of the template marked by a pattern of lines. Picture 12: Adjustment of cartridge Picture 13: Adjustment of cartridge Page 12 clearaudio electronic GmbH 2009...
- Page 13 Picture 14: Detail view of cartridge adjustment TIP: For even better and more easy adjustment of the pick-up/cartridge and tonearm we recommend the clearaudio installation gauge (Art.-Nr. AC 005) . The following adjustment is very important: Performance SE Please make sure that your turntable is in a leveled position by using the level- gauge.
- Page 14 Place the motor into the cut out on the left of chassis. Picture 18: Positioning the motor- unit into the stainless steel motor stand Picture 19: Positioning of the motor-unit Page 14 clearaudio electronic GmbH 2009...
-
Page 15: Speed Calibration
The belt tension is correct if the belt can be deflected by approximately ¾inch by a finger. Page 15 clearaudio electronic GmbH 2009... -
Page 16: Azimuth-Setting
Picture 24: Antiskating The tonearm is adjusted now. Connect the power cord of the motor platter to the power supply. Place a record on the turntable and fix it with the clearaudio clever clamp (enclosed). Performance SE Your -turntable is completely set up and ready to play. -
Page 17: Service
Performance SE User manual 7. Service If any service or repair on all clearaudio products is necessary, please contact your dealer / distributor or contact clearaudio directly. We can inform you as well about your nearest service location. Transportation advice:... -
Page 18: Special Directions
Any damages should only be repaired only by authorized personal. A damaged power cord must be exchanged immediately! To achieve the full clearaudio warranty, it is necessary that you fill out and send the corresponding part of the warranty registration certificate /card back to clearaudio, within two weeks after purchase. -
Page 19: Technical Data
Warranty*: 5* years * Only if the warranty card is filled out correctly and sent back in time to clearaudio. Clearaudio electronic is not responsible for typographical errors in descriptions. Technical specifications subject to change or improvement without prior notice. Availability as long as stock lasts. -
Page 20: Warranty Information
RETAIN YOUR PURCHASE RECEIPT Your purchase receipt is your permanent record of a valuable purchase. It should be kept in a safe place to be referred to as necessary for insurance purposes or when corresponding with clearaudio. IMPORTANT When seeking warranty service, it is the responsibility of the consumer to establish proof and date of purchase. Your purchase receipt or invoice is adequate for such proof.


Need help?
Do you have a question about the Perfomance SE and is the answer not in the manual?
Questions and answers