
Subscribe to Our Youtube Channel
Related Manuals for Futuro Futuro INSERT


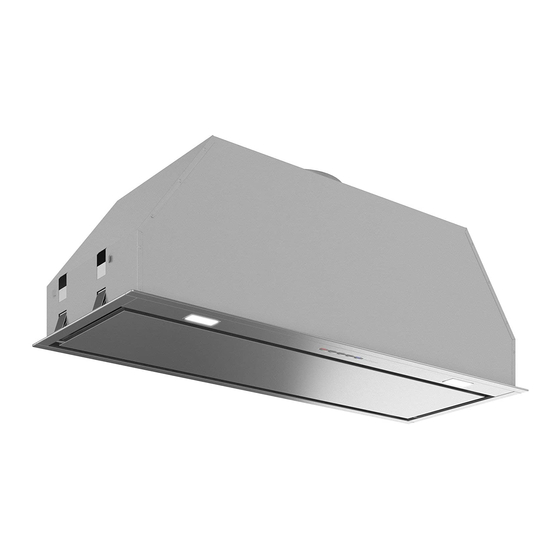
Summary of Contents for Futuro Futuro INSERT
-
Page 1: Range Hood
Futuro Futuro Futuro Futuro RANGE HOOD INSTALLATION MANUAL MODEL: INSERT/LINER (22” & 32” VERSIONS) www.FuturoFuturo.com... - Page 2 HOOD INSERT HOOD INSERT 28” - 30” recommended mounting height Fig. C Fig. C INSERT-LINER 22” Dimensions in millimeters (mm) & inches NOTE: Inch dimensions are rounded 531mm (20 7/8”) 257,5mm (10 1/8”) 494,4mm (19 7/16”) 291mm (11 1/2”) 531mm (20 7/8”) 494,4mm (19 7/16”)
- Page 3 INSERT-LINER 32” Dimensions in millimeters (mm) & inches NOTE: Inch dimensions are rounded 257,5mm (10 1/4”) 6” duct output 291mm (11 1/2”) 739,4mm (29 1/2”) 257,5mm (10 1/4”) 776mm (30 1/2”) 776mm (30 1/2”) Due to continuous product development and innovation, specifications and sizes are subject to change without notice.
- Page 4 ISTRUZIONI PER PANNELLO ASPORTABILE INSTRUCTION FOR REMOVABLE PANEL Magnets Fig. H1...
- Page 5 MONTAGGIO GRUPPO INCASSO • INSERT-LINER INSTALLATION Insert the ventilation unit into the bottom of the Cut the opening & drill holes cabinet/enclosure; the springs (M) will hold it in as necessary for mounting. place for ease of installation. Open the panel (P) and tighten the screws (A) until the springs (M) hold the ventilation unit securely against the cabinet panel Connect the 3-pin power plug to the power outlet.
-
Page 6: Installation
The range hood should be switched on when starting to cook, and left on until the odours disappear. Futuro Futuro range hoods equipped with an electronic control panel provide a convenient 15-minute “Timer” function (clock icon) for this purpose. -
Page 7: Technical Specifications
WARNINGS This instruction booklet must be kept together with the appliance for future reference. If the appliance is sold or consigned to other parties, check that the booklet is supplied with it, to ensure that the new user has the correct information on the operation of the range hood and is aware of the warnings. -
Page 8: Operation
INSTRUCTIONS BOOKLET OPERATION ELECTRONIC CONTROL PANEL Light pushbutton ON: light on (the pushbutton is lit); OFF: light off; Pushbutton - Press to reduce motor speed. Speeds 1, 2 and 3 are indicated by the number of LEDs that light up (excluding the light and the timer LEDs). -
Page 9: Wireless Remote
Replacing the battery: open the rear cover and insert the battery respecting the correct polarity. ATTENTION! If the battery is replaced with one that is of the wrong type there is the possibility of an explosion. -
Page 10: Cleaning And Maintenance
CLEANING & MAINTENANCE Regular maintenance ensures the correct operation and efficiency of the appliance over time. Special attention should be paid to the metal grease-trapping filters and the charcoal filters. Frequent cleaning of the filters and their supports will ensure that fats and grease do not accumulate on the range hood, with the consequent risk of fire.
Need help?
Do you have a question about the INSERT and is the answer not in the manual?
Questions and answers