Table of Contents
Advertisement
Quick Links
Advertisement
Table of Contents

Related Manuals for Futuro Futuro 36 SPLASH WALL


Summary of Contents for Futuro Futuro 36 SPLASH WALL
- Page 1 36 SPLASH WALL INSTALLATION, OPERATING AND MAINTENANCE GUIDE ...
-
Page 2: Table Of Contents
I GENERAL ......................3 II WARNINGS ......................3 III INSTALLATION ....................4 III.1 Preliminary Indications ..................4 III.2 Fixing the wood to the wall ................5 III.3 Electrical Connection ..................5 IV USE ........................ 5 V OPERATION ......................6 V.I Hood control .................... -
Page 3: I General
I GENERAL Installation, operating and maintenance instructions for cooker hood model 36 SPLASH WALL. 120V – 60HZ READ AND SAVE THESE INSTRUCTIONS II WARNINGS CAUTION: Automatically Operated Device – To Reduce The Risk Of Injury Disconnect From Power Supply Before Servicing. -
Page 4: Installation
READ AND SAVE THESE INSTRUCTIONS Keep these instructions in a safe place and pass them on to any future user. Read these instructions carefully before installing or using the range hood. Before connecting the appliance to the power supply make sure that the voltage (V) and frequency (Hz) listed on the data plate correspond with the household electrical supply. -
Page 5: Iii.2 Fixing The Wood To The Wall
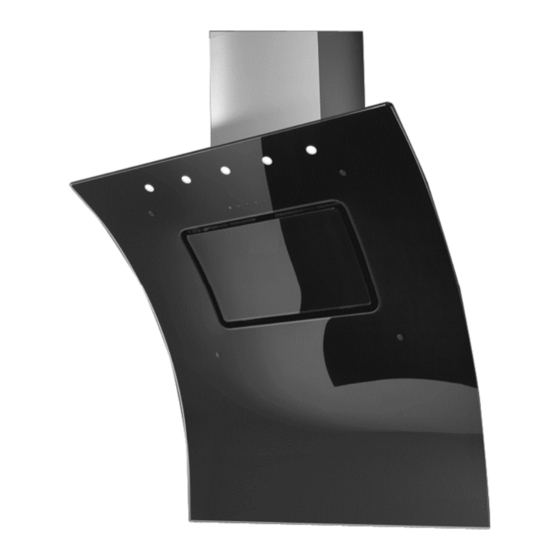
III.2 Fixing the wood to the wall The unit (Fig. 3.2.1) is composed of the following elements: 1) Cooker hood body 2) Telescopic chimney 3) Perimetric glass All fixtures are provided with the cookerhood. During installation, place the hood delicately on the hob so as not to damage the glass. To install the hood, proceed as follows: 1) Draw and drill the wall as in Fig. -
Page 6: Operation
V OPERATION The hood is supplied with a multispeed blower. The hood should be run at low speed under normal conditions and at higher speeds only when there is a heavy build-up of fumes or odours. Ideally, the hood should be switched on as soon as cooking is started and then kept on until all odours have been eliminated. -
Page 7: Maintenance And Cleaning
VI MAINTENANCE AND CLEANING Warning! Before any maintenance or cleaning operation, disconnect the hood from the power supply by setting the main switch of the domestic system to "off". VI.1 Metal grease filter Particular attention should be paid to the metal grease filter, which has the function of retaining the fat particles contained in the vapors. - Page 8 3.1.1 3.2.1 8 ...
- Page 9 3.2.2 9 ...
- Page 10 3.2.3 10 ...
- Page 11 3.2.4 11 ...
- Page 12 4.2 DUCTLESS MODE 4.1 DUCTED MODE 5.1.1 6.2.1 6.1.1 395.813.1 12 ...
Need help?
Do you have a question about the 36 SPLASH WALL and is the answer not in the manual?
Questions and answers