
Subscribe to Our Youtube Channel
Related Manuals for Ledj STAGE PAR 64


Summary of Contents for Ledj STAGE PAR 64
-
Page 1: User Manual
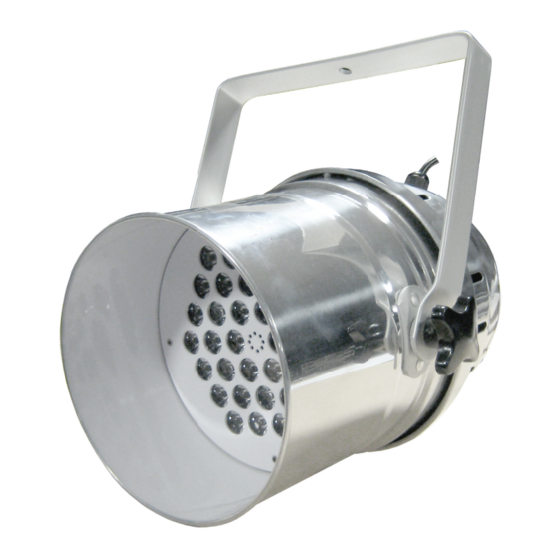
. p r o l i g h t . c o . u k STAGE PAR 64 Order code: LEDJ40 (Black) Order code: LEDJ41 (Polished) Order code: LEDJ42 (Black) Order code: LEDJ43 (Polished) USER MANUAL... - Page 2 Stage Par 64 Safety WARNING FOR YOUR OWN SAFETY, PLEASE READ THIS USER MANUAL CAREFULLY BEFORE YOUR INITIAL START-UP! CAUTION! Keep this equipment away from rain, moisture and liquids. SAFETY INSTRUCTIONS Every person involved with the installation, operation & maintenance of this...
- Page 3 Stage Par 64 Safety IMPORTANT: The manufacturer will not accept liability for any resulting damages caused by the non-observance of this manual or any unauthorised modification to the equipment. • Never let the power-cable come into contact with other cables. Handle the power-cable and all mains voltage connections with particular caution! •...
- Page 4 Stage Par 64 Technical specifications You should find inside the LEDJ carton the following items: 1, Stage Par 64 Unit 2, Power cable 3, Instruction manual Technical Specifications: Voltage: AC 230 ~ 50Hz 24 Ultra bright 1W LED’s (R: 8, G: 8, B: 8) - LEDJ40 + LEDJ41 36 Ultra bright 1W LED’s (R: 12, G: 12, B: 12) - LEDJ42 + LEDJ43...
- Page 5 Stage Par 64 Operation Operation: There are 7 different operation modes to choose from: 1) Static colour mode 2) Colour changing mode 3) Colour fade mode 4) Auto run mode 5) Sound active mode 6) Master/Slave mode 7) DMX modes 1, Static colour mode Mode button - By pressing the “MODE”...
- Page 6 Stage Par 64 Operation DMX Value/Function 3 Channel DMX Chart Channel Value Function 000-255 RED (0 - 100%) 000-255 GREEN (0 - 100%) 000-255 BLUE (0 - 100%) 6 Channel DMX chart Channel Value Function RED (0 - 100%) 000-255...
- Page 7 DATA Cable (DMX cable) requirements (for DMX operation): • The Stage Par 64 can be controlled via DMX-512 protocol. The DMX address is set on the back of the unit. Your unit and your DMX controller require a standard 3-pin XLR connector for data input/output (figure 1).
- Page 8 Stage Par 64 DMX Set up Notice: • Be sure to follow figures 2 & 3 when making your own cables. Do not connect the cable’s shield conductor to the ground lug or allow the shield conductor to come in contact with the XLR’s outer casing.
Need help?
Do you have a question about the STAGE PAR 64 and is the answer not in the manual?
Questions and answers