Advertisement
Quick Links
Advertisement

Related Manuals for TVLogic LVM-091W


Summary of Contents for TVLogic LVM-091W
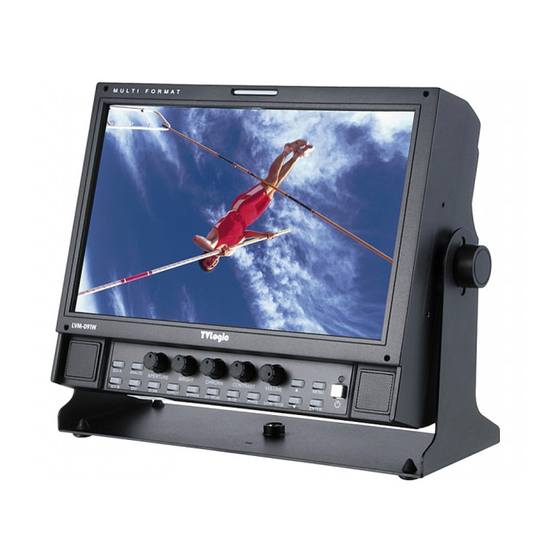
- Page 1 Multi User’s Manual Multi-Format LCD Monitors LVM Series LVM-091W...
-
Page 2: Table Of Contents
Contents LVM-091W Warnings ................... 2 Features .................... 5 Name & Function of Each Part ............7 Menu Organization & Adjustment ...........12 Menu Contents ................13 Other Functions ................21 DVI Digital/Analog Input Signal Format .......... 24 Product Specifications ..............26... -
Page 3: Warnings
Warning · Always use set voltage. - DC 12V/24V (MAX 2A) · All operating instructions must be read and understood before the product is operated. · These safety and operating instructions must be kept in safe place for future reference. ·... - Page 4 d. When the product does not operate properly as described in the operating instructions. Do not touch the controls other than those described in the operating instructions. Improper adjustment of controls not described in the instructions can cause damage, which often requires extensive adjustment work by a qualified technician.
- Page 5 · The vents and other openings in the cabinet are designed for ventilation. Do not cover or block these vents and openings since insufficient ventilation can cause overheating and/or shorten the life of the product. Do not place the product on a bed, sofa, rug or other similar surface, since they can block ventilation openings.
-
Page 6: Features
Features Multi-Format LVM-091W Series unit has the following features: Compatible with varied SDI signals The product is compatible with varied SDI Signals - 480i,576i,720p,1035i,1080i,1080p,1080psf Compatible with varied Analog signals The product is compatible with varied analog signals - Composite, S-Video, Component, RGB... - Page 7 Wide Variety of Markers & Safety Areas Center Marker, Safety Area Marker, Aspect Marker, Display Size(Scan) Pixel To Pixel Provides both full screen and unscaled native image. Wide Screen/CCFL Backlight 8 bit LVDS 2Channel Interface Panel DC Compatible The product is powered by normal 12V/24V source. Remote control function Simple remote controllability with single cable connection, no additional modules required...
-
Page 8: Name & Function Of Each Part
Name & Function of Each Part <FRONT> TALLY CONTRAST CHROMA VOLUME BRIGHT APERTURE MENU ANALOG LED INDICATOR SDI-A SPEAKER-RIGHT SPEAKER-LEFT SDI-B POWER SELECT SCAN DOWN ASPECT WAVEFORM/VECTOR SCOPE MARKER PHASE H/V DELAY BLUE · [ANALOG] button/lamp Used to select desired Analog Input. (CVB1/2/3, S-Video, Component, RGB) ·... - Page 9 · [ASPECT] button/lamp Used to toggle aspect ratio in SD from standard to anamorphic. · [MARKER] button/lamp Used to show MARKER on the screen. The type of marker at work may be selected on the main menu. · [BLUE ONLY]/[MONO] button/lamp You may remove R(red) and G(green) from the input signal and play the screen only with B(blue) signal.
- Page 10 · [POWER] switch Power On/Off button. If the signal is normal, LED lights in Green. If the signal is unsupported or discon- nected, LED flashes in Yellow. · TALLY(Front) LED indicating monitor’s current status using optional Remote/RS-485. · [APERTURE] knob Used to adjust the picture sharpness between MAX(12) and MIN(-12).
- Page 11 <REAR> SDI-B TALLY TALLY REMOTE SDI-A SDI-OUT FACTORY PGM CVBS1/B/Pb CVBS2/G/Y/S-Y DC IN AUDIO IN AUDIO OUT CVBS3/R/Pr/S-C DVI-DIGITAL/ DVI-ANALOG · REMOTE (RJ-45) Connection for remote control of monitor. · DVI DIGITAL/DVI ANALOG (DVI-I) Input connection for DVI-I · SDI-A/B (BNC) SDI signal input terminal ·...
- Page 12 Connector Composite Component S-Video CVBS1 No Con. CVBS2 CVBS3 · AUDIO IN (phone jack) Used to External audio input jack. · AUDIO OUT (phone jack) Used to audio output jack. · FACTORY PGM (40 pins) Input connector for FACTORY PGM allowing for firmware updates. ·...
-
Page 13: Menu Organization & Adjustment
Menu Organization & Adjustment The product may be controlled and set system-wise through OSD displayed on the screen. 1) Menu Organization Below is the organization of the product’s menu. 2) Menu Control You may control various functions using MENU, UP/DOWN and ENTER buttons on the bottom front of the monitor. -
Page 14: Menu Contents
Menu Contents Below is the description of each function of the menu. [1] PICTURE · Brightness This Item controls the degree of brightness. #Brightness can be adjusted by using the [BRIGHT] control knob on the front of the monitor. · Contrast This item controls the contrast ratio. - Page 15 · Aperture This item controls the picture sharpness. #Sharpness can be adjusted by using the [APERTURE] control knob on the front of the monitor. · NTSC Setup This item sets IRE value in NTSC mode between 0 IRE and 7.5 IRE. [2] PICTURE(DVI/Analog Only) ·...
- Page 16 · Clocks/Line This item is adjust timing for signal sync · Auto Adjustment This item adjusts the input signal automatically. Phase, Clocks/Line and Image Position are also adjusted. [3] COLOR · Color Temp This item controls Color Temperature with presets of 3200K, 5600K, 6500K, 9300K, and User1, User2, User3 mode.
- Page 17 [4] MARKER · Marker This selects the marker type when the MARKER is displayed on the screen. Compatible MARKER types are as follows: MODE MARKER CLASS 16:9, 4:3, 4:3 ON AIR, 15:9,14:9, 13:9, SD 16:9 1.85:1, 2.35:1, 1.85:1 & 4:3 SD 4:3 16:9 # MARKER may only be activated by pressing the MARKER button on the front of the...
- Page 18 [5] REMOTE · Pin1 ~ Pin6 The user may connect RJ-45 jack to the remote terminal on the rear of the unit and designate a function for each pin. The selectable functions are as follows: ANALOG CHANNEL DVI CHANNEL SDI-A/SDI-B TALLY RED TALLY GREEN BLUE ONLY...
- Page 19 [6] SYSTEM(1/2) · System Default User can use the System Default menu to initialize the values of the monitor. · Audio Channel This item set embedded audio channel selects CH1 ~ CH16, Off, and Ext. Audio. · Audio Level Meter This item set embedded audio group selects Off, G1+G2, G2+G3, G3+G4, G1+G3, G1+G4, G2+G4 to activate Audio Level Meter.
- Page 20 [7] SYSTEM(2/2) · Closed Caption This item controls closed caption.(Off, CC608(ANC), CC608(Line21), CC708) (Closed Caption may be used only SDI mode.) · Back Light This item can be adjusted by using the [CONTRAST] control knob on the front of the monitor ·...
- Page 21 [8] Analog Input Menu · LVM-091W Series unit is capable of processing varied ANALOG Input signals. · Press [ANALOG] button on the front of the monitor and activate the OSD menu as shown on the left. Select the input you desire by using the [UP]/[DOWN] button and press the [ENTER] button to confirm.
-
Page 22: Other Functions
Pixel To Pixel CENTER After two seconds · LVM-091W monitor’s Pixel to Pixel mode displays input signal without scaling. · Press [UNDERSCAN] button on the front of the monitor to activate the [Pixel To Pixel] mode. · In the [Pixel To Pixel] mode, use the [UP]/[DOWN] buttons to toggle between 1:1... - Page 23 · Positions in HD Signal 1080i/1080p mode [UP] [UP] [DOWN] [DOWN] Center Left Top Mid Top [UP] [UP] [UP] [DOWN] [DOWN] [DOWN] Right Top Right Mid Right Bottom [UP] [UP] [UP] [DOWN] [DOWN] [DOWN] Mid Bottom Left Bottom Left Mid ·...
- Page 24 [2] WAVE FORM · Waveform Position Waveform OFF Waveform ON #This function is only available with SDI Input. [3] VECTOR SCOPE · Vector Scope Position Vector Scope OFF Vector Scope ON #This function is only available with SDI Input.
-
Page 25: Dvi Digital/Analog Input Signal Format
DVI Digital/Analog Input Signal Format [1] DVI Digital Resolution DotClock Sync (Source) [MHz] (kHz) (Hz) (H/V) 640 x 350 70Hz (IBM) 25.175 31.469 70.086 640 x 480 60Hz (IBM) 25.175 31.469 59.940 720 x 400 70Hz (IBM) 28.322 31.469 70.087 640 x 480 67Hz (MAC) 30.240 35.000... - Page 26 [2] DVI Analog Resolution DotClock Sync (Source) [MHz] (kHz) (Hz) (H/V) Pixel To Pixel 640 x 350 70Hz (IBM) 25.175 31.469 70.086 640 x 480 60Hz (IBM) 25.175 31.469 59.940 720 x 400 70Hz (IBM) 28.322 31.469 70.087 640 x 480 67Hz (MAC) 30.240 35.000 66.667...
-
Page 27: Product Specifications
PRODUCT SPECIFICATIONS 1 x DVI-I DVI IN 3 x BNC Analog Input Input 2 x BNC SDI 2 Channel Input Output 1 x BNC SDI Channel ( Active Through Out ) Composite / S-Video / Component / RGB Analog HD-SDI 1.485Gbps Input Signal SD-SDI... - Page 28 LVM - 571W LHM - 400W LHM - 460W LHM - 570W Developed by For more information please visit : www.tvlogic.co.kr Suite 914 ACE TECHNO TOWER-9, 345-30 Gasan-Dong, GuemChun-Gu, Seoul, Korea TEL : +82-2-2026-1333 FAX : +82-2-2026-1339 E-mail : support@tvlogic.co.kr...
Need help?
Do you have a question about the LVM-091W and is the answer not in the manual?
Questions and answers