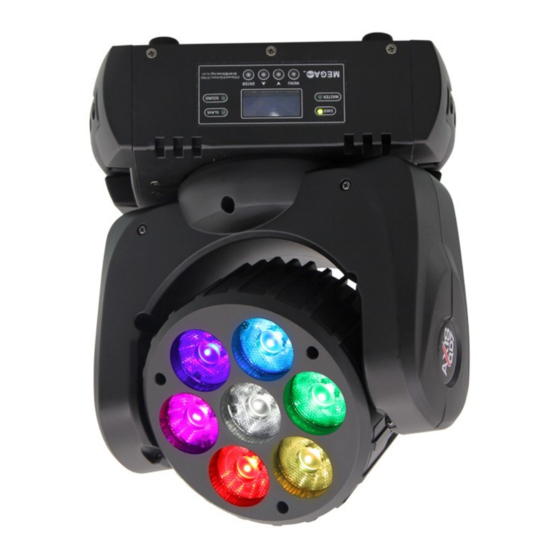
Table of Contents
Advertisement
Quick Links
USER MANUAL
Safety Information...............................................................3
Specifications.....................................................................4
Main Power Connection........................................................5
DMX-512 Connection...........................................................5
Rigging the Fixture..............................................................6
Main Control Menu..............................................................6
DMX Profile.................................................................................... 8
Cleaning & Maintenance...............................................................13
Parts List.......................................................................................13
Advertisement
Table of Contents

Summary of Contents for Mega Lite Axis QD7
-
Page 1: Table Of Contents
USER MANUAL Table of Contents Safety Information……………………………………...………………3 Specifications………………………………………...…………………4 Main Power Connection…………………………...…………………..5 DMX-512 Connection……………………………..…………………...5 Rigging the Fixture……………………………….…………………….6 Main Control Menu……………..…………………………………..….6 DMX Profile..................8 Cleaning & Maintenance...............13 Parts List..................13... -
Page 3: Table Of Contents Safety Information
Check that the unit has not been damaged during transport Protection Against Fire 1. Maintain a minimum of 1 foot distance from any type of flame. 3. Replace fuse only with the specified type and rating. 4. Do Not install the unit to close to a heat source. 5. -
Page 4: Specifications
Specifications Part Numbers Fixture Lamp Flight Case 1125- AXIS QD7 LOSRAM–12W RGBWLED P-1125 DUALCASE Mechanical Specifications Pan: 540° Tilt: 270° 3.75 ” 10.5 ” DMX Connectors: 3-pin and 5-pin XLR connectors Thermal: Maximum ambient temperature 100° F Maximum surface temperature 130° F... -
Page 5: Main Power Connection
Main Power Connection Caution! Do not connect fixture to a dimmer system. This unit must be earthed. (electronically grounded) Replace fuse only with the specified type and rating. This device is equipped with a auto switching power supply that will allow you to work from 100V-240V 50/60Hz The occupation of the connection-cable is as follows: Cable (USA) Cable (EU) -
Page 6: Rigging The Fixture
Rigging the fixture Caution! 1. The installations must be carried out by an authorized dealer or trained professional. 2. Unit may cause severe injures if you have doubts concerning the safety do not install. 3. Unit is to be 24inches away from flammable materials (decoration material) 4. - Page 7 To set the desired operational channel mode press Enter. Use the ▲ or ▼ to >Chan Mod select the desired DMX profile operational mode from 6,17 or 37 and press Enter 17CH to confirm your setting. Note: Operational mode are located on Page 8 of the manual. This function will give you access to the Display Control press Enter.
-
Page 8: Dmx Profile
>Info Version To reset the fixture press Enter. Use the ▲ or ▼ for Yes or No press Enter to >Reset confirm your setting. DMX Profile Axis QD7 6 Ch Mode 1 Pan Course 0-255 Tilt Tilt Course 0-255 LED Color... - Page 9 Axis QD7 17 Ch Mode 2 DMX Channel Function Description Value Pan Course 0-255 Pan Fine Pan Fine 0-255 Tilt Tilt Course 0-255 Tilt Fine Tilt fine 0-255 Fast 0-84 Pan/Tilt Speed 85-170 Slow 171-255 LED Color 0-255 LED Color...
- Page 10 80-99 Control Demo Program 1 100-150 Demo Program 2 151-200 Demo Program 3 201-250 No Function 251-255 Axis QD7 37 Ch Mode 3 Closed 0-19 Open 20-49 Strobe (fast to slow) 50-64 Open 65-69 Open Pulse (fast to slow) 70-84...
- Page 11 No Function Moroccan Pink 10-14 Pink 15-19 Rose Pink 20-24 Follies Pink 25-29 Fuchsia Pink 30-34 Hot Pink 35-39 Congo Blue 40-44 Tokyo Blue 45-49 Deep Blue 50-54 Blue 55-59 Medium Blue 60-64 Double CT Blue 65-69 State Blue 70-74 Full CT Blue 75-79 Half CT Blue...
- Page 12 Red 3 Red Intensity 3 0-255 Green 3 Green Intensity 3 0-255 Blue 3 Blue Intensity 3 0-255 White 3 White Intensity 3 0-255 Red 4 Red Intensity 4 0-255 Green 4 Green Intensity 4 0-255 Blue 4 Blue Intensity 4 0-255 White 4 White Intensity 4...
-
Page 13: Cleaning & Maintenance
Replacing the power cable: If the power cable of this device becomes damaged, it has to be replaced by author- ized dealers only Should you have further questions , please contact your dealer. Parts List P-1125 4 Axis QD7 Case 1125-HANB Handle Set 1125-LEDMOD LED Module... -
Page 14: Warranty Information
Warranty Information Warranty Conditions • Unless otherwise stated in writing, your product is covered by a one year parts and labor limited warranty. • LEDs are not guaranteed to match in color temperature or output. • It is the owner’s responsibility to furnish receipts or invoices for verification of purchase, date, and reseller or distributor. If purchase date cannot be provided, date of manufacture will be used to determine warranty period.


Need help?
Do you have a question about the Axis QD7 and is the answer not in the manual?
Questions and answers