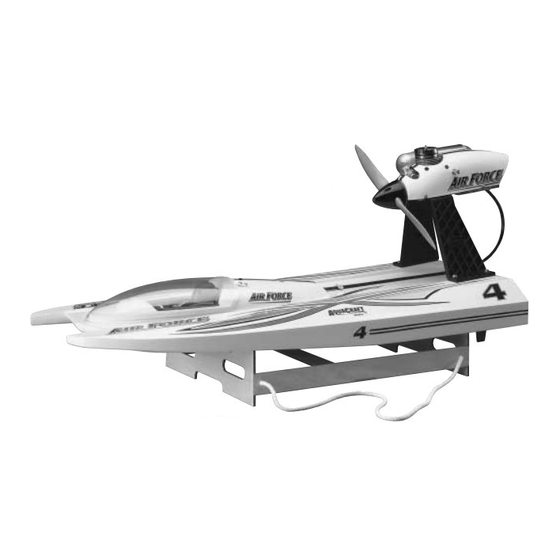
Table of Contents
Advertisement
Quick Links
ASSEMBLY AND OPERATION MANUAL
We want the assembly and operation of this airboat to be a success so BEFORE removing any parts from the parts bags,
please read this manual thoroughly to familiarize yourself with the model. If for any reason you think this model is not for
you, return it to your local dealer immediately. PLEASE NOTE: Your hobby dealer cannot accept a return on any model
after assembly has begun.
AquaCraft
will warrant this kit for 90 days after the date of purchase from defects in materials or workmanship.
™
AquaCraft will either repair or replace, at no charge, the incorrectly made part.
Make sure you save the receipt or invoice you were given when you bought your model! It is your proof of purchase
and we must see it before we can honor the warranty.
To return your Air Force for repairs covered under warranty you should send your boat to:
Entire Contents © Copyright 2002 v1.1
™
Before Building
Hobby Services
1610 Interstate Drive
Champaign, Illinois 61822
Attn: Service Department
Phone: (217) 398-0007 9:00 am - 5:00 pm Central Time M-F
E-mail: hobbyservices@hobbico.com
™
Warranty
HCAZ3011 for HCAB5027/HCAB27**
Advertisement
Table of Contents

Subscribe to Our Youtube Channel
Summary of Contents for Hobbico Air Force
- Page 1 Make sure you save the receipt or invoice you were given when you bought your model! It is your proof of purchase and we must see it before we can honor the warranty. To return your Air Force for repairs covered under warranty you should send your boat to: Hobby Services...
-
Page 2: Table Of Contents
R/C airboat. Read running propeller. over this manual thoroughly before operating the Air Force. If the buyer is not prepared to accept the liability associated with the use of this product, the buyer is advised to return... -
Page 3: Repair Service
Repair service is available anytime. STERN: The back of the boat After the 90-day warranty, you can still have your Air Force repaired for a small charge by the experts at AquaCraft’s PORT: This is the left side of the boat when aboard and facing authorized repair facility, Hobby Services, at the address the front (bow). -
Page 4: Finishing The Ready-To-Run Air Force
FINISHING THE READY-TO-RUN AIR FORCE Note: If you have the prebuilt version, proceed to page 6. FINAL ASSEMBLY Engine and Propeller Installation 6. Place the spinner backplate onto the crankshaft so that it rests against the drive washer. 1. Looking down at the top (deck) of the hull, remove the four large mounting screws with washers located toward the rear of the hull (stern). - Page 5 backplate. If you see a gap, check to make sure that the prop is installed correctly. Installation of Batteries 3. Install four new “AA” batteries into the battery box and re-install the battery box into the boat. There is hook and loop material provided with the model to make your battery box extra secure.
-
Page 6: Finishing The Pre-Built Air Force
Too • Your Airforce Airboat is now ready for action. Go to page 9 much steering can cause the air Force to flip over. for information on running and breaking in your engine. FINISHING THE PRE-BUILT AIR FORCE ADDITIONAL REQUIRED ITEMS .40 –... - Page 7 7. Insert the four 3 x 27mm screws (with washers) and secure the assembly with 3mm locknuts. 4. Test fit the engine and engine mount to determine the proper width of the supports. Then tighten the 4 x 20mm screws. 8.
-
Page 8: Install The Servos
INSTALL THE SERVOS 11. Screw the clevis onto the throttle pushrod and attach it to the inside hole of the throttle lever. 1. Cut two X-shaped servo arms as shown. This will cut down the chances of any radio wiring getting tangled in the radio compartment. -
Page 9: Install The Radio Gear
Note: The needle valve settings listed in this manual are for the AquaCraft Pro 46 engine included with the RTR Air Force. If you purchased the ARR version, see your engine instruction manual for the proper needle valve settings. - Page 10 7. Prime the engine by rotating the propeller counterclockwise with the carburetor intake choked. CAUTION! Use a glove to protect your hand while rotating the propeller. Once you see fuel reach the carburetor (in the fuel line), rotate the engine 2-3 more times.
-
Page 11: Breaking In The Engine
10. Remove the glow starter after 10-15 seconds. 2. Start the engine. IMPORTANT NOTE: Never place your finger over the 3. Once the engine is started, open the high-speed needle carburetor intake when applying the starter. Such an action will valve around 1/8 turn at a time, finding the setting where the cause an excess quantity of fuel to be forced into the cylinder engine just barely runs. -
Page 12: Running The Air Force
When • Before running your Air Force, it is a good idea to check surveying areas to run your Air Force, keep in mind things like over all screws to make sure they are securely fastened. -
Page 13: Ordering Replacement Parts
ORDERING REPLACEMENT PARTS To order replacement parts for the AquaCraft Air Force, use the order numbers in the Replacement Parts List that follows. Replacement parts are available only as listed and can be purchased from hobby shops or mail order/ Internet order firms. -
Page 14: Engine Troubleshooting
ENGINE TROUBLESHOOTING The engine starts Does it run It should be continuously? ready to go. Is the high speed needle setting 2 Does the engine Clear the engine to 3 turns out Replace the Is fuel getting to quit when the of fuel. -
Page 15: Engine Mounting Template
ENGINE MOUNTING TEMPLATE...


Need help?
Do you have a question about the Air Force and is the answer not in the manual?
Questions and answers