Advertisement
Quick Links
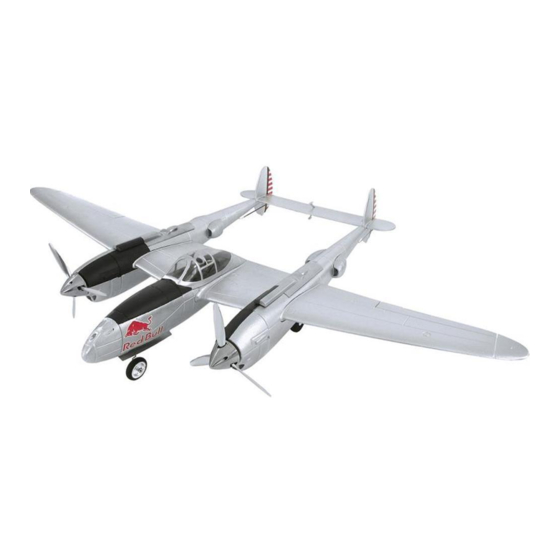
FLITEWORK P-38 Lightning 1.5m FLWA4120
Please read the instruction manual carefully and take notice of the safety guidelines.
If the model is given to a third party, always include this instruction manual to the model.
The Flitework Gmbh assumes no liability in case of misprints. Technical amendments reserved.
www.flyingbulls.at
Instruction manual
Distributed by
Fully licensed through the Red Bull GmbH - Austria
Wingspan
Length
Take off weight
RC Channels
Battery
- 1 -
1465 mm
1065 mm
1500 g
Ailerons, elevator, rudder, motor,
electric retracts
3s 2200 - 2500 mAh
Advertisement

Related Manuals for Hobbico FLITEWORK P-38 Lightning FLWA4120


Summary of Contents for Hobbico FLITEWORK P-38 Lightning FLWA4120
-
Page 1: Instruction Manual
Instruction manual FLITEWORK P-38 Lightning 1.5m FLWA4120 Wingspan 1465 mm Length 1065 mm Take off weight 1500 g Ailerons, elevator, rudder, motor, RC Channels electric retracts Battery 3s 2200 - 2500 mAh Please read the instruction manual carefully and take notice of the safety guidelines. If the model is given to a third party, always include this instruction manual to the model. - Page 2 Technical data............1 Mounting the rudder linkage........8 Introduction............2 Installing the aileron linkages.........8 General information..........2 Assembling the propeller........8 Environment protection infos.........2 Placing the battery..........9 Safety precautions..........3 Center of Gravity............9 Recommended accessories........4 Setting the control throws........9 Additional items required........4 Check list...............10 Kit check..............4 Service line............10 Content of delivery..........4 Personal notes............11...
- Page 3 1. Your P-38 should not be considered a toy, but rather 6. You must check the operation of the model before a sophisticated, working model that functions very every flight to insure that all equipment is operating much like a full-size airplane. Because of its perfor- and that the model has remained structurally sound.
- Page 4 Before starting to build, use the Kit Contents list to take an inventory of this kit to make sure it is complete and inspect the parts to make sure they are of acceptable quality. If any parts are missing or are not of acceptable quality, or if you need assistance with assembly, contact Hobbico Product Support. Service center Revell GmbH Henschelstr.
- Page 5 Take off the turbocharger cap, lifting the covers backside off the magnetic holder. Then pull backwards. The ESC wires should stay below the wing area at this time. Connect the V-cable, named AIL with the aileron servo cable of the wing 1. Move the servo cables in the shown position, that they are no handycap during inserting the main wing into the twin fuselage.
- Page 6 Before you glue the rudder blades to the fuselage, remove the painting from the glueing areas by sanding it. Patch the cables with the same numbering together. 1. Aileron 2. Elevator 3. Throttle 4. Rudder 5. Retract If necessary, shorten the fitting a little bit, that you can glue Now you can close the fuselage with the turbo cap.
- Page 7 Use the flat parts with claws on upper side and press the If you like to connect the two aileron servos to separate into the EPO. The pilot pins goes through the elavator and channels, you have to change the aileron V-cable to 2 reache the middle of the mounting socket of the rudder.
- Page 8 Take the longer linkage wire and hook it into the servo lever, using the 3 hole from outer side. Glue the aileron levers into the aileron flaps. The clamp screws of the linkage holder should point to inner side. Do this work on the 2 side in the same manner.
- Page 9 Put the spinner base plate an the propeller onto the motor Before flight you can connect the battery with the ESC shaft. Then place the shim and screw the propeller to the before closing the fuselage with the canopy. propeller adapter with the M5 nut. The holes for spinner mounting should be exactly between to prop blades.
- Page 10 ● 21. Range check your radio when you get to will turn freely. the flying field. ● 7. Make sure all hinges are securely glued in place. Service - Department Revell GmbH Henschelstr. 20-30, 32257 Bünde, Germany Tel: +49 52239 65144 Email: service@hobbico.de - 10 -...
- Page 11 - 11 -...
- Page 12 Remember to think. Have a ball! But always stay in control and fly in a safe manner. GOOD LUCK AND GREAT FLYING! Flitework GmbH Tel: +43 664 3231059 Geymannstraße 27 Skype: elektroflug 4713 Gallspach Austria / Europe Mail.: office@flitework.at www.flitework.at - 12 -...
Need help?
Do you have a question about the FLITEWORK P-38 Lightning FLWA4120 and is the answer not in the manual?
Questions and answers