Table of Contents
Advertisement
Advertisement
Table of Contents

Related Manuals for Motion Computing CL910


Summary of Contents for Motion Computing CL910
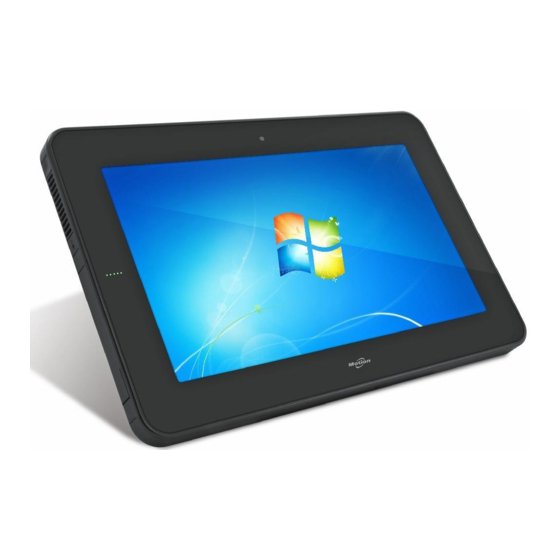
- Page 1 CL910 Tablet PC Model FWS-001 User’s Guide...
- Page 2 © 2012 Motion Computing, Inc. All rights reserved. Motion Computing, Inc. has made every effort to identify trademarked properties and owners on this This document contains information protected by page. All brands and product names used in this copyright. No part of this document may be...
-
Page 3: Table Of Contents
Step 3: Get familiar with your CL910 Tablet PC....... . - Page 4 Docking or floating the input panel ......... . 25 Entering numbers with numbers pad .
- Page 5 Traveling with your CL910 Tablet PC ........
-
Page 6: Chapter 1 Getting Started
Running Microsoft® Windows® 7 and powered by the Intel® Atom™ N2600 Dual Core processor, the CL910 balances power, performance, and a battery life of up to 7 hours. Weighing 2.2 pounds, and offering added durability and productivity features, the CL910 helps users work more efficiently, providing the capabilities, applications, and connectivity mobile workers need for improved field productivity. -
Page 7: Optional Features
Optional features This section describes the optional features available for your CL910. Mobile broadband with GPS You can purchase a CL910 Tablet PC with the optional mobile broadband with GPS module. When installed, the module provides: • Worldwide mobile broadband support •... -
Page 8: Overview Of The Cl910
Overview of the CL910 The following illustrations show the buttons, slots, and ports on the CL910 Tablet PC. Top view The speaker and microphones are located on the top edge of the CL910. speaker microphones CL910 top view Speaker Listen to audio warnings, videos, music, and other multimedia applications. -
Page 9: Front View
Front view The front of CL910 consists of a capacitive touchscreen display, web camera, and battery gauge. web camera battery gauge touchscreen display ambient light sensor CL910 front view Web camera Interact with people online, stream video, or capture color images with a 1.3 MP web camera. -
Page 10: Back View
JPG format with a resolution of up to 2048 x 1536 pixels. Right side view The pen is stored in a storage drawer on the right side of the CL910. pen tether pen storage attach point... -
Page 11: Left Side View
Left side view Most of the CL910 connectors and slots appear on the left side of the tablet. The ports are protected by a cover that is not shown in the picture below. power battery Micro- audio adapter gauge card... -
Page 12: Pen
The CL910 supports touch with your finger as well as input with a CL-Series digitizer pen. You may find the pen handy when you want to write a quick email or take notes. The pen is particularly effective for precise data entry and navigation. -
Page 13: Where To Begin With Your Cl910
CL910 Tablet PC. Step 1: Power up the tablet 1. Pull out the port door located at the bottom of the left side of the CL910 to expose the AC adapter port and plug in the AC adapter. power button... - Page 14 • Enable 802.11 Internal Wireless • Enable Mobile Broadband with GPS (If this option is not listed, your CL910 does not have mobile broadband installed.) To extend battery life, enable only the wireless devices that you will be using. Set up Wi-Fi Connect to the Internet and other computers using Wi-Fi.
-
Page 15: Step 3: Get Familiar With Your Cl910 Tablet Pc
On the Options tab, select Allow Bluetooth devices to find this computer. Step 3: Get familiar with your CL910 Tablet PC Once you’ve set up your CL910, take a few minutes to get familiar with your tablet PC. •... -
Page 16: Sleep Mode
To put the tablet in Hibernate mode: • From the Start menu, tap the arrow next to Shut down and select Hibernate. hibernate Hibernate from the Start menu Chapter 1 Getting Started Where to begin with your CL910 11... -
Page 17: Optional Setup Tasks
Attach the pen tether The CL910 pen comes with a tether so that you can attach the pen to your tablet or docking station to avoid misplacing it. The tether is a string with loops at each end. To attach the pen tether: 1. -
Page 18: Connect The Tablet To A Docking Station
2. Slip the other end of the tether through the attach point on the CL910 then pull the pen through the loop until it is tight. You may find it helpful to use a small screwdriver or something similar to assist with threading the loop through the tight space of the tether attach point. -
Page 19: For More Information
FAQs—Provides answers to common issues you may encounter as you use your CL910. The Getting Started document located on the CL910’s desktop provides a number of tips to get you started using the tablet quickly. You will find other useful information on our website: •... -
Page 20: Chapter 2 Using Your Cl910
Introducing the CL910 desktop and applications When you start up the CL910 for the first time, the desktop looks like the following picture. Motion Computing applications appear in the taskbar and Windows® notification area. Getting Started document ®... -
Page 21: Changing The Location Of The Taskbar
The Motion Computing applications are described below. Motion Getting Document that contains tips for starting out with the Started CL910 Tablet PC Motion Dashboard Motion application for changing tablet settings. See Using the Motion Dashboard on page 16. Motion QuickNav User interface designed for touch devices. - Page 22 This is a partial list of tasks that you can perform with Motion Dashboard. Some of these tasks are described in this chapter; all tasks are described in Motion Dashboard by tapping the help icon Chapter 2 Using your CL910 Using the Motion Dashboard 17...
-
Page 23: Accessing Motion Tools From The Windows® Notification Area
Initially, the Motion icons do not appear in the Windows® notification area. Tap the arrow to view more icons. Tap Customize to enable the icons to appear. arrow Motion utilities Motion power indicator QuickNav Motion icons in the Windows® notification area Chapter 2 Using your CL910 Accessing Motion tools from the Windows® notification area 18... -
Page 24: Using Touch
Using touch With the CL910 dual touchscreen display, you can use either your finger, a pen, or both to interact with the touchscreen display. While it’s convenient to use your finger most of the time, a pen allows you more precise control, for example, when editing documents or drawing graphics. -
Page 25: How To Use Gestures With The Multiple-Touch Display
When you tap Pen & Tablet Touch Settings, it opens a panel titled N-trig DuoSense® Digitizer Settings. N-trig makes the CL910 digitizer pen and the digitizer software that detects your finger or pen input and converts it to digital input. -
Page 26: Using The Touch Tuning Option
8. To adjust the Press and hold action, under Touch action, tap Press and hold then tap Settings. Move the slider to make your adjustments. 9. To display the touch pointer on the screen, tap Show the touch pointer. Chapter 2 Using your CL910 Using touch 21... -
Page 27: Adjusting Pen Settings
Adjust how quickly the tablet responds when you press and hold the pen button. Important: The CL910 Tablet PC responds only to the CL-Series pen that comes with the tablet. Do not use traditional pens or other pointing devices with the CL910. -
Page 28: Adjusting Tablet Pc Settings
4. Tap the Other tab and make your desired change. The Tablet PC Settings Display tab has a Calibrate option. This does not apply to the CL910. Instead, if touch input does not behave as expected, you can tune touch as described in Using the touch tuning option on page 21. -
Page 29: Opening And Closing The Input Panel
The tablet PC input panel often opens automatically when you tap in a text field. You can also tap the tab located on the left side of the screen to expand the input panel. Chapter 2 Using your CL910 Entering text and handwriting recognition 24... -
Page 30: Docking Or Floating The Input Panel
If you find yourself typing a lot of numbers, use the numbers pad. To open the numbers pad: • Tap the Num key at the bottom of the writing pad. Numbers pad Chapter 2 Using your CL910 Entering text and handwriting recognition 25... -
Page 31: Entering Special Keys With The Extended Keyboard
4. Tap Target specific recognition errors to correct recognition errors for specific characters or words that are being identified incorrectly. 5. Tap Teach the recognizer your handwriting style to train the tablet to recognize your general handwriting style. Chapter 2 Using your CL910 Entering text and handwriting recognition 26... -
Page 32: Using Motion Quicknav
PC input panel (as described in Entering text and handwriting recognition on page 23.) To use GPS with Motion QuickNav, your CL910 must have the mobile broadband module installed and set up and GPS must be running. For more information, see Mobile broadband with GPS on page 2. - Page 33 Motion QuickNav keyboard As Motion QuickNav starts up, the screen displays “Motion QuickNav powered by Dial Keys. ” Dial Keys is the vendor that created Motion QuickNav for Motion Computing. 1. Tap the Motion QuickNav toolbar icon located on the bottom left of the keyboard to open the Motion QuickNav toolbar.
-
Page 34: Hiding And Showing The Motion Quicknav Toolbar
Motion QuickNav to operate the photo camera in greater detail. To use the barcode scanner from Motion QuickNav: 1. Open the Motion QuickNav toolbar then tap the barcode icon to open the barcode scanner. Chapter 2 Using your CL910 Using Motion QuickNav 29... -
Page 35: Using The Cameras With Motion Quicknav
Using the cameras with Motion QuickNav Your CL910 comes equipped with two built-in cameras: • Front-facing web camera—a 1.3 MP camera that supports streaming video. -
Page 36: Using The Web Camera
Send through email. • Adjust and annotate on the spot. • Add geographical information, called a geotag (requires GPS capabilities as described in Mobile broadband with GPS on page 2). Chapter 2 Using your CL910 Using the cameras with Motion QuickNav 31... - Page 37 Action menu to select photo destination By default, Motion QuickNav saves photos to a folder. Chapter 2 Using your CL910 Using the cameras with Motion QuickNav 32...
- Page 38 4. Continue to take photos and they will appear on the left of the viewfinder. 5. To add notes or make any other edits to a photo, tap the photo on the left. For more information, see Editing photos on page 34. Chapter 2 Using your CL910 Using the cameras with Motion QuickNav 33...
-
Page 39: Editing Photos
You can open a photo in the Motion QuickNav edit window to change it. For example, you can add notes, adjust brightness, rotate, crop, or delete it. Edit tools are available from the edit toolbar located at the bottom of the edit window. Chapter 2 Using your CL910 Using the cameras with Motion QuickNav 34... - Page 40 2. Tap an icon from the edit toolbar at the bottom of the edit window to make changes: return contrast crop extend undo annotate brightness zoom rotate delete viewfinder Motion QuickNav edit toolbar Chapter 2 Using your CL910 Using the cameras with Motion QuickNav 35...
-
Page 41: Switching Cameras
If you are in view, the web camera is active. 2. Tap Options icon located at the top of the viewfinder. Chapter 2 Using your CL910 Using the cameras with Motion QuickNav 36... -
Page 42: Locating Motion Quicknav Output
A folder icon appears in front of each tool indicating that QuickNav is in folder mode as shown: Chapter 2 Using your CL910 Using the cameras with Motion QuickNav 37... - Page 43 (You don’t need to open the Options menu.) 2. For photos and videos, tap the close icon to close the Options menu. Chapter 2 Using your CL910 Using the cameras with Motion QuickNav 38...
-
Page 44: Setting Display Options
To enable or disable rotating the display automatically: 1. From the Windows® notification area, tap the Motion icon then tap Options. 2. Select or clear the Automatic Display Rotation check mark. Chapter 2 Using your CL910 Setting display options 39... -
Page 45: Setting Up An External Display
Monitor Only Desktop appears only on the monitor. Tablet Only Desktop appears only on the tablet. tablet PC external monitor Mirror display scheme Chapter 2 Using your CL910 Setting display options 40... -
Page 46: Connecting To An External Monitor
The CL910 10.1” HD display has a resolution of 1366 X 768. Connecting to an external monitor To connect an external monitor to the CL910, you can use the Micro-HDMI port (located on the left side of the tablet) with an appropriate connector, such as the Micro-HDMI-to-VGA... -
Page 47: Using The Built-In Microphones
You can use the built-in array microphones to record audio, dictate notes, and use voice commands. The two microphones are used at the same time to optimize sound detection for speech recognition and voice recording. Chapter 2 Using your CL910 Using the built-in microphones 42... -
Page 48: Using Speech Recognition
You can use the speech tutorial to learn basic commands and dictation. The tutorial takes about 30 minutes to complete. To take the speech tutorial: 1. In the Control Panel, tap the Ease of Access category, then tap Speech Recognition. Chapter 2 Using your CL910 Using speech recognition 43... -
Page 49: Using Dictation And Voice Commands
Using the magnetic stripe reader (optional) If you have a CL910 with MSR and BCS, it comes with a magnetic stripe reader that you can use to read any card that has a magnetic stripe on the back, such as a credit or debit card. -
Page 50: Using The Barcode Scanner (Optional)
The green light flashes when the swipe is successful. Using the barcode scanner (optional) If you have a CL910 with MSR and BCS, it comes with a barcode scanner that you can use to scan barcodes. Many applications use barcodes for asset tracking, identification, and process controls. -
Page 51: Supported Barcode Types
Using the battery The CL910 is equipped with a built-in lithium-ion battery that is charged automatically when the tablet is connected to an outlet. Under normal conditions, you can run the tablet on battery power for up to seven hours. -
Page 52: Checking Tablet Battery Power
(green) or charging (amber). • When the CL910 is running on battery, pressing the battery gauge button on the left side displays status lights on the front of the CL910 indicating the current level of charge. • From the Motion Dashboard •... - Page 53 Tap the power indicator, which is different depending on whether or not the tablet is plugged in. – If the tablet is plugged in, tap the plug icon – If the tablet is on battery power, tap the battery icon Chapter 2 Using your CL910 Using the battery 48...
-
Page 54: Battery And Power Management Tips
Wireless tab, and clear the checkbox next to the wireless device you want to disable. Changing the power plan By default, the CL910 uses the Motion Optimized power plan, which is designed specifically for Motion Computing tablets. It balances the need to save power while maximizing tablet performance. -
Page 55: Changing How The Power Button Functions
Action Center sends you an alert and provides recommendations for how to remedy the situation. To learn more, open Motion Dashboard, tap Security, then tap Windows Action Center. Chapter 2 Using your CL910 Using Windows® Action Center 50... -
Page 56: Setting Up User Accounts
An alert sounds when you’ve accessed the BIOS Setup Utility. If a keyboard is attached to your CL910, you can press F2 to open the Setup Utility. Then, press the arrow keys to select items and press Enter to select a submenu. -
Page 57: Backing Up Your System
2. From the Windows® Control Panel, tap System and Security category, then tap Back up your computer. 3. From the navigation bar on the left, tap Create a system image, then follow the on-screen instructions. Chapter 2 Using your CL910 Backing up your system 52... -
Page 58: Restoring Your System Image From Windows® Control Panel
6. Attach the external drive that contains the system image. 7. In the System Recovery Options dialog box, use the Tab key to navigate to System Image Recovery and then press Enter. Chapter 2 Using your CL910 Restoring your system 53... -
Page 59: Restoring Your System Without A System Image
For information about other software for your tablet, go to Motion Computing Accessories and the Motion Computing Store. You will find links to software solutions for purchase as well as free downloads from Motion Computing and its service partners. Chapter 2 Using your CL910 Finding other software 54... -
Page 60: Chapter 3 Caring For Your Cl910
Caring for your CL910 Proper care and maintenance will keep your CL910 Tablet PC working and in good condition. For general information about care of the tablet and its components and accessories, see the Safety and Regulatory Guide included with your tablet PC. -
Page 61: Caring For The Display
If liquid is spilled on the display, wipe it up immediately with a soft cloth like the one provided with the tablet. • Use only the CL910 pen or your finger to write on the display. Any other object could damage the display surface. •... -
Page 62: Caring For The Tablet Battery
Use the following tips when you travel with your CL910 Tablet PC: • Put the tablet PC in a case to protect the display. Motion Computing sells a variety of cases for the CL910. You can purchase one at the Motion Computing Accessories page. -
Page 63: Chapter 4 Troubleshooting And Faqs
Troubleshooting and FAQs Motion Computing tablet PCs are thoroughly tested for performance and quality, but occasionally issues can still occur. If you don’t find the information you’re looking for in this section, go to Motion Computing Support. Troubleshooting Use the information in this section to identify and resolve common issues. If an issue has more than one potential cause, the most common cause is listed first. -
Page 64: Battery Issues
Have the battery replaced. While the built-in lithium-ion battery is designed for a long battery life, you may find the need to replace it. If so, contact your Motion Computing service provider. Only authorized service providers can replace the battery. -
Page 65: Touch Or Pen Issues
The tablet PC doesn’t respond to the pen I’m using • Use only the CL910 pen with the tablet. The tablet PC does not respond to other digitizer pens, even Motion Computing pens for other models. When I add an external display, touch input doesn’t appear on the desired display •... - Page 66 • The Tablet PC Settings Display tab has a Calibrate option, but it doesn’t apply to the CL910. Instead, if touch input doesn’t behave as expected, you can re-tune touch. Open Motion Dashboard, then tap Pen & Tablet, tap Touch Settings, tap Touch Tuning, then Start.
-
Page 67: Ports And Connectors Issues
The CL910 is in its dock, but the tablet doesn’t recognize any accessory devices, such as the external disk drive or monitor • The CL910 may not be fully seated in the dock. Remove it from the dock and then replace it. Network issues The wireless adapter keeps connecting even when I don’t want it to... - Page 68 Your Bluetooth device is out of range. The Bluetooth devices are designed for short- range communication and can only connect at distances up to 33 feet (10 meters). No other Bluetooth device can detect the CL910 tablet • From the Windows® notification area, tap the Bluetooth icon and select Open settings.
-
Page 69: Bluetooth Wireless Tips
Mobile broadband with GPS issues I can’t connect to a mobile broadband network • Mobile broadband is only available if you purchased your CL910 with the optional Mobile Broadband with GPS module. • A mobile broadband network requires you to have a data plan from a cellular network provider. -
Page 70: Audio Issues
Programs > Motion Computing > MotionCM. The GPS doesn’t work • The GPS receiver is only available if you purchased your CL910 with the optional Mobile Broadband with GPS module. • Mobile Broadband with GPS must be enabled from the Motion Dashboard. Open... -
Page 71: Motion Quicknav Issues
For more information, open Windows® Help and Support and search for “disk defragmenter. ” Note: Unlike traditional hard drives, SSD drives, like the one available on the CL910, see no performance benefit from traditional HDD defragmentation tools. Using these tools simply adds unnecessary wear to the SSD. -
Page 72: Frequently Asked Questions
How can I make the battery charge last longer? • By default, the power plan for the CL910 is a balance between optimal performance and a long battery charge. If you want the tablet to run longer between charges, use the Power saver power plan. - Page 73 Can I recycle my old computer? • Yes. Motion Computing has a recycling program that allows free return of all Motion- branded products and non-Motion-branded electronics with the purchase of a similar Motion tablet for processing and disposal in an environmentally safe manner. For details,...
- Page 74 Chapter 4 Troubleshooting and FAQs Frequently asked questions 69...
-
Page 75: Index
Index Numerics BIOS boot options 54 802.11 Wi-Fi 9 troubleshooting password 66 BIOS setup utility 51 blinking power button 58 AAAA battery 7 Bluetooth AC adapter 6 discovery 63 AC power 8 setting up 10, 64 accessing 51 tips 64 accessories 14, 54 boot options 54 amber light 67... - Page 76 desktop FAA wireless air travel requirement 57 Getting Started doc 16 features introduction 15 optional 2 QuickNav 16 flicks 19, 21 Dial Keys 28, 66 folder options DialKeys.exe 66 changing 20 dictation mode 43 free downloads 54 digital ink 23 digital monitor 6, 68 digitizer gestures 21...
- Page 77 Motion Computing Accessories 14, 54 portrait mode 39 Motion Computing Store 14, 27 portrait orientation 39 Motion Computing Support 14, 46, 58 power adapter port 6 Motion Connection Manager 9, 64, 65 power button 6, 50 Motion Dashboard 16, 19...
- Page 78 text entering 23–?? scheme touch display 41 and pen 20 scratch resistance 1 calibrate 23, 61 scratches 67 configuring settings 20 screen. See display 68 disabling touch input 20 Scroll lock key 26 gestures 21 SD card slot 1, 6 on multiple displays 42 serial number 51 pointer, adjusting 21...
- Page 79 voice recorder 30 Windows Action Center 50 Windows Firewall 50 Windows Live 30 Windows Security Center 50 web camera 4 wireless using 31 setting up 802.11 Wi-Fi 9 Wi-Fi 9 setting up Bluetooth 10 Windows setting up mobile broadband 9 Action Center 50 wireless network Advanced Boot Options 53...
Need help?
Do you have a question about the CL910 and is the answer not in the manual?
Questions and answers