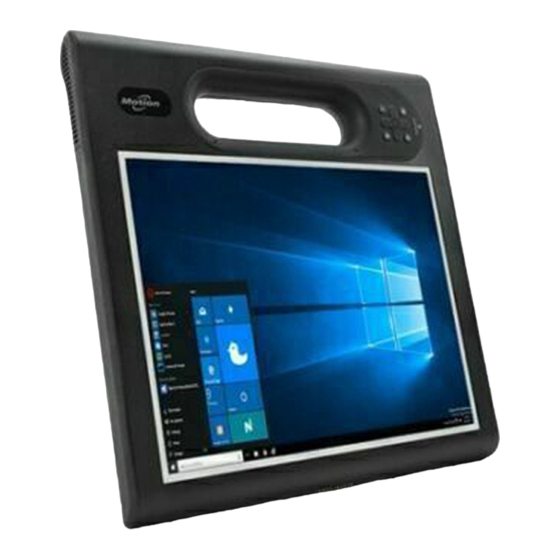
Motion Computing C5v User Manual
Portable, semi-rugged pen-based computers
Hide thumbs
Also See for C5v:
- Getting started (7 pages) ,
- User manual (85 pages) ,
- Quick reference manual (2 pages)
Table of Contents
Advertisement
Quick Links
Download this manual
See also:
User Manual
Advertisement
Table of Contents

Subscribe to Our Youtube Channel
Related Manuals for Motion Computing C5v


Summary of Contents for Motion Computing C5v
- Page 1 User’s Guide Motion C5v Motion F5v...
- Page 2 © 2010 Motion Computing, Inc. All rights reserved. copy protection technology in the product must be authorized by Macrovision. Reverse engineering or This document contains information protected by disassembly is prohibited. copyright. No part of this document may be reproduced in any form without written consent from Motion Computing, Inc.
-
Page 3: Table Of Contents
Contents Chapter 1 Getting Started ......1 Finding information ............. 1 Overview. - Page 4 Using the RFID reader (optional) ..........27 Using the cameras (optional) .
- Page 5 Chapter 4 Care and Maintenance ....51 General care..............51 Standard display .
- Page 6 Contents...
-
Page 7: Getting Started
The C5v and F5v integrate traditional computer features with digital ink, data capture, and speech recognition. The C5v and F5v differ from convertible and slate devices in the following ways: •... -
Page 8: Overview
Overview The following illustrations show the features of the system. Front Function button Dashboard button Directional pad Battery gauge B button A button Microphones Web camera Docking connector Function button Activate secondary functions for other buttons (page 8). Dashboard button Open Motion Dashboard (page 8). -
Page 9: Right Side
Right side Power Windows Security button button Power adapter RFID antenna Camera Fingerprint port, USB port (F5v), area button reader Bar code scanner and cover Power adapter Connect the power adapter (page 17). port, USB port (F5v F5v only: Connect accessories requiring a USB port. only), and cover RFID (optional) Scan area for reading RFID tags (page 14). - Page 10 Back Pen tether Pen holder Fan cover Camera light Speaker Camera lens Battery Battery latch 0560 0560 Docking guide Smart card reader Hot-swap logo Pen tether Attach the pen tether. Pen holder Store the pen when not in use (page 10). Fan cover Protects the fan assembly.
-
Page 11: Setting Up The System
Setting up the system The tablet is self-contained, so you can start using it immediately. If you are using a Docking Station, refer to the instructions that came with the docking station. Use the following steps to get started. For safety information, see the Safety and Regulatory Guide packaged with the system. Step 1: Plug in the power adapter •... -
Page 12: Restoring And Backing Up The System
64. Step 4: Get familiar with the system Motion Computing® offers free Web-based Quick Start Training that you can use to familiarize yourself with the features of your tablet PC. If you are new to tablet computing, you can use the training to get started quickly. You can find the training at http://training.motioncomputing.com/products/training_online_resources.asp. -
Page 13: Features
Features Motion Computing tablet PCs provide the power and features of a traditional computer, while giving you the added mobility and versatility of a portable computer. Use the information in this chapter to get more familiar with the hardware features of the system, such as the buttons, camera, RFID reader, bar code scanner, and wireless adapters. -
Page 14: Front Panel Buttons
Front panel buttons You can use the buttons on the front of the unit to perform many functions without having to use the pen. The buttons are customizable, so you can modify their functions to suit the way you work. See “Configuring front panel buttons” on page 24. Function Dashboard Directional pad... -
Page 15: Battery Gauge
Battery gauge You can use the battery gauge on the front of the unit to monitor the status of the battery. The following illustration shows the battery gauge. When the tablet is running on the battery, the battery gauge shows the current level of charge. -
Page 16: Pen
An important difference between traditional PCs and tablet PCs is that you frequently use a pen instead of a mouse and keyboard to interact with the computer. The pen includes a pressure-sensitive tip, a function button, and an eraser. The pen contains no batteries and requires no external power. -
Page 17: Windows Security Button
The optional Computrace®Complete solution offers Computer Theft Recovery, Data Protection, Secure Asset Tracking and a Recovery Guarantee. Windows Security button You can use the Windows Security button to log on to or lock the system. Pressing the Windows Security button is equivalent to pressing Ctrl+Alt+Del on a keyboard. Fingerprint reader Using the fingerprint reader, you can log on to the system by scanning your fingerprint instead of entering a password. -
Page 18: Cameras (Optional)
Cameras (optional) Your tablet may include both a built-in web camera and documentation camera. Web camera The web camera is a 1.3-megapixel camera that supports color images and streaming video. It is located on the front of your tablet. You can use the web camera for interacting with people online. -
Page 19: Bar Code Scanner (Optional)
Bar code scanner (optional) The system is available with an optional integrated 1D and 2D bar code scanner that you can use to retrieve information from bar codes. A bar code is a series of shapes on a contrasting background that can be optically read by a bar code scanner. -
Page 20: Rfid Reader (Optional)
RFID reader (optional) Your system may include an integrated 13.56 MHz RFID (Radio Frequency Identification) reader that you can use to retrieve information from RFID tags. RFID tags use radio frequency (RF) transmissions to identify a product, animal, or person. RFID does not require direct contact or line-of-sight scanning, and can be scanned through many materials, including clothing. -
Page 21: Speaker
Speaker The system includes a sealed speaker that can be used for audio warnings or confirmation, dictation, videos, or other multimedia applications. Docking connector The docking connector is used to attach the unit to a docking station. When the unit is docked, you can use the ports on the docking station to connect a monitor, keyboard, mouse, or other external USB devices. -
Page 22: Mobile Broadband With Gps (Optional)
Mobile Broadband with GPS (optional) Your tablet may have an embedded Qualcomm® Gobi2000™ module. The Gobi™ module lets you connect to a variety of mobile broadband networks for sending and receiving data wirelessly. It also includes a global positioning system (GPS) receiver. Mobile Broadband By using mobile broadband, you can browse the Internet, send and receive email, connect to your company’s intranet, and use Web-based applications. -
Page 23: Battery
Battery The system includes a high-capacity Lithium-ion battery that fits in to the back of the unit. Under normal conditions, you can run the system on battery power for about three hours. You can maximize battery life by optimizing your power scheme. See “Using power management”... - Page 24 Chapter 2 Features...
-
Page 25: Chapter 3 Using The System
7, which includes ink-to-text and handwriting recognition, voice recognition, and security features to help defend against viruses, worms, and other threats. And unlike PDAs or other handheld devices, the C5v and F5v run any Windows 7-compatible application. Use the information in this chapter to learn about common tasks, such as using the pen to enter text, using Motion Dashboard, using speech recognition, and customizing the tablet to fit the way you work. -
Page 26: Using Motion Dashboard
Using Motion Dashboard Motion Dashboard puts many common settings and tasks at your fingertips. For example, you can enable or disable Bluetooth and Wi-Fi, calibrate the digitizer, or check the remaining battery power. To start Motion Dashboard • Press the Dashboard button ( ) on the front of the unit. -
Page 27: Using The Motion Utility In The Notification Area
Using the Motion utility in the notification area Click the Motion utility icon ( ) in the notification area ( ). You may need to click the up arrow ( ) to view the icon. You can access the following features from the Motion utility icon: •... -
Page 28: Using Tablet Pc Input Panel
Store the pen in the pen holder when not in use. To put the pen in the pen holder, press it until it clicks into place. To remove the pen, press down on one end, grab the other end, and remove from the holder. -
Page 29: Configuring Pen Options
Configuring pen options You can use pen options to enable or disable the pen function button and the pen eraser. To configure pen options 1. Open Motion Dashboard to the Pen & Tablet panel (page 20). 2. Tap the Pen & Input Devices button. 3. -
Page 30: Configuring Front Panel Buttons
Configuring front panel buttons As you become more familiar with your system, you may want to customize the buttons on the front panel. You can configure the buttons to start your favorite program, run a command, or enter a key combination. Function Dashboard Directional pad... -
Page 31: Using The Display
Using the display Use the information in this section to customize your display settings. You can adjust the brightness level, rotate the display, and change the order in which the display rotates. Adjusting the display brightness Use this procedure to change the brightness of the display. To adjust the display brightness 1. -
Page 32: Using The Bar Code Scanner
Using the bar code scanner You can use the built-in bar code scanner to retrieve information from bar codes. For more information about the bar code scanner, see “Bar code scanner (optional)” on page 13. To use the bar code scanner 1. -
Page 33: Using The Rfid Reader (Optional)
Using the RFID reader (optional) Your tablet may include a built-in RFID reader. You can use the RFID reader to retrieve information from RFID tags. For more information about the RFID reader, see “RFID reader (optional)” on page 14. To use the RFID reader 1. -
Page 34: Using The Cameras (Optional)
Using the cameras (optional) Your tablet may include the built-in web and documentation cameras. Using the web camera You can use the built-in web camera to interact with people online. Use the software of your choosing to operate the web camera. For more information about the web camera, see “Cameras (optional)”... -
Page 35: Using The Smart Card Reader (Optional)
Using the smart card reader (optional) Some tablets contain the optional smart card reader. Using smart card software, this device reads information from the smart card when the card is inserted into the reader. Depending on the smart card software you are using: •... -
Page 36: Using The Built-In Microphones
Using the built-in microphones You can use the built-in array microphones to record audio, dictate notes, and use voice commands. The two microphones are used at the same time to optimize sound detection for speech recognition and voice recording. You can use the Speak Anywhere acoustics software to fine tune the built-in microphones to suit your environment. - Page 37 To train your computer to recognize your speech 1. In Control Panel, tap the Ease of Access category, then tap Speech Recognition. 2. Tap Train your computer to better understand you. 3. Follow the instructions in the setup program. To take the speech tutorial 1.
-
Page 38: Using The Battery
Using the battery The system runs on battery power when it is not plugged in. The battery is located on the back of the unit. To maximize the performance of the battery, deplete the battery charge to less than 10% every 30 days. -
Page 39: Removing And Replacing The Battery
Removing and replacing the battery Before you remove the battery, ensure that the tablet is plugged in, turned off, or in Hibernate (page 37) or Sleep mode (page 36). If you are hot-swapping the battery (page 34), you can do so while the tablet is on and running on battery power. To remove the battery 1. -
Page 40: Hot Swapping The Battery
1. Remove the battery (page 33). 2. Insert the new battery (page 33). Important: Use only Motion Computing batteries with the system. Long-term battery storage Do not store any batteries with a full charge; this can cause a permanent loss of charging capacity. -
Page 41: Battery And Power Management Tips
Battery and power management tips • To lengthen the battery’s usable life, use AC power when you can. The battery will charge automatically while you run on AC power, so leave the battery in the unit while you are working. •... -
Page 42: Using Power Management
Using power management Windows 7 includes a comprehensive suite of power management functions that can help you maximize your tablet’s performance or conserve power. To select a power plan 1. Open Motion Dashboard to the Power panel (page 20). 2. For Power Plan, select the appropriate option. For information about creating and using power plans, see the Dashboard Help. -
Page 43: Using Hibernate
Using Hibernate Hibernation is a state in which the computer shuts down to save power but first saves everything in memory on the hard disk. When you restart the computer, your desktop is restored exactly as you left it. Use hibernation to save power when you will be away from the tablet for an extended time. -
Page 44: Setting Up A Wi-Fi Connection
Setting up a Wi-Fi connection Use this procedure to create a Wi-Fi connection. To set up a Wi-Fi connection 1. Open the Motion Dashboard to the Wireless panel (page 20). 2. Ensure that Enable Internal 802.11 Wireless is selected. 3. Tap the Properties button. 4. -
Page 45: Using The Sim Card Slot
Using the SIM card slot The SIM card slot holds one SIM (Subscriber Identity Module) card. A SIM card is a smart card, about the size of a postage stamp, that stores information about your wireless account. You need to use a SIM card only if you are using Mobile Broadband on a GSM/UMTS/HSPA network. -
Page 46: Using The Gps Receiver
The Connection Manager also lets you start, stop, and manage the GPS receiver that comes with the Gobi module. To download and install the Connection Manager 1. Go to the Motion Computing Support web page at http://www.motioncomputing.com/support/WWANconmgr/gobi/ 2. Follow the instructions on downloading and installing the Connection Manager. -
Page 47: Using Bluetooth
Using Bluetooth You can use Bluetooth® to connect to accessory devices or other computers. The devices can communicate with each other when they are in range. For more information, see “Bluetooth wireless” on page 16. Enabling or disabling Bluetooth Before you can set up a Bluetooth device, you must enable the Bluetooth adapter on the tablet. - Page 48 Bluetooth wireless tips Motion Computing and its Bluetooth partners have worked to ensure a positive experience with this technology, and to ensure Bluetooth interoperability. In doing so, we have found the following issues: •...
-
Page 49: Using Motion Omnipass And The Fingerprint Reader
Using Motion OmniPass and the fingerprint reader Motion OmniPass offers a secure and convenient system for managing your passwords and providing confidentiality for your sensitive data. To start Motion OmniPass • In the notification area, double-tap the Motion OmniPass icon ( ). Also, you can start Motion OmniPass from the Security panel of Motion Dashboard. - Page 50 4. In the Choose Finger window, tap on the finger you want to enroll, then tap Next or Practice. Practice allows you to do a trial run of the fingerprint capture. 5. Place the selected finger over the fingerprint reader and slowly drag your finger across the sensor from right to left or left to right.
- Page 51 6. Tap Next, then tap Yes if you want to enroll a second fingerprint (recommended). If you injure a finger, you can use a second finger to authenticate. You can also capture a second fingerprint later. From the OmniPass Control Center, tap Run Enrollment Wizard, then tap Modify a user’s device enrollment.
-
Page 52: Using Password Replacement
Using password replacement OmniPass can manage your passwords for other applications, such as Web sites, Internet email, FTP, or any restricted-access network resource. After OmniPass registers your credentials, you can access any of these restricted areas by using your fingerprint or the master password. -
Page 53: Logging On To A Remembered Site
Logging on to a remembered site To log on to a remembered site, open the Web site or application that you have set up with password replacement. See “Using password replacement” on page 46. Swipe your finger or enter the master password when prompted. To remove a remembered site, tap Manage Passwords. -
Page 54: Using Windows Security Center
Using Windows Security Center Windows Security Center provides a central location for you to manage the tablet’s security settings and learn more about improving security. If a problem is detected (such as an out- of-date antivirus application), the Security Center sends you an alert and provides recommendations for how to remedy the situation. -
Page 55: Setting Up Users And Passwords
“S/N=. ” To set a BIOS password 1. Start the system. When the Motion Computing splash screen appears, tap the screen with the pen. On the TrustedCore menu, tap Password Options. If you miss the splash screen, restart the computer and try again. -
Page 56: Setting Up A Hard Disk Drive Password
To set up an HDD password 1. Start the system (page 5). 2. When the Motion Computing splash screen appears, tap the screen with the pen. On the TrustedCore menu, tap Launch System Setup. If you miss the splash screen, restart the tablet and try again. -
Page 57: Chapter 4 Care And Maintenance
Care and Maintenance Proper care and maintenance will keep your tablet PC working and in good condition for a long time. This chapter describes the care and maintenance procedures for the system. For general information about care of the tablet PC and its components and accessories, see the Safety and Regulatory Guide packaged with the system. -
Page 58: Standard Display
Avoid using tissues or paper towels to clean the display surface. These contain wood fibers that can scratch the display. • Use only a Motion Computing pen on the display. Do not write on the display with an ink pen or pencil, or any other object that could damage the display surface. •... -
Page 59: Cleaning In A Health Care Environment
EPA-approved low-level disinfectant when general cleaning is required. For a list of cleaning solutions tested by Motion Computing, see “Cleaning solutions” on page 54. If the system becomes soiled with blood or other body fluids, a hospital-approved low-level disinfectant that is tuberculocidal/virucidal when used at recommended dilutions and contact times can be used. -
Page 60: Cleaning Solutions
Cleaning solutions Motion Computing maintains a list of tested cleaning solutions and chemical disinfectants on the Motion Computing web site. To access the list, follow the instructions provided below for your tablet PC. For the C5v 1. Go to http://www.motioncomputing.com/products/tablet_pc_c5.asp. -
Page 61: Pen
3. Insert a new tip, placing the flat end of the pen tip in first. 4. Apply slight pressure to push the tip in to place. Ordering new pens To order additional pens, go to the Motion Computing accessories page at https://store.motioncomputing.com/. Chapter 4... -
Page 62: Traveling With The System
Traveling with the system Use the following tips when you travel with the system. • Remove all accessories and cables. Remember to pack those you will need while traveling, including at least one pen. • Put the unit into a case to protect the display. •... -
Page 63: Creating A Backup Archive
Creating a backup archive If you want to roll back your tablet to a predetermined state, you can create a backup archive. To create a complete PC backup archive 1. From the Control Panel, tap the System and Security category, then tap Backup and Restore. -
Page 64: Using Windows 7 To Restore Individual Files
To restore from your complete PC backup archive 1. After the initial BIOS screen, press and hold the F8 key. 2. On the Advanced Boot Options screen, select Repair your computer and press the Enter key. 3. Select a keyboard layout and click Next. 4. -
Page 65: Appendix A Troubleshooting And Support
Troubleshooting and Support Motion Computing products are thoroughly tested for performance and quality, but occasionally problems still occur. If you do not find the information you are looking for in this section, go to the Motion Computing support page at www.motioncomputing.com/support. - Page 66 3. Press the camera, Windows Security, and dashboard buttons, simultaneously. For the locations of these button, see below. Dashboard button Windows Security button Camera button The tablet will not enter Hibernation mode. • Hibernation might not be enabled. Use Motion Dashboard to enable Hibernation. See “Using Hibernate”...
- Page 67 The system does not respond to the pen I am using • You may be using an improper input device. Only Motion Computing digitizer pens can be used. The system does not respond to other pens or to a plastic stylus.
-
Page 68: Ports And Connectors
The eraser does not work • The eraser may not be enabled. You can use Tablet and Pen Settings window to enable the eraser. See “Configuring pen options” on page 23. The eraser works on digital ink only, not text. The buttons on the unit do not do what I expect them to do •... -
Page 69: Frequently Asked Questions
An application has stopped responding, but I can still move the pointer and use other applications • Use Task Manager to manually stop the application. For more information, open Windows Help and Support and search for “task manager”. The computer seems to be operating more slowly than usual •... -
Page 70: Specifications
You can use System Information to find out more about your hardware and software environment. From the Start menu, choose All Programs > Accessories > System Tools > System Information. You can find the specifications for other Motion Computing products at www.motioncomputing.com/products. Appendix A... -
Page 71: Warranty And Insurance Programs
Go to the Motion Computing Support and Services page at www.motioncomputing.com/products/services_top.asp. Service and support If you need help with your system, go to the Motion Computing Support and Services page at www.motioncomputing.com/support. This page will provide you links to all the information you need about Motion products, technical support, customer services and professional services. - Page 72 Appendix A Troubleshooting and Support...
-
Page 73: Index
Index Numerics 802.11a/b/g calibrating the digitizer 6 about 15 calibrating the pen 6 enabling 37 camera setting up 38 button 3 using 37 documentation 3, 4 web 2 cameras 28 capturing a fingerprint 43 AC adapter care and maintenance about 17 display 52 using 5 fingerprint reader 54... - Page 74 digitizer pen Function button about 21 about 8 calibrating 6 configuring 24 directional pad 2, 8 disabling the eraser 23 getting started 5 the pen button 23 green lights 9 display about 10 brightness 25 handwriting recognition features 10 about 21 rotating 25 using 22 rotation sequence 25...
- Page 75 microphones about 14 recovery procedure 57 using 30 removing the battery 33 mini-plug 17 replacing pen tips 55 Motion Dashboard replacing the battery 33 using 20 right-clicking 21 Motion Dashboard button 8 rotate sequence 25 rotate the display 25 rotating the display 25 running the repair and recovery network profiles 40 procedure 57...
- Page 76 troubleshooting battery 60 View Anywhere display 10 display 61 voice commands 30 input 61 network 62 system 62 warranty 65 Trusted Platform Module 10 web camera 2 turning on the unit 5 Wi-Fi about 15 enabling 37 USB port 3 setting up 38 using using 37...
Need help?
Do you have a question about the C5v and is the answer not in the manual?
Questions and answers