Outback Excel 100 Assembly And Operating Instructions Manual
Gas barbecues
Hide thumbs
Also See for Excel 100:
- Assembly and operating instructions manual (25 pages) ,
- Assembly and operating instructions manual (28 pages) ,
- Assembly and operating instructions manual (29 pages)
Advertisement
Assembly and Operating Instructions for
Excel 100, Excel 200, and Excel 300 Gas Barbecues
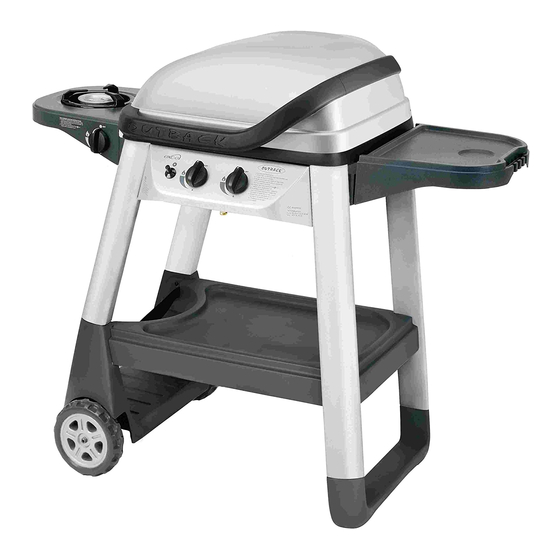
Excel 100
Photographs are not to scale.
Specifications subject to change
without prior notice.
•
•
•
•
•
•
•
WARNING
•
•
FOR YOUR SAFETY
If you smell gas:
1.
Shut off gas to the appliance.
2.
Extinguish any open flame.
3.
Open barbecue lid or hood.
4.
If odour continues, discontinue use and
contact your local dealer.
Gas Barbecues
Excel 200
For outdoor use only. Not for commercial use.
Read instructions before using the appliance. Failure to follow instructions
could result in death, serious bodily injury, and/or property loss.
Warning: accessible parts may be very hot. Keep young children away.
Do not move the appliance during use.
Turn off the gas supply at the gas bottle after use.
Any modification of the appliance, misuse, or failure to follow the instructions
may be dangerous and will invalidate your warranty. This does not affect your
statutory rights.
Retain these instructions for future reference.
Leak test your barbecue annually. Check the hose connections are tight and leak
test them each time you reconnect the gas bottle.
For Flare-up control please refer to the 'OPERATION' section of this manual.
1.
2.
Excel 300
FOR YOUR SAFETY
Do not store or use petrol or other flammable
vapours or liquids in the vicinity of this or any
other appliance.
A gas bottle not connected for use shall not be
stored in the vicinity of this or any other
appliance.
EN (Europe)
0359
Advertisement
Table of Contents

Related Manuals for Outback Excel 100


Summary of Contents for Outback Excel 100
-
Page 1: For Your Safety
Gas Barbecues Assembly and Operating Instructions for Excel 100, Excel 200, and Excel 300 Gas Barbecues EN (Europe) Excel 300 Excel 100 Excel 200 Photographs are not to scale. Specifications subject to change 0359 without prior notice. • For outdoor use only. Not for commercial use. -
Page 2: Table Of Contents
A. Parts List Quantities vary according to model purchased. Specifications subject to change without prior notice. For more details on hardware, please see the corresponding Hardware Reference Diagram for your barbecue model. OUTBACK® EXCEL RANGE CODE PART EXCEL 100 EXCEL 200 EXEL 300 √... - Page 3 B1. Parts Diagram: Excel 100 Quantities vary according to model purchased. Specifications subject to change without prior notice. For more details on hardware, please see ‘Hardware Reference Diagram: Excel 100.’ Pre-assembled body unit includes following individual parts: A5 A10 A11 A15...
- Page 4 B2. Hardware Reference Diagram: Excel 100 Specifications subject to change without prior notice.
- Page 5 C1. Parts Diagram: Excel 200 Quantities vary according to model purchased. Specifications subject to change without prior notice. For more details on hardware, please see ‘Hardware Reference Diagram: Excel 200.’ Pre-assembled body unit includes following individual parts: A5 A10 A11 A15...
- Page 6 C2. Hardware Reference Diagram: Excel 200 Specifications subject to change without prior notice.
- Page 7 D1. Parts Diagram: Excel 300 Quantities vary according to model purchased. Specifications subject to change without prior notice. For more details on hardware, please see ‘Hardware Reference Diagram: Excel 300.’ Pre-assembled body unit includes following individual parts: A5 A10 A11 A15...
- Page 8 D2. Hardware Reference Diagram: Excel 300 Specifications subject to change without prior notice.
- Page 9 Please lay out all nuts and bolts and check lengths before assembling. Whilst every care is taken during the manufacture of this product, care must be taken during the assembly in case sharp edges are present. Excel 100 Excel 200 Excel 300...
- Page 10 Excel 100 Excel 200 Excel 300 Attach the Bottom Shelf (C9) to the Gas Bottle Holder (C3) using the screws (D5). Taking care not to over tighten. Excel 100 Excel 200 Excel 300 Attach the leg assembly to the Bot- tom Shelf assembly using the screws (D1).
- Page 11 Excel 100 Excel 200 Excel 300 Insert the axle (C5) through the clamping brack- ets underneath the Gas Cylinder Holder (C3) and tighten the clamping screws. Taking care Slide a wheel (C4) and secure it not to over tighten. with a M8 Locknut (D6). Repeat for Slide a Wheel Spacer (D8) over the Axle (C5).
- Page 12 Excel 100 Excel 200 Excel 300 Attach the Hood Lower Handle (A3) to the Hood (A4) using the Screws (D2). Excel 100 Excel 200 Excel 300 Attach the Body (A5) to the Trolley As- sembly using the Screws (D1). Ensure...
- Page 13 Excel 100 Excel 200 Excel 300 Attach the Control Panel Assembly to the Trolley Assembly using the Screws (D1). Ensure the tabs on the body fit over the legs as shown in the diagram and do not go down inside of the legs.
- Page 14 Excel 100 Excel 200 Excel 300 Insert the main electrode (A12) into the hole at the bottom of the body and screw with the pre-assembled nut. Excel 100 Excel 200 Excel 300 View from underneath the body. Feed the Burner (A2) into the Body (A5) en- suring the burner venturi tubes are over the ends of the gas valves.
-
Page 15: Lava Rock Rack
Excel 100 Excel 200 Excel 300 Attach the Heat Shield (A13) to the Body (A5) using the Screws (D2) and nuts (D7). Excel 100 Excel 200 Excel 300 Place the Lava Rock Rack (A1) and Lava Rock (A9) into the body of the barbecue followed by the Cooking Grill (A8). - Page 16 Attach the Trolley Handle (B4) to the Long Legs using the screws (D1). EXCEL 100 USERS: ASSEMBLY IS NOW COMPLETE. Proceed to pages 19 onwards for operation and maintenance instructions. Important – the barbecue must not be used before being leak tested as detailed on P. 20...
-
Page 17: Burner
Excel 100 Excel 200 Excel 300 Attach the Side Burner Shelf (B9) to the Short Legs using the Screws (D1). Excel 100 Excel 200 Excel 300 Remove the screws from Side Burner Valve/Hose Assembly (B12) and secure it to the side shelf with those 2 screws. - Page 18 Excel 100 Excel 200 Excel 300 Place the Side Burner Electrode (B11) onto the side burner shelf as shown and place the Side Burner (B10) through the central hole and position the side burner venturi tube over the side burner gas valve. Secure the elec-...
-
Page 19: Hood
E. Important Information F. Gas and Regulator This barbecue can use either propane or Please read these instructions carefully butane LPG bottled gas. Propane bottles, will before assembly and use. supply gas all year round, even on cold winter • Retain these instructions... -
Page 20: Cooking Grill
rapidly several times until left portion of Connecting Hose the burner is lit. If burner fails to ignite, Barbecue Connect the gas hose to the gas rail inlet on turn control knob to the off position and the left hand side of the barbecue. Do not turn gas off at the bottle or regulator. - Page 21 ABSOLUTELY ESSENTIAL to accessories are available from you local trim away excess fat from meat and poultry Outback® stockist. before grilling, use cooking sauces and marinades sparingly and try to avoid very I1. Cooking Grill cheap cuts of meat or meat products as these Clean with hot soapy water.
-
Page 22: Warming Rack
50mbar faces the burners in order to burn off any residue. Replacement lava rock is available Gas Consumption: Excel 100: 446g/hr from your local Outback® stockist. Excel 200: 446g/hr Excel 300: 446g/hr Side Burner: 165g/hr I4. Barbecue Body Regularly remove excess grease or fat from... - Page 23 K. Troubleshooting Problem Possible Cause Solution LP gas bottle is empty Replace with full bottle Burners will not light using the ignition system Faulty regulator Have regulator checked or replaced Obstructions in burners Clean burners Obstructions in gas jets or gas hose Clean jets and gas hose Electrode wire is loose or disconnected Reconnect wire...
Need help?
Do you have a question about the Excel 100 and is the answer not in the manual?
Questions and answers