Table of Contents
Advertisement
Advertisement
Table of Contents

Summary of Contents for Strong SRT 5200
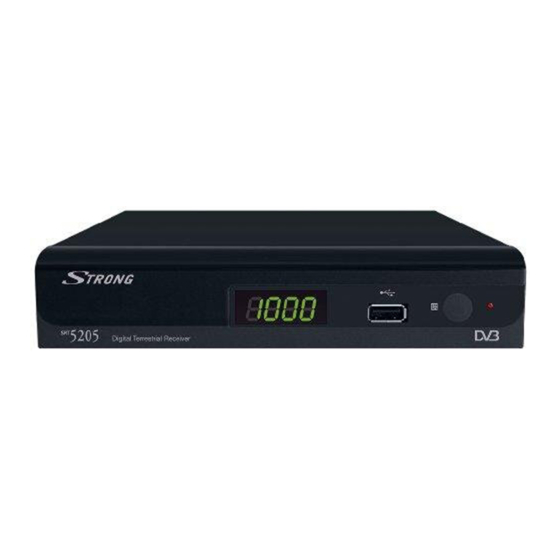
- Page 1 Digital Terrestrial Receiver SRT 5200/SRT 5202/SRT5205 User manual...
-
Page 4: Table Of Contents
6.3 Accessing the favourite channels A.1 TRoUblEShooTIng A.2 SPECIfICATIonS STRong declares that this item complies with the basic requirements and other relevant regulations of directives CE 2004/108/EEC and 73/23EEC; RohS 2002/95EEC Subject to alterations. In consequence of continuous research and development technical specifications, design and appearance of products may change. -
Page 5: Instruction
Attachments - For your safety, and to avoid damaging the product, use only accessories recommended by STRONG. Water and moisture - Never use this product around water (near a bathtub, kitchen sink, laundry tub, wet basement. swimming pool or in the rain) -
Page 6: Storage
PART 1 • English gEnERAl PRECAUTIonS - SAfETY PRECAUTIonS lightning - If a lightning storm occurs while using a specified AC adapter, remove it from the wall outlet immediately. To avoid damage from unexpected power surges, always unplug the AC adapter from the power outlet and disconnect it from the receiver when the receiver is not in use. -
Page 7: Equipment Set-Up
PART 1 • English When transporting the receiver from one place to another or if you are returning it under warranty make sure to repack the receiver in its original packaging with its accessories. Failing to comply with such packaging procedures could void your warranty. 1.3 Equipment Set-up We recommend you consult a professional installer to set up your equipment. -
Page 8: Connection
PART 1 • English User-friendly Remote Control NTSC/PAL converting automatically and manually 3 Games (Tetris, Snake, Othello) Digital sound through coaxial output (S/PDIF) by connecting to digital amplifier DVB-T compliant, UHF/VHF Tuner with Loop-through function Support of active antenna by 5 V output Power saving automatic standby function * Depending on local signal conditions;... -
Page 9: Rear Panel
PART 1 • English 3.2 Rear Panel Fig. 4 1. ANT IN To connect an antenna for reception of broadcasting signal. 2. To Tv To connect a TV set or to connect an extra receiver. 3. S/PDIf (Coax.) To connect your receiver to digital audio amplifier. 4. -
Page 10: Default Password: 0000
PART 1 • English 22. SUbTITlE Shows list of subtitled languages 23. tt uu Fast forward/rewind of video files 24. ColoURED bUTTonS For Teletext and other functions 3.4 Default password: 0000 4.0 fIRST TImE InSTAllATIon If you use the receiver for the first time, the “Easy Install” menu appears. Use pq to select Region, OSD Language, Antenna Power and Scan Mode and tu to select options. - Page 11 PART 1 • English lock: To Lock channel or all channels press button [2], with tu select Yes in the confirmation window and press oK to save. Selected channel/s will get marked with the symbol. Skip: To Skip channel or all channels press button [3], with tu select Yes in the confirmation window and press oK to save.
-
Page 12: Installation
PART 1 • English 5.1.4 Delete all Use this menu to delete all channels. Select Delete All with the pq and press oK, then enter the Password (default: 0000). In the confirmation window select Yes with tu and press oK to delete or select No to cancel. 5.1.5 group Rename In this menu you can change favourite group name. -
Page 13: Setup
PART 1 • English 5.2.4 lCn mode If LCN (Logical Channel Number) is activated and LCN signal is provided by operator, then channels will be stored at operator defined order. You can activate/deactivate the LCN function by setting the "LCN Mode" to ON/OFF. 5.3 Setup This menu allows you to set OSD Language, Subtitles preference, TV System, Region and Time, Timer Setting, OSD Setting and Parental Lock. - Page 14 PART 1 • English 5.3.5 Timer Setting In this menu you can set a programme timer or sleep timer. Programme timer Timer Number: You can set 8 timers Timer Mode: Off/Once/Daily/Weekly/Monthly Timer Service: TV Service/Radio Service Wake-up Channel: You can select a desired channel as wake-up channel. Press pq buttons to select your desired month, date and day.
-
Page 15: Tools
2. Press EXIT button to exit. 5.4.1 Receiver Information This menu displays some Receiver information like Hardware, Software, Signature and Remote Control and our Web site www.strong.tv. 1. In Tools menu, select “Receiver Information” and press oK button to open receiver information window. -
Page 16: Media
This receiver has foreseen an over the air update function, which might not be available at your local broadcast conditions. For further details visit our website www.strong.tv or contact your local Serviceline. 5.5 media+ Select “Media+” and press oK button to enter Media+ menu. -
Page 17: Accessing The Electronic Program Guide (Epg)
PART 1 • English 3. Selected by on-screen channels list You can also select the required channel directly from on-screen channel list. This is displayed using the receiver’s main menu. See chapter 5.1.1 TV Channel list in this manual for operation detail. Alternatively you can call up channel list by pressing oK in viewing mode. -
Page 18: Specifications
Forgotten menu lock code Contact local Service Hotline or send email to our Support via www.strong.tv After moving the receiver The aerial feed former new point may Try a direct feed from the antenna to another room you are no... - Page 19 Data Supply Voltage: 220 ~ 240 V AC (SMPS), 50/60 Hz Power Consumption: 8 W (max) SRT 5200: 3.80 W (typ.) SRT 5202: 3.90 W (typ.) SRT 5205: 4.40 W (typ.) Power consumption in Standby: SRT 5200: 0.80 W SRT 5202: 0.95 W...


Need help?
Do you have a question about the SRT 5200 and is the answer not in the manual?
Questions and answers