Table of Contents
Advertisement
1. Introduction ........................................................................................................... 1
2. Safety/Precautions ............................................................................................... 3
3. Points to Check before Use ................................................................................. 5
4. Controls/Functions .............................................................................................. 6
5. How to Connect .................................................................................................. 11
6. Operation ............................................................................................................. 12
7. Troubleshooting ................................................................................................. 54
8. Specifications ..................................................................................................... 55
Contents
Advertisement
Table of Contents

Related Manuals for Strong SRT 5495


Summary of Contents for Strong SRT 5495
-
Page 1: Table Of Contents
Contents 1. Introduction ......................1 1.1 Overview 1.2 Main Features 2. Safety/Precautions ....................3 2.1 Safety 2.2 Precautions 2.3 Positioning 3. Points to Check before Use ................. 5 3.1 Accessories 4. Controls/Functions ....................6 4.1 Front Panel 4.2 Rear Panel 4.3 Remote controller 4.4 Front Display 5. -
Page 2: Introduction
1.2 Main Features Introduction Digital Video Recorder with Twin Tuner Built in 500GB Hard Drive Time Shift, Record & Playback (Max. 3 channels recording simultaneously) 1.1 Overview Media Playback via external storage devices (HDD, SD Card Reader) 2 X USB 2.0 Host for MP3 Playback, JPEG Viewing & Firmware Update This receiver is designed for the reception of free to air channels and is equipped with a Ethernet Port for file transfer and Ice TV functionality hard drive memory unit to allow program and content recording. -
Page 3: Safety/Precautions
Strong technician to arrange repair or replacement before using the receiver again. Do not allow children to use the receiver without supervision. Always refer maintenance to a qualified service technician or contact Strong for an authorized representative. -
Page 4: Points To Check Before Use
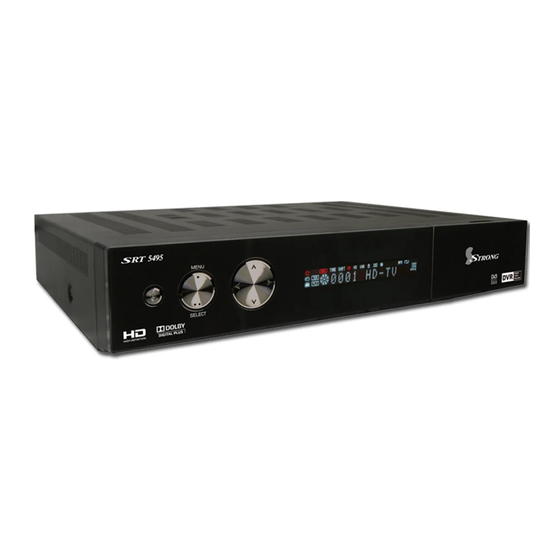
Points to Check before Use Controls/Functions 3.1 Accessories 4.1 Front Panel Unpack the unit and ensure that all of the following items are included in the pack. User Manual : 1 Remote Control : 1 Batteries (AAA type) : 2 Splitter : 3 Power : Switches the receiver between “Standby”... -
Page 5: Rear Panel
4.2 Rear Panel 4.3 Remote controller 17 18 7 11 10 POWER : Turns the unit on and off STAND BY : Places the receiver in standby mode TV/RADIO : Switches between TV and Radio functions MUTE : Turns the sound on and off MEDIA : To access media file playback menu 21 22... -
Page 6: Front Display
4.3 Remote controller 4.4 Front Display CH Up/Down : To change channels Up & Down : To change channels or move the cursor up and down in menu mode Left & Right : To change the volume level. Also modifies a setting in menu mode OK : To show the channel list or to select or confirm an item in menu mode... -
Page 7: How To Connect
How to Connect Operation Connect the antenna lead coming from the wall plate to the input marked “Tuner 1” 6.1 Getting Started Connect the Loop Cable provided to the input marked Tuner 1 RF then to the Tuner 2 input as shown in the diagram below After your receiver is powered on, proceed with installation as follows : There are a number of methods to connect your receiver to your television A. - Page 8 6.1 Getting Started 6.1 Getting Started 3) Channel Selection You can use the keys to navigate between channels to select desired channels. If you know the channel number you can enter it using the NUMERIC buttons on the remote control and wait 2 seconds for the change. Detailed information about the selected channel will be displayed on the right hand side of the screen <Figure 6.1.9>...
- Page 9 6.1 Getting Started 6.1 Getting Started 4) Other Functions of the Remote Control ZOOM By pressing the button you can zoom in video. Volume Control By pressing the PAUSE button and you can zoom in on sections of video on Press to adjust the volume while watching a program Freeze <Figure 6.1.10>...
-
Page 10: System Setting
6.1 Getting Started 6.2 System Setting V.FORMAT <Figure 6.1.14> These can be accessed by pressing the button and then scrolling to the “System” You may select the video resolution by pressing . Available selections are 1080p section and pressing 1080i 720p 576p 576i... - Page 11 6.2 System Setting 6.2 System Setting 2) A/V Output Settings 3) On Screen Display Settings This menu lets you specify the audio and video output settings of your receiver <Figure Using this menu, you can select the menu language, the transparency of the on screen 6.2.2>...
- Page 12 Power Saving : Set Power Saving to ON using the left and right arrow keys for the receiver to consume less power whilst in standby Normal : Should you wish to access your televisions inbuilt tuner whilst your STRONG DVR is in standby you will need to set the Standby Mode to Normal. Using arrow keys set Standby Mode to Normal.
- Page 13 6.2 System Setting 6.2 System Setting 6) Database Reset <Figure 6.2.6> 7) IP Setting This section allows you to reset the receiver to the factory settings. If the Network supports DHCP , IP settings can be allocated automatically. If the Network - Delete Radio Channels : Erase all radio channels in the database.
- Page 14 6.2 System Setting 6.2 System Setting - If your Network does not support DHCP, the IP Address must be entered manually Connecting your receiver via LAN to a PC (Static IP). EG. If your computers IP is 192.168.168.114, you can allocate the unit an IP 1.
- Page 15 6.2 System Setting 6.2 System Setting 8) ICE TV Settings 9) Data Transfer Connect your receiver via LAN to an internet connection to receive the Ice TV EPG Used to transfer data from another receiver. Select the appropriate caption and press service.
-
Page 16: Channels
6.3 Channels 6.3 Channels 1) Setting Favorite Channels 3) Move Channels This section allows you to select up to 16 groups of favorite channels in either TV or By navigating through this section you can change the channel sequence. Radio. Choose the channel list by pressing the button, use the cursor keys to select the Press... - Page 17 This feature skips a set channel when using the buttons to navigate Your STRONG SRT 5495A incorporates an AV Input feature that will allow you to record channels. from any external video source to the internal HDD, such as Pay TV, Gaming consoles, Press on the “Skip Channels”...
-
Page 18: Electronic Program Guide
The 2 x White (Audio Output Left) plugs should be connected to the 2 x RCA sockets your STRONG SRT 5495A Digital Video Recorder’ section for recording instructions via of the splitter that has the White (Audio Output Left) plug connected to it from the the EPG gaming console. -
Page 19: Games
6.5 Games 6.5 Games Your receiver contains 4 built-in games programs. 2) Sokoban In this game you are required to push the balls into their required position. The ball can 1) Tetris only be pushed, never pulled and you can only push one ball at a time. Press button to activate the menu <Figure 6.5.1>... -
Page 20: Storage
6.5 Games 6.6 Storage With this feature you can play various Mp3 files, view JPG files or download new software 3) Snake using a USB flash drive Press button on “Snake” to display the menu <Figure 6.5.5> to select a skill level 1) MP3 menu Press button on start the game <Figure 6.5.6>... - Page 21 6.6 Storage 6.6 Storage 2) JPG menu 4) Disk Manager Press to select a picture then press button to display the selected Use the cursor keys to activate the desired functions from this menu. picture <Figure 6.6.3> - Default Disk : If you have additional Storage devices connected to your receiver (i.e. - RED : Sets the time interval between slides.
- Page 22 6.6 Storage 6.6 Storage 5) File Manager (Transferring Files from your SRT 5495A to a PC) Note : Follow instructions in the “Connecting your receiver via LAN to a PC” section on page 25 if you have not already connected a PC to the SRT 5495A Press the YELLOW button on the remote control to create a new Network Connection.
-
Page 23: System Information
6.8 DVR Your receiver displays current information <Figure 6.7.1> regarding model name, software 1) How to record on your STRONG SRT 5495A Digital Video Recorders internal version and date of manufacture. This info is useful when downloading new software. Please note if you have performed a software update you must also perform a factory There are 3 ways to record TV programs on your STRONG DVR: reset of the receiver. - Page 24 This method can be used to record at specific times. Press the button on your STRONG remote. You can expand the storage capacity of your STRONG DVR by connecting an Press the RED coloured key on your STRONG remote. external HDD via the front or rear USB ports Use the buttons to highlight a slot that is “OFF”.
- Page 25 6.8 DVR 6.8 DVR Skip FWD & BCK 4) Playing Recorded TV programs: You can skip forwards or backwards through a file by pressing the SKIP FWD & SKIP To access any programs you have recorded press the button on your remote BCK buttons.
- Page 26 6.8 DVR 6.8 DVR 6) Lock Recorded TV programs: 8) Bookmarking Recorded Programs To protect a recorded program from accidental deletion or to restrict the viewing of The SRT 5495A will set auto bookmarks to each recorded program. Once a recorded recorded programs to specific audience, programs can be locked.
-
Page 27: Media
6.8 DVR 6.9 MEDIA Playing Media Files On Your SRT 5495A: 10) Time Shift (Pause & Rewind Live TV) The SRT 5495A is compatible with most PC type media files Timeshift allows you to Pause and Rewind Live TV. Timeshift can be set to Automatic These files can be played back on your receiver via the USB ports or SD Card Reader or manual and can be activated as required To Playback media files, firstly connect the storage device where files are stored... -
Page 28: Pip Function(Picture In Picture)
6.10 PIP Function(Picture in Picture) Troubleshooting PIP is the feature where one program (channel) is displayed on the main screen at the same time as another program (channel) is displayed in a smaller inset window To activate the PIP function press the PIP button There may be various reasons for the abnormal operation of the unit. -
Page 29: Specifications
Specifications Connector 9pin D-sub male, Max 115K bps Serial data interface Remote control Code NEC-IR Fully DVB compliant System capabilities Operating condition up to 7 Meter Input connector IEC 169-2, Female TERRESTRIAL Support SD spec up to ver. 2.0(SDHC) SD card reader Loop-through out IEC 169-2, Male System capabilities... - Page 30 60 WEDGEWOOD ROAD, HALLAM, VICTORIA 3803 PH: +61 3 8795 7990 FAX: +61 3 8795 7991 TECHNICAL SUPPORT: 1 800 820 030 STRONG & CO. ( FAR EAST ) , LTD. P. O. BOX 85, YOKOHAMA, KANAGAWA-KEN JAPAN 231-91 FAX : +81 45 651 1842 www.strong-technologies.com...
Need help?
Do you have a question about the SRT 5495 and is the answer not in the manual?
Questions and answers