Table of Contents
Advertisement
Advertisement
Table of Contents

Summary of Contents for Strong SRT 5434
- Page 1 High Definition Digital Receiver SRT 5434 User Manual...
-
Page 3: Warranty Information
STRONG Australia accompanied by the original purchase receipt. After this 30 days period the unit must be returned to STRONG Australia for testing, and if deemed faulty, will be repaired or replaced at the discretion of STRONG Australia Pty Ltd. - Page 4 Table of Contents Safety Instructions Reference & Software Update Product Overview Front Panel Rear Panel Remote Control Functions Installation Connecting to a Television First Time Installation Basic Unit Operations 1/Program Management Settings a) Program Edit b) EPG - Electronic Program Guide c) Sort Channels d) Creating favourite channel list e) View favourite channels...
-
Page 5: Safety Instructions
Safety Instructions Safety Precaution This STB has been designed and manufactured to satisfy the International safety standards. Please read the following safety precautions carefully before operating this receiver. Main Supply: Before operating, please check the units operating voltage is 100-240V AC 50/60HZ Overload: Do not overload a wall outlet, extension cord or adapter, neither use damaged power cord or touch it with wet hand as this may... -
Page 6: Software Update
USB 2.0 Interface Software update: If new software becomes available for this model, it can be downloaded from our website (www.strong.com.au) and then placed onto a USB. Plug in the USB into the USB port on the unit and then go to:... -
Page 7: Front Panel
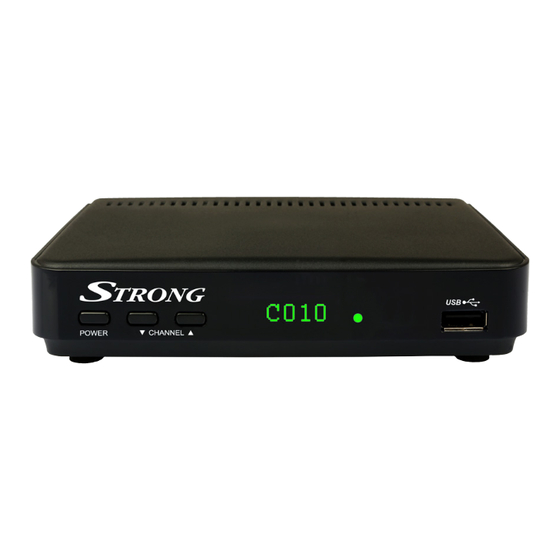
Product Overview Front Panel 1. Power button : Switch between operation and standby modes. 2. Up & Down Channel: Change channel in viewing mode and move the cursor up in menu mode 3. Display : It displays channel information. In standby mode it displays local time. -
Page 8: Remote Control Functions
Remote Control Functions... - Page 9 1. POWER: Turns the receiver On/ 18. Records the TV program to the Standby connected storage device 2. MUTE: Mutes audio output of the Stop of playback or Timeshift receiver 3. ZOOM: To open the recordings list 20. MENU: Opens the main menu, in when in viewing mode.
-
Page 10: Connecting To A Television
Connecting to a Television... -
Page 11: First Time Installation
First Time Installation If you are using the unit for the first time or have restored the unit to factory default, the installation guide menu will appear on your TV screen. • Select ‘On’ Power Antenna if you’re using Active Antenna. •... -
Page 12: Basic Unit Operations
Basic Unit Operation (1). Program Management Settings (a) Program Edit To edit your program preferences (lock, skip, favourite, move or delete), you will need to enter the Program Edit Menu. This Menu requires a password to access. Enter the default password ‘000000’... -
Page 13: System Settings
(c) TV Format If the picture does not appear to be correct you can change this setting. This should match the most common setting for TVs in your country. (d) 3D Output Change 3D Output Setting. [OFF] Set 3D Output Off [Side by Side]Set 3D Output format SBS [Auto] Set 3D Output Auto [Top/Bottom]Set 3D Output format T/B... -
Page 14: Instant Recording
(5). USB This model will support up to 1TB External USB Hard drive in NTFS or Fat32 Format (a) Multimedia When a USB device is attached you can select from the Music, Photo or Movie options in this menu. (b) USB Recording This function is available only when a USB storage device is connected to the receiver. - Page 15 status. In this case, you may make the unit to play the recorded program from the start. Press [Info] key to see time shift information : You can press [fast forward]/[fast back] to move the slide to left or right of the current recording. Note: Time Shifting will only be available when USB HDD is connect- ed to the system and read/ write speed is high enough to do that.
-
Page 16: Trouble Shooting
(7). Trouble Shooting Before contacting your local service centre, please read the tips be- low carefully. If the problem persists after completing the following procedure, please contact your local product distributor or service centre for further instructions. 1. No message displayed on the front display. (The product will not switch on.) •... - Page 17 4. No or poor sound • Check that your AV/HDMI cable is connected correctly. • Check the volume levels of your TV set and the product. • Check if the product or TV is on mute. • Check audio type or soundtrack option. (where applicable) 5.
- Page 18 DVB-T2 (MPEG4)TUNER x 1 Guard Interval Modes : 1/4,1/8,1/16,1/32,1/128 Code Rate :1/2,3/5,2/3,3/4,4/5,5/6 Frequency Range : 177.5-226.5MHz (VHF) BW=7Mhz | 474- 8585MHz (UHF) BW =8Mhz IF Bandwidth : 7 MHz Waveform : COFDM Input Impedance : 75 Ω Carrier Mode : 1k,2k,4k,8k,16k,32k mode MPEG TRANSPORT STREAM &...
- Page 19 POWER SUPPLY Input Voltage : AC100~240V (Detachable) Power Consumption : Standby <1W, on mode Max 6W (w/out DVR) GENERAL DATA Dimensions : W150 x D90 x H30mm (D110mm with connec tions) Weight : 0.15Kgs (15grams) *For optimal picture quality HDMI cable is recommended...
- Page 20 STRONG AUSTRALIA PTY LTD 60 WEDGEWOOD ROAD HALLAM, VIC. 3803 Ph: +61 3 8795 7990 Fax: +61 3 8795 7990 HELP DESK 1800 820 030 tech@strong.com.au WEBSITE www.strong.com.au...


Need help?
Do you have a question about the SRT 5434 and is the answer not in the manual?
Questions and answers