HighPoint RocketRAID 600L User Manual
Sata 6gb/s pci-express 2.0 raid host adapters
Hide thumbs
Also See for RocketRAID 600L:
- Quick installation manual (9 pages) ,
- User manual (22 pages) ,
- Quick installation manual (8 pages)

Related Manuals for HighPoint RocketRAID 600L


Summary of Contents for HighPoint RocketRAID 600L
- Page 1 RocketRAID 600L SATA 6Gb/s PCI-Express 2.0 RAID Host Adapters User’s Guide Revision: 1.0 Nov. 19, 2012 HighPoint Technologies, Inc.
- Page 2 Copyright Copyright © 2012 HighPoint Technologies, Inc. This document contains materials protected by International Copyright Laws. All rights reserved. No part of this manual may be reproduced, transmitted or transcribed in any form and for any purpose without the express written permission of HighPoint Technologies, Inc.
-
Page 3: Table Of Contents
2 Physical Specifications ........................... 6 3 Kit Contents ............................7 4 Hardware Description and Installation ....................8 4.1 RocketRAID 600L Host Adapter board layout ................8 4.2 Connector and Jumper Description ....................9 4.3 Installing the RocketRAID 600L Host Adapter ................9 4.4 Verifying Installation ........................ -
Page 4: Features And Specifications
PC operating systems including Windows 8, and 7. Each RocketRAID 600L Series HBA’s directly supports up to 4 SATA devices, and up to 20 when used in conjunction with port multiplier storage devices. For maximum performance, attach SATA hard drives and SSD’s directly to the RocketRAID 600’s SATA and eSATA ports. - Page 5 User friendly Browser-based Management Interface Easy to use BIOS configuration Tool Linux Command Line Interface (CLI)-Scriptable configuration tool Hot key (ctrl-h) boot-up RAID manager via BIOS Web browser-based RAID management software (Web GUI) Command Line Interface (CLI) Operating System Support ...
-
Page 6: Physical Specifications
2 Physical Specifications Dimensions: RocketRAID 640L: 79mm x 65mm x 19mm RocketRAID 642L: 79mm x 67mm x 19mm RocketRAID 644L: 106mm x 79mm x 19mm EMI: FCC Part 15 Class B and CE Thermal and Atmospheric Characteristics: Work Temperature Range: +5°C ~ + 55°C Relative Humidity Range: 5% ~ 60% non-condensing Storage Temperature: -20°C ~ +80°C MTBF: 920,585 Hours... -
Page 7: Kit Contents
3 Kit Contents RocketRAID 644L HBA / RocketRAID 642L HBA / RocketRAID 640L HBA Quick Installation Guide HighPoint Software CD Low-Profile Bracket (RocketRAID 642L and RocketRAID 640L only) Two SATA 6Gb/s cables (RocketRAID 642L only), four SATA 6Gb/s cables (RocketRAID 640L only) -
Page 8: Hardware Description And Installation
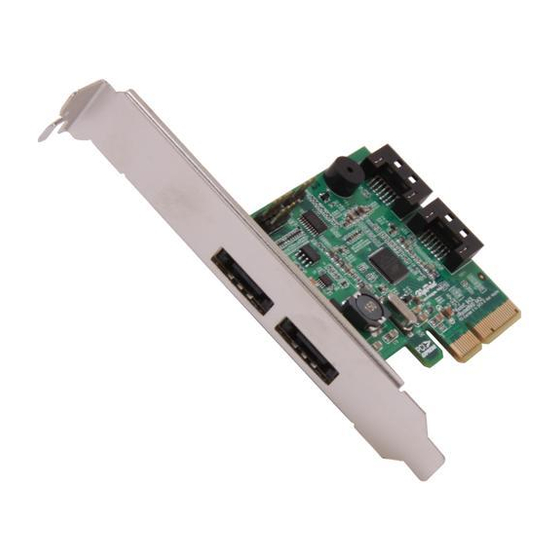
4 Hardware Description and Installation 4.1 RocketRAID 600L Host Adapter board layout RocketRAID 640L RocketRAID 642L RocketRAID 644L... -
Page 9: Connector And Jumper Description
1. Open the system chassis and locate an unused PCI-E (2.0/1.0) (x4, x8, x16) slot or (3.0) (x16) slot. 2. Remove the PCI-E slot cover. 3. Gently insert the RocketRAID 600L HBA into the PCI-E slot, and secure the bracket to the system chassis. -
Page 10: Verifying Installation
1. Power on the system. If the system detects the presence of the adapter, the RocketRAID BIOS Utility will be displayed during boot up. 2. Press “Ctrl+H” key combination to access the RocketRAID 600L adapter’s BIOS Utility. -
Page 11: Rocketraid 600L Bios Utility
5 RocketRAID 600L BIOS Utility The RocketRAID 600L controller will display its BIOS screen during the system's boot process. The BIOS Utility will display information about hard drives attached to the adapter. Make sure all attached drives are detected by this utility. If any of the hard drive is not detected, power down the system and check the power and cable connections. -
Page 12: Bios Commands
5.3 BIOS Commands Create: This command is used to open the RAID Creation menu. Delete: This command will delete the selected RAID array. Add/Remove This command is used to assign hard disks to function as spare disks. The controller is Spare capable of using spare disks to automatically rebuild broken or faulted RAID arrays. -
Page 13: Creating Raid Arrays
5.4 Creating RAID Arrays Initializing Disks: Before creating a RAID array, the disks must be initialized. Disk initialization writes necessary RAID configuration information to the hard disks. Select the Initialize command from the toolbar, and press Enter key. Highlight the target disks using the arrow keys, then press the Enter key. A numeral will be displayed before each selected disk. - Page 14 Note: The Array Name command is optional – it is not necessary to name the array. The array can be named at a later time, and the name of the array can be changed at any time. 3. On the Create menu, use the arrow keys to highlight the Select Devices item and press Enter key. A device list will appear, and display all available hard disk drives.
- Page 15 available capacity will be displayed. Press Enter key if you wish to use all available space. If you wish to reserve disk space for additional arrays/single disks, use the keyboard to input the amount of space (in GB) you wish to set aside for this particular array, and press Enter key. Note: Multiple arrays can be created using the same set of hard disk drives.
- Page 16 7. Sector Size – Also known as “Variable Sector Size”. Use this option if you are using an older 32-bit Windows operating system. This allows older operating systems to support volumes over 2TB in size. Do not use if the operating system already supports large volumes (such as GPT). 8.
- Page 17 No initialization: When you select the option, will popup the following warning window. 9. Press the Y (yes) key to create the array, or N (no) key to cancel the creation process. If you press the Y, BIOS will show the following window.
-
Page 18: Deleting Arrays
5.5 Delete Arrays Highlight the Delete command from the toolbar, and press Enter key. The BIOS utility will display a list of available RAID arrays. Select the array you wish to delete, and press Enter key. The utility will display a warning message. Press Y (yes) to delete the array, or select N (no) to cancel. Warning: All data stored on the array will be lost –... -
Page 19: Adding/Remove Spare Disks
5.6 Add/Remove Spare Disks This Add/Remove Spare command is used to assign a hard disk to act as a Spare Disk. Spare Disks are used to automatically rebuild Redundant RAID arrays (RAID 1, 5, 10) in the case of disk failure. As with creating RAID arrays, disks must be initialized before they can be used as spares. -
Page 20: View
Staggered spinup: The default value of this option is disabled. Enabling this setting will instruct the card to power up the hard disks, sequentially (one disk approximately every 2 seconds). Not all disk support this setting – consult the disk documentation for more information. - Page 21 RAID Array – This option will display information about each RAID array hosted by the HBA. Highlight the target device and press Enter to view details about the configuration.
-
Page 22: Rocketraid 600L Driver Installation
Installing the driver for an existing Windows operating system 1. Install the RocketRAID 600L host adapter into the PC, then boot up the Windows operating system. 2. Windows will detect the RocketRAID 600L HBA and automatically search for the driver. - Page 23 5. Right-click the “RAID Controller” entry and select “Update Driver Software”. 6. Select “Browse my computer for driver software” in the popup window.
- Page 24 Select the driver option that matches your operating system: x32 (32-bit) x64 (64-bit). 8. Follow the InstallShield Wizard’s prompts to install the RocketRAID 600L driver. Click “Close” to exit the Wizard and reboot once the driver has been successfully installed.
- Page 25 9. Once complete, the interface will notify you that the driver has been successfully installed. Click “OK” to reboot the system. 10. After rebooting the system, the RocketRAID 600L HBA will be recognized by Device Manager, and listed under “Storage Controllers”.
- Page 27 Installing the driver during a fresh Windows OS installation 1. Boot from the Windows Installation DVD. 2. When the following window is displayed, please insert the HighPoint software CD into the CD/DVD drive. Select “Load Driver” item. 3. Browse to the following software CD folder: \Driver\RR64xL\Driver\Windows Select x32 or x64 according with your windows OS.
-
Page 28: Driver Installation -Linux And Freebsd
4. Follow the InstallShield Wizard’s prompts to continue the installation process. 5. Windows should display the following entry after locating the driver. Click “Next” to install the RocketRAID 600L driver. 6.2 Driver installation -Linux and FreeBSD Please refer to the Driver Installation Guide or README file included with the driver packages for the more information. -
Page 29: Highpoint Web Raid Management Software
7 HighPoint Web RAID Management Software The HighPoint RAID Management software provides RAID configuration and management features. The software can be installed from the HighPoint software CD. 7.1 Installing / Uninstall the Web RAID Management Software - Microsoft Windows Install the Web RAID Management Software 1. - Page 30 3. Follow the InstallShield Wizard’s prompts to install the HighPoint RAID Management interface. 4. Please use the default settings. Restrict to localhost access – This setting will restrict the HighPoint RAID Management interface to the local network (the RocketRAID HBA cannot be managed remotely). 5.
- Page 31 6. Important: The interface will display the default user name and password after installation is complete.
- Page 32 7. To start the RAID Management Interface, double-click the “HighPoint RAID Management” icon that was placed on the desktop during the installation procedure.
- Page 33 8. Or, start the utility manually by opening your web browser. Enter the following URL address: http://localhost:7402 Note: If you are accessing the RAID Management interface using a remote system, please update “localhost” to the server’s address. If you are unable to connect to the local system, please make sure hptsvr.exe is running on that system (check using Windows Task Manager).
- Page 34 Uninstall the Web RAID Management Software 1. Go to Start All Programs HighPoint RAID Management, click Uninstall HighPoint RAID Management. 2. Follow the InstallShield Wizard’s prompts to uninstall the HighPoint RAID Management interface.
-
Page 35: Installing The Web Raid Management Software - Linux
7.2 Installing / Uninstalling the Web RAID Management Software - Linux Install the Web RAID Management Software Please refer to the Web RAID Management Installation Guide or README file under the following folder for the installation procedure. Software location (RocketRAID Software CD): \HighPoint RAID Management Software\Web RAID Management\Linux And the location of CLI is as the follow. -
Page 36: Bios Update
8 BIOS Update The BIOS update utility must be run while the system is operating in a pure DOS environment. The update utility cannot be run from a DOS-prompt window. 1. Visit the www.highpoint-tech.com website to download the latest firmware. 2. -
Page 37: Thank You
9 Thank You Thank you for purchasing the RocketRAID 600L SATA 6Gb/s RAID Host adapter. We appreciate your support, and welcome any questions, comments or product suggestions you may have. -
Page 38: Customer Support
10 Customer Support If you encounter any problem while utilizing RocketRAID series host adapters, or have any questions about this or any other HighPoint Technologies, Inc. product, feel free to contact our Customer Support Department. HighPoint Technologies, Inc. websites: http://www.highpoint-tech.com/ Web Support: http://www.highpoint-tech.com/websupport/...
Need help?
Do you have a question about the RocketRAID 600L and is the answer not in the manual?
Questions and answers