
Related Manuals for HighPoint RocketRAID 174x


Summary of Contents for HighPoint RocketRAID 174x
- Page 1 RocketRAID 174x SATAII Host Adapter User’s Guide Revision: 1.1 Date: Dec. 2006 HighPoint Technologies, Inc.
- Page 2 HighPoint’s products and use at your own risk. In no event shall HighPoint be liable for any loss of profits, or for direct, indirect, special, incidental or consequential damages arising from any defect or error in HighPoint’s products or manuals.
-
Page 3: Table Of Contents
RocketRAID 174x Hardware ..................2-1 1 - RocketRAID 174x Adapter Layout ................ 2-1 2 - LED Connections ....................2-2 3 - Installing the RocketRAID 174x Host Adapter ............2-3 4 - Verifying Installation ..................... 2-5 Chapter 3 RocketRAID 174x BIOS Utility RocketRAID 174x BIOS Utility ................... - Page 4 FreeBSD Driver Support 1 - Installing FreeBSD on the RocketRAID 174x Controller ........6-1 2 - Installing the RocketRAID 174x Driver on an Existing System ......6-4 3 - Updating the Driver ....................6-7 4 - Uninstalling the Driver ..................6-7...
- Page 5 Chapter 1 Introduction Contents of this Chapter: About this guide Introducing the RocketRAID 174x Host Adapter Product Features Understanding RAID Concepts and Terminology...
-
Page 6: Introduction
Introducing the RocketRAID 174x Host Adapter The HighPoint RocketRAID 174x series are 4-channel PCI to Serial ATA II RAID controllers. The RocketRAID 174x solutions are ideal for small business home and office servers, NAS storage, workgroup and web servers. . -
Page 7: Understanding Raid Concepts And Terminology
RoHS Compliant Understanding RAID Concepts and Terminology The following concepts and terminology is commonly used when describing the functions of the RocketRAID 174x Host Adapter. Disk initialization Initializing a disk writes necessary RAID configuration information to that disk. Disks must be initialized before configuring them into RAID arrays. The initialization process will destroy all data on the disk. -
Page 8: Background Initialization
Introduction When you create a redundant array using the RocketRAID 174x controller’s BIOS Configuration Utility, it will create the array in un-initialized state. The initialization process can be completed after installing the driver and management software. When creating an array using the HighPoint RAID Management Console software, you can specify an initialization option (Skip initialization, foreground and background). - Page 9 Disks attached to the RocketRAID 174x that contain valid partition tables will be identified as legacy disks. A legacy disk attached to the RocketRAID 174x can be accessed by the operating system, but cannot be used to create RAID arrays. A...
-
Page 10: Rocketraid 174X Hardware Description/Installation
Chapter 2 RocketRAID 174x Hardware Description/Installation Contents of this Chapter: RocketRAID 174x Hardware 1 - RocketRAID 174x Adapter Layout 2 - LED Connections 3 - Installing the RocketRAID 174x Host Adapter 4 - Verifying Installation... -
Page 11: Rocketraid 174X Hardware
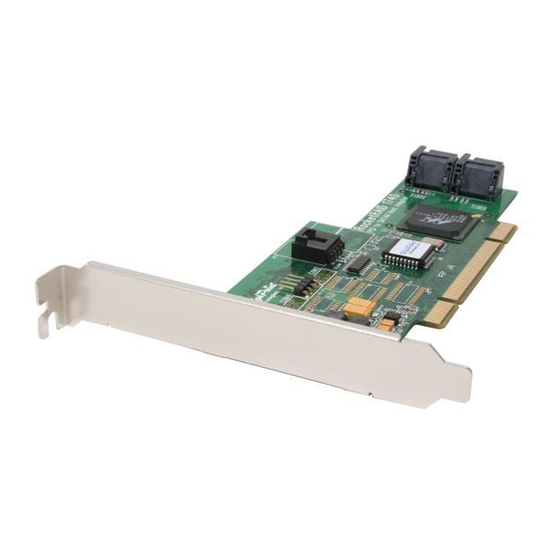
RocketRAID 174x Hardware Description/Installation RocketRAID 174x Hardware 1 – RocketRAID 174x Adapter Layout RocketRAID 1740 Adapter Layout RocketRAID 1742 Adapter Layout... -
Page 12: Led Connections
SAF-TE features. Consult the chassis’s manual for more information. 2 - LED Connections The RocketRAID 174x has two LED jumpers that are used to indicate the activity and failure status of hard disks attached to the card’s four SATAII channels. These (connector). -
Page 13: Installing The Rocketraid 174X Host Adapter
Open the system chassis and locate an unused PCI slot. Remove the PCI slot cover. Gently insert the RocketRAID 174x into the PCI slot, and secure the bracket to the system chassis. - Page 14 RocketRAID 174x Hardware Description/Installation After installing the adapter, attach hard disks to the RocketRAID 174x using the appropriate data cable. SATA cables have universal connections – either end can be attached to the adapter or hard disk. Each RocketRAID 174x included two standard SATA cables, for the internal ports (Port 3 and Port 4).
-
Page 15: Verifying Installation
RocketRAID 174x Hardware Description/Installation 4 - Verifying Installation Once the RocketRAID 174x host adapter and hard disks have been installed into the chassis, boot-up the system to verify that the hardware is properly recognized. Power on the system. If the system detects the presence of the adapter, the RocketRAID 174x BIOS Utility will be displayed during bootup. -
Page 16: Rocketraid 174X Bios Utility
Chapter 3 RocketRAID 174x BIOS Utility Contents of this Chapter: RocketRAID 174x BIOS Utility 1 - BIOS Command Overview 2 - Creating RAID Arrays 3 - Adding/Removing Spare Disks 4 - Updating the BIOS... - Page 17 RocketRAID 174x BIOS Utility RocketRAID 174x BIOS Utility The RocketRAID 174x’s BIOS Utility can be accessed using the “Ctrl+H” command. This command should be displayed automatically when the RocketRAID 174x’s BIOS screen appears during the system’s boot up procedure. 1 - BIOS Command Overview The RocketRAID 174x BIOS Utility provides a wide selection of RAID related commands.
- Page 18 – this command is used to select between two views. Press the ENTER key to change the view. Devices – displays information about hard disks attached to the RocketRAID 174x. Use the↑ ↓ arrow keys to highlight the target hard disk, and press ENTER to view the information.
-
Page 19: Creating Raid Arrays
RocketRAID 174x BIOS Utility 2 - Creating RAID Arrays Initializing Disks: Before creating a RAID array, the disks must be initialized. Initialization writes necessary RAID configuration information to the hard disk. ← → Use the arrow keys to select the Initialize command, and press ENTER. -
Page 20: Adding/Remove Spare Disks
RocketRAID 174x BIOS Utility ↓ Next, Use the arrow key to highlight the Capacity (GB) option and press ENTER. The total available capacity will be displayed. Press ENTER if you wish to use all available space. If you wish to reserve disk space for additional arrays/single disks, use the keyboard to input the amount of space (in GB) you wish to set aside for this particular array, and press ENTER. -
Page 21: Updating The Bios
RocketRAID 174x BIOS Utility not utilize the full available capacity at the time of creation, these disks may be used as spares. For example: a RAID 0 array was created between two 200GB hard disks, but only 200GB of space (out of a grand total of 400GB), was assigned to that array. In this example, 200GB of disk space remains unallocated. - Page 22 RocketRAID 174x BIOS Utility 4) Select the “Browse the CD” option, and access the directory provided for the RR174x host adapter. 5) Open the “BIOS” directory, and double click the “hptflash.exe” icon. This will start the BIOS flash utility: 6) Select the RR174x from the drop down menu labeled “Controller”, and press the “Open”...
- Page 23 RocketRAID 174x BIOS Utility 2) If you are booting from a CD image, you will need to add these files to the Insert the boot image media into the appropriate drive, and boot the system. Once the A:\> prompt has appeared, insert the media that contains the required BIOS files, and type the following command: load xxx.xxx...
-
Page 24: Rocketraid 174X Driver And Software Installation
Chapter 4 RocketRAID 174x Driver and Software Installation Microsoft Windows (2000, XP, 2003 Server, x64 versions, Vista) Contents of this Chapter: Driver and Software CD Windows Driver Installation... -
Page 25: Driver And Software Cd
RocketRAID 174x Driver and Software Installation Driver and Software CD The RocketRAID 174x retail box includes a Driver and Software CD. This CD can be used to generate driver diskettes, and install the RAID Management software for a variety of operating systems. - Page 26 RocketRAID 174x Driver and Software Installation Click on the “OK” button to create the driver diskette. To install the RAID software: Click on “Install RAID Management Software”. Select the desired software from the drop down menu, and click on the “OK”...
-
Page 27: Windows Driver Installation
2003/x64/Vista system After the operating system has booted, Windows will automatically detect the RocketRAID 174x, and request that a device driver be installed. To install the device driver, follow the steps outlined below: When the “Found New Hardware Wizard” window appears, select “Install from a list or specific location (Advanced)”, and click Next to continue. -
Page 28: 1- Web Raid Management Interface
RocketRAID 174x Driver and Software Installation Double click the “SCSI and RAID controllers” entry. If the RocketRAID 174x device entry is not displayed, or there are “?” or “!” marks displayed near the RocketRAID 174x entry, the driver has not been installed properly. Delete the entries and reinstall the driver. -
Page 29: Preparing Hard Disks
RocketRAID 174x Driver and Software Installation Note: the login information is saved in /etc/hptuser.dat. If you forget the password you can remove this file to reset the password. If you can’t connect to the local system, please check and make sure a process named hptsvr is running. -
Page 30: Array Management
RocketRAID 174x Driver and Software Installation 3 Array Management Creating an Array To create an array: 1) Select “Manage - Array” from the menu. 2) Click the Create Array button. The create array page will appear. 3) Choose the array type you want to create from the drop-down list. -
Page 31: Deleting An Array
RocketRAID 174x Driver and Software Installation Write-through When the write-through setting is selected, writes to the array are always passed directly to the disks. Subsequent reads may still be completed from the cache, if appropriate. 7) Select disks from the Available Disks list. - Page 32 RocketRAID 174x Driver and Software Installation Adding Disks to an Array When an array member in a redundant array fails, the array will be listed as broken. A broken array will be automatically rebuilt using available-spare disks. However, if you have no spare disks configured, you can still rebuild by manually adding an Available Disk to the array.
- Page 33 RocketRAID 174x Driver and Software Installation 1) Select menu “Manage - Array”. 2) Click the “Maintenance” button. 3) Click the “Rebuild” button. The rebuild process should begin. Expanding/Migrating an Array With the OCE/ORLM function, you can migrate an array from one RAID level to another RAID level and/or expand the array dynamically, even under I/O load.
-
Page 34: Device Management
RocketRAID 174x Driver and Software Installation Renaming an Array To rename an array: 1) Select “Manage - Array” from the menu. 2) Click on the Maintenance button. 3) Enter a new name for the array. 4) Click the Rename button. - Page 35 RocketRAID 174x Driver and Software Installation S.M.A.R.T Status You can view S.M.A.R.T. (Self-Monitoring, Analysis, and Reporting Technology) data about a particular hard disk to help troubleshoot problems that occur. You can also setup periodically S.M.A.R.T. status checking to send notification messages when S.M.A.R.T.
-
Page 36: Configuring Spare Disks
RocketRAID 174x Driver and Software Installation To rescan the devices: 1) Select menu “Manage | Device”. 2) Click “Rescan Devices” button. Note: When you are hot-plugging an entire array, run rescan only after all array members (hard disks) have been physically plugged or unplugged from the system. -
Page 37: Managing Events And Tasks
Click the Clear button to clear the event log. Managing Tasks With HighPoint RAID Management Software, you can setup background rebuild and verify tasks to help maintain the integrity of your drives and data. The tasks can be scheduled periodically. - Page 38 RocketRAID 174x Driver and Software Installation Scheduling a Task To add a task schedule: 1) Select the array that you want to verify or rebuild. 2) Enter a name for the task. 3) Configure the frequency for the task. 4) Check the Submit button.
-
Page 39: Settings
Listening Port Change Listening Port This is the TCP port number utilized by the HighPoint RAID Management Service in order to communicate with the management console and web browser software. When you connect to the service, the port value you enter must be in accordance with the system port value on the service. - Page 40 RocketRAID 174x Driver and Software Installation Enter a new port number and click the “Change Port” button to change the listening port. Restrict to localhost access If this option is selected, the HPT Web RAID Management Service will refuse any Remote Access request.
-
Page 41: Linux Driver Support
Chapter 5 Linux Driver Support Contents of this Chapter: Fedora Core 6 Linux installation Overview Red Hat Enterprise 4 Overview SuSE Linux Enterprise Server (SLES) installation Overview... -
Page 42: Fedora Core 6 Linux Installation Overview
BIOS/Driver page for the RocketRAID 174x. To install Fedora Linux onto hard disks or RAID arrays attached to RocketRAID 174x controller, follow the steps outlined below: Step 1 Prepare the Driver Diskette The driver is contained in a floppy diskette image file. - Page 43 3 - Installing the RocketRAID 174x driver for an Exist- ing System Note: If a SCSI adapter is used to boot the system, make sure the RocketRAID 174x controller BIOS loads/posts after the SCSI adapter’s BIOS. It may be necessary to move the adapter(s) to another PCI slot.
- Page 44 If the original driver is installed in the system’s initrd (Initial RAM Disk) file (when using a system installed to the RocketRAID 174x controller, for example), the driver module in the initrd file should be updated using the mkinitrd com-...
- Page 45 To configure HighPoint RAID Management Software to work with RR174x driver, you should setup /etc/hptcfg to be the driver name: # echo RR174x > /etc/hptcfg Please refer to HighPoint RAID Man- agement Software documents for more information.
-
Page 46: Red Hat Enterprise 4 Overview
1 - Red Hat Enterprise 4 Overview This section provides instructions describing how to install and utilize the RocketRAID 174x Adapter on a Red Hat Enterprise 4 Linux system. 2 - Installing Red Hat Enterprise 4 (AS, ES, WS) Linux... - Page 47 3 - Installing the RocketRAID 174x driver for an Exist- ing System Note: If a SCSI adapter is used to boot the system, make sure the RocketRAID 174x controller BIOS loads/posts after the SCSI adapter’s BIOS. It may be necessary to move the adapter(s) to another PCI slot.
- Page 48 Linux Driver Support To create a partition on this array (which will listed as /dev/sda1), use the “fdisk / dev/sda” command. Next, use the “mkfs /dev/sda1” command to setup a file system on this partition. Use the command “mkdir xxxx” to create a mount point for the RAID array. Then,mount /dev/sda1 /xxxx in order to access it.
- Page 49 Linux Driver Support 4 - Updating the Driver If you are not booting from disks attached to RocketRAID 174x controller, you can update the driver just by reinstalling it following the procedure outlined in the previous section, “Installing the RocketRAID 174x driver for an Existing System”.
-
Page 50: Suse Linux Enterprise Server (Sles) Installation Overview
BIOS/Driver page for the RocketRAID 174x. To install SLES onto hard disks or RAID arrays attached to RocketRAID 174x controller, follow the steps outlined below: Step 1 Prepare the Driver Diskette The driver is contained in a floppy diskette image file (slesdd.img). -
Page 51: Installing The Rocketraid 174X Driver On An Existing System
OS installation procedures. Additional Installation Notes: The system device mapping order is the same as the order shown in RocketRAID 174x BIOS Setting Utility. If no other SCSI adapters are installed, the device marked as “BOOT” or “HDD0” will be identified as /dev/sda, “HDD1” as /dev/sdb, “HDD2” as / dev/sdc, etc. - Page 52 Linux Driver Support title Linux kernel (hd0,1)/vmlinux root=/dev/hda1 acpi=off initrd (hd0,1)/initrd Reboot the system to allow the new kernel parameters to take effect. Step 2 Install the Driver Module Extract the module file from the file /linux/suse /[arch]-[version]/install/update.tar.gz (from the driver disk), using the following commands: # mount /dev/fd0 /mnt/floppy # cd / # tar xfz /mnt/floppy/linux/suse/i386-sles9/install/update.tar.gz...
-
Page 53: Updating The Driver
Note: If the driver is loaded in initrd (when system is installed onto a disk or array attached to the RocketRAID 174x), you need to run the mkinitrd command to update the initrd file. If you are using the lilo boot loader, run lilo again (# lilo). -
Page 54: Uninstalling The Driver
Linux Driver Support 5 - Uninstalling the Driver To uninstall the RocketRAID 174x driver Note: The driver cannot be uninstalled while the system is booted from a disk or array attached to the RocketRAID 174x. To uninstall the driver, remove the lines added to /etc/modules.conf and /etc/fstab. - Page 55 Chapter 6 FreeBSD Driver Support Contents of this Chapter: 1 - Installing FreeBSD on the RocketRAID 174x Controller 2 - Installing the RocketRAID 174x Driver on an Existing System 3 - Updating the Driver 4 - Uninstalling the Driver...
- Page 56 FreeBSD Driver Support 1 - Installing FreeBSD on the RocketRAID 174x Con- troller If you would like to install FreeBSD onto arrays attached to the RocketRAID 174x host adapter, please follow the steps below. Step 1 Prepare the Driver Diskette...
- Page 57 Booting [kernel] in 9 seconds… <-press SPACE key A prompted label “ok” will appear at the bottom of the screen. Insert the RocketRAID 174x driver diskette into floppy drive. Type in “load diskx: rr174x-x.x” (without quotation marks), and then press enter. for FreeBSD 4.3-RELEASE ok load kernel ok load disk1:rr174x-4.3.ko...
- Page 58 FreeBSD Driver Support for FreeBSD 4.11-RELEASE ok load disk1:rr174x-4.11.ko for FreeBSD 5.0-RELEASE ok load disk0:rr174x-5.0.ko for FreeBSD 5.1-RELEASE ok load disk0:rr174x-5.1.ko for FreeBSD 5.2.1-RELEASE ok load disk0:rr174x-5.2.1.ko for FreeBSD 5.3-RELEASE ok load disk0:rr174x-5.3.ko for FreeBSD 5.4-RELEASE ok load disk0:rr174x-5.4.ko for FreeBSD 5.3-AMD64-RELEASE ok load disk0:rr174x-5.3-amd64.ko for FreeBSD 5.4-AMD64-RELEASE ok load disk0:rr174x-5.4-amd64.ko...
- Page 59 FreeBSD Driver Support Before exiting installation, an additional step must be taken to copy the RocketRAID 174x driver module to the system. On the driver diskette, there is a setup script labeled “postinstall”, which will complete this task. Before rebooting...
- Page 60 FreeBSD Driver Support For FreeBSD 4.x: # vnconfig vn0c freebsd_xxx.img # mount /dev/vn0c /mnt # cp /mnt/rr174x-xxx.ko /modules/rr174x.ko # vnconfig –du vn0c myfilesystem mount=/mnt For FreeBSD 5.x: # mdconfig –a –t vnode –f freebsd_5.x.img –u 0 # mount /dev/md0 /mnt # cp /mnt/rr174x-xxx.ko /boot/kernel/rr174x.ko # umount /mnt # mdconfig –d –u md0...
- Page 61 # echo ’rr174x_load=”YES”’ >> /boot/defaults/ loader.conf This command will instruct the loader to load the RocketRAID 174x module together with the kernel. After using this command, reboot the system. The RocketRAID 174x module should now automatically load each time the operating system starts up.
- Page 62 4 – Uninstalling the Driver The driver can only be uninstalled when the system is not booting from devices attached to the RocketRAID 174x controller. To uninstall, remove the line rr174x_load=”YES” located in /boot/defaults/loader.conf, and then delete the driver module /modules/rr174x.ko or /boot/kernel/rr174x.ko.
-
Page 63: Appendix
Appendix Customer Support... - Page 64 Customer Support Customer Support If you encounter any problems while utilizing the RocketRAID 174x, or have any questions about this or any other HighPoint product, feel free to contact our Cus- tomer Support Department. Troubleshooting Checklist Before contacting our Customer Support department: Make sure the latest BIOS, driver and RAID Software have been installed for the RocketRAID 174x.
- Page 65 FCC Part 15 Class B Radio Frequency Interference statement This equipment has been tested and found to comply with the limits for a Class B digital device, pursuant to part 15 of the FCC Rules. These limits are designed to provide reasonable protection against harmful interference in a residential installation.
Need help?
Do you have a question about the RocketRAID 174x and is the answer not in the manual?
Questions and answers