
Related Manuals for HighPoint RocketRAID 264x


Summary of Contents for HighPoint RocketRAID 264x
- Page 1 RocketRAID 264x SAS/SATAII Host Adapter User’s Guide Revision: 1.0 Date: October 2008 HighPoint Technologies, Inc.
- Page 2 HighPoint’s products and use at your own risk. In no event shall HighPoint be liable for any loss of profits, or for direct, indirect, special, incidental or consequential damages arising from any defect or error in HighPoint’s products or manuals.
-
Page 3: Table Of Contents
Table of Contents Table of Contents CONGRATULATIONS Specifications and Features ..................6 1 - RocketRAID 264x (2640X4, 2640X1 and 2642) Host Adapter layout ......9 2 - LED Connections ....................10 3 - Hardware Installation ..................... 12 4 - Verifying Installation ....................13 ROCKETRAID BIOS UTILITY 1 - BIOS Command Overview .................. - Page 4 Table of Contents CUSTOMER SUPPORT Troubleshooting Checklist ..................32 CONTACT US ......................33...
- Page 5 HighPoint Technologies, Inc. HighPoint Technologies, long recognized as a leader in mass storage technologies specializes in the design and manufacturer of HBA (Host Bus Adapters) and HighPoint RAID IP (Intellectual Property). HighPoint provides a broad range of scalable hardware HBA’s that meet the storage requirements from Enterprise to SMB (Small Medium Sized Business) to PC enthusiast.
-
Page 6: Congratulations
Congratulations You have purchased one of the highest performing and most cost effective 4 channel SAS RAID controllers available. The RocketRAID 264x offers the flexibility to support both the highest performing SAS 15,000 RPM hard drives, and larger capacity cost sensitive SATA hard drives in homogeneous and heterogeneous storage environments. - Page 7 Congratulations • BIOS booting support • Online Array roaming • Automatic hard drive (insert / remove) detection • Automatic RAID rebuild • 64bit LBA support greater than 2TB per volume Array Monitors, Alerts and Indicators • Hard Drive LED Indicators (Activity and Failed) •...
- Page 8 Congratulations Physical Specifications RR2640X4 / RR2640X1 Size: (87.8mm X 64.3mm) 3.45”L x 2.53”W RR2642 Size: (79.4mm X 67.5mm) 3.13” L x 2.66” W EMI: FCC Part 15 Class B and CE Thermal and Atmospheric Characteristics: Work Temperature Range: +5 C ~+ 55 C Relative Humidity Range: 5% ~ 60% non condensing Storage Temperature: ~20 ~ 80 C MTBF: 920,585 Hours Electrical Characteristics:...
-
Page 9: Rocketraid 264X (2640X4, 2640X1 And 2642) Host Adapter Layout
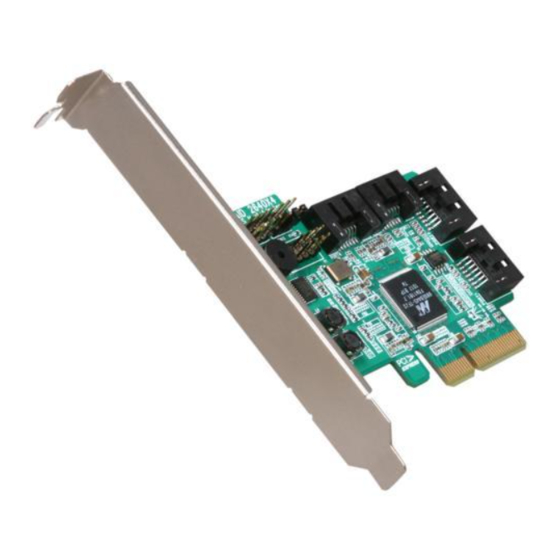
Congratulations 1 – RocketRAID 264x (2640X4, 2640X1 and 2642) Host Adapter layout RocketRAID 2640X4 Port1- Port4 Port1 – Port4 represent the RocketRAID 2640X4’s 4 Internal SAS channels. RocketRAID 2640X1 Port1- Port4 Port1 – Port4 represent the RocketRAID 2640X1’s 4 Internal SAS channels. -
Page 10: Led Connections
2 – LED Connections LED connectors (Drive-activity/Drive-failure): LED support is discussed in greater detail in the LED Connection section. The RocketRAID 264x host adapter has 2 LED connectors that are used to indicate the activity and failure status of hard drives attached to the card’s 4 SATA/SAS channels. - Page 11 Congratulations BEEP1-Speaker Alarm (speaker): this speaker emits an audible alarm in the case of Drive/array failure. J7 (RR2640X4 and RR2640X1) This jumper supports the SAF-TE interface (I2C). J1 (RR2642) This jumper supports the SAF-TE interface (I2C). J3 (RR2640X4 and RR2640X1) This jumper is SGPIO signal.
-
Page 12: Hardware Installation
Note: Make sure the system is powered-off before installing the RocketRAID host adapter. The RocketRAID 264x include both standard and low-profile brackets. It may be necessary to attach the low-profile bracket in place of the standard bracket, depend- ing upon the chassis design. Open the system chassis and locate an unused PCI- Express slot. -
Page 13: Verifying Installation
Power on the system. If the system detects the presence of the adapter, the RocketRAID 264x BIOS Utility will be displayed during bootup. Press Ctrl+H to access the RocketRAID 264x adapter’s BIOS Utility. The BIOS Utility will display information about hard disks attached to the adapter. -
Page 14: Rocketraid Bios Utility
RocketRAID BIOS Utility RocketRAID BIOS Utility The RocketRAID 264x card will display its BIOS screen during the system’s boot process. Press Control + H when prompted, to access the BIOS settings Menu. 1 - BIOS Settings Overview The RocketRAID 264x BIOS utility is an interface that provides management com- mands and controller related settings. -
Page 15: Creating Raid Arrays
RocketRAID BIOS Utility BIOS Commands Create - this command is used to open the RAID Creation menu. Delete - this command will delete the selected RAID array. Add/Remove Spare - this command is used to assign hard disks to function as spare disks. - Page 16 RocketRAID BIOS Utility Highlight the target disks using the arrow keys, then select using Enter. A numeral will be displayed before each selected disk. Once all target disks have been selected, press ESC. The utility will display a warning, and ask you to press Y (yes) to initialize, or N (no) to cancel.
- Page 17 RocketRAID BIOS Utility Highlight the target disks that you want to use, and press Enter to select them. A numeral will be displayed before each selected disk. This number designates disk order. After all of the disks have been selected and press the ESC key to return to the Create Menu.
-
Page 18: Deleting Arrays
RocketRAID BIOS Utility Sector Size – Also known as “Variable Sector Size”. Use this option if you are using an older 32-bit Windows operating system. This allows older operating systems to support volumes over 2TB in size. Do not use if the operating system already supports large volumes (such as GPT). -
Page 19: Adding/Remove Spare Disks
RocketRAID BIOS Utility The utility will display a warning message. Press Y (yes) to delete the array, or select N (no) to cancel. Warning: all data stored on the array will be lost – do not delete if the array contains critical data. -
Page 20: Settings
RocketRAID BIOS Utility Generally, single disks are designated to act as spares (disks that are not configured into RAID arrays). However, in some instances, disks that are members of RAID arrays may also be designated to act as a spare. If the disks in question are part of a RAID array that did not utilize the full available capacity at the time of creation, these disks may be used as spares. -
Page 21: Highpoint Raid Management And Device Driver Cd
Drive CD Each retail box includes a copy of the HighPoint Products Software CD. This CD can be used to generate driver diskettes, and install the HighPoint RAID Management Utility Suite for a variety of operating systems. 1 - Creating a driver diskette... -
Page 22: Device Driver Installation
Installing the RocketRAID 264x driver for an existing Windows system. After the operating system has booted, Windows will automatically detect the RocketRAID 264x host adapter, and request that a device driver be installed. To install the device driver, follow the steps outlined below: When the “Found New Hardware Wizard”... - Page 23 In the popup window, click the “Hardware” tab then click Device Manager button. Double click the “SCSI and RAID controllers” entry. If the RocketRAID 264x device entry is not displayed, or there are “?” or “!” marks displayed near the RocketRAID 264x entry, the driver has not been installed properly.
- Page 24 USB flash disk or CD. If you are using the RocketRAID 264x software CD, the drivers are located in RR264x – Driver – Windows – VistaWin2008 – 32 (or 64, if you are running a 64-bit version of the operating system).
- Page 25 Double click the “Storage Controllers” entry. If the RocketRAID 264x device entry is not displayed, or there are “?” or “!” marks displayed near the RocketRAID 264x entry, the driver has not been installed properly. Delete the entries and reinstall the driver.
- Page 26 FreeBSD revisions, and are available from the same support page: http://highpoint-tech.com/USA/bios_rr264x.htm Several driver sets are also included with the RocketRAID 264x Software CD. Each binary driver and source package includes an installation guide (.pdf format). Linux Driver sets: RR264x/Driver/Linux directory.
-
Page 27: Highpoint Raid Management Utilities (Hrm)
HighPoint Web RAID Management .rpm file to start the installation process. Copy the Web RAID Management package from the RR264x Software CD, to the desktop of the Linux operating system. The .rpm file is located in HighPoint RAID Management Software – RR2xxx - Linux – WebGui-Linux.tbz. - Page 28 HighPoint RAID Management and Device Driver CD The package can also be installed manually, using a terminal. Log in as “root”, open a terminal, and browse to the location of the .rpm file. Run the following command: # rpm -i hptsvr-https-1.4-8.i386.rpm (or hptsvr-https-1.4-8.x86_64.rpm) Note: The i386 rpm package can also work on 64-bit systems if you have 32-bit runtime libraries installed.
- Page 29 RAID Management - CLI Command Line interface versions of the RocketRAID management utilities are available for Linux and FreeBSD operating systems. These packages are posted on the HighPoint Technologies, Inc. website, under the BIOS & Driver downloads page for the RocketRAID 264x.
-
Page 30: Mac Os X Driver And Raid Management Installation
4 - Mac OS X Driver and RAID Management Installa- tion The driver and software package for the RocketRAID 264x includes both the device driver for OS X, and a copy of the Web RAID Management utility. Copy the Mac driver and software package from the RR264x Software CD, to the Mac Desktop. - Page 31 After OS X reboots, the card will be recognized by the system. Configure arrays using the Web RAID Management interface. User guides for the Web interface are available from http://www.hptmac.com. Check the product page for the corresponding RocketRAID 264x model, and click on the “Download Center” link.
-
Page 32: Troubleshooting Checklist
Customer Support Customer Support If you encounter any problems while utilizing the RocketRAID host adapter, or have any questions about this or any other HighPoint product, feel free to contact our Customer Support Department. Troubleshooting Checklist Before contacting our Customer Support department: •... -
Page 33: Contact Us
Customer Support Contact Us HighPoint Corporate Headquarter USA Address 1161 Cadillac Ct. Milpitas, CA, 95035 Website: http://www.highpoint-tech.com Phone: 1-408-942-5800 (9 am ~ 6 pm PST, M-F) Fax: 1-408-942-5801 E-mail: sales@highpoint-tech.com Support: support@highpoint-tech.com Support Phone: 1-408-240-6108 (9 am ~ 5 pm PST, M-F) HighPoint Taiwan 5F., No.3, Swei Lane , Jhongjheng Rd. -
Page 34: European Union Compliance Statement
FCC Part 15 Class B Radio Frequency Interference statement This equipment has been tested and found to comply with the limits for a Class B digital device, pursuant to part 15 of the FCC Rules. These limits are designed to provide reasonable protection against harmful interference in a residential installation. -
Page 35: Thank You
Thank You Thank you for purchasing the RocketRAID 264x SATAII/SAS RAID Host adapter. We appreciate your support, and welcome any questions, comments or product suggestions you may have.
Need help?
Do you have a question about the RocketRAID 264x and is the answer not in the manual?
Questions and answers