Table of Contents
Advertisement
Quick Links
Advertisement
Table of Contents

Subscribe to Our Youtube Channel
Related Manuals for Advantech ARK-3381


Summary of Contents for Advantech ARK-3381
-
Page 1: User Manual
ARK-3381 Embedded Box Computer User Manual... - Page 2 No part of this man- ual may be reproduced, copied, translated or transmitted in any form or by any means without the prior written permission of Advantech Co., Ltd. Information provided in this manual is intended to be accurate and reli- able.
- Page 3 Product Warranty (2 years) Advantech warrants to you, the original purchaser, that each of its prod- ucts will be free from defects in materials and workmanship for two years from the date of purchase. This warranty does not apply to any products which have been repaired or...
- Page 4 This product has passed the CE test for environmental specifications when shielded cables are used for external wiring. We recommend the use of shielded cables. This kind of cable is available from Advantech. Please contact your local supplier for ordering information.
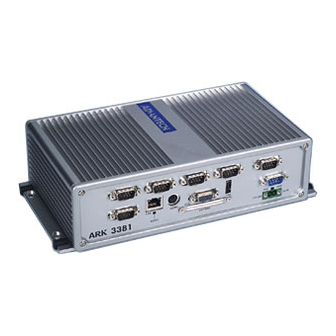
- Page 5 ARK-3381 Series Model There are two sub-models in ARK-3381 series listed below: ARK-3381-2S0B1E: ULV Celeron® M 1 GHz Embedded Box Computer, with VGA, LVDS, Fast Ethernet, 2 x RS-232, 5 x RS-232/422/485, 3 x Parallel, 3 x USB2.0, 1 x 8 Bits DIO ARK-3381-2S4B1E: LV Pentium®...
- Page 6 The equipment has been dropped and damaged. f. The equipment has obvious signs of breakage. DO NOT LEAVE THIS EQUIPMENT IN AN ENVIRONMENT WHERE THE STORAGE TEMPERATURE MAY GO BELOW - ARK-3381 User Manual...
- Page 7 The sound pressure level at the operator's position according to IEC 704- 1:1982 is no more than 70 dB (A). DISCLAIMER: This set of instructions is given according to IEC 704-1. Advantech disclaims all responsibility for the accuracy of any statements contained herein. Safety Precaution - Static Electricity Follow these simple precautions to protect yourself from harm and the products from damage.
- Page 8 ARK-3381 User Manual viii...
-
Page 9: Table Of Contents
Introduction of ARK-3381 External I/O Connectors..10 Figure 2.1: Front face plate I/O connectors ....10 Figure 2.2: Rear face plate I/O connectors ....10 ARK-3381 front face plate I/O connectors ..... 11 2.2.1 Power ON/OFF Button ..........11 2.2.2 LED Indicators ............. - Page 10 Connecting Power ............32 3.15 Installation of DIN Rail Mounting ........33 Figure 3.5: DIN Rail Mounting Kit ......33 Figure 3.6: DIN Rail Mounting Module orientation .. 34 Figure 3.7: L DIN Rail Mounting Module on ARK-3381 ........... 34 ARK-3381 User Manual...
- Page 11 Figure 3.7: R DIN Rail Mounting Module on ARK-3381 ........... 34 Figure 3.8: A DIN Rail ..........35 Figure 3.9: Hooking the L DIN Rail Mounting Module to a DIN Rail ..........35 Figure 3.10:Hooking the R DIN Rail Mounting Module to a DIN Rail ..........
- Page 12 ARK-3381 User Manual...
- Page 13 Overview This chapter gives background infor- mation on the ARK-3381. It shows you the ARK-3381 overview and specifica- tions. Sections include: • Introduction • Hardware Specifications • Chassis Dimension...
-
Page 14: Chapter 1 Overview
• A special cushioned design that absorbs vibration to ensure maximum reliability under harsh conditions 1.2.3 Highly Compact Size • With its maximum mounting height of 69 mm, the ARK-3381 can be used under space critical installation conditions 1.2.4 Optimized Integration •... -
Page 15: High Computing Performance
1.3.1 Processor Core Logic System • Intel® Ultra Low Voltage Celeron® M or Intel® Pentium® M Low Voltage Processor, µFC-BGA 479 Package: ULV Celeron® M 1 GHz (for Model of ARK-3381-2S0B1E) LV Pentium® M 1.4 GHz (for Model of ARK-3381-2S4B1E) System Chipset •... -
Page 16: Display
• Keyboard/Mouse: One PS/2 port to support PS/2 Mouse and PS/2 key- board • USB: Three USB 2.0 compliant universal serial bus port • DIO: ARK-3381 provides one D-sub 8 Bits Female connectors, which offers Digital IO communication interface ports ARK-3381 User Manual... - Page 17 Storage • Supports a drive bay space for 2.5'' HDD • Supports a CompactFlash socket for Type I/II CompactFlash disk Mechanical • Construction: Aluminum housing • Mounting: DIN-rail mounting, Desk/wall mounting • Dimension (W x H x D): 264.5 x 69.2 x 137.25 (10.41" x 2.72" x 4.4") •...
-
Page 18: Environment Specifications
• With CompactFlash Disk only: 50 Grms, IEC 68-2-27, half sine, 11 ms duration • With Hard Disk: 20 Grms, IEC 68-2-27, half sine, 11 ms duration EMC approved • CE, FCC Class A Safety approved • UL ARK-3381 User Manual... -
Page 19: Chassis Dimension
1.4 Chassis Dimension Figure 1.1: Chassis Dimensions Chapter 1... - Page 20 ARK-3381 User Manual...
- Page 21 This chapter shows how to set up the ARK-3381's hardware functions, including connecting peripherals, switches and indicators. Sections include: • Introduction of ARK-3381 External I/O Connectors • ARK-3381 front metal face plate external I/O connectors • ARK-3381 rear metal face plate external I/O connectors...
-
Page 22: Chapter 2 Hardware Functionality
Chapter 2 Hardware Functionality 2.1 Introduction of ARK-3381 External I/O Connectors The following two figures show the external I/O connectors on ARK- 3381. The following sections give you detailed information about the function of each I/O connector. PWR LED HDD LED... -
Page 23: Ark-3381 Front Face Plate I/O Connectors
Soft Power On/Off (Instant off or Delay 4 Second), and Suspend. 2.2.2 LED Indicators There are two LEDs on the ARK-3381 front panel for indicating system status: Red flashing PWR LED is for power status and the green flashing HDD LED is for hard disk and CompactFlash disk status. -
Page 24: Backlight On/Off Control Connector
2.2.4 Backlight On/Off control Connector The ARK-3381 has a D-Sub 9-pin connector that provides: • BKLTEN signals that the inverter module uses to turn the backlight on or off. • 12 V, 5 V and Ground as the inverter power source. -
Page 25: Dio Connector
2.2.5 DIO Connector ARK-3381 provides one D-sub 9-pin Female connectors, which offers Digital IO communication interface ports. If you want to use DIO, you can find the Pin assignment as following. Figure 2.5: DIO connector Table 2.3: DIO Connector Signal name... -
Page 26: Printer Port Connectors
2.2.6 Printer Port Connectors The ARK-3381 provides three D-sub 25-pin connectors that support PCI 1284 Printer Ports. The Moschip MCS9815 is a dual Parallel Port controller with PCI bus interface. MCS9815 fully supports the existing Centronics printer inter- face as well as PS/2, EPP, and ECP modes. -
Page 27: Ark-3381 Rear Face Plate External I/O Connectors
2.3 ARK-3381 rear face plate external I/O connectors 2.3.1 Power Input Connector The ARK-3381 comes with a Phoenix connector that carries a 12 ~ 24 VDC external power input. Figure 2.7: Power input connector Table 2.5: Power input connector pin assignments... -
Page 28: Com2 ~ Com6 Connector
2.3.3 COM2 ~ COM6 Connector The ARK-3381 provides five D-sub 9-pin connectors for RS-232/422/485 communications. The default setting of COM2 ~ COM6 is RS-232. Please refer to section 3.3 ~ 3.7 “Jumper Settings” and Chapter 6 “Full Disassem- bly Procedure” for set up information. The pin assignments of COM2 are different than COM3 ~ COM6. -
Page 29: Figure 2.10:Com3 ~ Com6 Connector
Note: NC represents “No Connection” 2.3.4 COM7 Connector The ARK-3381 provides a D-sub 9-pin connector, which offers one RS- 232 serial port (COM7). It has Rx and Tx signals without handshaking. Refer to section 3.8 “Jumper Settings” and Chapter 6 “Full Disassembly Procedure”... -
Page 30: Ethernet Connector (Lan)
CTS (optional) RI (optional) 2.3.5 Ethernet Connector (LAN) The ARK-3381 has an Intel 82551ER Ethernet controller that is fully compliant with IEEE 802.3u 10/100Base-T CSMA/CD standards. The Ethernet controller is connected to a standard RJ-45 jack socket with LED indicators to show its Active/Link status (Green LED) and Speed status (white LED). -
Page 31: Reset Button
2.3.7 PS/2 Keyboard/Mouse Connector The ARK-3381 provides a 6-pin mini-DIN PS/2 keyboard/mouse con- nector on the rear face plate. The ARK-3381 comes with an adapter to convert the 6-pin mini-DIN connector to two 6-pin mini-DIN connectors for PS/2 keyboard and PS/2 mouse connections. -
Page 32: Figure 2.14:Vga Connector
Figure 2.14: VGA Connector Table 2.12: VGA connector pin assignment Signal name Green Blue H-SYNC V-SYNC ARK-3381 User Manual... -
Page 33: Usb Connector
2.3.9 USB Connector The ARK-3381 provides three connectors, one in the rear panel and two in the front panel, for complete Plug & Play and hot swapping of up to 127 devices. The USB interface is USB UHCI, Rev. 2.0 compliant and can be disabled in the system BIOS setup. - Page 34 ARK-3381 User Manual...
- Page 35 Hardware Installation and Upgrade Sections include: • Jumpers and Connectors • Installing the DDR SDRAM Mem- ory Module • Inserting a CompactFlash Card • Installing the 2.5" Hard Disk Drive (HDD) • Connecting Power...
-
Page 36: Chapter 3 Hardware Installation And Upgrade
3.2 Setting jumpers You can configure your ARK-3381 to match the needs of your applica- tion by setting jumpers. A jumper is the simplest kind of electrical switch. It consists of two metal pins and a small metal clip (often protected by a plastic cover) that slides over the pins to connect them. -
Page 37: Com2 Rs-232/422/485 Jumper Setting
3.3 COM2 RS-232/422/485 Jumper setting (J3/J4/J5 Located on internal motherboard) The COM2 port located on rear face plate of ARK-3381 unit which can be configured to operate in RS-232, RS-422 or RS-485 mode by setting up the Jumper Pins of J3/J4/J5 located on internal motherboard of ARK- 3381 unit. -
Page 38: Com4 Rs-232/422/485 Bios Setting
3.5 COM4 RS-232/422/485 BIOS setting The COM4 port connector located on the rear face plate of ARK-3381 unit can be configured to operate in RS-232, RS-422 or RS-485 mode by adjusting the “COM4 Mode” of “Integrated Peripherals” in the BIOS. -
Page 39: Com7 Rs-232 Jumper Setting
3.8 COM7 RS-232 Jumper Setting (JP15/JP16 Located on internal I/O board) The COM7 port connector located on rear face plate of ARK-3381 can be configured via JP15 and JP16. Refer to table 3.2 and table 3.3 for more details. The default setting is “DTR#5”. -
Page 40: Com3~Com6 Ring / Voltage Selection
5-6 closed* *Default jumper setting Table 3.7: COM6 Ring/Voltage Selection Serial port Function JP19 JP20 COM 6 11-9 closed open 12 V 11-13 closed open wake on ring* open* 7-8 closed* *Default jumper setting ARK-3381 User Manual... -
Page 41: Lcd Power Jumper Setting (J6)
3.10 LCD Power Jumper Setting (J6) The ARK-3381 series of embedded box computer provides a jumper (JP6) on the internal PCM-9380 or PCM-9386 motherboard for selecting 5 V or 3.3 V LCD signal power. When you connect your LVDS LCD panel display, you need to configure JP6 to select the correct LCD power setting. -
Page 42: Installing The Ddr Sdram Memory Module
64 MB to 1 GB of DDR SDRAM memory. Follow these steps to install an SODIMM into the ARK-3381: Remove the power cord. Unscrew the four screws from the bottom cover of the ARK-3381. Remove the bottom cover. Insert a DDR SDRAM SODIMM. - Page 43 Insert a CompactFlash card with your OS or application program into the CF carrier. Chapter 3...
-
Page 44: Installing The 2.5" Hard Disk Drive (Hdd)
Insert the CF Carrier in to the ARK-3381 and replace the 2 screws. Note: The CompactFlash socket is a secondary IDE Master. 3.13 Installing the 2.5" Hard Disk Drive (HDD) You can attach one Serial ATA (SATA) hard disk drive to the ARK-3381's internal controller. -
Page 45: Installation Of Din Rail Mounting
3.15 Installation of DIN Rail Mounting Follow these steps to mount the ARK-3381 on a DIN Rail. Remove the rubber feet from the ARK-3381. Find the DIN Rail Mounting Kit in the ARK-3381 accessory box. This kit has 2 pieces: an L DIN Rail Mounting Module (Left) and a R DIN Rail Mounting Module (Right). -
Page 46: Figure 3.6: Din Rail Mounting Module Orientation
Attach the L DIN Rail Mounting Module and the R DIN Rail Mounting Module to the ARK-3381. Figure 3.6: DIN Rail Mounting Module orientation Figure 3.7: L DIN Rail Mount- Figure 3.7: R DIN Rail Mount- ing Module ing Module... -
Page 47: Din Rail
Figure 3.8: A DIN Rail Hook the ARK-3381 on to the DIN Rail. L DIN Rail Mounting Module Hook DIN Rail ARK-3381 Figure 3.9: Hooking the L DIN Rail Mounting Module to a DIN Rail Chapter 3... -
Page 48: To A Din Rail
R DIN Rail Mounting Module Hook DIN Rail ARK-3381 Figure 3.10: Hooking the R DIN Rail Mounting Module to a DIN Rail ARK-3381 User Manual... -
Page 49: Hook Switch
Pull the L DIN Mounting Module and R DIN Mounting Module Hook Switches away from the DIN Rail. Push the L DIN Mounting Module and R DIN Mounting Module Hook Switches toward the DIN Rail to fix the ARK-3381 to the DIN Rail. ARK-3381 DIN Rail... - Page 50 ARK-3381 User Manual...
- Page 51 Award BIOS Setup...
-
Page 52: Chapter 4 Award Bios Setup
Then enter the "Setup" screen to modify the data. If the "CMOS checksum error..." mes- sage appears again and again, please check to see if the system battery needs to be replaced. ARK-3381 User Manual... -
Page 53: Entering Setup
4.2 Entering Setup Turn on the computer and check for the .patch code. If there is a number assigned to the patch code, it means that the BIOS supports your CPU. If there is no number assigned to the patch code, please contact an Advan- tech application engineer to obtain an up-to-date patch code file. -
Page 54: Main Menu
• Set Password Establish, change, or disable password. • Save & Exit Setup Save CMOS value settings to CMOS and exit BIOS setup. • Exit Without Saving Abandon all CMOS value changes and exit BIOS setup. ARK-3381 User Manual... -
Page 55: Standard Cmos Features
4.2.2 Standard CMOS Features • Date The date format is <weekday>, <month>, <day>, <year>. Weekday From Sun to Sat, determined and displayed by BIOS only Month From Jan to Dec From 1 to 31 Year From 1999 through 2098 • Time The time format is <hour>... -
Page 56: Advanced Bios Features
Use this to add yet another device to the bootup queue. If First, Second, and Third Boot Devices are not present or fail, the system will boot from the next available device. • Boot Up NumLock Status [On] ARK-3381 User Manual... - Page 57 When ON, system boots to keypad NumLock activated. • Gate A20 Option [On] Options are On (default), and Off. On means that the chipset controls GateA20, and gives fast GateA20 speed. Off means that the keyboard controller controls GateA20. This gives normal GateA20 speed.
-
Page 58: Advanced Chipset Features
PCI specification version 2.1. • Delay Prior to Thermal [16Min] This field activates the CPU thermal monitoring function after the sys- tem is given time to boot for a set number of minutes. Options are 16Min and 64 Min. ARK-3381 User Manual... - Page 59 • AGP Aperture Size [64] The field sets aperture size of the graphics. The aperture is a portion of the PCI memory address range dedicated for graphics memory address space. Host cycles that hit the aperture range are forwarded to the AGP without any translation.
-
Page 60: Integrated Peripherals
Enabled, Disabled. • Super IO Device [Press Enter] This item enables users to set the Super IO device status, including enable Floppy, COM, LPT, IR and control GPIO and Power fail status. - Onboard Serial Port 1 [3F8/IRQ4] ARK-3381 User Manual... - Page 61 This item allows the user to select I/O port address. Range is from 2E8 to 3F8. - Onboard Serial Port 2 [2F8/IRQ3] This item allows the user to select I/O port address. Range is from 2E8 to 3F8. - Onboard Parallel Port [378/IRQ7] This field sets the address of the on-board parallel port connector.
-
Page 62: Power Management Setup
Minimum power management. Suspend Mode=1 hr. Max Saving Maximum power management. Suspend Mode=1 min. User Define Allows the user to set each mode individually. Sus- pend Mode= Disabled or 1 min ~1 hr. • Video Off Method [DPMS] ARK-3381 User Manual... - Page 63 This item allows the user to determine the manner in which the monitor is blanked. V/H SYNC+BlankThis option will cause system to turn off vertical and horizontal synchronization ports and write blanks to the video buffer. Blank Screen This option only writes blanks to the video buffer. DPMS Initial display power management signaling.
-
Page 64: Pnp/Pci Configurations
This item allows the user to assign interrupt types to IRQ-3, 4, 5, 7, 9, 10, 11, 12, 14, and 15, respectively. • PCI / VGA Palette Snoop [Disabled] The item is designed to solve problems caused by some non-standard VGA cards. A built-in VGA system does not need this function. ARK-3381 User Manual... -
Page 65: Frequency/Voltage Control
4.2.8 Frequency/Voltage Control Note: This “Frequency/Voltage Control” option controls the CPU Host and PCI frequency, this page is CPU and Chipset dependent; some items will show up when a processor which supports those items is installed. • Auto Detect PCI Clk [Enabled] This item enables or disables automatic PCI clock detection. -
Page 66: Set Password
Select Set Password again, and at the “Enter Password” prompt, enter the new password and press <Enter>. At the “Confirm Password” prompt, retype the new password, and press <Enter>. Select Save to CMOS and EXIT, type <Y>, then <Enter>. ARK-3381 User Manual... -
Page 67: Save & Exit Setup
To Disable Password Choose the Set Password option from the CMOS Setup Utility main menu and press <Enter>. When you see “Enter Password”, enter the existing password and press <Enter>. You will see “Confirm Password”. Type it again, and press <Enter>. - Page 68 ARK-3381 User Manual...
- Page 69 PCI SVGA/LCD Setup This chapter details the software con- figuration information. It shows you how to configure the card to match your application requirements. The AWARD System BIOS is covered in Chapter 4. Sections include: • Installation of SVGA drivers - for Windows 98/ME - for Windows 2000/XP...
-
Page 70: Chapter 5 Pci Svga/Lcd Setup
Figure 5.1: Advanced Chipset features screen 5.1.2 Display type The ARK-3381 can be set in one of five configurations: on a CRT, on an LVDS based flat panel display, on a DVI based digital flat panel display, on a TV display, or on both dual independent displays. The system is ini- tially set to “Auto”. -
Page 71: Dual Independent Display
5.1.3 Dual Independent Display The ARK-3381 uses an Intel 855GME or Intel 852GM controller that is capable of providing multiple views and simultaneous displays with mixed video and graphics on a flat panel and CRT. To set up dual display under Windows 98, Windows NT/2000/XP follow these steps: Select “Start”, “Control panel”, “Setting”, “Advanced”, “Graphics... -
Page 72: Figure 5.3: Extended Desktop Settings
Select “1” for current display, or “2” for second display. Figure 5.3: Extended Desktop Settings Enable "Extend my Windows desktop onto this monitor". Click “OK”. ARK-3381 User Manual... -
Page 73: Installation Of The Svga Driver
5.2 Installation of the SVGA Driver Follow the steps for your operating system to install the SVGA driver. 5.2.1 Installation of Windows 98/Me You can find the Win98/Me VGA driver on the ARK-3381 CD, in the fol- lowing directory: VGA\Win9x_ME\Graphics\Setup. Figure 5.4: Directory "Graphics"... -
Page 74: Installation Of Windows 2000/Xp
5.2.2 Installation of Windows 2000/XP You can find the Win2000/XP VGA driver on the ARK-3381 CD-ROM, in the following directory: \VGA\win2k_xp1332. Figure 5.5: CD Directory “VGA” ARK-3381 User Manual... -
Page 75: Figure 5.6: Driver Software Install Wizard
Double click “setup” and then “next” in the setup wizard. Figure 5.6: Driver Software Install Wizard Figure 5.7: Graphics Driver Setup Chapter 5... -
Page 76: Figure 5.8: Installshield® Wizard Complete
Restart the computer when installation has finished. Figure 5.8: InstallShield® Wizard Complete ARK-3381 User Manual... - Page 77 Full Disassembly Pro- cedure This chapter details the system disas- sembling procedure for setting up the jumpers and for maintenance.
-
Page 78: Chapter 6 Full Disassembly Procedure
If you want to completely disassemble the Embedded Box Computer, fol- low the step-by-step procedures below. Users should be aware that Advantech Co., Ltd. takes no responsibility whatsoever for any problems or damage caused by the user disassembly of the embedded box com- puter. - Page 79 Remove the front frame bracket by carefully pulling and lifting the bracket. Unscrew the 2 screws on the Front Metal Face plate and unscrew the 4 hexagonal bolts on the Printer1 and Printer2 connectors. Chapter 6...
- Page 80 Warning: Do not use too much pressure when removing the front metal face plate as the power button cable is still attached and could be dam- aged. Unscrew the 4 screws of the frame bracket on the rear side of the sys- tem. ARK-3381 User Manual...
- Page 81 Remove the rear frame bracket by carefully pulling and lifting the bracket. Unscrew the 2 screws on the rear metal face plate. Chapter 6...
- Page 82 Unscrew the 2 hexagonal bolts that fix the “COM2 port” on the Rear Metal Face Plate. Warning: Do not use too much pressure when removing the front metal face plate as the COM2 connector cable is still attached and could be damaged ARK-3381 User Manual...
- Page 83 Unscrew the 6 screws which fix the AMO-3731 Module I/O board to the system board. Chapter 6...
- Page 84 Remove AMO-3731 Module I/O board from MIO Socket of the system board. ARK-3381 User Manual...
- Page 85 COM2 setting power setting JP15 JP16 JP19 JP20 Chapter 6...
- Page 86 ARK-3381 User Manual...
Need help?
Do you have a question about the ARK-3381 and is the answer not in the manual?
Questions and answers