
Related Manuals for Excalibur RS-255-EDP+


Summary of Contents for Excalibur RS-255-EDP+
- Page 1 rS-255-eDP+ Deluxe 2-Way Keyless entry & remote Start august 1, 2013 Operation Guide Temporary cover. Color cover is in a separate fi le.
-
Page 2: Table Of Contents
Table Of Contents Introduction ....................2 The Controller & Transmitter ..............3 Controller & Transmitter Functions ............3 Controller Options..................4 Selecting Mute & Audible Modes ............4 Other Remote Start Features ..............4 Low Battery/Low Temp Automatic Starting ........4 Turbo Timer Feature ................4 Pit-Stop Feature ................5 The Status Light ..................5 Using The Valet Switch ................5 Transmitter Protection & Technology .............6 Programming Transmitters ..............6 Programming Features ................6 User Programmable Features ...............7 Installer Programmable Features ............8 Programmable Features Matrix ............11 Introduction Please note that this manual is written to reflect the full capability of this system though some features may not be available to you because of vehicle limitations and/or chosen options at the time of installation. It is also written to reflect the operations in their default configurations. -
Page 3: The Controller & Transmitter
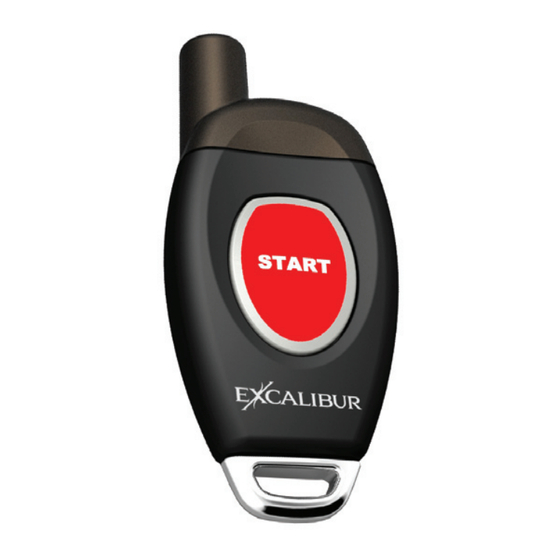
The Controller & Transmitter 2-way controller part number: 115-03 Controller battery replacement: 1-way transmitter part number: 113-03 Remove the small screws from the lower Call your dealer or visit back case, and separate the transmitter halves. Replace the battery(s) and reas- www.caralarm.com to order replacement transmitters. semble the transmitter case. “start”/ ”unlock” button 115-03 113-03 Battery type: Battery type: CR2032 (Qty: 1) CR2016 (Qty: 2) Controller &... -
Page 4: Controller Options
Controller & Transmitter Functions (cont’d) uNLOCK: Press and hold the button for 3 seconds. • THE DOORS WILL UNLOCK, THE PARKING LIGHTS WILL FLASH TWICE THEN ILLUMINATE FOR 30 SECONDS. • THE 2-WAY CONTROLLER WILL BEEP TWICE AND THE BUTTON WILL FLASH GREEN TWICE. Controller Options SeLeCTING MuTe & auDIBLe MODeS To select between audible (default mode) and mute modes, open the controller case, remove the battery and do one of the following: • AUDIBLE MODE: Insert the battery without pressing the controller button • MUTE MODE: Insert the battery while pressing the controller button. The green light above the button will fl ash once, indicating that the controller is in mute mode. You will only receive visual confi rmations (fl ashing green light) for system functions. Other remote Start Features LOW BaTTerY/LOW TeMP auTOMaTIC STarTING This feature will automatically start the engine if the vehicle battery drops below 11 volts or the interior temperature drop to 15 (or 32) degrees fahrenheit. You must activate these features each time you park your car to use them. They can be acti-... -
Page 5: Pit-Stop Feature
Other remote Start Features (cont’d) PIT-STOP FeaTure This feature allows you to leave your engine running for making quick errands. To use this feature, have the engine running normally from the ignition switch and your foot off the brake pedal. Press the Valet Switch twice; the parking lights will flash. Turn the key off and the engine will remain running for the programmed run time. The Status Light The Status Light helps to visually confirms the status of the system and provides a high level of visual deterrence. The Status Light is located in the window mount receiver unit. Normal System Status 1) Off = The remote starter system is off, in standby mode. 2) On Constant = The system is in the Valet Mode, with remote start disabled. Starting System Status The Status Light also indicates the remote start status: 3) Flashing Slow (once per second): Remote start is on. 4) Flashing Fast (after activating remote start): The system is in the process of start- ing the engine. remote Starting Diagnostics Whenever the system is placed into Valet Mode, the Status Light illuminates solid. However, when this first occurs, the Status Light will flash 1 to 6 flashes be- fore resuming solid illumination. This indicates why the engine stopped running from the last previous remote starting attempt. 5) 1 Flash = Programmed run time expired. 6) 2 Flashes = Brake was pressed or hood opened. 7) 3 Flashes = Engine stalled or bad tach signal. 8) 4 Flashes = Received transmitter command to stop. -
Page 6: Transmitter Protection & Technology
Transmitter Protection & Technology Code Jumping Technology Code jumping technology uses a complex algorithm to change the transmitter’s codes every time a button is pressed to prevent a thief from copying the signal. Only the system in your car has the key to decipher this code and it is not replicable. Automatic Transmitter Verification There the potential threat of someone, who has temporary access to your vehicle (mechanic, valet), programming their own transmitter to your system. For example, someone could do so and gather your personal info from any paper work in your ve- hicle. Then, they could visit your home and help themselves to the contents of your vehicle without any signs of intrusion. ATV shows you how many transmitters are programmed to your system by flashing the status light every time you turn on the ignition key for a 10 second period. Easily identify if transmitters have been added to your system. Programming Transmitters Standard Programming: Before starting, be sure the system is in an “unlocked” state by using a working transmitter or performing a manual override. Step 1 Have all transmitters which are to operate the system at hand. Then, turn the ignition “on”. Step 2 Within 5 seconds of turning on the ignition, press the Valet Switch 5 times. The status light and parking lights will illuminate, confirming that for the next 10 seconds the system is ready to learn a transmitter/controller code. To enter a code, simply press and release the transmitter button. When the first code is learned all existing stored codes will be erased. Step 3 Press the button on each remaining transmitter one at a time. The sys- tem will turn the lights off then back on to confirm that each was learned. If a code is not received within a 10 second period, the learning process will automatically... -
Page 7: User Programmable Features
user Programmable Features This group of User Programmable Features are all accessed as a group in the first level of features’ programming. These features have a direct affect upon the sys- tem’s operations, so the programming and operation of each are described. Feature #1 remote Start run Time 10 Minutes (press the brake pedal 1 time to program) - DeFauLT 5 Minutes (press the brake pedal 2 times to program) 15 Minutes (press the brake pedal 3 times to program) 20 Minutes (press the brake pedal 4 times to program) This feature sets the period of time that the engine will run after being remotely started. If the engine is not stopped by controller/transmitter command or a safety circuit violation, the engine will automatically stop upon the expiration of the selected time period. Caution: The remote engine starting feature should NeVer be used when the vehicle is parked in an enclosed structure or garage. Feature #2 Steady/Flashing Lights During remote Start Steady (press the brake pedal 1 time to program) - DeFauLT Flashing (press the brake pedal 2 times to program) -
Page 8: Installer Programmable Features
Installer Programmable Features This group of Installer Programmable Features are all accessed as a group in the second level of features’ programming. These features have a direct affect upon the system’s operations related to the installation and vehicle type aND SHOuLD ONLY Be CHaNGeD BY THe INSTaLLer!!! Feature #1 remote Start activation 1 button presses (press the brake pedal 1 time to program) 2 button presses (press the brake pedal 2 times to program) - DeFauLT 3 button presses (press the brake pedal 3 times to program) 4 button presses (press the brake pedal 4 times to program) This feature allows you to choose the number of button presses AND pulses required on the White/Blue activation wire to activate the remote start feature. All of the settings must occur within a 5 second window of the previous button press. Feature #2 PINK/WHITe (IGN #2) wire operation Ignition (press the brake pedal 1 time to program) - DeFauLT accessory... - Page 9 Installer Programmable Features (cont’d) Feature #4 Gasoline Or Diesel engine Gasoline (press the brake pedal 1 time to program) - DeFauLT Diesel 15 Sec. Delay (press the brake pedal 2 times to program) Diesel 20 Sec. Delay (press the brake pedal 3 times to program) Diesel 30 Sec. Delay (press the brake pedal 4 times to program) This feature changes the system’s timing of the ignition and starter output sequence for gas or diesel engines. Gasoline: the starter output will occur 3 seconds after the ignitions turn on. When in “Tachless” mode, the engine running status is determined 10 seconds after starting. Diesel: the starter output will occur 15, 20, or 30 seconds after the ignitions turn on (allows for glow plug warming). When in “Tachless” mode, the engine running status will be determined 40 seconds after cranking. Feature #5 Satellite relay Port Green Wire Function Starter (press the brake pedal 1 time to program) - DeFauLT Pulse after engine Start...
- Page 10 Installer Programmable Features (cont’d) Feature #8 Low Temp Crank extender 0ms (Off) (press the brake pedal 1 time to program) 200ms (press the brake pedal 2 times to program) - DeFauLT 300ms (press the brake pedal 3 times to program) 400ms (press the brake pedal 4 times to program) When the vehicle’s interior temperature is below freezing, this feature adds extra crank time to the base timing (see installer feature #7). It applies to “Tachless” & “Crank Only” modes only (installer feature #3) Feature #9 Lock/unlock Outputs 0.8 Second Output (press the brake pedal 1 time to program) - DeFauLT 3 Second Output (press the brake pedal 2 times to program) Double 0.8 Sec unlock (press the brake pedal 3 times to program) This single feature gives the installer several needed options, to match the system’s doorlocking outputs to suit different vehicle requirements.
-
Page 11: Programmable Features Matrix
Programmable Features Matrix User Feature Programming: Ignition on, off, press valet 5 times # Feature Lock Button Unlock button Trunk button ”START” button 1 Engine Run Time 2 RS Light Confirmation Steady Flashing 3 Horn Honk Volume 4 N/A 5 Lock w/ IGN on 6 Unlock w/ IGN Off 7 Unlock w/ Trunk release Installer Feature Programming: Ignition on, off, press valet 10 times... - Page 12 Back Cover Color cover is in a separate file.
Need help?
Do you have a question about the RS-255-EDP+ and is the answer not in the manual?
Questions and answers