Eiki LC-XNS2600 Owner's Manual
Multimedia projector
Hide thumbs
Also See for LC-XNS2600:
- Specifications (2 pages) ,
- Service manual (71 pages) ,
- Quick start manual (45 pages)
Table of Contents
Advertisement
Quick Links
Advertisement
Table of Contents

Related Manuals for Eiki LC-XNS2600


Summary of Contents for Eiki LC-XNS2600
- Page 1 Owner's Manual Multimedia Projector Model LC-XNS2600 LC-XNS3100 LC-WNS3200...
-
Page 2: Features And Design
Features and Design This Multimedia Projector is designed with the most advanced technology for portability, durability, and ease of use. This projector utilizes built-in multimedia features, a palette of 16.77 million colors, and matrix liquid crystal display (LCD) technology. Compact Design Security Function This projector is designed compact in size The Security function helps you to ensure... -
Page 3: Table Of Contents
Contents Features and Design System Contents Color adjust Safety Instructions Image Mode Safety Guide Color adjust(Computer) Air circulation Color adjust Moving the projector (Vdieo,S-video,Component) Installing the projector properly Setting Compliance On start Accessories Standby mode Part names and functions High land Front Lamp control Back... -
Page 4: Safety Instructions
Safety Instructions Please read this manual completely before installing Safety precautions and operating the projector. The projector provides many convenient features Caution: • The projector must be grounded. and functions. Proper operation may enable you to • Do not expose the projector to fully utilize the features and keep it in good condition. -
Page 5: Safety Guide
Safety Guide All the safety and operating instructions should be Do not install the projector near the ventilation duct of air-conditioning equipment. read before the product is operated. This projector should be operated only from the type Read all of the instructions given here and retain of power source indicated on the marking label. -
Page 6: Air Circulation
Safety Guide Air circulation Installing the projector properly Vents in the cabinet are provided for ventilation. Please set the projector on nearly-level. To ensure reliable operation of the product and to Be sure to install the projector properly. Improper protect it from overheating, these openings must installation may reduce the lamp lifetime and even not be blocked or covered. -
Page 7: Compliance
Do not make any changes or modifications to the equipment unless otherwise specified in the instructions. If such changes or modifications should be made, you could be required to stop operation of the equipment. Model Number : LC-XNS2600, LC-XNS3100, LC-WNS3200 Trade Name : EIKI Responsible party : EIKI International,Inc. -
Page 8: Accessories
Accessories Remote control with batteries User's Manual(CD) AC Power cord (AAA or LR03) VGA cable Quick start guide... -
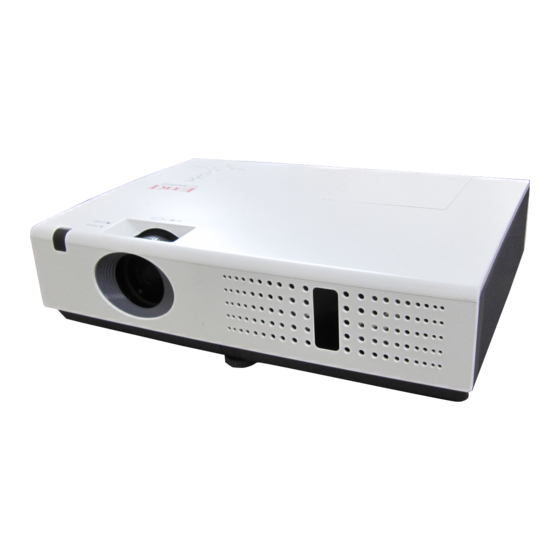
Page 9: Part Names And Functions
Part names and functions Front ① Top control and Indicators ① ② Zoom ring ② ③ ③ Lamp cover ④ Filter ⑤ Remote control receiver ⑥ Projector lens ⑦ Air intake vent ⑤ ④ ⑥ ⑦ Back ⑧ Focus ring ⑨... -
Page 10: Terminals
Part names and functions Terminals ④ ② ③ ⑤ ⑥ ⑦ ① ⑧ ⑨ ⑩ ① AUDIO OUT ⑥ VGA IN 2/VGA OUT - Connect external audio amplifier to this - Connect a computer output to this jack. terminal. - Output audio signal from ②,⑦or⑧. - Output the analog signal from ⑥... -
Page 11: Top Control And Indicators
Part names and functions Top Control and Indicators ① ② ③ ④ ⑤ ⑥ ① POWER indicator ④ OK/INPUT button - Lights red when the projector is in stand- - Press INPUT button to select input source by mode. while no screen menu is displayed. - Lights green during operations. -
Page 12: Remote Control
Part names and functions Remote control ① POWER Turn on or turn off the projector.(Page 21) ③ ② ① ② VGA Select VGA as input source.(Page 28) ③ INPUT Enter input source menu to select input source directly. (Page 28) ⑤... - Page 13 Part names and functions ⑫ D.ZOOM+ Select the digital zoom + mode.(Page 27) ⑬ TIMER Enable the timer function.(Page 27) ⑭ VOUME + Increase the volume level.(Page 24) ⑮ AUTO Enter auto setup mode.(Page 25) ⑯ VOUME - Decrease the volume level.(Page 25) ⑰...
-
Page 14: Install Remote Control Batteries
Part names and functions Install remote control batteries ② Install new batteries ① Open the battery ③ Replace the into the compartment. compartment lid. compartment lid. Two AAA batteries For correct polarity (+ and –), be sure battery terminals are in contact with pins in the compartment. -
Page 15: Installation
Installation Positioning the projector Note: ● The brightness in a room has a great influence on picture quality. It is recommended to limit the ambient lighting in order to get the best image. ● All measurements are approximate and may vary from the actual sizes. (Diagonal:Inch) 10.83m 9.02m... -
Page 16: Connecting To Computer(Digital And Analog Rgb)
Installation Connecting to computer(Digital and analog RGB) Cables used for connection: ● VGA cable ● Serial control cable* ● HDMI cable* (*=Cables are not supplied with the projector) Serial output Monitor output Monitor input HDMI output Serial HDMI control cable cable cable cable... -
Page 17: Connecting To Video Equipment (Video, S-Video)
Installation Connecting to video equipment (Video, S-Video) Cables used for connection: ● Video cable* ● S-Video cable* ● RCA cable* ● Audio cable* (*=Cables are not supplied with the projector) Component Audio S-video Audio Video Audio output output ouput output ouput output Audio... -
Page 18: Connecting To Audio Equipment
Installation Connecting to audio equipment Cables used for connection: ● Audio cable* (*=Cables are not supplied with the projector) External audio equipment Audio output Audio input (R) (L) Note: The left and right Audio cable Audio cable Audio channels are combined when (stereo) (stereo) cable... -
Page 19: Connecting The Ac Power Cord
Installation Connecting the AC power cord This projector uses nominal input voltages of 100–240V AC and it automatically applies to different input voltages. It is designed to work with a single-phase power system having a grounded neutral conductor. To reduce the risk of electrical shock, do not plug into any other type of power system. -
Page 20: Basic Operation
Basic operation Turn on the projector . Complete peripheral connections (with a computer, VCR, etc.) before turning on the projector. 2. Connect the projector’s AC power cord into AC outlet. The POWER indicator turns red. 3. Press the POWER button on top control or on the remote control. -
Page 21: Turn Off The Projector
Basic operation Turn off the projector 1. Press the POWER button on top control or on the remote control, and “Power off?” appears on the screen. Power off ? 2. Then, press the POWER button again in 4 seconds. The POWER indicator starts to flash red, and the cooling fans keep running (You can select the level of fans’... -
Page 22: How To Operate The Screen Menu
Basic operation How to operate the screen menu Top control The projector can be adjusted or set via the OK/INPUT on-screen menu, each main menu can be divided into several levels of submenus, and submenus are also divided into several levels of sub-submenus. -
Page 23: Menu Bar
Basic operation Menu bar Main menu Sub menu Auto PC adj. ① PC adjust Fine sync Total dots 1056 ② Display Horizontal ③ Vertical Color adjust Display area H ④ Setting Display area V Reset ⑤ Expand Mode free Store ⑥... -
Page 24: Adjust Zoom And Foucus
Basic operation Adjust zoom and foucus Zoom ring Focus ring Rotate the zoom ring to zoom in or zoom out the (back) (front) image. Rotate the focus ring to adjust the focus of the image. Auto setup function Remote control This function is available just by pressing the AUTO button on the remote control. -
Page 25: Volume
Basic operation Remote control Volume Direct operation VOLUME +/- VOLUME +/- Press the VOLUME +/- button on the remote control to adjust the volume. MUTE MUTE Press the MUTE button on the remote control and select On to turn off the audio temporarily. To restore the audio to its previous level, press the MUTE button again and select Off or press the VOLUME+/–... -
Page 26: Remote Control Operation
Basic operation Remote control operation Using the remote control for some frequently used operations is advisable. Just pressing one of the buttons enables you to make the desired operation quickly without calling up the screen menu. Remote control INPUT Press INPUT button on the remote control to INPUT select the input source. - Page 27 Basic operation BLANK Blank Image Blank Press BLANK button to black out the image. To restore to normal, press the BLANK button again or press any other button. The screen changes each time you press the button as follows: “Blank” disappears after 4 seconds if there is no other button operation.
-
Page 28: Input Select
Input select Direct Operation Remote control Press HDMI, VGA, COMOPNENT, S-VIDEO or INPUT VIDEO button on the remote control to select HDMI, VGA IN, Component, S-video or Video as input source. Top control HDMI S-VIDEO COMPONENT VIDEO INPUT Menu operation 1 Press MENU button on the remote control or top control to display the input select menu. -
Page 29: Pc Adjust
PC Adjust Auto PC adj. Auto PC Adjustment function is provided to automatically adjust Fine sync, Total dots, Horizontal and Vertical to conform to your computer. Menu operation PC adjust Menu Auto PC adj. Auto PC adj. PC adjust Fine sync 1 Press MENU button on the remote control to Total dots 1056... -
Page 30: Manual Pc Adj
PC Adjust Manual PC adj. Some computers employ special signal formats which may not be tuned by Multi-scan system of this projector. Manual PC Adjustment is provided for you to precisely adjust several parameters to match those signal formats. The projector has five independent memory areas to store those parameters manually adjusted, which allows you to recall the setting for a specific computer. -
Page 31: Display
Display Following items can be set in Display menu: Screen Size, Keystone, Project Mode, Menu Position, Background Display and System. Screen Size Display menu The screen size can be reset to the value as you desire. Screen Size Normal PC adjust 1 Press MENU button on the remote control to Keystone Stored... -
Page 32: Keystone
Display Keystone This function is used to store or reset the Keystone menu keystone correction when the AC power cord is unplugged. Screen Size Normal PC adjust Reset Keystone Stored 1 Press MENU button on the remote control to Stored Project Mode ... -
Page 33: Menu Position
Display Menu Position You can use this function to change the Menu position position of screen menu. 1 Press MENU button on the remote control to Screen Size Normal PC adjust display screen menu. Press button to Keystone Stored Upper left Project Mode Front... -
Page 34: System
Display System Computer system select The projector automatically tunes to various types of computers with its function of Multi-scan system and Auto PC Adjustment. If a computer is selected as a signal source, the projector automatically detects the signal format and tunes to project proper images without any additional setting. - Page 35 Display Video or S-video System for Video or S-video signal Auto System Video PC adjust Auto The projector automatically detects an incoming video system, and adjusts itself to Display SECAM optimize its performance. When Video System NTSC Color adjust is PAL-M or PAL-N, select the system manually.
-
Page 36: Color Adjust
Color adjust Color adjust menu is used to set the image mode and adjust the image. Image Mode Menu operation 1 Press MENU button on the remote control to Image mode (Computer) display screen menu. Press button to select Color adjust, then press OK button. Image Mode Normal ... -
Page 37: Color Adjust(Computer)
Color adjust Color adjust (Computer) 1 Press MENU button on the remote control to Color adjust(Computer) display screen menu. Press button to select Color adjust, then press OK button. Image Mode Normal 2 Press button to select the item you want PC adjust Contrast to set, press OK button. -
Page 38: Color Adjust
Color adjust Color adjust (Vdieo,S-video,Component) Color adjust(Video,S-video, Component) 1 Press MENU button on the remote control to display screen menu. Press button to select Color adjust, press OK button. Image Mode Normal PC adjust 2 Press button to select the item you want Contrast Brightness to set, press OK button. -
Page 39: Setting
Setting The projector has Setting menu that allows you to set the other various functions described as follows. 1 Press MENU button on the remote control to Setting menu display screen menu. Press button to select Setting, then press OK button. On start PC adjust 2 Press... -
Page 40: High Land
Setting High land Enable to control the fan through the Setting High land menu. You can select the running speed of the fan On start PC adjust according to the altitude of the location where Standby mode Normal High land the projector is installed. -
Page 41: Closed Caption
Setting Closed Caption Allows the subtitle to be displayed for the Closed Caption audio contents or other information. If the input source contains closed caption, you can enable this function and change the channel. Press On start PC adjust Standby mode Normal ... -
Page 42: Iris
Setting Iris This function is used to increase the contrast Iris of the image. On..Enable Iris function, increase the On start contrast of the image. PC adjust Standby mode Normal Off..Disable Iris function. High land Display Lamp control Cooling fast Normal Color adjust Closed caption... -
Page 43: Expand
Expand The projector has Expand menu that allows you to set the other various expand functions described as follows. 1 Press MENU button on the remote control to Expand menu display screen menu. Press button to select Expand, then press OK button. Language 2 Press ... -
Page 44: Logo
Expand Logo This function allows you to customize the screen logo with Logo select, Capture, Logo PIN code lock and Logo PIN code change functions. Logo Select Logo This function decides on the starting-up display from among following options. Default ..Show the factory-set logo. Logo PC adjust Logo Select... -
Page 45: Security
Expand Security This function allows you to use the PIN code Security lock and PIN code change functions to set the security for the projector operation. Security PC adjust PIN code lock PIN code lock PIN code change Display This function prevents the projector from Color adjust being operated by unauthorized persons and provides the following setting options for... -
Page 46: Power Management
Expand Power management For reducing power consumption as well as maintaining the lamp life, the Power management function turns off the projection lamp when the projector is not operated for a certain period. Select one of the following options: Ready ....When the lamp has been fully cooled down, the POWER indicator changes to green blinking. -
Page 47: Test Pattern
Expand Test Pattern Test Pattern This function is used to set the internal test Test Pattern PC adjust signal:Gray scale 1,Gray scale 2,Gray scale Gray scale 1 3,Gray scale 4, Color bar, Red, Green, Blue, Display Gray scale 2 Cross hatch,White,Black and Gray. -
Page 48: Factory Default
Expand (3) When DHCP is set On, IP address, Network setting Subnet, Gateway and DNS will be DHCP obtained automatically, press OK at IP address "Set" to confirm the parameters. Subnet Gateway When DHCP is set Off, press OK button to enter IP address, then press OK Cancel button to enter Subnet, Gateway and... -
Page 49: Infomation
Infomation The information menu is used to detect signal of projected image and running state. Menu operation Press MENU button on the remote control to Info. menu display the screen menu. Press to select Info., then press OK button, the information Input VGA IN 1 menu will appear as the right picture. -
Page 50: Network Control
Network Control You can set and control the projector through network. Connecting to the LAN Computer Projector Connect the LAN cable to the LAN terminal of the projector. LAN cable LAN cable Router Computer operation 1.Turn on the computer. Network setting 2. - Page 51 Network Control Webpage operation 1. Input IP address in address bar. Refer to page 50 for obtaining IP address. 2. Input ID and password, click OK to display the webpage. Default ID: admin Default password: admin 3. Set the items for projector in webpage. Projector/Standby This page displays the current power supply state of the projector.
- Page 52 Network Control Projector/Display This page displays Screen size, Menu position and Background. Projector/ColorAdj You can select Image Mode, adjust value of Contrast/Brightness/Red/Green/Blue/Sharpness in this page. Projector/Input You can select input source in this page. VGA IN 1 VGA IN 2...
- Page 53 Network Control Projector/Setting You can set Input Search/Auto PC adj/On start/Lamp control/Blank/Freeze in this page.
-
Page 54: Maintenance And Cleaning
Maintenance and cleaning POWER indicator The POWER indicator shows the state of the function which protects the projector. Check the state of the POWER indicator to take proper maintenance. The projector is shut down and the POWER POWER indicator indicator is flashing orange. POWER indicator When the temperature inside the projector flashes orange. -
Page 55: Cleaning The Filter
Maintenance and cleaning Cleaning the filter The air filter prevents dust from accumulating on the surface of the optical elements inside the projector. Should the air filter become clogged with dust particles, it will reduce cooling fans’ effectiveness and may result in a buildup of internal heat and adversely affects the life of the projector. -
Page 56: Clean The Project Lens
Maintenance and cleaning Clean the project lens Unplug the AC power cord before cleaning. Gently wipe the projection lens with a cleaning cloth that contains non-abrasive camera lens cleaner, or use a lens cleaning paper or commercially available air blower to clean the lens. -
Page 57: Replace The Lamp
Maintenance and cleaning Replace the lamp When the projection lamp of the projector Lamp replacement icon reaches its end of life,the Lamp replacement Lamp replace icon appears on the screen, please replace the lamp immediately. For the sake of safety, only use the lamp of As temperature inside the projector is high, you should cool the projector for at least 45 the same model. - Page 58 Maintenance and cleaning LAMP HANDLING PRECAUTIONS This projector uses a high-pressure lamp which must be handled carefully and properly. Improper handling may result in accidents, injury, or create a fire hazard. ● Lamp life may differ from lamp to lamp and according to the environment of use. There is no guarantee of the same life for each lamp.
-
Page 59: Appendix
Appendix Troubleshooting Before calling your dealer or service center for assistance, check the items below once again. - Make sure you have properly connected the projector to peripheral equipment. - Make sure all equipment is connected to the AC outlet and the power is turned on. - If the projector does not project an image when it is connected to a PC, restart the PC. - Page 60 Appendix No Sound - Check the audio cable connection from audio input source. - Adjust the audio source.(Page 25) - Press the VOLUME + button.(Page 25) - Press the Mute button. - When the AUDIO OUT is plugged in, the projector’s built-in speaker is not available.
-
Page 61: Indicator And Projector State
Appendix Indicator and projector state Check the indicator to know about the state of projector. Indicator State of projector POWER WARNING (Green/Red) (Red) The projector is off. (AC power cord not connected). The projector is operating normally. - In standby mode. Press POWER to power on the projector. - When the projector is cool enough, the temperature is restored to the normal value, you can turn on the projector. -
Page 62: Compatible Computer Specifications
Appendix Compatible computer specifications This projector can receive the signals below: Scanning frequency Signal Dot Frequceny horizontal Field Signal format Resolution (Mhz) frequency Frequceny Component HDMI Video/S-Video (Khz) (Hz) NTSC/NTSC443/PAL-M (720x487) 15.734 59.940 PAL/PAL-N/SECAM (720x576) 15.625 50.000 720x480i 15.734 59.940 13.500 525i (480i) 720(1440)x480i... -
Page 63: Technical Specifications
Appendix Technical Specifications Model LC-XNS2600 LC-XNS3100 LC-WNS3200 Parameter Adjustbale foot 10˚ LCD system 0.63" TFT , active matrix, 3-panel 0.59" TFT , active matrix, 3-panel Resolution XGA (1024x768) WXGA (1280x800) Contrast 2400:1 F=2.1-2.25, f=19.109-22.936, F=1.58-1.75,f=18.85-22.63, Lens 1.2 optical zooming,1/4-16 digital zooming 1.2 optical zooming,1/4-16 digital zooming... -
Page 64: Configurations Of Terminals
Appendix Configurations of terminals COMPUTER IN 1/SCART, COMPUTER IN 2/MONITIOR OUT Terminal: Analog RGB (D-sub 15 pin) Red (Input/output) ----- Green (Input/output) Grounding (field synchronizing) Blue (Input/output) Grounding ----- DDC data Horizontal synchronizing Grounding (line synchronizing) (compound sync.) input/output Vertical synchronizing input/ Grounding (red) output Grounding (green) -
Page 65: Dimensions
Appendix Dimensions Unit: mm Screw Holes for Ceiling Mount Screw: M4 Depth: 10.0... -
Page 66: Pin Code Memorandum
Appendix PIN code memorandum Write down the PIN code in the blank below and keep it, please contact the repair center. Factory default PIN code 111* PIN code lock Factory default PIN code 111* Locking startup-animation PIN code *If this 3-digit number is changed, the factory default number will be ineffective. - Page 68 U.S.A. Canada EIKI International, Inc. EIKI CANADA - Eiki International, Inc. 30251 Esperanza P.O. Box 156, 310 First St. - Unit 2, Rancho Santa Margarita Midland, ON, L4R 4K8, Canada CA 92688-2132 Tel: 800-563-3454 (705)-527-4084 U.S.A. Fax: 800-567-4069 (705)-527-4087 Tel: 800-242-3454 (949)-457-0200 E-Mail: canada@eiki.com...
Need help?
Do you have a question about the LC-XNS2600 and is the answer not in the manual?
Questions and answers