Table of Contents
Advertisement
Available languages
Available languages
Quick Links
Use this book as a start guide when setting up the projector.
For detailed information about installation, setup and operation of projector,
refer to the owner's manual on the CD-ROM.
Read the safety instructions in the Owner's Manual before using projector.
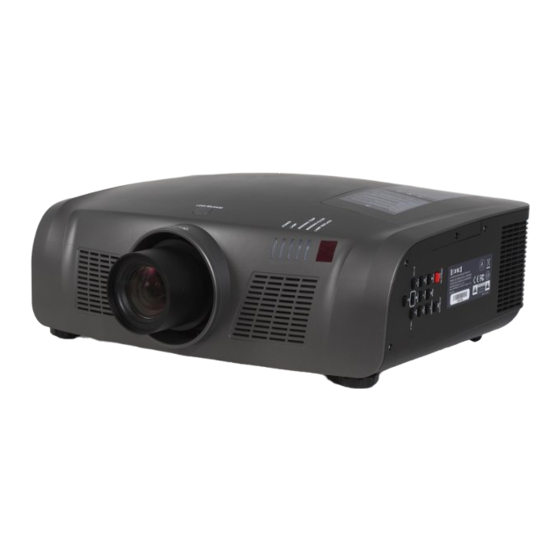
Quick Start Guide
MODEL
LC-XN200
LC-WXN200
LC-XN200L*
LC-WXN200L*
*Projection lens is optional.
Advertisement
Table of Contents

Related Manuals for Eiki LC-XN200


Summary of Contents for Eiki LC-XN200
- Page 1 Quick Start Guide LC-XN200 MODEL LC-WXN200 LC-XN200L* LC-WXN200L* *Projection lens is optional. Use this book as a start guide when setting up the projector. For detailed information about installation, setup and operation of projector, refer to the owner's manual on the CD-ROM.
- Page 4 Quick Start Guide LC-XN200 MODEL LC-WXN200 LC-XN200L* LC-WXN200L* *Projection lens is optional. Use this book as a start guide when setting up the projector. For detailed information about installation, setup and operation of projector, refer to the owner's manual on the CD-ROM.
- Page 5 Accessories Unpack and inspect the box contents to ensure all parts listed below are in the box. If something is missing, please contact your dealer. Remote control with batteries Owner's Manual(CD) AC Power cord (AA or LR6) US Type x1 Euro Type x1 VGA cable Quick start guide...
-
Page 6: Installation
Installation Install remote control batteries ② Install new batteries ① Open the battery ③ Replace the into the compartment. compartment lid. compartment lid. Two AA batteries For correct polarity (+ and –), be sure battery terminals are in contact with pins in the compartment. -
Page 7: Positioning The Projector
● The brightness in a room has a great influence on image quality. It is recommended to limit the ambient lighting in order to get the best image. ● All measurements are approximate and may vary from the actual sizes. LC-XN200 (Diagonal:Inch) 17.62m (19.10m) 300”... -
Page 8: Lens Shift Adjustment
Installation Lens shift adjustment Projection lens can be moved from side to side and up to down. This function makes the positioning of images easy on the screen. The display position can be shifted upward up The display position can be shifted downward to 50% elevation of the display. -
Page 9: Connecting To Computer(Digital And Analog Rgb)
Installation Connecting to computer(Digital and analog RGB) Cables used for connection: ● VGA cable ● Serial crossover cable* ● DVI cable* ● BNC cable* ● HDMI cable* (*=Cables not supplied with the projector) VGA output VGA input/output RS232 output DVI output HDMI output RGBHV signal Serial... -
Page 10: Connecting To Video Equipment (Video, S-Video)
Installation Connecting to video equipment (Video, S-Video) Cables used for connection ● Video cable * ● RCA cable * ● BNC cable * (*=Cables not supplied with the projector) Composite video output Component video output S-video output S-Video cable cable cable Component video input Composite video input... -
Page 11: Connecting To Usb Device (Usb-A, Usb-B)
Installation Connecting to USB device (USB-A, USB-B) Connect the wireless network adapter to USB –A port Cables used for connection ● USB-A cable * ● USB-B cable * (*=Cables not supplied with the projector) USB-A output USB-B cable USB-A device or wireless network adapter USB-B input... -
Page 12: Connecting The Ac Power Cord
Installation Connecting the AC power cord This projector uses nominal input voltages of 100-240V AC and it automatically applies to different input voltages. It is designed to work with a single-phase power system having a grounded neutral conductor. To reduce the risk of electrical shock, do not plug into any other type of power system. -
Page 13: Turn Off The Projector
Basic operation Turn off the projector 1. Press the POWER button on side control or on the remote control, and “Power off?” appears on the screen. 2. Then, press the POWER button again within Power off ? 4 seconds. The POWER indicator starts to flash red, and the cooling fans keep running (You can select the level of fans’... - Page 14 LC-XN200 LC-WXN200 LC-XN200L* LC-WXN200L* *Das Projektionsobjektiv ist optional.
- Page 15 Zubehör Lieferumfang Entpacken und prüfen Sie den Inhalt des Kartons, um sicherzustellen, dass sich sämtliche unten aufgelisteten Artikel darin befinden. Wenden Sie sich bitte an unseren Kundendienst, wenn etwas fehlen sollte. Fernbedienung mit Batterien Bedienungsanweisung (CD) AC Netzkabel (AA oder LR6) US Type x1 Euro Type x1 VGA Kabel...
- Page 16 Installieren Einbau der Batterien der Fernbedienung ② Installieren Sie die neuen ① Öffnen Sie den Deckel ③ Legen Sie den Deckel für Batterien im Fach. des Batteriefachs. den Fach wieder auf. Zwei AA Batterien Für eine korrekte Polarität (+ und –), vergewissern Sie sich, dass die Batterien gut mit den Pins im Fach...
-
Page 17: Einstellbare Füße
● Die Helligkeit des Raums hat einen großen Einfluss auf die Bildqualität. Es wird empfohlen das Umgebungslicht zu reduzieren, um das bestmögliche Bild zu haben. ● Alle Abmessungen sind ungefähr und können von der eigentlichen Größe abweichen. LC-XN200 (Diagonale:Inch) 17,62m (19,10m) 40SDSq 100SDSq 150SDSq 200SDSq 300SDSq Bildschirmgröße... - Page 18 Installieren Anpassung der Objektivverschiebung Das Objektiv kann von links, nach rechts, oben und unten bewegt werden. Diese Funktion erlaubt eine leichte Positionierung der Bilder auf den Bildschirm. Die Position des Bildschirms kann nach oben um Die Position des Bildschirms kann nach unten 50% bewegt werden.
- Page 19 Installieren Computeranschluss (Digital und analog RGB) Kabel, die für den Anschluss benutzt werden: ● VGA Kabel ● Serielle Crossover Kabel* ● DVI Kabel* ● BNC Kabel* ● HDMI Kabel* (*=die Kabel sind nicht im Lieferumfang des Projektors enthalten) Serieller Ausgang Computer Ausgang Monitor Eingang Monitorausgang HDMI Ausgang...
- Page 20 Installieren Anschluss des Videoanlage (Video, S-Video) Kabel, die für den Anschluss benutzt werden ● Videokabel * ● RCA Kabel * ● BNC Kabel* (*=die Kabel sind nicht im Lieferumfang des Projektors enthalten) Kompositvideo Ausgang Component Video S-Video Ausgang Ausgang S-Videokabel Kabel Kabel Video...
- Page 21 Installieren Anschluss des USB Geräts (USB-A, USB-B) Schließen Sie einen Funkadapter am USB-A Anschluss Kabel, die für den Anschluss benutzt werden ● USB-A Kabel * ● USB-B Kabel * (*=die Kabel sind nicht im Lieferumfang des Projektors enthalten) USB-A Ausgang USB-B Kabel USB-A Gerät...
-
Page 22: Grundlegende Funktionen
Grundlegende Funktionen Anschluss des AC Netzkabels Dieser Projektor benutzt Eingangsspannungen von 100-240V AC und es passt sich automatisch den Eingangsspannungen ein. Es wurde entwickelt um in einem Einphasenleistungssystem mit einem geerdeten neutralen Anschluss zu funktionieren. Um das Risiko eines Stromschlags zu reduzieren, schließen Sie es an keinem anderen Stromkreislauf an. -
Page 23: Ausschalten Des Projektors
Grundlegende Funktionen Ausschalten des Projektors 1. Drücken Sie den LEISTUNGSKNOPF (POWER) auf den seitlichen Bedienfeld oder der Fernbedienung und die Anzeige „Ausschalten?“ wird eingeblendet. Ausschalten? 2. Drücken Sie dann denn POWER Knopf erneut binnen 4 Sekunden. Die POWER Anzeige beginnt rot zu blinken, und die Kühlungslüfter funktionieren weiter (Sie können den Geräuschpegel und Geschwindigkeit der Kühler einstellen). - Page 24 LC-XN200 LC-WXN200 LC-XN200L* LC-WXN200L* * Lentille de projection en option.
- Page 25 Accessoires Déballez et inspectez le contenu du carton pour vous assurer que toutes les parties listées ci-dessous sont présentes. Si quelque chose manque, merci de contacter notre service Client. Télécommande avec piles Manuel d'utilisateur (CD) Cordon d'alimentation AC (AA ou LR6) US Type x1 Euro Type x1 Câble VGA...
-
Page 26: Installer Les Piles De La Télécommande
Installation Installer les piles de la télécommande. ② Installez de nouvelles piles ① Ouvrez le couvercle du ③ Replacer le couvercle dans le compartiment. compartiment à piles. du compartiment. 2 piles AA. Pour une polarité correcte (+ et -), assurez-vous que les bornes de la pile sont en contact avec les broches du... -
Page 27: Positionnement Du Projecteur
● La luminosité d'une pièce a une grande influence sur la qualité de l'image. Il est recommandé de diminuer la luminosité ambiante de la pièce afin d'obtenir la meilleure qualité d'image. ● Toutes les mesures sont approximatives et peuvent varier des tailles réelles. LC-XN200 : (Diagonale: en pouces) 17,62m (19,10m) - Page 28 Installation Réglage du déplacement de la lentille (Lens Shift) La lentille de projection peut être décalée d'un côté à l'autre et de haut en bas. Cette fonction rend le positionnement des images sur l'écran plus facile. La position de l'affichage peut être décalée vers La position de l'affichage peut être décalée vers le haut jusqu'à...
- Page 29 Installation Connexion à un ordinateur (RVB numérique et analogique) Câbles utilisés pour la connexion : ● Câble VGA ● Câble de transfert en série* ● Câble DVI* ● Câble BNC * ● Câble HDMI * (*=Les câbles ne sont pas fournis avec le projecteur) Sortie du Sortie en série Sortie ordinateur...
- Page 30 Installation Connecter à un équipement vidéo (Vidéo, S-Vidéo) Câbles utilisés pour la connexion : ● Câble Vidéo * ● Câble RCA * ● Câble BNC * (*=Les câbles ne sont pas fournis avec le projecteur) Sortie d'un composite vidéo Sortie d'un composant vidéo Sortie S-Vidéo Câble Câble...
- Page 31 Installation Connecter à un appareil USB (USB-A, USB-B) Connecter l'adaptateur au réseau sans fil au port USB-A Câbles utilisés pour la connexion : ● Câble USB-A * ● Câble USB-B * (*=Les câbles ne sont pas fournis avec le projecteur) USB-A sortie USB-B...
-
Page 32: Opération De Base
Opération de base Connecter le cordon d'alimentation AC Ce projecteur utilise un tension nominale de 100- 240V AC et s'accorde automatiquement aux différentes tensions. Il est conçu pour fonctionner avec un système monophasé disposant d'un conducteur neutre raccordé à la terre. Pour réduire le risque de choc électrique, ne pas brancher d'autres types de système d'alimenta- tion. -
Page 33: Éteindre Le Projecteur
Opération de base Éteindre le projecteur. 1 Appuyez sur le bouton POWER sur le tableau de commande ou la télécommande et "Arrêt?" apparait à l'écran. 2 Puis appuyez sur le bouton POWER une "Arrêt ?" nouvelle fois au bout de 4 secondes. Le voyant POWER commence à... - Page 34 LC-XN200 LC-WXN200 LC-XN200L* LC-WXN200L* *La lente de proyección es opcional.
- Page 35 Accesorios Abra el paquete e inspeccione el contenido de la caja para comprobar que todas las piezas de la siguiente lista estén dentro. Si faltase algo, póngase en contacto con nuestro servicio de atención al cliente. Control remoto con baterías Manual del Propietario (CD) Cordón de alimentación de CA (AA o LR6)
-
Page 36: Instalación
Instalación Instalación de las baterías del control remoto ② Instale baterías nuevas ① Vuelva a colocar ① Abra la tapa del en el compartimiento. la tapa del compartimiento de compartimiento. baterías. Dos baterías AA Para la polaridad correcta (+ y -), asegúrese de que los conectores de la batería estén en contacto... -
Page 37: Pies Ajustables
● La luminosidad en una habitación tiene gran influencia en la calidad de la imagen. Recomendamos limitar la iluminación del ambiente a fin de lograr la mejor imagen. ● Todas las medidas son aproximadas y pueden variar con respecto a los tamaños reales. LC-XN200 (Diagonal: pulgadas) 17.62m (19.10m) Tamaño de... - Page 38 Instalación Ajuste de desplazamiento de lente La lente de proyección se puede mover de lado a lado y arriba y abajo. Esta función facilita la colocación en posición de las imágenes en la pantalla. La posición de la pantalla puede ser desplazada La posición de la pantalla puede ser desplazada hacia arriba hasta el 50% de la altura de la pantalla.
- Page 39 Instalación Conexión a la computadora (RGB digital y analógica) Cables usados para la conexión: ● Cable VGA ● Cable serie cruzado* ● Cable DVI* ● Cable BNC* ● Cable HDMI* (* = cables no suministrados con el proyector) Salida serie Salida de computadora Entrada al monitor Salida de monitor...
- Page 40 Instalación Conexión a equipo de video (Video, S-Video) Cables usados para la conexión ● Cable Video * ● Cable RCA * ● Cable BNC * (* = cables no suministrados con el proyector) Salida de video compuesta Salida de video Salida S-video del componente Cable...
- Page 41 Instalación Conexión a dispositivo USB (USB-A, USB-B) Conecte el adaptador de red inalámbrica al puerto USB-A Cables usados para la conexión ● Cable USB-A * ● Cable USB-B * (* = cables no suministrados con el proyector) Salida USB-A Cable USB-B Dispositivo USB-A o llave WiFi...
-
Page 42: Operación Básica
Operación básica Conexión del cordón de alimentación de CA Este proyector usa voltajes de entrada nominales de 100-240 VCA y se adecua automáticamente a los diferentes voltajes de entrada. Está diseñado para trabajar con un sistema de alimentación monofásico que tenga un conector neutro conectado a tierra. Para reducir el riesgo de choque eléctrico, no lo enchufe en ningún otro tipo de sistema de alimentación. -
Page 43: Apagado Del Proyector
Operación básica Apagado del proyector 1. Pulse el botón POWER en el control lateral o en el control remoto. Aparece "¿Apagar?" en la pantalla. 2. Luego pulse el botón POWER nuevamente dentro de 4 segundos. El indicador POWER comienza a ¿Apagar? destellar en rojo, y los ventiladores de enfriamiento se mantienen funcionando (puede seleccionar el... - Page 44 LC-XN200 LC-WXN200 LC-XN200L* LC-WXN200L* *L'obiettivo di proiezione è opzionale.
- Page 45 Accessori Togliere dalla confezione e controllare che la scatola contenga tutte le parti elencate di seguito. Se manca qualcosa, contattare la nostra assistenza clienti. Telecomando con batterie Manuale di istruzioni (CD) Cavo di alimentazione CA (AA o LR6) Tipo USA x 1 Tipo Euro x 1 Cavo VGA Guida rapida...
-
Page 46: Installazione Delle Batterie Del Telecomando
Installazione Installazione delle batterie del telecomando ② Inserire le nuove ① Aprire il coperchio del ③ Riposizionare il batterie nel comparto. comparto batterie. coperchio del comparto. Due batterie AA Per una polarità corretta (+ e -), assicurarsi che i terminali della batteria siano in contatto con pin nel comparto. -
Page 47: Posizionamento Del Proiettore
● La luminosità della stanza ha una grande influenza sulla qualità dell'immagine. Si consiglia di limitare l'illuminazione ambientale per ottenere un'immagine migliore. ● Tutte le misurazioni sono approssimative e possono variare in base ai formati correnti. LC-XN200 (Diagonale: pollici) 17,62m (19,10m) - Page 48 Installazione Regolazione dello spostamento dell'obiettivo L'obiettivo di proiezione può essere spostato da lato a lato e dall'alto al basso. Questa funzione semplifica il posizionamento delle immagini. È possibile spostare la posizione del display È possibile spostare la posizione del display verso il basso fino al 50% dell'elevazione del display.
- Page 49 Installazione Collegamento al computer (RGB digitale e analogico) Cavi utilizzati per la connessione: ● Cavo VGA ● Cavo di crossover di serie* ● Cavo DVI* ● Cavo BNC* ● Cavo HDMI* (*= cavi non in dotazione con il proiettore) Ingresso Uscita computer Uscita di serie Uscita monitor...
- Page 50 Installazione Collegamento all'apparecchiatura video (Video, S-Video) Cavi utilizzati per la connessione ● Cavo video* ● Cavo RCA* ● Cavo BNC* (*= cavi non in dotazione con il proiettore) Uscita video composite Uscita video component Uscita S-Video Cavo Cavo Cavo S-Video Video Y Cb/Pb Cr/Pr S-VIDEO in...
- Page 51 Installazione Collegamento al dispositivo USB (USB-A, USB-B) Collegare l'adattatore di rete wireless alla porta USB-A Cavi utilizzati per la connessione ● Cavo USB-A* ● Cavo USB-B* (*= cavi non in dotazione con il proiettore) Uscita USB-A Cavo USB-B Dongle Wi-Fi o dispositivo USB-A Ingresso USB-B...
-
Page 52: Operazioni Di Base
Operazioni di base Collegamento del cavo di alimentazione CA Il proiettore utilizza una tensione di ingresso nominale pari a 100-240V CA e applica automaticamente tensioni di ingresso differenti. È progettato per lavorare con sistemi di alimentazione a fase singola con conduttore neutrale di messa a terra. - Page 53 Operazioni di base Spegnere il proiettore 1. Premere il pulsante POWER sul controllo laterale o sul telecomando e sullo schermo viene visualizzato "Spegnere?". 2. Quindi, premere nuovamente il pulsante Spegnere? POWER entro 4 secondi. L'indicatore POWER inizia a lampeggiare in rosso e le ventole di raffreddamento iniziano a lavorare (è...
- Page 54 Fax: 86-21-3251-3997 E-mail: info@eiki-china.com Deutschland & Österreich Canada EIKI Deutschland GmbH EIKI CANADA - Eiki International, Inc. Am Frauwald 12 P.O. Box 156, 310 First St. - Unit 2, 65510 Idstein Midland, ON, L4R 4K8, Canada Deutschland Tel: 800-563-3454 (705)-527-4084...
Need help?
Do you have a question about the LC-XN200 and is the answer not in the manual?
Questions and answers