Sign In
Upload
Download
Table of Contents
Contents
Add to my manuals
Delete from my manuals
Share
URL of this page:
HTML Link:
Bookmark this page
Add
Manual will be automatically added to "My Manuals"
Print this page
×
Bookmark added
×
Added to my manuals
Manuals
Brands
AMX Manuals
Touch Panel
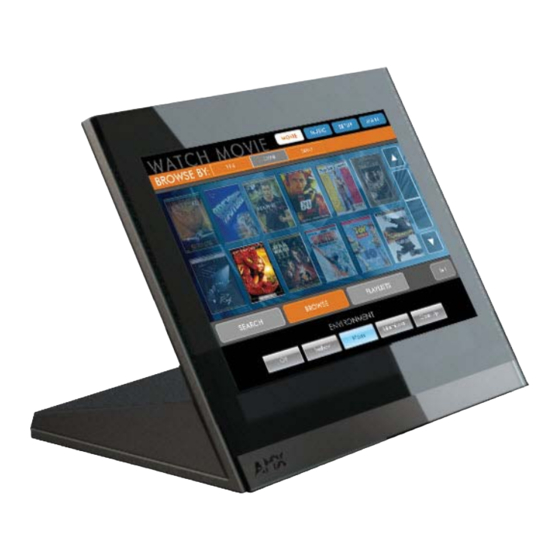
MXT-1000
Operation/reference manual
AMX MXT-1000 Operation/Reference Manual
10.1" modero x series tabletop touch panel; 10.1" modero x series wall/flush mount
Hide thumbs
Also See for MXT-1000
:
Instruction manual
(62 pages)
,
Quick start manual
(2 pages)
1
2
3
4
Table Of Contents
5
6
7
8
9
10
11
12
13
14
15
16
17
18
19
20
21
22
23
24
25
26
27
28
29
30
31
32
33
34
35
36
37
38
39
40
41
42
43
44
page
of
44
Go
/
44
Contents
Table of Contents
Bookmarks
Table of Contents
Table of Contents
Modero X® Series Touch Panels
Overview
Features
Modero X Dealer Benefits
Modero X Customer Benefits
Mxt-1000
Connector Locations
Memory
Basic Operation
Powering on the MXT-1000
Microphone
Audio/Video Capabilities
Mxt-1000-Nc
MXD-1000
Memory
Basic Operation
Powering on the MXD-1000
Microphone
Audio/Video Capabilities
MXD-1000-Nc
MXD/T-1000 Features
Picture View
Preview Mode and Normal Mode
Picture View Send Command
Configuration
Bluetooth Support
Nfc
Cleaning the Touch Overlay and Case
Installation
MXT-1000 Installation
Power Via Power over Ethernet
Ethernet Cable Installation and Modification
MXD-1000 Installation
Installing the MXD-1000 into a Wall
Uninstalling the MXD-1000
Configuration and Programming
Modero X Series Programming Guide
Upgrading Firmware
Overview
Upgrading Firmware Via USB Flash Drive
Load the Firmware on a USB Flash Drive
Transfer the Firmware File from the Flash Drive to the Touch Panel
Upgrading from Previous Firmware
Returning to Factory Default Firmware
Upgrading Firmware Via Netlinx Studio
Viewing Devices on the Virtual System
Downloading Firmware
Appendix: Troubleshooting
Overview
Panel Doesn't Respond to Touches
Panel Isn't Appearing in the Online Tree Tab
Can't Connect to a Netlinx Master
Only One Modero Panel in My System Shows up
Advertisement
Quick Links
1
Mxt-1000
2
Basic Operation
3
Configuration
4
Configuration and Programming
5
Modero X Series Programming Guide
Download this manual
See also:
Instruction Manual
Operation/Reference Guide
MXT/D-1000
10.1" Modero® X Series Tabletop Touch Panel
10.1" Modero X® Series Wall/Flush Mount
Touch Panels
L a s t U p d a t e d : 9 / 2 4 / 2 0 1 2
Table of
Contents
Previous
Page
Next
Page
1
2
3
4
5
Advertisement
Table of Contents
Need help?
Do you have a question about the MXT-1000 and is the answer not in the manual?
Ask a question
Questions and answers
Related Manuals for AMX MXT-1000
Touch Panel AMX MXTD-1000 Instruction Manual
10.1", 7", 4.3" modero x-series touch panels (62 pages)
Touch Panel AMX MXT-1000 Quick Start Manual
10.1" modero x series tabletop touch panel (2 pages)
Touch Panel AMX MXT-2000XL-PAN Operation/Reference Manual
20.3" modero x series panoramic touch panel (44 pages)
Control Panel AMX Modero X MXT-700 Operation/Reference Manual
7" tabletop, wall/flush mount touch panel (42 pages)
Switch AMX Multi Preview Operation/Reference Manual
(26 pages)
Touch Panel AMX Modero X Series Quick Start Manuals
20.3" panoramic tabletop touch panel (2 pages)
Touch Panel AMX Modero X Series Installation Manual
7 inch tabletop touch panel (2 pages)
Touch Panel AMX MXD-1000 Quick Start Manual
10.1" modero x® series wall/flush mount touch panel (2 pages)
Telephone Accessories AMX Modero X Series Installation Manual
(2 pages)
Touch Panel AMX Modero X Series Quick Start Manual
4.3" wall/flush mount touch panel (2 pages)
Touch Panel AMX Modero X Series Quick Start Manual
G5 wall/flush mount touch panel (2 pages)
Touch Panel AMX Modero X Series Installation Manual
Wall/flush mount touch panel (2 pages)
Racks & Stands AMX Modero X Series Quick Start Manual
Flush mount kit (2 pages)
Touch Panel AMX MXD-700 Modero X Series Quick Start Manual
7" modero x series wall/flush mount touch panel (2 pages)
Touch Panel AMX MXT-700 Quick Start Manual
7" modero x series tabletop touch panel (2 pages)
Touch Panel AMX MXT-701 Operation/Reference Manual
7" modero x series g5 touch panel (36 pages)
This manual is also suitable for:
D-1000
Mxd-1000
Modero x series
Modero x mxt-1000
Modero x mxd-1000
Modero x mxt-1000-nc
...
Show all
Modero x mxd-1000-nc
Modero x mxd-1000-p-nc
Modero x mxd-1000-l-nc
Fg5968-24
Fg5968-03
Fg5968-07
Fg5968-13
Fg5968-25
Fg5968-26
Table of Contents
Print
Rename the bookmark
Delete bookmark?
Delete from my manuals?
Login
Sign In
OR
Sign in with Facebook
Sign in with Google
Upload manual
Upload from disk
Upload from URL


Need help?
Do you have a question about the MXT-1000 and is the answer not in the manual?
Questions and answers