Advertisement
Quick Links
Advertisement

Related Manuals for Vanraam Fun-2-Go


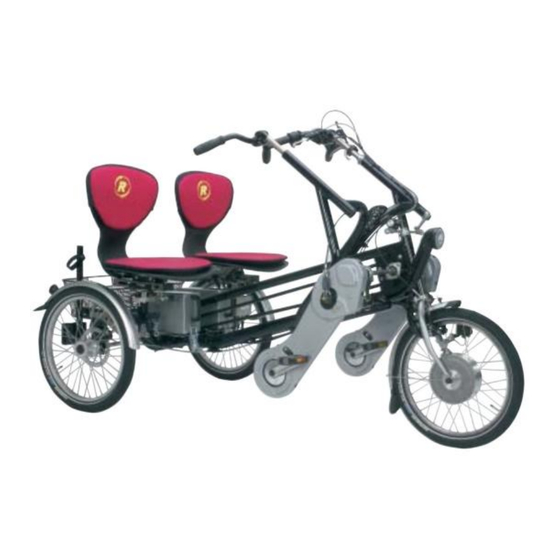
Summary of Contents for Vanraam Fun-2-Go
- Page 1 User manual Fun-2-Go Van Raam BV Aaltenseweg 56 7051 CM Varsseveld Netherlands 06.13...
- Page 2 Aaltenseweg 56 7051 CM Varsseveld Netherlands Tel. : +31 (0)315 257370 E-mail : info@vanraam.nl Internet : www.vanraam.com Conformity Van Raam declares as manufacturer that the Fun-2-Go bicycle has been produced in accordance with the 93/42/EEG guidelines. User manual Fun-2-Go 06.13...
- Page 3 Also the local traffic rules should always be complied with. All other use, including damage or physical injuries due to this, are not the manufacturer's responsibility. User manual Fun-2-Go 06.13...
- Page 4 If children or people with limited mental perception join the bike ride, there should always be a responsible supervising person as the main driver of the bike. This main driver is always responsible for the safe use of the bike. User manual Fun-2-Go 06.13...
- Page 5 If an optimal adjustment of the bicycle, as defined in the instructions, is not possible for the cyclist, you can contact your dealer for a fitting solution. The brakes are correctly adjusted as standard and can only be adjusted by the dealer during periodic maintenance. User manual Fun-2-Go 06.13...
- Page 6 Do not pull out the handle bars further than the mark. Otherwise the tube will not be deep enough in the shaft and will risk coming off, which can lead to MIN INSERT serious injuries. User manual Fun-2-Go 06.13...
- Page 7 The crank shortener is fitted to the crank, as illustrated. The pedal can then be fitted into the crank shortener at two positions. With the socketed screw (A) the crank shortener should be aligned with the crank. 2 assembly points pedal User manual Fun-2-Go 06.13...
- Page 8 4. Fit the elastic to a point on the frame, so that the lower leg support stays upright in stationary position. Determine by yourself which point is best. Use the velcro to secure the lower leg. User manual Fun-2-Go 06.13...
- Page 9 2. Pull the handle again to rotate the seat back. The seat locks itself again. Lap belt of the co-driver Wrap the belt around the body and buckle it. Push the red button to unfasten the belt again. User manual Fun-2-Go 06.13...
- Page 10 1. Slightly loosen the handle behind the footrest. 2. Slightly loosen the handle at the crank. 3. Slide the clamp out of the bike frame. To assemble the adapter again, follow these steps in reverse order. User manual Fun-2-Go 06.13...
- Page 11 2. Move the seat to the required position and release the handle. To adjust the seat on the adapter: 1. Slightly loosen the grip handle. 2. Bring the seat in the required position. 3. Tighten the grip handle again. User manual Fun-2-Go 06.13...
- Page 12 Firmness backrest comfort seat To adjust the backrest to a looser or tighter position: 1. Open the straps by loosening the velcro. 2. Tighten the straps or loosen them. 3. Fasten the velcro again. User manual Fun-2-Go 06.13...
- Page 13 Tighten the star knob again. To disassemble the rack, all screws can be loosened with an Allan key. Once they are loosened, all the pipes can be taken out of the frame. User manual Fun-2-Go 06.13...
- Page 14 Loosen the screws with an Allen key to adjust the supports. Loosen the screws with an Allen key to remove the rack. When loosened, the rods can be pulled out of the bike frame. User manual Fun-2-Go 06.13...
- Page 15 When the last red light flashes, the battery is empty and the engine will not support you any longer while cycling. User manual Fun-2-Go 06.13...
- Page 16 Open the little lock by turning the key a quarter (to the right) Push down the lock while pulling the battery with your other hand. Take the battery pack into the house. Plug the charger into the plug contact of the battery. User manual Fun-2-Go 06.13...
- Page 17 After being charged, first disconnect the socket and only then remove the charger from the tricycle! After charging, always remove the charger cable from the battery. Ensure that the battery is always is pushed straight into the holder. User manual Fun-2-Go 06.13...
- Page 18 With the red button you shut down the system. If the system is not used, it will automatically shut itself down after a period of time. When walking backwards with the bicycle, always turn off the motor. User manual Fun-2-Go 06.13...
- Page 19 When charging, first connect the plug to the charging point on the bicycle and then put the plug in the wall socket! When charged, first take the plug from the wall socket and then disconnect the charger from the bicycle! User manual Fun-2-Go 06.13...
- Page 20 Only use the charger in non-humid indoor spaces. Below 5 degrees Celsius the charger will not function properly. In that case it is advisable to charge the batteries indoors. Extra accessories are available at your dealer. User manual Fun-2-Go 06.13...
- Page 21 The light has 2 modes; steady and flashing. The front light works on the dynamo. Push the button so that the dynamo moves against the tyre. To turn off the light push the dynamo back again. User manual Fun-2-Go 06.13...
- Page 22 Obstacles higher than 5 cm should be avoided. Technical details Length (cm) Width (cm) 113 includ. armrest 20“ Front wheel 20“ Back wheel Weight (kg) From 50 Max. load basket (kg) Total max. load (kg) Brakes, front Cantilever brakes Brakes, back Disk brakes User manual Fun-2-Go 06.13...
- Page 23 In that case the rim should be replaced, because it can lead to loss of brake function or even a crack in the rim, which can lead to all kinds of dangerous consequences. User manual Fun-2-Go 06.13...
- Page 24 Wipe the chain with a cloth, treat it with grease or spray and remove any excess lubricant with a rag. Other parts should not be treated with a lubricant. User manual Fun-2-Go 06.13...
- Page 25 The guarantee as well as the product liability in general expires if the instructions stated in this manual are not followed. This is also the case if unauthorized maintenance is carried out or if technical changes or additions are made without permission of Van Raam. User manual Fun-2-Go 06.13...
- Page 26 Frame number The frame number is printed on the sticker. This sticker is located on the frame, see the image below. Example sticker: Frame number Position of sticker: on the back bridge tube User manual Fun-2-Go 06.13...
Need help?
Do you have a question about the Fun-2-Go and is the answer not in the manual?
Questions and answers