
Related Manuals for Vanraam Easy Rider 3


Summary of Contents for Vanraam Easy Rider 3
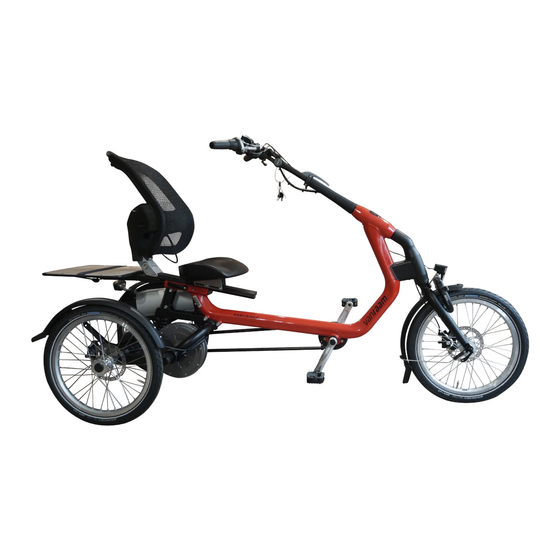
- Page 1 User Manual Easy Rider 3 Easy Rider Junior Easy Sport Van Raam Guldenweg 23 7051 HT Varsseveld, The Netherlands +31 (0)315 – 25 73 70 info@vanraam.com Version 21.01 www.vanraam.com...
-
Page 2: Table Of Contents
Table of contents Manufacturer contact details ........................3 Conformity ................................ 3 Introduction ..............................3 Delivery ................................4 Indication................................4 Intended usage ............................... 5 Safety measures............................. 6 Adjustment of the tricycle ......................... 10 Before use ..............................19 Electro system Silent ..........................23 Van Raam E-Bike App .......................... -
Page 3: Manufacturer Contact Details
Easy Rider, Easy Rider Junior and Easy Sport. In this document, when we mention the Easy Rider, this refers to the Easy Rider 3, both the Medium and the Large variant, READ CAREFULLY unless otherwise stated. -
Page 4: Delivery
Delivery Delivery must include the following: Bicycle with any packaging • User manual(s) • Possible Smart battery including card with 5-digit code (depending on options) • Possible chargers (depending on options) • Spare keys • Check the delivery immediately upon receipt. In case of damage or an incomplete delivery, we request that you contact your dealer immediately. -
Page 5: Intended Usage
Intended usage The tricycles are designed for normal use on a flat, solid surface. The usual caution for bicycles should always be observed. The safety instructions as described in this manual must also be strictly followed. Also, the local rules for participation in traffic must always be observed. -
Page 6: Safety Measures
Safety measures Take immediate action if any part is loose while using the bicycle, if slack is • detected or if you hear a strange noise. If you cannot solve the problem yourself, please contact your Van Raam dealer. Pay particular attention to the wheels, handlebars and seat. - Page 7 and ride away functions. For more information, carefully read the chapter "Electro system Silent". If a charger is supplied with the bicycle, also read the information under the • heading “Charger Safety Precautions” in the “Electro system Silent” chapter. High speeds when cornering and on uneven terrain, or taking a too sharp turn, can lead to overturning the tricycle.
- Page 8 Tips for safe biking Make sure you have properly adjusted the bike to the dimensions of the rider, then you can use the bike safely and comfortably. Riding a tricycle is a completely different experience compared to riding a bicycle with two wheels. Important safety points for the rider Ride very carefully on the first ride.
- Page 9 Check that the seat and handlebars are secure. See chapter ‘Adjusting the • bicycle’ for the correct adjustment of the seat and handlebars. Make sure the battery is sufficiently charged (optional). • As with all mechanical parts, the bicycle is subject to wear and tear and high loads. If a component fails, it can lead to very dangerous situations and to damage or injury to the bicycle user.
-
Page 10: Adjustment Of The Tricycle
Adjustment of the tricycle Before you start using the bike, set it to the dimensions of the rider. This is essential, especially for the seat and handlebars. If an optimal setting is not possible with the described instructions, you can contact your dealer for a suitable solution. - Page 11 The bicycle is delivered with the correct tension on the lever. The clamping lever therefore does not have to be loosened or tightened. If the quick-release lever no longer clamps the seat properly, the quick-release lever bolt [A] must be adjusted to the correct tension. You do this by holding the quick-release lever in the closed position tightening the bolt [A] on the other side with an Allen key.
- Page 12 Handlebar position You can tilt the handlebars. This affects the distance from the handlebars to the upper body. You determine the most comfortable position yourself in practice. To tilt the handlebars: Press and hold the button [A] on the side of the handlebar stem to release the lever.
- Page 13 Handlebar height The height of the handlebars influences the riding comfort. This determines the pressure on the hands and the posture of the back. You determine the most comfortable position yourself in practice. To adjust the height of the handlebars: Tilt the handlebars to the lowest position as shown in the picture.
- Page 14 Easy Rider Junior Seating position A rule of thumb for adjusting the seating position. Consider the following. The rider sits on the bicycle and puts one foot on the pedal in the furthest position from the rider. Adjust the sitting position so that in that situation the leg is straight, but still relaxed.
- Page 15 Backrest firmness To make the backrest softer or tighter: Open the straps by loosening the Velcro. Tighten or loosen the straps. Re-attach the Velcro. Handlebar position You can tilt the handlebars. This affects the distance from the handlebars to the upper body. You determine the most comfortable position yourself in practice.
- Page 16 Easy Sport Seating position and frame length A rule of thumb for adjusting the seating position is the following. The rider sits on the bicycle and puts one foot on the pedal in the furthest position from the rider. Adjust the sitting position so that in that situation the leg is straight, but still relaxed.
- Page 17 Seat height (Easy Sport with comfort seat) The seat can be adjusted to the desired height. You determine the most comfortable position yourself in practice. To adjust the height: Loosen the four screws a few turns with an Allen key. Loosen the two nuts a few turns with a wrench.
- Page 18 Seat height (Easy Sport with recumbent cockpit) The seat can be adjusted to the desired height. You determine the most comfortable position yourself in practice. To adjust the height: Loosen the three screws a few turns with an Allen key. Loosen the two nuts on the backrest a few turns with a spanner.
-
Page 19: Before Use
Before use Parking brake (Easy Rider, Easy Rider Junior, Easy Sport) Always use the parking brake when you park (and leave) the bike. The image shows the parking brake in the parked position. Always try to park the bicycle on a level surface. It is not recommended to park the bicycle on a slope steeper than 10%. - Page 20 Manually operated headlight (Easy Rider, Easy Rider Junior, Easy Sport) The headlight has a push button with three positions: ON – ON [50%] – OFF. Adjust the angle of the headlight so that the center of the light beam is approximately ten meters in front of the bicycle.
- Page 21 Manually operated rear light (Easy Rider, Easy Rider Junior, Easy Sport) The rear light has an on/off button with which Off- Auto-On can be set. The seating is as follows: 1x = ON 2x = AUTO Press 1x lighting is on 3x = OFF Press 2x lighting is automatic Press 3x lighting is off...
- Page 22 Centrally operated lighting (Easy Rider, Easy Rider Junior, Easy Sport) The bicycle is equipped with centrally operated lighting (front and rear) with the lighting connected to the electrical system. The lighting switches on automatically when the electrical system is activated. Adjust the angle of the headlight so that the center of the light beam is approximately ten meters in front of the bicycle.
-
Page 23: Electro System Silent
Electro system Silent The Silent system is a pedal support specially developed by Van Raam for the rehabilitation market. The Silent system is characterised by: Smart E-Bike; Easy operation; 3 pedal assistance positions + starting aid; Virtually silent motor; Very powerful electric motors; Modern and efficient electronics;... - Page 24 If not in use, the system will automatically shut itself down after some time. Always switch off the electrical system before getting on and off the bicycle and when walking with the bicycle. 2. Pedal assistance position 1, 2 or 3 The desired pedal assistance can be set by means of the assistance positions 1, 2 and 3.
- Page 25 4. Indicator lights The battery status is shown by the coloured indicator lights on the display. This indication consists of five green LEDs, the leftmost LED of which can light up red. The battery is fully charged. When the battery is used, the number of green lights will decrease.
- Page 26 Centrally operated lighting The bicycle is equipped with centrally operated lighting, which switches on automatically when the electrical system is activated. Further instructions can be found under the chapter "Before use". Other functions The smart display has an automatic dimming function. With the help of a light sensor, the light of the display automatically dims when it is in the dark.
- Page 27 Charging the battery For optimal condition and capacity of the battery we recommend that you charge the battery inside at room temperature. Only use the charger when the ambient temperature is between 0 and 35 degrees. To charge the battery indoors, follow steps 1 to 9. To charge the battery on the bike, follow steps 4 to 8.
- Page 28 Charger: LED indication Status Green Stand-by/ battery full Charging Flashing red Safety: Change polarity; Short circuit; Overheating; Over flow; Over voltage It is better for the battery to charge periodically instead of waiting until it is completely empty. Never put the bicycle away with an empty battery! Slide the battery straight into the carrier, not at an angle.
- Page 29 Backup battery (optional) The bicycle can be equipped with a second battery. As soon as the connected battery is empty, swap the batteries. One battery holder is connected to the system, recognisable by the cables. Switchable battery pack (optional) If you have two batteries, the bicycle can be equipped with the switchable battery pack option.
- Page 30 Charging and maintenance tips for the battery Never put the bicycle away with an empty battery. We recommend charging the • battery as soon as possible when it is empty. The best storage charge for the battery is at a charge with three to five LEDs light up. •...
- Page 31 Possible malfunctions The system cannot be switched on: • Check that the battery is attached properly. Check the status of the battery. If it is empty, charge the battery. If the above does not provide a solution, please contact your dealer. The battery indicator LEDs on the display flash: •...
-
Page 32: Van Raam E-Bike App
The Van Raam E-Bike App can be downloaded free of charge from the Google Play Store or Apple App Store. For more information about the Van Raam App, you can visit the Van Raam website: www.vanraam.com. Version 21.01 32/55... - Page 33 From the 15th of July, 2020, all electric Van Raam bicycles will be delivered as Smart E-Bikes. You can recognize this by the large sticker with a yellow border on the battery. If you have a Smart E-Bike and you download the updated app, there are even more options.
-
Page 34: Options
Options Do you have extra options on your bike? Some of these options are explained below. Additional options are available through a Van Raam dealer. Crank shortener (Easy Rider, Easy Rider Junior, Easy Sport) The crank shortener is attached to the crank (as shown). - Page 35 Foot fixation (Easy Rider, Easy Rider Junior, Easy Sport) With the foot fixation you can fix the foot by sliding the two notched straps [A] into the quick releases [B]. The quick release can be unlocked by pulling the lip back completely. The notched strap can then be pulled out.
- Page 36 The foot fixation returns to its neutral position when not in use. The neutral position can be determined by sliding the balance block. 1. Loosen the two nuts a few turns with a socket wrench. 2. Slide the balance block into the desired position.
- Page 37 Lower leg fixation (Easy Rider, Easy Rider Junior, Easy Sport) With the lower leg fixation option, you can fix the lower leg. To adjust the lower leg strap: Loosen the bolt [A] a few turns with a wrench. Adjust the height of the lower leg fixation so that it matches the rider's lower leg.
- Page 38 Armrests (Easy Rider) The armrests are individually foldable and can also be adjusted to different heights for the Easy Rider. The armrest must not be loaded with more than 20 kg. To adjust the armrests to the correct height (Easy Rider only): Unscrew the two hexagon bolts [A] a few turns with an Allen key.
- Page 39 4-Points belt (Easy Rider, Easy Rider Junior, Easy Sport) To open the belt, the buckle button [A] must be pressed. Then the buckle can be pulled apart. The 4- points belt is adjustable in length. This can be done by loosening the belt clips [C] on the back of the backrest.
- Page 40 Gear lever (Easy Rider, Easy Rider Junior, Easy Sport) The position of the gear lever can be determined based on the position of the shifter and the user's preference. To adjust the lever, the bolt [A] must be loosened a few turns with an Allen key.
-
Page 41: Technical Specifications
Technical specifications Easy Rider Easy Rider Large Easy Rider Easy Sport Medium Junior Inseam (cm) 65-88 85-108 47-73 65-105 Length (cm) 195-225 Width (cm) Height (cm) Entry height (cm) ca. 34 Front Tire 20" 20" 16" 20" Rear Tire 20" 20"... -
Page 42: Cleaning And Maintenance By Owner
Cleaning and maintenance by owner Below are instructions for maintenance and adjustments that you can carry out yourself on a regular basis. This keeps the condition of the bicycle optimal. Cleaning The frame of the tricycle can be cleaned with a damp cloth. You can use a mild detergent for dirty spots. - Page 43 If you do want to replace components yourself, you are liable for damage or injury as a result of incorrectly mounted components. Only use original Van Raam spare parts, you can purchase these from your dealer. Upon request, the dealer will provide the necessary information for repair and maintenance. Version 21.01 43/55...
-
Page 44: Repair And Maintenance By Dealer
Repair and maintenance by dealer During the service, check the brakes, rims, lights, chain tension and spokes. Also check the tread depth of the tires. This must be at least one millimetre. Worn tires or any defective parts must be replaced. Check the operation of the parking brake. With the fixed parking brake applied, the tricycle with rider on it may not ride away. - Page 45 Setting the adjustable handlebar stem If the handle of the handlebar stem does not close properly and the handlebars are not sufficiently clamped by the stem, the adjustment bolt must be readjusted. Follow the following instructions to properly adjust the handlebar stem: Open the handlebar stem bracket [A].
- Page 46 Adjusting chain tension (Easy Rider) In order to set the chains to the correct tension, it is important that the correct sequence is followed. Follow the instructions below to adjust the hub and tension wheel so that the chains have the correct tension: Loosen the nuts [A] on both sides of the hub.
- Page 47 Adjusting chain tension (Easy Rider Junior) In order to set the chains to the correct tension, the following actions must be taken: Loosen the nut [A] a few turns. On the other side, prevent the nut from turning with a wrench. Push the tensioner upwards to increase the tension on the chain.
- Page 48 Replacing the shock absorber (Easy Rider) The Easy Rider has a suspension frame (optional choice of suspension suitable for the body weight). To replace the suspension is recommended to hang the bicycle in a hoist. Make sure the swingarm can hang freely from the rear fork. To replace the suspension: Loosen the hexagon bolt [A].
-
Page 49: Return Point For Removal
Return point for removal If you want to return the bike, please contact your dealer. You can also contact the local waste disposal company. He will recycle the bike according to the rules of your place of residence. Recycling the battery If your battery is defective or if you are not longer using it, you must have it recycled. -
Page 50: Warranty
Warranty The warranty applies to all product defects for which it has been proven that the cause is a material or manufacturing defect. We give a five-year warranty on the frame and front fork. For all accessories and other parts (with the exception of wearing parts), we apply the statutory warranty period of two years. -
Page 51: Frame Number
Frame number You will find the frame number on the sticker. This sticker is applied to the frame, see pictures. Example sticker: Position sticker Easy Rider, Easy Rider Junior and Easy Sport: Easy Rider Easy Rider Junior On the frame tube On the frame tube Easy Sport Under the seat tube... -
Page 52: Service, Maintenance And Modifications Form
Service, maintenance and modifications form To retain the warranty claim, the Van Raam bicycle must be serviced in accordance with the schedule below. Service: Performed on: Initials dealer: Service after the first 200 KM or after two months Service 1 year after delivery Service 2 years after delivery Service 3 years after delivery Service 4 years after delivery... - Page 53 Notes: Version 21.01 53/55...
- Page 54 Notes: Version 21.01 54/55...
-
Page 55: Delivery And Service Form
Delivery and service form Congratulations on your Van Raam bicycle. This bicycle has been produced with the utmost care. To guarantee a high quality as much as possible, Van Raam produces the bicycles according to the ISO 9001: 2015 quality requirements. Van Raam has been certified for this by DNV GL Business Assurance B.V.
Need help?
Do you have a question about the Easy Rider 3 and is the answer not in the manual?
Questions and answers