
Subscribe to Our Youtube Channel
Related Manuals for Vanraam Chat


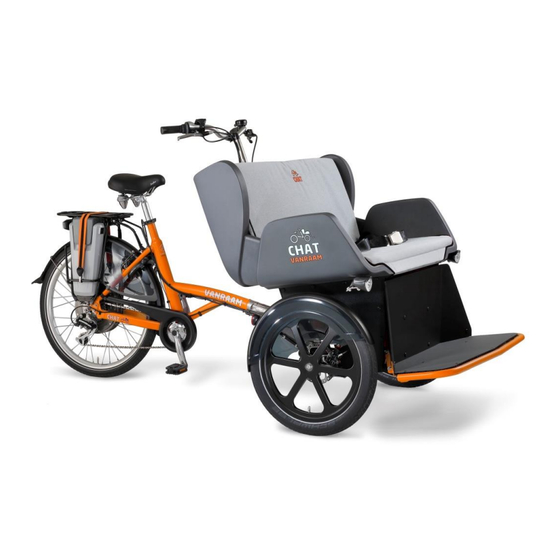
Summary of Contents for Vanraam Chat
- Page 1 User manual Chat Van Raam Guldenweg 23 7051 HT Varsseveld, The Netherlands +31 (0)315 – 25 73 70 info@vanraam.com Version 21.01 www.vanraam.com...
-
Page 2: Table Of Contents
Table of contents Manufacturer contact details ........................3 Conformity ................................ 3 Introduction ..............................3 Levering ................................4 Indication................................4 Intended usage ............................... 4 Safety measures............................. 5 Adjustment of the trishaw .......................... 7 Before the first use ............................10 Electro system Silent ..........................17 Van Raam E-Bike App .......................... -
Page 3: Manufacturer Contact Details
Conformity Van Raam declares as manufacturer that the Chat trishaw, as described in this manual, has been produced in accordance with the 2006/42/EG guidelines. The signed declaration of conformity can be found on the Van Raam website. Introduction This user manual provides important and necessary information about the use of your trishaw. -
Page 4: Levering
“Form service, maintenance, modifications a warranty claims” in the back of this manual. Indication The Chat is meant for cycling together with children or adults. Intended usage The trishaw has been designed for normal use on a flat, solid surface (do not use the trishaw off-road). -
Page 5: Safety Measures
Safety measures Ensure the trishaw is in good condition each time before using it. Check before • each ride that the brakes are in order. Check the lighting and make sure there is enough tyre pressure. Please note, your bike tires are equipped with car-type air valves. - Page 6 Your trishaw is equipped with the Silent electric motor system, make sure that • you get used to riding with the electric support engaged. Be careful when you turn on the electric support system and make sure you don’t get startled by unexpected behaviour because you turned on the electric support.
-
Page 7: Adjustment Of The Trishaw
Adjustment of the trishaw Before using the trishaw, adjust its height to the height of the rider. This is of essential importance, especially with regard to the, saddle, handlebars and seat. If an optimum setup with specified instructions is not possible you can contact your dealer for a suitable solution. - Page 8 Don't pull out the seat post further than the markings. If you do so, the tube won't be inserted deep enough into the shaft, MIN INSERT increasing the risk of breakage, which may lead to serious injuries. Handlebars height The height of the handlebars greatly influences ride comfort.
- Page 9 Passenger hip belt Use the hip belt when you go cycling. Place the belt around the body of the passenger and adjust the length of the belt for the individual. Fasten the metal fittings together. Adjust them by pulling the loose end of the belt.
-
Page 10: Before The First Use
Before the first use Parking brake Always use the parking brake if you park the tricycle and leave it behind. Block the tricycle with the hydro brake when passengers are getting on and off. To operate the parking brake, squeeze the left brake [A] and secure the brake with the lever [B]. - Page 11 You can switch the lighting on and off manually by briefly pressing the on/off button on the display or by using the button on the lighting. If the electronic system is switched off, the lighting automatically switches off. On/off button When cycling in the dark, make sure there is always a battery present on the bike! When the battery is almost empty, the motor will no longer provide support while cycling.
- Page 12 To operate the footrest, follow the steps below: Set the parking brake by pinching the left brake [A] and securing the brake with the handle [B]. Lower the footrest control pedal by pressing down on the tab marked “PUSH”. Remove the safety pin securing the handle. Press down on the footrest control pedal with your foot and pull the handle up so the footrest unlocks.
- Page 13 Place the footrest control pedal back into the brace. Finally, place the safety pin back in the link in the handle. Only use the footrest when standing still. The footplate is only intended to support the passengers’ feed. Do not load heavy objects on the footrest and don’t stand on it while the footplate is raised.
- Page 14 Baggage space On the back of the seat there is a baggage compartment [A At the front, beneath the seat, there is also a baggage compartment [B . You can access this baggage compartment by lowering the footrest. Seat cushion The seat cushion is water resistant.
- Page 15 Before every ride check: The brakes (including the parking brake) • The tyre pressure • The lighting • That all parts are secure • That the battery is sufficiently charged • Contact your dealer and never use your bike if you notice any irregularities. As is the case with all mechanical parts, the trishaw is subject to wear and high loads.
- Page 16 If there is an electric motor on a bike: you must train with the acceleration function and reverse functions. Be careful that the acceleration mode or reverse mode are not unintentionally started while using the bike. For example, at traffic lights the reverse function can accidentally be activated and the trishaw reverses.
-
Page 17: Electro System Silent
Electro system Silent The Silent Electric motor system is a special developed support system by Van Raam for the rehabilitation market. The system is characterized by: A simplicity of operation Individually adjustable support for cycling Modern and efficient electronics The powerful electric motors High quality and safe batteries Highly reliable system The Silent system comes standard with a basic support mode individually programmed for... - Page 18 When the system is not used, it will automatically turn off after a certain time. Always turn off the electric system before getting on and off the bike, and when you are walking while holding the bike. Make sure that the switch under the luggage carrier is always pressed to the side where the battery is located.
- Page 19 3. Start assist The Silent electric motor has a start support. This allows the driver to pull-away without pedalling up to a speed of 6 km/h over 6 seconds. To accelerate, press the start assist button and keep it pressed down. The function will only activate again, when the support button has been pressed down again.
- Page 20 The battery is equipped with a button and indicator that makes it possible to check the charge by briefly pressing the button [A]. The status of the battery is shown with five green indicator LEDs, of which the left most one can blink. That means the battery is nearly empty.
- Page 21 Charging the Battery For the best performance and to prolong the life of the battery, we recommend that you charge the battery at home at room temperature. Only use the charger if the temperature of the environment is between 0 and 35 degrees centigrade.
- Page 22 9. Put the battery back in the holder of the cycle. Slide it behind bar [A] and press it firmly on strip [B]. 10. Pull the handle backwards and push the top of the battery to connect as shown in the drawing and close the lock.
- Page 23 Charger: Status indication Green Standby Charging Green Battery full Red, blinking Safety: Polarity inversion; Short; Over temperature; Over power; Over voltage Backup battery (optional) The bike can be supplied with a second battery. To activate the second battery (when the first battery is empty), turn the switch under the luggage carrier to the side of the second battery.
- Page 24 Charging and maintenance tips for the battery Never leave the bike with an empty battery! We advise you charge the battery as • soon as possible before it’s totally empty. The best storage-charge of the battery is when three to five LED lights are lit. •...
- Page 25 Possible malfunctions The system does not turn on: • Make sure that the battery is properly attached. Check if the switch under the luggage carrier is pressed towards the side of the battery. Check the status of the battery. If it is empty, recharge the battery. If the above action does not help, contact your dealer.
- Page 26 Charger Safety Measures: Only charge Van Raam Li-Ion batteries with the included charger. Only connect • the charger to a suitable power point (220-240 Volt AC 50-60 Hz). If the charger is not being used, unplug it from the socket and take the plug out of the battery. The charger may only be used by people who have read the information in this •...
-
Page 27: Van Raam E-Bike App
The Van Raam E-Bike App can be downloaded free of charge from the Google Play Store or Apple App Store. For more information about the Van Raam App, you can visit the Van Raam website: www.vanraam.com. Version 21.01 27/43... - Page 28 From the 15th of July, 2020, all electric Van Raam bicycles will be delivered as Smart E-Bikes. You can recognize this by the large sticker with a yellow border on the battery. If you have a Smart E-Bike and you download the updated app, there are even more options.
-
Page 29: Accessories
Accessories Depending on your order, you can use the accessories described below. Additional accessories are available from your dealer. Canopy The canopy offers passengers protection from sun, rain, and wind. The material is water resistant. Please note! Make sure the canopy is tensioned correctly before you start cycling. - Page 30 Place the side flaps on top of the canopy and fold the three canopy braces towards each other. Fold the back flap around the poles to create a small package and secure it with the elastic band. Remove the top part of the canopy construction and place this in the suspension hooks on the back of the seat.
- Page 31 Then remove the two retractable poles from the seat by opening the securing pin and removing them. Place the poles in the baggage compartment on the back of the seat. To attach the canopy again, follow the steps in the opposite direction.
-
Page 32: Technical Specification
Technical specification Length (cm) Width (cm) Height (cm) Mounting Height (cm) Inseam Size (cm) 80-95 Seat width passengers (cm) Front Wheel 20“ Rear Wheel 26“ Weight (kg) approx 97 Max. Load Rear Carrier (kg) Max. load of baggage compartment front (kg) Max. -
Page 33: Maintenance And Adjustments By Owner
Maintenance and adjustments by owner Below are some instructions for maintenance and adjustments that you can perform on a regular basis. This ensures an optimum condition of your bike. Cleaning The frame of the trishaw can be cleaned with a damp cloth. For dirty spots it is recommended to use a mild detergent. - Page 34 The right lubricant The chain should be cleaned and maintained regularly (approx. once every three months). Only use special chain grease or Teflon spray. This is the only way to ensure that the chain moves smoothly, remains water-repellent and does not rust. Clean the chain with a cloth.
-
Page 35: Repair And Maintenance By Your Dealer
Repair and maintenance by your dealer During the maintenance session, check the brakes, wheels, lights, chain tension and spokes. Also check the tread depth of the tyres. This must be at least one millimetre. Worn tyres or defective parts must be replaced. Also check the operation of the parking brake. -
Page 36: Adjustments By Dealer
Adjustments by dealer Setting the steering In order to realise optimal steering behaviour and minimal tyre wear, the steering must be set correctly. Loosen the left and right nuts of the steering shaft [A]. Please note! This is a nut with a left wire and a nut with a right wire. -
Page 37: Disposal
Finally point the handlebar straight ahead. Make sure the wheels also face straight ahead at that moment. Check whether the trishaw easily drives straight ahead on the tyres, without resistance and friction. Disposal If you want to dispose your tricycle, contact your dealer. You can also contact the local waste disposal company. -
Page 38: Guarantee
Guarantee The guarantee is valid for all faults in the product, which are proven to be caused by material or manufacturing error. We give a guarantee of five years on the frame and the front fork. For all accessories and other parts (except wear parts) we provide a two year guarantee, as legally regulated. -
Page 39: Frame Number
Frame number The frame number is printed on the sticker. This sticker is located on the frame, see the image below. Example sticker: Position of sticker: behind the seat tube Version 21.01 39/43... -
Page 40: Service Record, Maintenance, Modifications And Warranty Claims
Service record, maintenance, modifications and warranty claims To maintain warranty on the Van Raam trishaw, follow this service schedule. Service: Carried out (date): Signature dealer: Service after the first 200 KM or two months. Service 1 year after delivery. Service 2 year after delivery. Service 3 year after delivery. - Page 41 Here you have space to take notes or write down the maintenance on your bike: Version 21.01 41/43...
- Page 42 Version 21.01 42/43...
-
Page 43: Delivery And Service Form
Delivery and service form Congratulations on your purchase of your Van Raam trishaw. This bike is produced with utmost care. To guarantee the quality as much as possible Van Raam produces the cycles according to the ISO 9001:2015 quality standards. Van Raam has been certified by DNV GL Business Assurance B.V.
Need help?
Do you have a question about the Chat and is the answer not in the manual?
Questions and answers