
Subscribe to Our Youtube Channel
Related Manuals for JAI AT-200CL


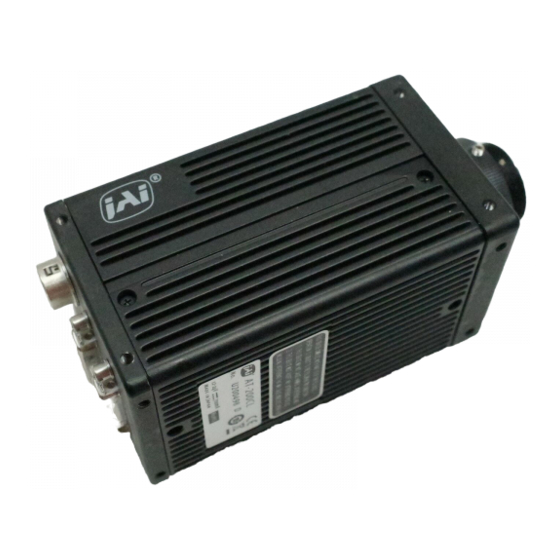
Summary of Contents for JAI AT-200CL
- Page 1 User Manual AT-200CL Digital 3CCD Progressive Scan RGB Color Camera Document Version: Ver.1.1 AT-200CL_Ver.1.1_May2012 1009E-0908...
- Page 2 JAI Ltd., Japan and may only be used by the purchasers of the product. JAI Ltd., Japan makes no warranty for the use of its product and assumes no responsibility for any errors which may appear or for damages resulting from the use of the information contained herein.
- Page 3 AT-200CL Supplement The following statement is related to the regulation on “ Measures for the Administration of the control of Pollution by Electronic Information Products “ , known as “ China RoHS “. The table shows contained Hazardous Substances in this camera.
-
Page 4: Table Of Contents
AT-200CL Table of Contents 1. General ..................- 5 - 2. Camera nomenclature ..............- 5 - 3. Main Features ................- 6 - 4. Locations and Functions ..............- 7 - 5. Pin Assignment ................- 9 - 5.1. 12-pin Multi-connector (DC-IN/Trigger) ..............- 9 - 5.2. - Page 5 10.2. Communication setting................- 34 - 10.3. AT-200CL command list ................. - 35 - 11. Camera Control Tool for AT-200CL ..........- 38 - 11.1. Software installation ................- 38 - 11.2. Run the software ..................- 38 - 11.3....
-
Page 6: General
AT-200CL 1. General The AT-200CL is a digital 3CCD progressive scan RGB color camera. It employs three 1/1.8 inch 1628(h) x 1326(v), 2 Megapixel CCDs and it runs 20 frames per second in full resolution ® mode. The AT-200CL has a Camera Link... -
Page 7: Main Features
AT-200CL 3. Main Features 3 x 1/1.8” CCD progressive scan RGB color camera for vision applications 3 x 1628(h) x 1236 (v) 4.4m effective square pixels Compact RGB prism for C-mount lenses Chromatic shading reduction permits wider choice of lenses ... -
Page 8: Locations And Functions
AT-200CL 4. Locations and Functions ④ ⑤ POWER / TRIG POWER / TRIG DC IN DC IN / TRIG TRIG ⑥ ③ DIGITA I DIGITAL I/O 2 ② DIGITAL I DIGITAL I/O 1 ① 1. Lens mount Lens mount of C-mount type. *1) 2. - Page 9 AT-200CL 6. Mounting holes 8 x M3 depth 5mm for tripod mount plate or direct installation *3) *1) Note: Applicable C-mount lens should be designed for 3-CCD cameras. Rear protrusion on C-mount lens must be less than 4mm. Be advised: when using a lens with the iris diaphragm fully open, vignetting on corners may occur.
-
Page 10: Pin Assignment
Data out 4(-),17(+) TxOUT2 5(-),18(+) TxClk Clock for CL 6(-),19(+) TxOUT3 Data out 7(+),20(-) SerTC (RxD) LVDS Serial Control 8(-),21(+) SerTFG (TxD) 9(-),22(+) CC1 (Trigger) JAI Standard Trigger 10(+),23(-) CC2 (Reserved) 11,24 N.C. 12,25 N.C. 13,26 Shield - 9 -... -
Page 11: Dip Switch
AT-200CL Port2 (30bits, 36bits) Pin No In/Out Name Note 1,14 Shield 2(-),15(+) TxOUT0 3(-),16(+) TxOUT1 Data out 4(-),17(+) TxOUT2 5(-),18(+) TxClk Clock for CL 6(-),19(+) TxOUT3 Data out 7(+),20(-) N.C. 8(-),21(+) N.C. 9(-),22(+) N.C. 10(+),23(-) N.C. 11,24 N.C. 12,25 N.C. -
Page 12: Rear Panel Indication
AT-200CL 5.4. Rear Panel indication The rear panel mounted LED provides the following information: P O W E R Amber : Power connected - initiating D C IN /T R IG /T R IG Steady green : Camera is operating in Continuous mode ... -
Page 13: Xeen Output
The AT-200CL outputs an RGB signal via Camera Link. A 3 x 8-bit signal is allocated via a Base configuration through port 1, while a 3 x 10-bit or 3 x 12-bit signal is allocated via a Medium configuration through both port 1 and port 2. - Page 14 AT-200CL 24 bits 30 bits 36 bits Port/Signal Connector Pin No. output output output Port A0 Port 1 Port A1 Port 1 Port A2 Port 1 Port A3 Port 1 Port A4 Port 1 Port A5 Port 1 Port A6...
-
Page 15: Digital Output (Bit Allocation)
AT-200CL 6.4.1 Digital Output (Bit allocation) CCD out Analog Signal Digital Out(24bit) Digital Out(30bit) Digital Out(36bit) Black Setup 3.6%, 25mV 8LSB 32LSB 128LSB 200mV 700mV 222LSB 890LSB 3560LSB 230mV↑ 800mV 255LSB 1023LSB 4095LSB Note: The above data is for the case when gamma is OFF. -
Page 16: Functions And Operations
The partial scanning function uses the middle of the image vertically to achieve faster frame rates. This is very useful when capturing and inspecting an image which does not require the full height. The AT-200CL has 4 types of pre-set partial scan modes: 2/3, 1/2, 1/4 and 1/8. Mode... - Page 17 AT-200CL 2 lines Image Height 1236 lines Minimum: 2 lines Maximum: 1236 lines Image start line/end line 1235/ 1236 Image start line from 1 to 1235 Image start line from 1 to 1235 Image end line from 2 to 1236 Image end line from 2 to 1236 Fig.14.
-
Page 18: Vertical Binning (Vb)
2:1 V Binning 618 / 628 22.563 KHz 35.93 frames /sec. 7.2.3 Electronic shutter (SM) The AT-200CL has the following shutter modes. Pre-set shutter(SH) The setting command is from SH=0(OFF) to SH=11(1/51,000) OFF(1/20),1/60,1/100,1/120,1/250,1/500,1/1000,1/2,000,1/4,000,1/7,000,1/17,000 and 1/51,000s Note: The actual exposure uses the programmable exposure (PE) method. When the camera receives a pre-set shutter value, it is converted to a programmable value inside the camera. -
Page 19: Auto-Detect Lval-Sync / A-Sync Accumulation
Note: In Pulse Width mode, the minimum trigger pulse width requires more than 2LVAL. Auto shutter AT-200CL has an automatic shutter function which sets the video at an appropriate level depending on illumination. Auto shutter range: 1/20 sec to 1/2400 sec 7.2.4 Auto-detect LVAL-sync / a-sync accumulation... -
Page 20: Shading Compensation (Sdm)
AT-200CL 7.2.5 Shading compensation (SDM) The AT-200CL implements a digital shading compensation circuit for the white shading which could be caused in the prism or optical system. The whole image is divided horizontally and vertically and uses the center level as the reference. The circuit will compensate the difference between the center and each divided area. -
Page 21: White Balance (Wb)
The pre-set white balance can be set to 4000K, 4600K or 5600K. The white balance of AT-200CL is set under 7800K lighting in factory. If the camera is started up at the first time, it is 7800K white balance and R and B gain settings are 0. -
Page 22: Gamma Setting (Lutc)
0(x0.0005) ~ 4095(x2.0000) 7.2.10 Test pattern generator The AT-200CL has an internal test pattern generator. These signals are output as the last process of the digital signal processing circuit and can be used for adjustment of the related system. The AT-200CL has a total of 15 test pattern types. -
Page 23: Sensor Layout And Timing
AT-200CL 1 = Vertical 2 = Horizontal 3 = Both Note: The center marker is displayed only on full scan mode. Fig. 23 Center marker 8. Sensor Layout and timing 8.1. CCD Sensor Layout Read Out blank 1688 (Vertical) Optical Black... -
Page 24: Normal Continuous Mode Timing
AT-200CL 8.2. Normal continuous mode timing 8.2.1 Horizontal timing Fig. 25. Horizontal timing 8.2.2 Vertical timing F V A L p e r i o d 1L = 42.07 s F V A L 1 2 5 2 L L V A L... -
Page 25: Partial Scan Timing
AT-200CL 8.3. Partial scan timing 8.3.1 Horizontal timing Fig.27 Horizontal timing ( Partial scan, the same as normal continuous) 8.3.2 Vertical timing 1 FVAL Period 8 9 5 L 8 9 1 L F V A L L V A L... -
Page 26: Vertical Binning
AT-200CL No. of Front of Back Blank Start lines Frame Option line line Output image (Lines) Frame Frame (Line) (Line) Full 1252 1252 Full Frame screen 1030 screen screen Partial Scan screen screen 8.4. Vertical binning 8.4.1 Vertical timing 1 F VAL Per i od... -
Page 27: Horizontal Timing
AT-200CL 8.4.2 Horizontal timing 1 L V A L p e r i o d 2 2 1 6 1688 L V A L FVAL raising edge FVAL falling edge F V A L 2138 S U B 835 (16.7μs) -
Page 28: Edge Pre-Select Trigger Mode
AT-200CL 9.2. Edge Pre-select Trigger Mode An external trigger pulse initiates the capture, and the exposure time (accumulation time) is the fixed shutter speed set by SH or PE. The accumulation can be automatically set either LVAL synchronous or LVAL asynchronous in relation to FVAL and trigger timing. -
Page 29: Eps Timing
AT-200CL 9.2.1 EPS timing Fig.31. Edge Pre-select. 9.2.2 EPS timing LVAL sync details Ext. Tri g FVAL LVAL Exposur e Pr i od XEEN 1. 5L ( H ir os e 12pi n) ( Exposure) Dat a out Del ay Exposur e Del ay 11. -
Page 30: Eps Timing Lval Async Details
AT-200CL 9.2.3 EPS timing LVAL async details Ext . Tr i g FVAL LVAL Exposure period XEEN 1 to 2L ( Hi r os e 12pi n) (Exposure) Data output delay Exposure delay 11 to 12L 9. 7us DATA out Fig.33... -
Page 31: Pulse Width Control Trigger Mode
AT-200CL 9.3 Pulse Width Control Trigger Mode In this mode the accumulation time is equal to the trigger pulse width. Here it is possible to have a long time exposure. The accumulation can be automatically set either LVAL synchronous or LVAL asynchronous in relation to FVAL and trigger timing. Refer to chapter 7.2.4. -
Page 32: Pwc Timing - Lval Sync Details
AT-200CL 9.3.2 PWC timing - LVAL sync details Ext. Tr i g Del ay of Exposur e End 0. 5 to 1.5L FVAL LVAL Exposure Pri od XEEN 1. 5L ( Hirose 12pi n) ( Exposur e) Data out Del ay Del ay of Exposur e St ar t 11.5L... -
Page 33: Reset Continuous Trigger (Rct)
After the trigger pulse is input, a fast dump read out is performed. In the AT-200CL, this period is 7.08ms which is 180L. The exposure time is determined by the pre-set shutter speed. If no further trigger pulses are applied, the camera will continue in normal mode and the video signal is not output. -
Page 34: Smearless Mode
Fig.38 Smearless mode 9.6. Trigger mask AT-200CL has a trigger mask function. When this is ON, triggers which are input in shorter intervals than the minimum interval, are disabled. Refer to each trigger mode for information about minimum intervals. 9.7. Mode and functions matrix... -
Page 35: Configuring The Camera
10. Configuring the Camera 10.1. RS-232C control All configuration of the AT-200CL camera is done via Camera Link. The camera can be set up from a PC running terminal emulator software, or using JAI’s camera control software. Below is the description of the ASCII based short command protocol. -
Page 36: At-200Cl Command List
AT-200CL 10.3. AT-200CL command list Command Name Format Parameter Remarks A – General settings and useful commands Echo Back EB=Param.<CR><LF> 0=echo off 1=echo on Off at power up Camera Status request ST?<CR><LF> Actual setting Online Help request HP?<CR><LF> Command list Firmware version VN?<CR><LF>... - Page 37 AT-200CL AASX=[Param.]<CR><LF> AASX 1 to 8 AASX?<CR><LF> Window Size X AASY=[Param.]<CR><LF> AASY 1 to 8 AASY?<CR><LF> Window Size Y AAOX=[Para.]<CR><LF> AAOX 0 to 7 AAOX?<CR><LF> Window offset X AAOY=[Para.]<CR><LF> AAOY 0 to 7 AAOY?<CR><LF> Window offset Y AGC tracking AGCS=[Param]<CR><LF>...
- Page 38 AT-200CL LUTB=[Param.]<CR><L transfer by a serial method. LUT data communication LUTB F> The number of the data is 512. (For Blue) LUTB?<CR><LF> Param: 0 to 8191 TPN=[Param.]<CR><LF 0=OFF Test pattern > 1 to 15 pattern TPN?<CR><LF> RF=[Param.]<CR><LF> 0=Camera Link Standard RCT FVAL Type RF?<CR><LF>...
-
Page 39: Camera Control Tool For At-200Cl
AT-200CL 11. Camera Control Tool for AT-200CL A Camera Control Tool for AT-200cl can be downloaded from JAI web site www.jai.com This control tool is based on the Windows XP operating system. 11.1. Software installation Run AT-140_200CL.exe file from the folder downloaded. As the setup program initiates, start to set up according to screen instructions. - Page 40 AT-200CL User Parameter 1 Shutter, Trigger, Output format, Knee, Test pattern, Color matrix, Blemish ON/OFF, Center marker User Parameter 2 Gain, AWB, Matrix gain user, Shading, Setup, LUT, Noise reduction ON/OFF, Temperature - 39 -...
-
Page 41: Lut Set Up
AT-200CL 11.4. LUT set up Click “settings” button on the tab to open the following windows. - 40 -... -
Page 42: Menu
AT-200CL Click “Clear LUT point” button and then “γ=1” graph will be shown. It is possible to set up an appropriate gamma characteristics by dragging the necessary point in a line. Click “Send table data” button and send the data to the camera. -
Page 43: Settings Menu
AT-200CL 11.5.2 Settings menu Reload: Read the setting parameters in the RAM inside the camera. Load settings: Load the setting parameters in the EEPROM inside the camera. Select from Factory, User 1, User 2, User 3. Store settings: Store the setting parameters in the EEPROM inside the camera. -
Page 44: External Appearance And Dimensions
AT-200CL 12. External Appearance and Dimensions 4-M3 Depth5 C Mount POWER / TRIG POWER / TRIG DC IN DC IN / TRIG TRIG DIGITA I DIGITAL I/O 2 DIGITAL I DIGITAL I/O 1 Depth5 4-M3 98.3 4-M3 Depth5 Outside dimensions tolerance : ± 0.3mm... -
Page 45: Specifications
AT-200CL 13. Specifications 13.1. Spectral sensitivity for sensor Fig. 41. Spectral sensitivity for AT-200CL sensor - 44 -... -
Page 46: Specification Table
AT-200CL 13.2. Specification table Specifications AT-200CL Optical system 1/1.8 inch F4.0 prism Scanning system Progressive Frame rate full frame 20.31 frames/second (1236 lines per frame) Pixel clock 50 MHz Line frequency 25.432 kHz (1966 clk per line) V binning 22.563 kHz (2216 clk per line) CCD sensors 3 x 1/1.8”... - Page 47 AT-200CL Specifications AT-200CL Vibration 3 G (15 Hz – 200 Hz in XYZ) Shock 50 G Regulations CE (EN 61000-6-2, EN 61000-6-3), FCC part 15 class B, RoHS 10.8V DC to 26.4V DC. 0.57A (Typical , Full frame ,12V input) Power 0.68 A (Typical ,1/8 partial, +12V input)
-
Page 48: Appendix
AT-200CL 14. Appendix 14.1. Precautions Personnel not trained in dealing with similar electronic devices should not service this camera. The camera contains components sensitive to electrostatic discharge. The handling of these devices should follow the requirements of electrostatic sensitive components. -
Page 49: Caution When Mounting The Camera
When exporting this product, please follow the export regulation of your own country. 14.6. References 1. This manual can and datasheet for AT-200CL can be downloaded from www.jai.com 2. Camera control software can be downloaded from www.jai.com - 48 -... -
Page 50: Change Tracking
AT-200CL Change tracking Date Revision Changes Oct 2009 New issue May 2012 Delete Blemish Compensation circuit - 49 -... -
Page 51: User's Record
Company and product names mentioned in this manual are trademarks or registered trademarks of their respective owners. JAI A-S cannot be held responsible for any technical or typographical errors and reserves the right to make changes to products and documentation without prior notification.
Need help?
Do you have a question about the AT-200CL and is the answer not in the manual?
Questions and answers