Table of Contents
Advertisement
Quick Links
Advertisement
Table of Contents

Subscribe to Our Youtube Channel
Related Manuals for ATEN VE829


Summary of Contents for ATEN VE829
- Page 1 5x2 HDMI Wireless Extender VE829 User Manual www.aten.com...
- Page 2 VE829 User Manual RoHS This product is RoHS compliant. SJ/T 11364-2006 The following contains information that relates to China.
-
Page 3: User Information
VE829 User Manual User Information Online Registration Be sure to register your product at our online support center: International http://eservice.aten.com Telephone Support For telephone support, call this number: International 886-2-8692-6959 China 86-10-5255-0110 Japan 81-3-5615-5811 Korea 82-2-467-6789 North America 1-888-999-ATEN ext 4988... -
Page 4: Package Contents
© Copyright 2013 ATEN® International Co., Ltd. Manual Date: 2013-10-02 ATEN and the ATEN logo are registered trademarks of ATEN International Co., Ltd. All rights reserved. All other brand names and trademarks are the registered property of their respective owners. -
Page 5: Table Of Contents
VE829 User Manual Contents User Information ..........iii Online Registration . - Page 6 VE829 User Manual 4. OSD Operation Overview..........21 Source Device Switching .
-
Page 7: About This Manual
An overview of the information found in the manual is provided below. Chapter 1, Introduction, introduces you to the VE829 system. Its purpose, features and benefits are presented, and its front and back panel components are described. -
Page 8: Conventions
For information about all ATEN products and how they can help you connect without limits, visit ATEN on the Web or contact an ATEN Authorized Reseller. Visit ATEN on the Web for a list of locations and telephone numbers: International http://www.aten.com... -
Page 9: Introduction
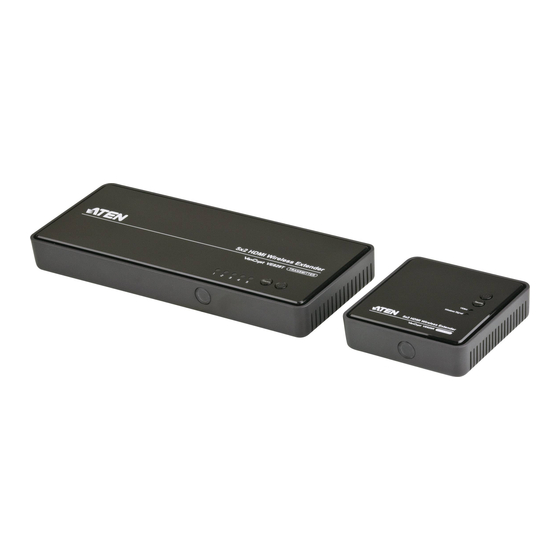
Introduction Overview The VE829 5x2 HDMI Wireless Extender is the first of its kind to send full uncompressed HD 1080p, while connecting up to 5 source devices and allowing users to switch and independently select any source to display on two HDTVs. -
Page 10: Features
VE829 User Manual Features Wireless transmission of fully uncompressed HD videos up to 30m for two HDTVs Note: Distance, quality and signal may vary depending on the environment; solid structures, such as steel, concrete and brick may result to shorter distance coverage or complete loss of signal. -
Page 11: Requirements
Introduction Requirements Consoles 2 HDMI displays with HDMI Type A output connectors Keyboard / mouse (optional, USB HID function) Sources Up to 4 video source devices with an HDMI Type A input connector 1 video source with component output connector Computer or laptop (optional) Cables Up to 4 HDMI cables for the source devices you will be connecting... -
Page 12: Components
VE829 User Manual Components VE829T Top View Component Description Source LEDs These LEDs light green to indicate active connection to a source. The LEDs blink to indicate that it is trying to link with a Receiver. The LEDs blink quickly when no source is detected. -
Page 13: Ve829R Top View
Introduction VE829R Top View Component Description Power Button / Press this button to power on/off the VE829R. Note: The HDMI Out on the Transmitter is always ON even when the Receiver is in standby mode. The LED lights green to indicate that the device is receiving power. -
Page 14: Ve829R Rear View
USB HID Connect a USB keyboard / mouse to this port to control the computer connected to the Transmitter. The VE829 supports USB HID function for keyboard / mouse usage. HDMI OUT Use an HDMI cable to connect your HDMI display device to this port. -
Page 15: Front View
Introduction Front View VE829T VE829R Component Description IR Receiver This receives signals from the IR remote control. -
Page 16: Ir Remote Control
OK. Note: 1. The battery compartment is located at the back panel of the IR remote control. 2. Refer to Chapter 4 for further details on how to use the IR remote control to operate your VE829 installation. -
Page 17: Hardware Setup
Chapter 2 Hardware Setup 1. Important safety information regarding the placement of this device is provided on page 25. Please review it before proceeding. 2. Make sure that the power to all devices connected to the installation is turned off. You must unplug the power cords of any computers that have the Keyboard Power On function. - Page 18 VE829 User Manual 3. Hang the VE829R by having the bottom panel holes aligned into the screws. Slide down into position. Note: These screws are not provided. We recommend that you use M5 x 12 Phillips Type I cross, recessed type screws.
-
Page 19: Single Station Installation
You must unplug the power cords of any computers that have the Keyboard Power On function. To set up your VE829 installation, refer to the installation diagram on the next page (the numbers in the diagrams correspond to the steps below), and do the following: 1. - Page 20 VE829 User Manual 7. (Optional) For USB HID control (keyboard / mouse) of the PC connected to the Transmitter, connect a keyboard or mouse to the USB port. 8. Power on all connected source devices. HDMI Display Device HDMI Display Device...
-
Page 21: Ir Blaster Extender Cable Setup
4. Attach the IR sensor to a visible area where you can point your IR remote control (i.e. front panel of the display device or against a wall). Note: The VE829 IR sensors support 38 KHz, 47 KHz and 56 KHz remote signal protocol. - Page 22 VE829 User Manual This Page Intentionally Left Blank...
-
Page 23: Basic Operation
Transmitter and Receiver. The maximum distance between VE829T / VE829R is 100 feet, while the minimum distance between VE829 devices is 6.5 feet if you have more than one set of VE829. 2. Distance, quality and signal may vary depending on the environment;... -
Page 24: Manual Switching
VE829 User Manual Manual Switching You can manually switch input sources by pressing the pushbutton on the top panel of the VE829T / VE829R, or using the IR remote control. Front Panel Pushbutton Press the SOURCE button on the top panel of the Transmitter or Receiver to toggle between connected input sources, and select the video you want displayed on screen. -
Page 25: Led Display
Basic Operation LED Display The Mode and Port Selection Pushbuttons on the VE829’s front panel each have three corresponding LED icons that represent audio, KVM, and USB Link. These light green or orange, depending on status, as shown in the table,... -
Page 26: Naming Source Devices
VE829 User Manual Naming Source Devices You can give names the input source devices attached to the VE829T (Transmitter) to easily identify them. To do this, follow these steps: 1. Press and hold the Source button on the top panel of the VE829T for over 3 seconds. -
Page 27: Powering Off And Restarting
Basic Operation Powering Off and Restarting If it becomes necessary to power off the unit, before starting it back up you must do the following: 1. Shut down all the devices that are attached to the VE829T / VE829R. 2. Unplug the VE829T / VE829R’s power adapter cable. 3. - Page 28 VE829 User Manual This Page Intentionally Left Blank...
-
Page 29: Osd Operation
Chapter 4 OSD Operation Overview The On-Screen Display (OSD) is a menu driven method to handle VE829T / VE829R control and switching operations. It appears on the attached HDMI displays (Transmitter or Receiver) after hardware connections are made and the devices are powered on. Source Device Switching You can switch between source inputs via the OSD using the IR remote control as follows:... - Page 30 VE829 User Manual To add another Transmitter to a Receiver, do the following steps: 1. Make sure Transmitter 1 is powered off. Press Transmitter No. on the IR remote control (pointing to the Receiver). 2. Press the Up / Down button on your remote control and go to SETUP, press OK.
-
Page 31: Remove Transmitter
OSD Operation Remove Transmitter To remove a Transmitter from the list of transmitters paired with a receiver, do the following: 1. Press Transmitter No. on the IR remote control, go to SETUP then press 2. Select Remove Transmitter. 3. Go to the Transmitter you want to remove and press OK. Modify Transmitter Name To change a Transmitter name, do the following: 1. - Page 32 VE829 User Manual This Page Intentionally Left Blank...
-
Page 33: Appendix
Appendix Safety Instructions Read all of these instructions. Save them for future reference. Follow all warnings and instructions marked on the device. This product is for indoor use only. Do not place the device on any unstable surface (cart, stand, table, etc.). If the device falls, serious damage will result. - Page 34 VE829 User Manual If an extension cord is used with this device make sure that the total of the ampere ratings of all products used on this cord does not exceed the extension cord ampere rating. Make sure that the total of all products plugged into the wall outlet does not exceed 15 amperes.
-
Page 35: Technical Support
Appendix Technical Support International For online technical support – including troubleshooting, documentation, and software updates: http://eservice.aten.com For telephone support, Telephone Support, page iii. North America Email Support support@aten-usa.com Online Troubleshooting http://www.aten-usa.com/support Technical Documentation Support Software Updates Telephone Support 1-888-999-ATEN ext 4988 When you contact us, please have the following information ready beforehand: Product model number, serial number, and date of purchase. -
Page 36: Specifications
VE829 User Manual Specifications Function VE829T VE829R Connectors Input HDMI In 4 x HDMI Type A Female (Black) Component in 1 x S Video Female (Black) USB input 1 x USB type A (USB HID for Keyboard/ Mouse) (Black) IR Input port 1 x 2.5 mm jack... -
Page 37: Video And Audio Format Supported
Appendix Video and Audio Format Supported 2D Video Format Timings Resolution Primary CEA Video Timing 640x480p @ 59.94 / 60Hz 480p 720x480p @ 59.94Hz 720x480p @ 60Hz 720x576p @ 50Hz 576p 1280x720p @ 50Hz 720p 1280x720p @ 59.94 / 60Hz 1920x1080i @ 50Hz 1080i 1920x1080i @ 59.94 / 60Hz... -
Page 38: Troubleshooting
VE829 User Manual Troubleshooting Operation problems can be due to a variety of causes. The first step in solving them is to make sure that all cables are securely attached and seated completely in their sockets. Problem Resolution The Power LED does not Check that the power adapters of the Transmitter / light up. - Page 39 Appendix Problem Resolution Poor picture quality or Check if the video resolution on your HDMI display is set intermittent video to 1080p, 1080i, 720p, 576p, or 480p resolution. Refer to Video and Audio Format Supported, page 29. Check that the distance between the Transmitter and Receiver does not exceed 100 feet.
-
Page 40: Limited Warranty
VE829 User Manual Limited Warranty IN NO EVENT SHALL THE DIRECT VENDOR'S LIABILITY EXCEED THE PRICE PAID FOR THE PRODUCT FROM DIRECT, INDIRECT, SPECIAL, INCIDENTAL, OR CONSEQUENTIAL DAMAGES RESULTING FROM THE USE OF THE PRODUCT, DISK, OR ITS DOCUMENTATION. The direct vendor makes no warranty or representation, expressed, implied, or statutory with respect to the contents or use of this documentation, and especially disclaims its quality, performance, merchantability, or fitness for any particular purpose. - Page 41 CM1164 User Manual Contents User Information ..........iii Online Registration .
- Page 42 CM1164 User Manual 4. OSD Operation Overview..........21 Source Device Switching .
Need help?
Do you have a question about the VE829 and is the answer not in the manual?
Questions and answers