Table of Contents
Advertisement
Advertisement
Table of Contents

Subscribe to Our Youtube Channel
Related Manuals for ATEN VE819


Summary of Contents for ATEN VE819
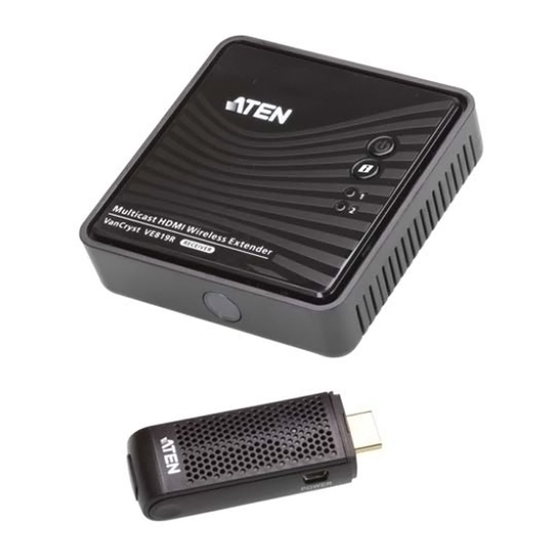
- Page 1 HDMI Dongle Wireless Extender VE819 User Manual www.aten.com...
- Page 2 VE819 User Manual FCC Information FEDERAL COMMUNICATIONS COMMISSION INTERFERENCE STATEMENT: This equipment has been tested and found to comply with the limits for a Class B digital service, pursuant to Part 15 of the FCC rules. These limits are designed to provide reasonable protection against harmful interference in a residential installation.
-
Page 3: Rohs
VE819 User Manual Broadband Radio Access Networks (BRAN); 5 GHz high performance RLAN; Harmonized EN covering essential requirements of article 3.2 of the R&TTE Directive EN 301 489-1 Electromagnetic compatibility and Radio Spectrum Matters (ERM); ElectroMagnetic Compatibility (EMC) standard for radio equipment and services;... -
Page 4: User Information
VE819 User Manual User Information Online Registration Be sure to register your product at our online support center: International http://eservice.aten.com Telephone Support For telephone support, call this number: International 886-2-8692-6959 China 86-400-810-0-810 Japan 81-3-5615-5811 Korea 82-2-467-6789 North America 1-888-999-ATEN ext 4988... -
Page 5: Ve819 Package Contents
© Copyright 2017 ATEN® International Co., Ltd. Manual Date: 2017-09-19 ATEN and the ATEN logo are registered trademarks of ATEN International Co., Ltd. All rights reserved. All other brand names and trademarks are the registered property of their respective owners. -
Page 6: Table Of Contents
VE819 Package Contents ........ -
Page 7: About This Manual
An overview of the information found in the manual is provided below. Chapter 1, Introduction, introduces you to the VE819 system. Its purpose, features and benefits are presented, and its front and back panel components are described. -
Page 8: Conventions
For information about all ATEN products and how they can help you connect without limits, visit ATEN on the Web or contact an ATEN Authorized Reseller. Visit ATEN on the Web for a list of locations and telephone numbers: International http://www.aten.com... -
Page 9: Chapter 1 Introduction
Chapter 1 Introduction Overview The VE819 HDMI Dongle Wireless Extender is a wireless solution that can extend crystal clear image quality from laptops, DVD players, projectors and other HDMI Devices to HDMI displays, making it perfect for home, office or school. -
Page 10: Features
Chapter 1 Introduction Features Wireless transmission of fully uncompressed HD videos up to 30ft.* (10m) Allows you to switch and independently select any of sources. When additional transmitters are connected Supports full uncompressed 1080p HD resolutions, 3D, and 5.1 channel digital audio Superior video quality –... -
Page 11: Requirements
VE819 User Manual Requirements Display A display device with an HDMI Type A input connector Sources A source player with an HDMI Type A output connector... -
Page 12: Components
Chapter 1 Introduction Components VE819T Top and Side View Component Description Status LED Solid blue when powered on and wireless link is established. 1 flash/sec when in pairing mode. 3 flashes/sec when establishing the link with the Receiver. HDMI Connector Connects the HDMI Transmitter to a laptop or media player’s HDMI port. - Page 13 VE819 User Manual VE819R Top View Component Description Power Button with Press this button to power on/off the VE819 R This LED lights blue to indicate active connection to a source. Lights red when in Standby Mode. Info Button Press to show information on screen. See OSD Operation, page 13.
-
Page 14: Ir Remote Control
Chapter 1 Introduction IR Remote Control No. Component Description Power Press this button to power on/off the Receiver. Info Press this button to display the OSD on the screen. Transmitter No. Press this button to switch to another transmitter, if more than one Transmitter is being used and within range. -
Page 15: Chapter 2 Hardware Setup
Chapter 2 Hardware Setup 1. Important safety information regarding the placement of this device is provided on page 18. Please review it before proceeding. 2. Make sure that the power to all devices connected to the installation is turned off. You must unplug the power cords of any computers that have the Keyboard Power On function. - Page 16 Chapter 2 Hardware Setup 3. Hang the VE819R by having the bottom panel holes aligned into the screws. Slide down into position.
-
Page 17: Setup The Wireless Hdmi Transmitter And Receiver
VE819 User Manual Setup the Wireless HDMI Transmitter and Receiver To set up your HDMI Wireless Transmitter and Receiver, please follow these steps: 1. Connect the Wireless HDMI Transmitter to the HDMI port of the computer or media source. 2. Power the transmitter through one of two options: If used with a Blu-Ray player or similar device, connect the Wireless HDMI Transmitter to the USB power adapter. -
Page 18: Chapter 3 Basic Operation
This takes around 15 to 20 seconds. The LEDs light a steady blue when the connection is established and the VE819 devices are ready for use. If all operations are normal, the LED lights on both should be static (not blinking). -
Page 19: Computer Display Settings
Duplicate, Extend or Project Only. LED Display The VE819 has different icons and LED behaviors that display the actions of the transmitter and receiver. These actions are displayed on the OSD display or the devices’... -
Page 20: Led Display Notes
Chapter 3 Basic Operation LED Display Notes a) If the link has not been established after 80 seconds, it is likely the connection was lost or the transmitter is out of range. You may have to verify the range and adjust or shorten the distance between the transmitter and receiver. -
Page 21: Chapter 4 Osd Operation
Chapter 4 OSD Operation Overview The On-Screen Display (OSD) is a menu driven method to handle VE819T / VE819R control and switching operations. The OSD appears on the attached HDMI display after the transmitter/receiver connection is established and a button on the remote control is pressed. OSD Main Interface Press the Transmitter No. - Page 22 Chapter 4 OSD Operation Pairing Transmitter to Receiver If the transmitter and receiver cannot find each other or lose their connection, follow the steps on page 16 for pairing additional transmitters to re-establish the connection. Switching between Wireless HDMI Transmitters 1.
- Page 23 VE819 User Manual 3. Select the Remove Transmitter option. 4. Use the Up / Down buttons to select the transmitter to be removed and then press OK. Modify Transmitter Name This section allows you to name your transmitters for easy use or reference. All individual paired transmitter names can be edited.
-
Page 24: Chapter 5 Additional Transmitters
Chapter 5 Additional Transmitters Overview Adding additional Wireless HDMI Transmitters is the perfect solution to take advantage of your large screen HDTV and send your computer's screen wirelessly or you can set your computer / game console up for wireless gaming With less than 1ms latency. - Page 25 VE819 User Manual Pairing Mode for the Receiver: 1. Once the receiver is connected to the HDTV or HD projector and is powered on, press the Transmitter No. button on the remote control. 2. The On-screen Display (OSD) will appear on the HDTV / HD projector.
-
Page 26: Appendix
Appendix Safety Instructions Read all of these instructions. Save them for future reference. Follow all warnings and instructions marked on the device. This product is for indoor use only. Do not place the device on any unstable surface (cart, stand, table, etc.). If the device falls, serious damage will result. - Page 27 VE819 User Manual If an extension cord is used with this device make sure that the total of the ampere ratings of all products used on this cord does not exceed the extension cord ampere rating. Make sure that the total of all products plugged into the wall outlet does not exceed 15 amperes.
-
Page 28: Technical Support
Support Documentation Software Updates Telephone Support 1-888-999-ATEN ext 4988 When you contact us, please have the following information ready beforehand: Product model number, serial number, and date of purchase Your computer configuration, including operating system, revision level, expansion cards, and software... -
Page 29: Specifications
VE819 User Manual Specifications Function VE819T VE819R Video Input Interfaces 1 x HDMI Type A Male (Black) Impedance 100 Ω Max Distance Video Output Interfaces 1 x HDMI Type A Female (Black) Impedance 100 Ω Video Max. Data Rate 6.75 Gbps (2.25 Gbps 6.75 Gbps (2.25 Gbps... - Page 30 Appendix Function VE819T VE819R Physical Properties Housing Plastic Plastic Weight 128g Dimensions (L x W x H) 30 x 70.3 x 17.5mm, 95 x 95 x 33.3mm...
-
Page 31: Supported Video And Audio Formats
VE819 User Manual Supported Video and Audio Formats 2D Video Format Timings Resolution Primary CEA Video Timing 640x480p @ 59.94 / 60Hz 480p 720x480p @ 59.94Hz 720x480p @ 60Hz 720x576p @ 50Hz 576p 1280x720p @ 50Hz 720p 1280x720p @ 59.94 / 60Hz... -
Page 32: Troubleshooting
Appendix Troubleshooting Operation problems can be due to a variety of causes. The first step in solving them is to make sure that all cables are securely attached and seated completely in their sockets. Problem Resolution The Power LED does not Check that the power adapters of the Transmitter / light up. - Page 33 VE819 User Manual Problem Resolution Poor picture quality or Check if the video resolution on your HDMI display is set intermittent video to 1080p, 1080i, 720p, 576p, or 480p resolution. Refer to Supported Video and Audio Formats, page 23. Check that the distance between the Transmitter and Receiver does not exceed 100 feet.
-
Page 34: Wall Placement Template
Appendix Wall Placement Template... -
Page 35: Limited Warranty
What is covered by the Limited Hardware Warranty ATEN will provide a repair service, without charge, during the Warranty Period. If a product is detective, ATEN will, at its discretion, have the option to (1) repair said product with new or repaired components, or (2) replace the entire product with an identical product or with a similar product which fulfills the same function as the defective product.
Need help?
Do you have a question about the VE819 and is the answer not in the manual?
Questions and answers