Table of Contents
Advertisement
Quick Links
BLK-CP700 Series
High Performance 700TVL
Varifocal CCTV Dome Cameras
User Manual
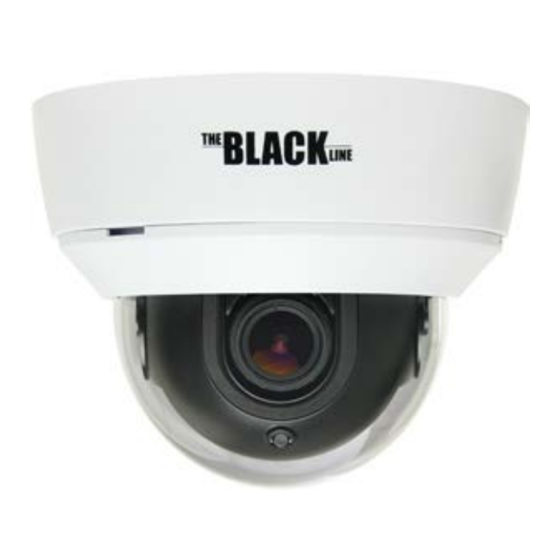
Products: BLK-CPD700, BLK-CPD700R, BLK-CPV700, BLK-CPV700R
BLK-CPD700 and BLK-CPV700R
Please read this manual before using your camera, and always follow the instructions for
safety and proper use. Save this manual for future reference.
BLK-CPD700-CPV700_CM
4/10/14
Advertisement
Table of Contents

Related Manuals for Black BLK-CPD700


Summary of Contents for Black BLK-CPD700
-
Page 1: User Manual
High Performance 700TVL Varifocal CCTV Dome Cameras User Manual Products: BLK-CPD700, BLK-CPD700R, BLK-CPV700, BLK-CPV700R BLK-CPD700 and BLK-CPV700R Please read this manual before using your camera, and always follow the instructions for safety and proper use. Save this manual for future reference. - Page 2 Changes or modifications not expressly approved by the manufacturer could void the user’s authority to operate the equipment. WARNING To prevent electric shock and risk of fire hazards, do NOT use other than the specified power source. CAUTION REGULATORY NOTICE This device complies with Part 15 of the FCC Rules.
-
Page 3: Table Of Contents
Table of Contents SECTION 1 Introduction ............... 1 1.1 Features . - Page 4 Precautions This camera should be installed by qualified personnel only. • There are no user serviceable parts inside. • Do not disassemble this camera other than to make initial adjustments. • Use a UL approved regulated 24 volt AC or 12 volt DC power supply. •...
-
Page 5: Introduction
SECTION 1: INTRODUCTION SECTION 1 Introduction These high performance CCTV dome cameras feature a very high resolution Sony CCD sensor providing 700 TVL, dual voltage ® range (24 Vac, 12 Vdc), and on-screen display (OSD) for control and setup. The BLK-CPV700 and BLK-CPV700R cameras feature a vandal-proof case and indoor/outdoor 1.1 Features High resolution: color 700 TV Lines... -
Page 6: What's In The Box
SECTION 1: INTRODUCTION Zoom adjust Focus adjust Drop cable Rotate lock screw video, power, Rotate ring connectors Video test port OSD control board BLK-CPD700R camera module back 1.1.1 What’s in the box Your camera includes the following: Camera assembly • Four (4) coarse-threaded screws and wall inserts to secure the base to the mounting surface •... -
Page 7: Optional Mounting Brackets
SECTION 1: INTRODUCTION 1.1.3 Optional mounting brackets Two optional mounting brackets are available for the BLK-CP700 series cameras: BLK-WALLMT: Wall mount bracket • BLK-PENDMT: Pendant mount bracket • BLK-WALLMT bracket BLK-PENDMT bracket High Performance 700TVL CCTV Dome Camera User Manual... -
Page 8: Installation
SECTION 2: INSTALLATION SECTION 2 Installation 2.1 General Guidelines Camera Lens: Handle the camera dome carefully to prevent scratching or soiling the dome and lens. If the dome or lens • becomes soiled, clean it only with approved products. See the Cleaning section later in this manual. Monitor impedance: Set the monitor impedance switch to 75Ω. - Page 9 SECTION 2: INSTALLATION Remove the camera dome cover from the camera. If you have a BLK-CPD700 series camera, use a coin to pry off the cover. For BLK-CPV cameras, loosen the four captive dome screws using the Torx L-wrench provided.
- Page 10 SECTION 2: INSTALLATION Screw locations for surface mount Cable channel (between base and seal) Screw locations Hole in for bracket mount side for drop cable (conduit) Hole in base for drop cable (conduit) BLK-CPV700 series camera base Drill holes for the screws that anchor the base to the mounting surface. The four (4) course-threaded screws and wall inserts provided are sufficient for mounting the camera to most surfaces.
-
Page 11: Installing The Camera With A Mounting Bracket
Apply power to the camera. Verify that video from the camera can be seen on the video monitor. 2.2.2 Installing the camera with a mounting bracket The BLK-CPD700 series cameras and BLK-CPV700 and BLK-CPV700R cameras can be can be installed with either the BLK-WALLMT (wall mount) or BLK-PENDMT (pendant (ceiling) mount) bracket. - Page 12 Remove the dome from the camera by loosing the four captive dome screws using the Torx L-wrench provided (BLK-CPV700 series) or inserting a coin into the slot on the side of the camera to pry it off (BLK-CPD700 series). Remove the camera module from the base by loosing the three captive screws that secure the camera module to the base.
-
Page 13: Camera Fov Adjustments
SECTION 2: INSTALLATION 2.3 Camera FOV adjustments In this procedure, point the camera at your surveillance (field of view) target and adjust zoom and focus. The following steps assume the camera is mounted on a ceiling. Monitor video from your camera. You can monitor video using your DVR monitor, or by watching video with a setup monitor attached to the video test port on the OSD control board. - Page 14 SECTION 2: INSTALLATION Tilt adjustment (image up or down) Pan adjustment (image left or right) Horizon adjustment (aligns the horizon in the image: Loosen (do not remove) the rotate lock screw. Turn the rotate ring to align the horizon in the video image. Tighten the lock screw until snug.
-
Page 15: Software Setup
SECTION 3: SOFTWARE SETUP SECTION 3 Software Setup The OSD (On Screen Display) software setup menus can be viewed from the camera video output or through the VIDEO TEST port on the OSD Control board. The OSD control board is accessible when the camera dome is remove. Configuration settings are made using the OSD joystick (see photo below). -
Page 16: Exposure
SECTION 3: SOFTWARE SETUP BRIGHTNESS: With the cursor pointing at the BRIGHTNESS option, rock the joystick left and right to change the setting. The DC Lens option provides 0 - 50 brightness adjustment steps. MODE: Rock the joystick down to highlight MODE. Rock the joystick left or right do display INDOOR or OUTDOOR (installation environment). - Page 17 SECTION 3: SOFTWARE SETUP The SENSE-UP feature is only available when the SHUTTER option is set to AUTO or 1/60 (DC LENS). When SENSE-UP is activated, NOTE the increased magnification can induce noise and pixilation. SENSE-UP: Rock the joystick left or right to observe the optimal screen brightness in low light conditions. Select a multiplier between x2 ~ x256.
- Page 18 SECTION 3: SOFTWARE SETUP After selecting the AREA graphical submenu, a POSITION screen opens. Rock the joystick up, down, left and/ — or right to position the upper-left corner of the BLC area, then push the joystick in to confirm your selection and enter the SIZE graphical submenu.
-
Page 19: White Bal
SECTION 3: SOFTWARE SETUP D-WDR OFF D-WDR ON OFF: The D-WDR function is disabled. INDOOR: The D-WDR is preset with default LOW-LEVEL and HIGH-LEVEL settings for normal indoor lighting condition. These settings can be adjusted in the INDOOR sub-menu. RETURN: Select RET to return to the EXPOSURE menu. OUTDOOR: The D-WDR is preset with default LOW-LEVEL and HIGH-LEVEL settings for normal outdoor lighting condition. -
Page 20: Day/Night
If white balance adjustments don’t perform well, use AWB mode. 3.4 DAY/NIGHT The DAY/NIGHT feature is used to configure the camera to provide images in color, black and white, or either depending on lighting conditions. EXT: This feature is not used in these cameras. - Page 21 SECTION 3: SOFTWARE SETUP B/W: The picture is displayed in black and white only. When B/W is used, WHITE BAL is disabled. Selecting this option opens the B/W sub-menu. BURST: Burst ON sends a color signal to the monitor in B/W mode. This signal does degrade the clarity of the image from the camera.
-
Page 22: 3Dnr
SECTION 3: SOFTWARE SETUP POSITION SIZE In the SIZE graphical submenu, rock the joystick up or down to raise or lower the bottom edge of the AREA. Rock — the joystick left and/or right to contract or expand the AREA horizontally. Press the joystick in twice to return to the IR SMART menu. -
Page 23: Special
SECTION 3: SOFTWARE SETUP ON: Activates the noise reduction feature. Selecting this option opens the 3DNR sub-menu where the level of noise reduction can be adjusted. LEVEL: With the cursor pointed at the LEVEL, rock the joystick left or right to decrease or increase the level of noise reduction. - Page 24 SECTION 3: SOFTWARE SETUP On the camera title screen: To enter a character in the title at the cursor position, rock the joystick up, down, left and right to highlight a character — (0 - 9, A - Z, u - .). The character under the cursor and the bar under the character position title both blinks slowly. Press the joystick in to select the character and move to the next character position.
- Page 25 SECTION 3: SOFTWARE SETUP MIRROR (off) MIRROR D-EFFECT selected D-ZOOM: D-ZOOM allows you to zoom in on a portion of the image by first setting the digital zoom magnification (x1 ~ x32), and then using the PAN and TILT controls to move to the area of the image you want to see. When D-ZOOM is used, SMART DZOOM and DIS are disabled.
- Page 26 SECTION 3: SOFTWARE SETUP NEG. IMAGE: Set this option to ON to show a color-reversed or black and white-reversed image. RETURN: On the D-EFFECT menu, select RETURN to return to the SPECIAL menu. MOTION: The MOTION feature allows you to quickly identify areas of the image where motion is detected. Set MOTION to ON then press the joystick in to open the MOTION sub-menu.
- Page 27 SECTION 3: SOFTWARE SETUP ON: When motion is detected, the motion detection areas where motion is detected are highlighted. — RETURN: Select RETURN to return to the SPECIAL menu. PRIVACY: The PRIVACY feature allows you to block up to 8 areas of the image from being seen. The areas blocked are covered by a color-coded polygonal (3-, 4-, or 5-sided) shape.
-
Page 28: Adjust
SECTION 3: SOFTWARE SETUP Lower DIFF values detect fainter defects. THRESHOLD: The higher value of “THRESHOLD” you set, the more defects will be compensated. START: Selecting START initiates defect repair processing. Follow the instructions on the image to complete the operation RETURN: Select RETURN to return to the SPECIAL menu. -
Page 29: Reset
SECTION 3: SOFTWARE SETUP SHARPNESS: With the cursor pointing at SHARPNESS, rock the joystick right or left as necessary to produce the clearest image from your camera. MONITOR: Rock the joystick right or left to select the monitor type you using (LCD or CRT), or select USER. The monitor feature enables you to setup your camera to produce the best image for the monitor you use. -
Page 30: Exit
SECTION 3: SOFTWARE SETUP FACTORY: Select FACTORY to reset the camera configuration. RETURN: Rock the joystick to select RETURN, to return to the SETUP menu. 3.9 EXIT Select EXIT to close the SETUP menu. -
Page 31: Cleaning
SECTION 4: CLEANING SECTION 4 Cleaning Clean the camera dome with an approved glass cleaning solution and a lint free cloth. Dust can be removed from the unit by wiping it with a soft damp cloth. To remove stains, gently rub the surface with a soft •... -
Page 32: Specifications
SECTION 5: SPECIFICATIONS SECTION 5 Specifications Table 1. Component Specifications Model BLK-CPD700 BLK-CPD700R BLK-CPV700 BLK-CPV700R Image Pick-Up Device 1/3” Sony 960H CCD TV System NTSC Total Pixels NTSC = 1020(H) * 508(V) Effective Pixels NTSC = 976(H) * 494(V) Scanning System... - Page 33 SECTION 5: SPECIFICATIONS BLK-CPV700 Model BLK-CPD700 BLK-CPD700R BLK-CPV700R Lens DC Auto iris varifocal lens (2.8 ~ 12 mm) Operational Temperature 14 °F ~ 122 °F (-10 °C ~ 50 °C), RH 95% max. Storage Temperature -4 °F ~ 142 °F (-20 °C ~ 60 °C), RH 95% Max.
-
Page 34: Appendix A Troubleshooting
APPENDIX A: TROUBLESHOOTING APPENDIX A Troubleshooting Problem Possible Cause - Check the power connection. Nothing appears on the screen - Check the video signal cable connection to the monitor. - If the camera lens is dirty, clean it with a soft, clean cloth. - Adjust the monitor controls, if necessary. -
Page 35: Appendix B Camera Dimensions
APPENDIX B: CAMERA DIMENSIONS APPENDIX B Camera Dimensions BLK-CPD700 (shown), BLK-CPD700R 5.91 in 4.72 in BLK-CPV700, BLK-CPV700R (shown) 5.91 in 4.80 in High Performance 700TVL CCTV Dome Camera User Manual...
Need help?
Do you have a question about the BLK-CPD700 and is the answer not in the manual?
Questions and answers