Table of Contents
Advertisement
Quick Links
High Performance
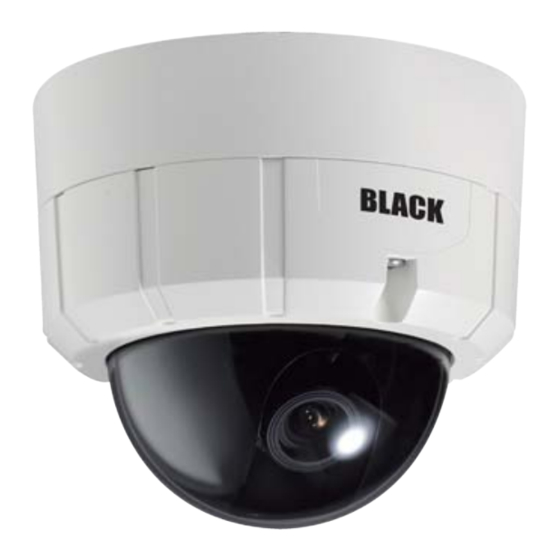
Indoor/Outdoor Color CCTV
Dome Camera User Manual
Products: BLK-CCD203VS2, BLK-CCD205VH2, BLK-CPD206VH2,
BLK-CCD223VS2, BLK-CCD225VH2, BLK-CPD226VH2
Please read this manual before using your camera, and always follow the instructions
for safety and proper use. Save this manual for future reference.
BLK-DomeCameras-2_CM
2/6/2013
Advertisement
Table of Contents

Related Manuals for Black BLK-CCD203VS2


Summary of Contents for Black BLK-CCD203VS2
- Page 1 High Performance Indoor/Outdoor Color CCTV Dome Camera User Manual Products: BLK-CCD203VS2, BLK-CCD205VH2, BLK-CPD206VH2, BLK-CCD223VS2, BLK-CCD225VH2, BLK-CPD226VH2 Please read this manual before using your camera, and always follow the instructions for safety and proper use. Save this manual for future reference.
- Page 2 Changes or modifications not expressly approved by the manufacturer could void the user’s authority to operate the equipment. WARNING To prevent electric shock and risk of fire hazards: Use a power source that is within specification only. CAUTION Do NOT expose this appliance to rain or moisture. REGULATORY NOTICE This device complies with Part 15 of the FCC Rules.
-
Page 3: Table Of Contents
Table of Contents Precautions. . . . . . . . . . . . . . . . . . . . . . . . . . . . . . . . . . . . . . . . . . . . . . . . . . . . . . . . . . . . . . . . . . . . . . . . . . . . . . iv SECTION 1 Introduction . -
Page 4: Precautions
PRECAUTIONS Precautions Do not install the camera in extreme temperature conditions. Use the camera in environments where temperature is between 14 °F and 122 °F. Ensure adequate ventilation. Do not install or use the camera in an environment where the humidity is high. It can degrade the image quality. Do not install the camera under unstable lighting conditions. -
Page 5: Introduction
SECTION 1: INTRODUCTION SECTION 1 Introduction These high performance indoor/outdoor CCTV bullet cameras feature a very high resolution Sony CCD sensor providing 600 TVL, ® with a 2.8 – 11 mm lens, a digital wide dynamic range, dual voltage range support (24 Vac, 12 Vdc), and on-screen display (OSD) for control and setup. -
Page 6: Cameras.with.a.vandalproof.enclosure
SECTION 1: INTRODUCTION Lens Lens Controls Assembly Access Door IR Array Lens Controls Inside Housing Tilt Lock Thumb Screw Cover Strap Anchor Point Tilt/Pan Gimbal Video Out Joystick / OSD Control Internal Components - Cameras With IR Lens Controls Lens Access Door Housing Far (L) –... - Page 7 SECTION 1: INTRODUCTION 1.1.1 What’s in the box Your camera includes the following: Security tool • Machine screws (4) • Mounting cap • Mounting screws (4) • L-wrench • User manual • Dome bracket (optional) • What’s in the box Optional dome bracket for wall and ceiling mounting High Performance CCTV Dome Camera User Manual...
-
Page 8: Cameras.with.a.plastic.enclosure
SECTION 1: INTRODUCTION 1.1.2 What you need To install the camera you will need: 12 Vdc or 24 Vac power source • Tools for mounting the camera • 1.2 Cameras with a plastic enclosure 1.2.1 What’s in the box Your camera includes the following: Mounting screws (4) •... -
Page 9: Installation
Camera drop cable: The camera drop cable includes two connectors: • Power connector (black with green terminal adapter) – The connector is non-polarized. Use 24 Vac power source — (AC24V 1A adapter) or 12 Vdc power source (DC12V 1A adapter). -
Page 10: Vandalproof.camera.mounting
SECTION 2: INSTALLATION Video Coax Power Connector Connector 2.1.1 What you need To install the camera you will need: 12 Vdc or 24 Vac power source • Tools for mounting the camera • 2.2 Vandalproof camera mounting The camera can be installed on a junction box or directly to a wall or ceiling. -
Page 11: Plastic.camera.mounting
SECTION 2: INSTALLATION 2.3 Plastic camera mounting Connect the dome base to the mounting surface using four (4) screws. Route the power and video cables to the camera location and attach them to the camera drop cable (see General guidelines above). 2.4 Camera adjustments Attach a video setup monitor to the yellow RCA (EXTRA VIDEO OUT) connector inside the camera assembly, or setup a remote monitor for viewing video from the camera. - Page 12 SECTION 2: INSTALLATION Horizon adjustment Adjust the image with the focus and zoom levers. Zoom adjustment Focus adjustment Configure your camera using the software menus in the OSD. See Software Setup in the following section of this manual. Place the dome cover over the base and adjust the dome window. Tighten the captive screws that secure the cover to the base.
- Page 13 SECTION 2: INSTALLATION Remove all foreign particles, such as plastic or rubber materials, attached to the camera housing. These may cause — damage to the surface over time. Do not use benzene, thinner or other chemical products on the camera assembly; these may dissolve the paint and ...
-
Page 14: Software Setup
SECTION 3: SOFTWARE SETUP SECTION 3 Software Setup Use the SETUP joy stick on the OSD control panel to navigate through the menu system. Press the joy stick down (toward the PC board) to enter the SETUP menu or select an entry, rock the stick up or down to highlight an item in the list, and left or right display the option you want to select. -
Page 15: White.balance
SECTION 3: SOFTWARE SETUP DWDR: The DWDR feature employs intelligent light level control to compensate for strong backlight conditions. DWDR: OFF / ON DWDR OFF DWDR ON 3.3 WHITE BALANCE WHITE BAL: You can select one of the following modes: ATW1 / ATW2 / AWC g SET / MANUAL (INDOOR / OUTDOOR / MANUAL) ATW1: Automatically adjusts color according to the available lighting for temperature range: 2500°K to 9500°K. -
Page 16: Backlight
SECTION 3: SOFTWARE SETUP 3.4 BACKLIGHT BACKLIGHT: Select OFF / BLC / HLC BLC (Back Light Compensation) AREA SEL: Select AREA1, AREA2 — AREA STATE: Select OFF / ON — GAIN: Select 0 ~ 255 steps — HEIGHT: Select 0 ~ 15 steps —... -
Page 17: Day&Night
N -> D DELAY: 1 ~ 30 SEC — COLOR: Day&Night only color mode B/W: Day&Night black and white (B/W) mode BURST: OFF / ON — IR SMART: OFF / ON. This option controls the IR LED output level to compensate for object distance. The IR SMART —... -
Page 18: Dpc.(Dead.pixel.compensation)
SECTION 3: SOFTWARE SETUP WIDTH: 0 ~ 15 LEFT/RIGHT: 0 ~ 15 TOP/BOTTOM: 0 ~ 15 IR LEVEL: HIGH / LOW — EXT: Day&Night EXT mode 3.6 DPC (Dead Pixel Compensation) Select DPC for dead pixel compensation processing. DPC can be set to OFF (default) or AUTO. When AUTO is used, the camera will remove defective pixels from an image automatically. - Page 19 SECTION 3: SOFTWARE SETUP AREA STATE: Select OFF / ON — HEIGHT: Select 0 ~ 15 steps — WIDTH: Select 0 ~ 15 steps — LEFT/RIGHT: Select 0 ~ 15 steps — TOP/BOTTOM: Select 0 ~ 15 steps — DEGREE: Select 0 ~ 255 steps —...
- Page 20 SECTION 3: SOFTWARE SETUP IMAGE ADJ.: You can adjust camera image. LENS SHAD: LEVEL: 0 ~ 255 steps — 2DNR: (on-screen Digital Noise Reduction) (OFF/ON) — MIRROR: (reverse the camera image horizontally) (OFF/ON) — MIRROR OFF MIRROR ON FONT COLOR: —...
- Page 21 SECTION 3: SOFTWARE SETUP PED LEVEL: 0 ~ 63 steps COLOR GAIN: 0 ~ 255 steps NEG.IMAGE: You can invert a color image, or a black and white image. (OFF/ON) — COMM ADJ.: CAM ID: Select the camera ID. 1 ~ 255 —...
-
Page 22: Specifications
BLK-CCD225VH2 √ BLK-CPD206VH2 BLK-CPD226VH2 √ √ TDN: True Day & Night, uses an IR cut filter instead of switching the image to black and white. IR: Built-in infrared LED array Table 2. Component Specifications Component Value Image Sensor 1/3" SONY Super HAD CCD II Total Pixels 811(H) ×... - Page 23 SECTION 4: SPECIFICATIONS Component Value All Day / Night / (0~255 steps) Day&Night Auto / Color / BW / Ext Auto Level / Delay selectable Burst off/on / IR Smart off/on (Gain/level selectable) Dead Pixels Compensation Special Title / MD / PM / Parking / Image / Comm / Language / Version Cam Title Text edit Motion...
-
Page 24: Appendix A Troubleshooting
APPENDIX A: TROUBLESHOOTING APPENDIX A Troubleshooting Problem Solution Nothing appears on the screen. - Check the power connections. - Check the video cable connections. - Ensure that the lens mode is set to DC (VIDEO). The video image is not clear. - Clean the lens with a soft, clean cloth. -
Page 25: Appendix B Camera Dimensions
APPENDIX B: CAMERA DIMENSIONS APPENDIX B Camera Dimensions Camera with vandalproof housing 2.95" Camera with plastic housing 3.29" High Performance CCTV Dome Camera User Manual...
Need help?
Do you have a question about the BLK-CCD203VS2 and is the answer not in the manual?
Questions and answers