Advertisement
Quick Links
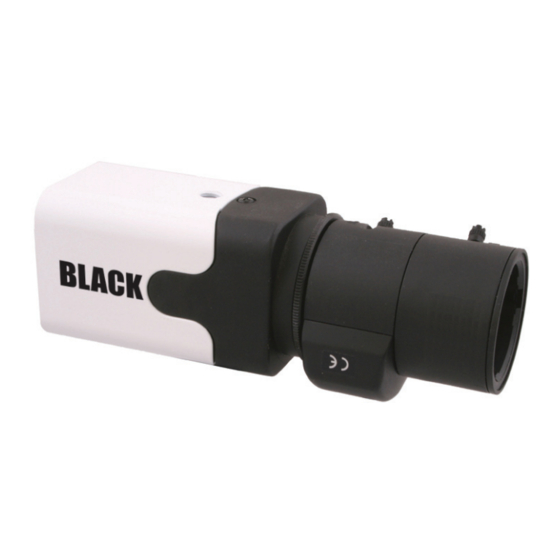
BLK-CDS205NS2
Quick Start Guide
Before operating this product, please read this quick-start guide to ensure proper
use. Please store these instructions a safe place for future reference.
FeatureS
•
⅓" High Sensitivity Sensor
•
Sens Up
•
700TVL Resolution
•
Defog
•
0.05 Lux
•
On Screen Menu
•
BLC
•
CS Mount
•
Privacy Masking
•
Dual Voltage
preCautionS
1. Before installing and operating the unit, please read this manual carefully.
2. Precision components are contained in this camera, please avoid violent
vibrations during installation and maintenance. Do not connect the power
until you have completed the installation.
3. Please obey all local electrical wiring regulations when using or installing this
unit.
4. Do not use abrasive or corrosive materials for cleaning. Use only a soft cloth
for cleaning.
5. To prevent damage to the lens or sensor, do not point the camera directly into
the sun or very strong light sources.
6. Do not use the camera outside it's working temperature (-10°C~ 50°C / 14°F
~ 122°F) or humidity (<90%) ranges.
7. Ensure that the power supply meets the current requirements of the
camera and that the supply voltage is inside the tolerances of the camera:
12 Vac: +15% ~ -10%, 24Vac: ±20%
8. Ensure that any mounting bracket and fixings used are adequate to support
the load of camera and lens used.
9. In case of camera failure, do not attempt to dismantle or service the camera
yourself. Please refer to qualified service personnel for repair of the camera.
ConneCtionS/ControLS
1. BNC Connector. Video Output. 75Ω 1Vp-p
2. DC Lens connector
3. Power LED
4. OSD joystick
5. Removable power connector. Observe
polarity of 12VDC connections. 24VAC
connections are not polarity conscious.
Polarity markings are visible when the
terminal block is removed
A CS-mount lens should not normally require any back focus adjustment when
mounted on the camera. If back focus adjustment is required, loosen the grub
screw
, using the supplied allen key and rotate the lens mounting ring
①
optimum focus is achieved. Tighten the grub screw to lock the mounting ring.
140131
If a C-mount lens is used, a C-mount adaptor (not supplied) must be fitted to the
lens mounting ring before attaching the C-Mount lens, or the CCD/filter may be
damaged.
Connect the Video-Out of the camera to a display monitor.
To activate the camera OSD, press in the joystick button on the rear panel of the
camera.
Rock the joystick to select a menu from the list.
Rock the joystick to change the selected value.
Press in the joystick button to open a sub-menu or execute a command.
Optional programming method
Connect the Video-In connector of the BLK-UTCR controller to the Video-Out connector
of the camera. Connect the Video-Out of the UTC controller to a display monitor.
To activate the camera OSD, depress the joystick button on the UTC Controller for
2 seconds (operation is confirmed when LED is latched on).
Push the joystick to select a menu from the list.
~ ~
+
-
Push the joystick to change the selected value.
Press in the joystick button to open the sub-menu or execute a command.
To return from a sub-menu to the previous menu, select "Return" and press the
joystick button.
LenS & BaCK FoCuS
②
oSD aCCeSS
~ ~
+
-
UP
LEFT
RIGHT
PRESS ENTER
DOWN
MENU
Exposure..
Day/Night..
WhiteBalance..
Display Adjust..
OSD Main Menu
When the OSD menu is launched, you are
presented with the adjacent opening screen.
A menu option followed by a
indicates the
presence of a sub-menu. Options set to OFF will
not show a until set to ON
Use RETURN to return to the previous menu.
eXPOSuRe Menu
until
aLC menu:
•
BriGHtneSS - sets the level of the overall
brightness
•
SHutter- OFF, 1/60~1/120K. (1/50~120K
PAL) Set this on to reduce the exposure
time of each image. This can be used to
reduce blur in images with fast changing
content.
•
FLK- Use this when flicker is observed
in the image under fluorescent lighting.
When FLK is ON, the shutter menu is disabled.
•
aGC- Off or Level Control -Used to adjust overall AGC level
•
SenS up - Slows frame rate and increases low light sensitivity
•
iriS SpeeD - Level control for iris
eLC menu: Use this option for fixed or
manual iris lenses
•
BRiGHTneSS: Sets the level of the
overall brightness of the image.
•
SHutter - Auto, 1/60~1/120K.
(1/50~120K PAL) Change to reduce the
exposure time of each image.
•
FLK - ON or OFF. Use this when
flicker is observed in the image under
fluorescent lighting. When FLK is ON,
the shutter menu is disabled.
•
aGC-Off or Level Control Used to adjust overall AGC level
•
SenS up - Slows frame rate and increases low light sensitivity
•
Return
DaY/niGHT Menu
•
DaY/niGHt - AUTO, COLOR, NIGHT,
EXT1, EXT2
•
auto - Allows the camera to switch from
color to monochrome mode in low light.
The switching thresholds and hysteresis
time are adjustable. SMaRT iR is not
applicable for this model.
•
DaY - fixes the camera in color mode
•
niGHt - fixes the camera in monochrome
mode.
•
extern - na
•
CDS - na
MENU
EXPOSURE
ALC
DAY/NIGHT.
AUTO
WHITE BAL
DISPLAY ADJ
IMAGE
DNR
ON
MOTION
SYSTEM
EXIT
SAVE
ALC
BRIGHTNESS 12
SHUTTER
INDOOR
FLK
OFF
AGC
ON
SENS UP
8x
IRIS SPEED
10
RETURN
ELC
BRIGHTNESS [ 10]
SHUTTER
1/60
FLK
AGC
ON
SENS UP
8x
RETURN
AUTO
AGC THRS
[ 11]
AGC MARGIN [ 6
D/N DELAY
3 SEC
B&W BURST ON
SMART IR
NA
RETURN
Advertisement

Related Manuals for Black BLK-CDS205NS2


Summary of Contents for Black BLK-CDS205NS2
- Page 1 OSD Main Menu LenS & BaCK FoCuS BLK-CDS205NS2 Quick Start Guide MENU EXPOSURE ALC When the OSD menu is launched, you are DAY/NIGHT. AUTO presented with the adjacent opening screen. WHITE BAL A menu option followed by a ...
- Page 2 © 2012 Observint Technologies, Inc. All rights reserved. Middle, High. This inverts over exposed • SpeCiaL areas from white to black. • DeFeCT DeTeCTiOn - Used to correct bad pixils • ContraSt - oFF, D-WDr, DeFoG • FOnT COLOR - 1-8 •...
Need help?
Do you have a question about the BLK-CDS205NS2 and is the answer not in the manual?
Questions and answers