Table of Contents
Advertisement
Quick Links
Before you begin
• Please unpack the box carefully and identify that all the parts are present.
• Please bear in mind the following points when choosing a mounting position.
> The camera must be positioned so that it will not point directly into the sun (sunrise
and sunset) or any bright light, as this may cause damage to the camera
> Avoid viewing areas where half the area is in bright sunlight and the other half is
dark, such as in the shadow of a building. All types of cameras have difficulty in
'seeing' with such a large lux level variation.
• Do not cut the camera cables, this will void the warranty.
• Make sure you use only the recommended power supply. Damage caused to the
camera by incorrect voltage or wiring is not covered by the warranty.
XPD700WIR-2
Model:
700 TVL Vandal Resistant Dome
with 40m IR, DNR and WDR
User Manual
Advertisement
Table of Contents

Related Manuals for XVision XPD700WIR-2


Summary of Contents for XVision XPD700WIR-2
-
Page 1: Before You Begin
• Do not cut the camera cables, this will void the warranty. • Make sure you use only the recommended power supply. Damage caused to the camera by incorrect voltage or wiring is not covered by the warranty. XPD700WIR-2 Model: 700 TVL Vandal Resistant Dome... -
Page 2: Table Of Contents
Contents 1. Safety Precautions ............3 2. Product Description ............4 3. Features ................ 4 4. Contents ............... 4 5. Installation ..............5 6. Camera OSD Control ............. 7 7. OSD Menu Structure ............. 7 8. SETUP Menu Functions ..........9 8.1 Lens ................ -
Page 3: Safety Precautions
Thank you for purchasing this Xvision camera. Before operating this product, please read this instruction manual carefully. 1. Safety Precautions z Do not disassemble or modify the camera. Please refer repairs or service to a qualified service technician. z Take care when installing the camera. Avoid scratching the front glass window. -
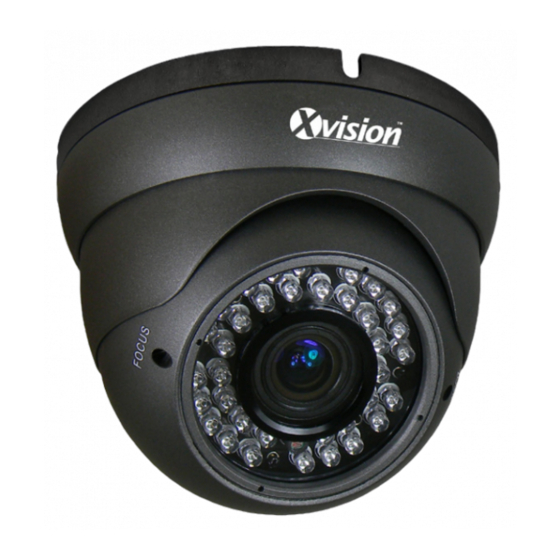
Page 4: Product Description
The camera also features an On Screen Display (OSD) that allows the user to fully customise the advanced features to its environment. The XPD700WIR-2 is designed for internal or external use and can be wall or ceiling mounted. -
Page 5: Installation
5. Installation 1. Select a suitable position on the wall or ceiling to install the camera. Take the mounting bracket off the dome camera by unscrewing the fixing screw using the small Allen key supplied. 2. Rotate the upper ring of the camera, it will unscrew from the dome base. Be careful when handling the camera as the parts are not fixed to the upper ring or the camera ‘ball’. -
Page 6: Camera Osd Control
5. Installation continued CONNECT THE POWER & VIDEO CABLES 1. Connect the video output to the monitor or other video device through a 75 Ohms type coaxial cable. 2. Connect the power source, insert the AC plug into the AC socket and the DC plug into the DC Jack (+12V DC in jack centre). -
Page 7: Osd Menu Structure
7. OSD Menu Structure LENS > AUTO > MANUAL SHUTTER/AGC > AUTO > MANUAL WHITE BALANCE > ATW > PUSH > USER1 WB > USER2 WB >ANTI CR > MANUAL WB > PUSH LOCK BACKLIGHT > OFF > BLC > HLC PICTURE ADJUST >... -
Page 8: Setup Menu Functions
8. SETUP Menu Functions 8.1. LENS <Option : AUTO / MANUAL> Select the iris aperture control method between ‘AUTO’ and ‘MANUAL’ by pressing LEFT or RIGHT button. When ‘AUTO’ is selected, you can press the setting button to enter its submenu. •... -
Page 9: Shutter/Agc
8. SETUP Menu Functions continued 8.2. SHUTTER/AGC Continued • If you have previously selected ‘MANUAL’ for the ‘LENS’ item, the mode will be forced as ‘SHUT’. The ‘BRIGHTNESS’ item let you adjust the aperture to tailor the brightness to your preference. •... -
Page 10: Backlight
8. SETUP Menu Functions continued 8.4. BACKLIGHT <Option : OFF / BLC / HLC> This function allows the user to adjust advanced backlight settings, giving the following options: • OFF: Turns the BLC function off • BLC: The BLC function makes objects in front of a bright scene (such as a window on a bright sunny day) clearer to see by increasing their brightness and making the background darker. -
Page 11: Atr
8. SETUP Menu Functions continued 8.6. ATR <Option : ON / OFF> Similar to Wide Dynamic Range, ATR can compensate for gradation of the subjects to the optimal level and thereby improve contrast in both bright and dark areas in the picture. -
Page 12: Day/Night
8. SETUP Menu Functions continued 8.8. PRIVACY ZONE <Option : OFF / ON> Privacy function can create up to 4 masks to protect sensitive areas in the scene. Switch to ‘ON’ to enter its submenu as shown below. Select an area and adjust the ‘TOP/BOTTOM/LEFT/RIGHT’... -
Page 13: Noise Reduction
8. SETUP Menu Functions continued 8.10. Noise Reduction Here you can configure the 2D digital noise reduction function (default: off). Its submenu includes 3 noise reduction mode: ‘Y’, ‘C’, and ‘Y/C’. Select any of the three NR modes, highlight the Y or C level, and then press the LEFT/RIGHT button to adjust the slider for Y level (brightness signal) or C level (color signal return). -
Page 14: Specifications
119x 100 mm Weight: 0.62 Kg TECHNICAL SUPPORT: For Technical Support for any Xvision product please contact your local distributor. LIMITED WARRANTY: This product is supplied with a 1 Year warranty. The Warranty excludes: Products that have been misused, (including accidental damage) and damage caused by normal wear and tear.
Need help?
Do you have a question about the XPD700WIR-2 and is the answer not in the manual?
Questions and answers