Table of Contents
Advertisement
Quick Links
Advertisement
Table of Contents

Related Manuals for XVision XC960S30


Summary of Contents for XVision XC960S30
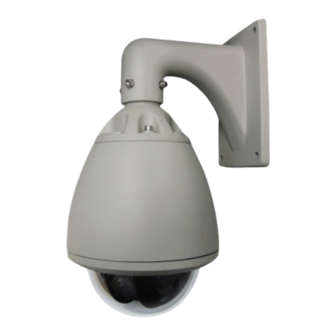
- Page 1 Professional HD 960H 30x Zoom Speed Dome User Manual Thank you for purchasing the XC960S30 camera from Xvision. Please ensure that you read and understand this User Guide before operating the camera. Please store this User Guide in an easily accessible location.
-
Page 2: Table Of Contents
XC960S30 Contents 1. Product Overview .................. 1.1 Features ..................1.2 Package Contents................2. Installation .................... 2.1 Conncetions .................. 3. Hardware Installation ................4. Operation Instructions ................4.1 Preset Functions ................4.2 Keyboard Operation ..............4.2.1 Preset Location Scan ............4.2.2 Area Scanning .............. - Page 3 XC960S30 Safety Precautions 1. Do not install the equipment in an environment with too much moisture, dust or smoke dust as this may result in fire or electric shock. 2. In the unlikely event that the equipment should malfunction and emit an abnormal smell or smoke, please immediately stop it, shut off the power and contact your supplier.
-
Page 4: Product Overview
XC960S30 1. Product Overview 1. Product Overview Thank you for purchasing the HD 960H XC960S30 from Xvision. Please read through this manual carefully and make sure you understand before operating the camera. 1.1 Features • Sony 960H CCD Sensor • Xvision X2K DSP •... -
Page 5: Installation
1. Product Overview 2. Installation The XC960S30 camera can be wall mounted, please follow the steps below for installation. 1. Using the bracket as a stencil, mark out the drill 2. If feeding wires through the wall, you will need holes needed in the wall. -
Page 6: Conncetions
XC960S30 2.1. Connections BNC Socket for Video DC Socket for Power RS485 Terminal for Speed Dome Control www.xvision.com... -
Page 7: Hardware Installation
XC960S30 1. Product Overview Hardware Installaton 3.1 Address Setting The address of the camera can be set in 2 ways: 1. Address Dial Switch: To do this, adjust the dial switch on the camera to the desired address. 2. Soft Address: To set by soft address, you will need to go to the OSD Menu. For more information, please go to section 5.6 on page 14. -
Page 8: Operation Instructions
XC960S30 4. Operation Instruction 1. Product Overview 4.1 Preset Functions Please Note: Not all functions are supported (we recommend using our XSDA-2 for alarm in and out functions). Preset Location Function 95+CALL Entering the main menu XXX+PRESET Saving a preset point... - Page 9 XC960S30 62+CALL Operating the second group of pattern 2 63+CALL Operating the third group of pattern 3 64+CALL Operating the fourth group of pattern 4 65+CALL Starting 360° continuous rotation 67+CALL Arm Alarm output 1 68+CALL Arm Alarm output 2...
-
Page 10: Keyboard Operation
XC960S30 97+CALL Begin image rollover function 98+CALL Stop image rollover function 101+CALL Defaulted setting 102+CALL Switch manual operation speed (Fast/Medium/Slow) 103+CALL Switch linear scanning speed (Fast/Medium/Slow) 107+CALL, 108+CALL Calling 107 followed by 108 will restard the dome 109+CALL Start communication for fault indication... -
Page 11: Start Area Scanning
XC960S30 2. Using the keyboard for setting Set the left boundary of region 1 by moving the joystick to the left until you have reached the ideal position. To confirm the position, press the ‘OPEN’ key. Set the right boundary of region 1 by moving the joystick to the right until you have reached the ideal position. -
Page 12: Menu Setting
XC960S30 1. Product Overview 5. Menu Setting To access the camera menu, when the camera is on, use the command ‘CALL 95 preset location’. When the menu has appeared, you will be presented with the following options: • System Information •... -
Page 13: Camera Setting
XC960S30 5.2 Camera Setting 1 Option: ZM SPEED / WB / EXPOSURE / B LIGHT / FREEZE The camera setting option allows you to adjust; zoom speed, white balance, exposure, backlight compensation or turn on the image freezing function. Zoom Speed: Set the speed to fast, medium or slow... -
Page 14: Auxiliary Setting
XC960S30 5.3 Camera Setting 2 CONTINUED Minimum Focus: Adjust the minimum focus from 1cm, 10cm 30cm and 100cm. Last Page: Go to the previouscamera setting submenu. Exit: End and return to the previous menu. Save: Save the settings and exit the submenu 5.4 Auxiliary Setting... -
Page 15: Title Set
XC960S30 5.5 Scanning Set CONTINUED... Set the preset scan: Set the preset scanning areas. SET AREA SCAN: RUN AREA SCAN: Run the preset scan: Run the preset scan (1-4) ENTER PRESET SCAN SET Set pattern scan: Set the mode scanning (1-4) -
Page 16: Alarm Linkage
XC960S30 5.7 Alarm Linkage - Not supported (we recommend usgin our XSDA-2 for alarm in and out functions) Option: Alarm Input / Input Type / Arming Time / Preset Scan / Pattern Scan / Zone Scan / Alarm Output The alarm linkage option allows you to set an adjust the alarms on the scannning modes. -
Page 17: Specification
XC960S30 1. Product Overview Specifications Model XC960S30 Picture Standard Horizontal Rotation 360° Resolution 960H Minimum Illumination 0.01 Lux Night Vision Lens Type 30x Optical Varifocal Lens Lens Size 3.9-105.3mm (2-64°) Preset Locations Horizontal Rotation / Speed 360° / 0.1 - 160° per second Vertical Rotation / Speed 0 - 90°... - Page 18 XC960S30 1. Product Overview Notes www.xvision.com...
- Page 19 XC960S30 www.xvision.com...
- Page 20 (including accidental damage) and damage caused by normal wear and tear. In the unlikely event that you encounter a problem with this product, it should be returned to the place of purchase. Xvision UK, Unit 2 Valley Point, Beddington Farm Road, Croydon, Surrey CR0 4WP www.xvision.com...
Need help?
Do you have a question about the XC960S30 and is the answer not in the manual?
Questions and answers