Table of Contents

Related Manuals for Swisscom Classic A313


Summary of Contents for Swisscom Classic A313
- Page 1 Classic A313 / Classic A413 User Manual...
-
Page 2: Safety Precautions
Safety precautions This DECT cordless telephone is designed for transmitting voice calls over the Swiss analog telephone network. Any other use whatsoever is not permitted and is regarded as in violation of the provisions. The user manual with safety precautions is a part of the product package and must be passed on to the new owner on reselling. -
Page 3: Table Of Contents
The Classic A413 offers the additional feature of an integrated ans- wer machine. Please read these operating instructions carefully to familiarise yourself with and take full advantage of the benefits of your new Classic A313 / Classic A413. Keep this user manual in a safe place! Note: These operating instructions describe the full range of functions provided by the Classic A313 / Classic A413. - Page 4 About the menus ……………………………………………………………………………19 Menu navigation …………………………………………………………………………19 Back to previous menu …………………………………………………………………19 End menu …………………………………………………………………………………19 Classic A413 base station with answer machine …………………………………………20 Classic A313 base station ……………………………………………………………………21 Telephoning …………………………………………………………………………………22 Making an external call ………………………………………………………………………22 Call preparation …………………………………………………………………………22 Ending a call ……………………………………………………………………………22...
- Page 5 Contents Enquiries ………………………………………………………………………………………26 Internal enquiry call ……………………………………………………………………26 External enquiry call ……………………………………………………………………27 Brokering (switching between two calls) …………………………………………………27 Call transfer …………………………………………………………………………………28 Call transfer during a call ………………………………………………………………28 Conference calls ………………………………………………………………………………29 Directory entries ………………………………………………………………………………30 Adding a new entry ……………………………………………………………………30 Tips for entering names/numbers ………………………………………………………30 Directory………………………………………………………………………………………30 Editing entries ……………………………………………………………………………31 Deleting directory entries/entire directory...
- Page 6 Contents Audio …………………………………………………………………………………………36 Handset/base station ringer …………………………………………………………………36 Tones …………………………………………………………………………………………36 Key beeps …………………………………………………………………………………36 Range beeps ……………………………………………………………………………36 Charging beep ……………………………………………………………………………36 Battery beep ……………………………………………………………………………36 Confirmation beep ………………………………………………………………………36 Family …………………………………………………………………………………………37 Direct call (baby call) …………………………………………………………………………37 Room monitoring (baby surveillance) ………………………………………………………38 Call costs ……………………………………………………………………………………39 Cost of last call ………………………………………………………………………………39 Total calls ……………………………………………………………………………………39 Settings ………………………………………………………………………………………39...
- Page 7 Contents Call anonymously (Identification restriction) ………………………………………………42 Combox ………………………………………………………………………………………43 Provider ………………………………………………………………………………………43 Access to voice portal………………………………………………………………………44 SMS ……………………………………………………………………………………………45 SMS – Short Messaging Service ……………………………………………………………45 Writing SMS messages ………………………………………………………………………45 Inbox …………………………………………………………………………………………46 Drafts …………………………………………………………………………………………46 Outbox ………………………………………………………………………………………46 Templates ……………………………………………………………………………………47 SMS memory full ……………………………………………………………………………47 Settings ………………………………………………………………………………………47 SMS centre ………………………………………………………………………………47 SMS send centre …………………………………………………………………………47 SMS mailbox...
- Page 8 Contents Recording a call …………………………………………………………………………51 Remaining time …………………………………………………………………………52 VIP number* ……………………………………………………………………………52 SMS notification* ………………………………………………………………………52 Operating the answer machine on the base station ………………………………………52 On/off ……………………………………………………………………………………52 Playing, repeating, deleting and skipping messages …………………………………52 Delete all listened messages ……………………………………………………………52 Listening over the base station …………………………………………………………53 Answer machine settings ……………………………………………………………………53 Answer mode ……………………………………………………………………………53 Answer delay and time saver mode ……………………………………………………53...
- Page 9 Contents Automatic DTMF …………………………………………………………………………57 Auto Talk …………………………………………………………………………………57 System PIN ……………………………………………………………………………………57 PBX ……………………………………………………………………………………………58 Range …………………………………………………………………………………………58 Repeater Mode …………………………………………………………………………58 Eco Mode (antenna off) …………………………………………………………………58 Additional handsets/base stations ………………………………………………………59 Registering additional handsets ……………………………………………………………59 Deregistering a handset ……………………………………………………………………59 Selecting the base station ……………………………………………………………………59 PBX access ……………………………………………………………………………………60 Compatibility …………………………………………………………………………………60 Exchange Access Code EAC …………………………………………………………………60 Entering the EAC...
-
Page 11: Setting Up The Telephone
Setting up the telephone Contents of the package Classic A313 / Classic A413 1 base station 1 connector cable 1 mains unit 1 handset 2 rechargeable batteries 1 user manual (three languages: German, French, Italian) 1 belt clip (already assembled) -
Page 12: Location
Setting up the telephone Location To obtain the best possible range, we recommend positioning the telephone in a location central to your sphere of activity. Avoid positioning the telephone in niches, recesses and behind steel doors. The maximum range between the base station and handset is approximately 40 meters indoors and 250 meters outdoors. -
Page 13: Setting Up The Base Station Or Charging Unit
Setting up the telephone Setting up the base station or charging unit Do not expose the base station or charging unit to direct sunlight. Protect the base station or charging unit against moisture. Do not position the base station or charging unit in rooms exposed to condensation, corrosive steam or excessive dust. -
Page 14: Connecting The Phone
Setting up the telephone Connecting the phone Before you can start using your telephone you must plug in the telephone connector cable and the mains cable. Socket for mains cable Socket for telephone connector cable Safety note Use only the mains units supplied for the base station or charging unit. Telephone connector cable The telephone connector cable has two different plugs. -
Page 15: Setting Up The Handsets
Setting up the telephone Setting up the handsets Your handsets will be ready for operation (for making or accepting calls) only once the batteries have been fully charged for the first time. Inserting the rechargeable batteries The bottom part of the handset contains a battery compartment for housing two type AAA batteries (microcells). -
Page 16: Charging The Batteries
Setting up the telephone Charging the batteries The batteries are not yet charged when you first unpack the telephone. Insert the hand- set in the base station or charging unit for charging. The flashing battery symbol on the handset shows the charging status. The batteries will take around 13 hours to fully charge. Note •... -
Page 17: Installation Assistant
Setting up the telephone Note You can replace the handset in the charging/base station after every call. Charging is electronically controlled to ensure optimal charging of batteries in different charge states. Avoid removing the batteries from the handset for no good reason, since this affects the optimum charging cycle. -
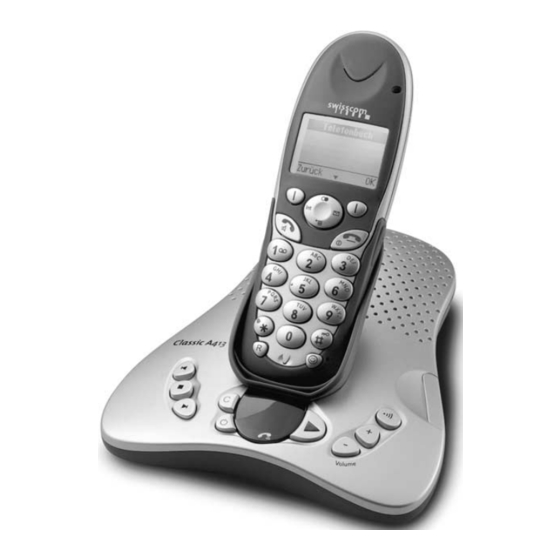
Page 18: Getting To Know Your Telephone
Getting to know your telephone Handset keys Earpiece Backlit display Navigation key Softkey Softkey (multifunctional key) (multifunctional key) Redial Message key Internal call key Call list “End call” key Talk key Headset connectivity Alphanumerical keypad Activating Hash key the key lock Key “Write Enquiry key with SMS Message”... - Page 19 Getting to know your telephone Softkeys (multifunctional keys) Right softkey: Choose menu options, confirms entries/settings. Left softkey: returns to previous menu step. Navigation key For scrolling up/down or right/left. In answer machine mode, message playback: right = skip forward, left = replay message; double click = skip back. Redial Open redial list.
-
Page 20: Handset Display Symbols
Getting to know your telephone Handset display symbols The following symbols are displayed on your handset. Coverage symbol Battery full Reception displayed when the handset is wit- Indicates that the batteries are fully charged. hin range of the base station. Flashes when out of range of the base station Battery empty or not registered with the base station. -
Page 21: About The Menus
Getting to know your telephone About the menus Menu navigation Your handset provides you with an easy-to-follow menu. As a rule, every menu offers a list of options. To select main menu, sub-menu and options, press the softkey below the corresponding display text. -
Page 22: Classic A413 Base Station With Answer Machine
Getting to know your telephone Classic A413 base station with answer machine SIM card reader Previous Stop Next Delete Adjust Group call loudspeaker on handsets Switches the answer machine "In volume (paging) on or off operation" display Message counter/ Playback/ status indicator replay... -
Page 23: Classic A313 Base Station
Getting to know your telephone Classic A313 base station SIM card reader "In operation" display Group call on handsets (paging) -
Page 24: Telephoning
Telephoning Making an external call Press , wait for the dialling tone and dial the number. Call preparation First, enter the number. If you enter an incorrect number, you can delete the entry. Press to dial the number. Ending a call Press or replace the handset in the charging unit/base station. -
Page 25: Handsfree Operation
Telephoning Handsfree operation You can use the handsfree function to conduct calls with the handset on-hook and allow others present in the room to take part in the call. Activating handsfree before a call: 1. Press . The display shows . -
Page 26: Redial
Telephoning Redial The 10 last-dialled numbers are saved in a redial list. If a name and number are already stored in the directory, the name is shown instead of the number. Redialling a number from the list Press to open the redial list and press to scroll through the list. -
Page 27: Sending Sms Messages From The Redial List
Telephoning Sending SMS messages from the redial list* 1. Press the softkey under . Use to scroll through the list to find the entry you are seeking, and press the softkey under OPTION. 2. Write and send your SMS message. Group call (paging) You can activate a group call to locate a mislaid handset. -
Page 28: Internal Calls
Telephoning Internal calls You can call other handsets which are registered with your base station. This allows you to make internal calls free of charge. 1. Press , dial the relevant handset number and press OK to confirm. Pressing automatically dials the second handset if only two handsets are registered with the base station. -
Page 29: External Enquiry Call
Telephoning External enquiry call Procedure: 1. You are conducting a call and want to call another external party without ending the active external call. 2. Press the enquiry key to start the external enquiry. Note An external enquiry call is managed by the public telephone network and is therefore dependent on your network operator's available services (network functions). -
Page 30: Call Transfer
Telephoning Call transfer You can transfer the call you are conducting to another handset (= switching). Call transfer during a call 1. Press and dial the handset to which you wish to transfer the call. The external cal- ler is put on hold. 2. -
Page 31: Conference Calls
Telephoning Conference calls You can set up a conference call by connecting another handset to the call. If you are conducting a call: 1. Press and dial the relevant handset. The external caller is put on hold. 2. If the second handset answers, you can talk to the internal call partner without the exter- nal caller hearing you. -
Page 32: Directory Entries
Directory You can store up to 100 names and numbers in the directory on each handset. Every entry contains a name and telephone number. Names can be up to 16 letters long and numbers up to 24 digits long. Directory entries Adding a new entry If the telephone is in standby mode: 1. -
Page 33: Editing Entries
Directory Editing entries 1. Press the softkey under DIRECTORY. Use to scroll through the list to find the entry you are seeking, and press the softkey under OPTION. 2. Edit the name and/or number and save the entry. Deleting directory entries/entire directory You can delete individual entries or the entire directory. -
Page 34: Copying Directory Entries
Directory Copying directory entries If you operate several handsets, you can copy entries from one handset to another. This way, you only have to enter names and numbers once. While you are copying entries from one handset to another, you can make external calls on another handset registered with the base station. -
Page 35: Sim Card
Directory SIM card Copying to the SIM card You can copy entries from your mobile phone SIM card to your telephone (and vice versa). Copied entries are added to entries already saved. You can copy entries individually or in their entirety. Note Names can be up to 16 letters long and numbers up to 24 digits long. -
Page 36: Calls List
Calls list* If your network operator supports caller ID presentation* (CLIP), the caller's number (if not withheld) is displayed before you accept the call. If you have received new calls, a message to this effect appears in the display. A list is kept of answered and unanswered calls. -
Page 37: Saving Numbers From The Calls List To The Directory
Calls list* Saving numbers from the calls list to the directory 1. Press . Scroll through until you reach the entry you are seeking. 2. Press the softkey under OPTION, SAVE NUMBER . Enter the associated name and save the entry. Deleting individual entries/entire calls list 1. -
Page 38: Audio
Audio Procedure: 1. Press the softkey under MENU. Press to scroll to AUDIO ad press OK to confirm. 2. Scroll to the relevant submenu and make the relevant settings: Handset/base station ringer You can programme different ringer melodies on the handset and base station to signal external and internal calls. -
Page 39: Family
Family Procedure: 1. Press the softkey under MENU. Press to scroll to FAMILY and press OK to confirm. 2. Scroll to the relevant submenu and make the relevant settings: Direct call (baby call) If you activate direct call on your telephone, the handset dials a preprogrammed number when any handset key is pressed. -
Page 40: Room Monitoring (Baby Surveillance)
Family Room monitoring (baby surveillance) You can set a baby call/noise alarm. Once this function is set, your phone monitors noises in its immediate vicinity and triggers a call to the programmed number if the noise exceeds a set level (defined by the user). The person called hears the noises and is alerted to the fact that, for instance, a child is crying in the room. -
Page 41: Call Costs
Charge factor To display costs accurately, you must set the charge per unit (factor). (The factor for the Swisscom analog network is CHF 0.10.) Currency To display costs accurately, you may need to set the currency (Switzerland: CHF). -
Page 42: Calendar/Clock
Calendar/clock Procedure: 1. Press the softkey under MENU. Press to scroll to CALENDAR/CLOCK and press OK to confirm. 2. Scroll to the relevant submenu and make the relevant settings: Reminders Your telephone also acts as an appointments reminder: You can set 5 different appoint- ment reminders. -
Page 43: Network Functions (Supplementary Services)
Network functions (supplementary services) To activate some network functions, you need to send special codes to the network. Often these codes contain special characters such as . In some cases, the so-called flash signal is required. You can enter this by pressing . -
Page 44: Busy
Network functions (supplementary services) Busy Calls are forwarded if the line is busy. Once you have defined the call forwarding option, enter the forwarding number (i.e. the number to which calls are to be forwarded). At any time you can: •... -
Page 45: Combox
Network functions (supplementary services) Combox Swisscom offers the option of setting up a network answer machine (Combox). Check whether this network function is available, the associated charges (if applicable) and the functions provided by this service. To access new messages quickly and simply, press and hold down for around 2 seconds to automatically dial the access number of your network answer machine. -
Page 46: Access To Voice Portal
Access to voice portal The access to the voice portal of Swisscom Fixnet AG is preprogrammed in the directory with «Voice Portal» (access number 0848 849 850). Select: • Directory • «Voice Portal» • Press • The access number of the voice portal is dialled. -
Page 47: Sms
SMS – Short Messaging Service Sending and receiving SMS messages is a network function. To send and receive SMS messages, your telephone line must have active Caller Identification Presentation (CLIP) and Connected Line Presentation (COLP)*. Check with your network operator to find out whether the SMS network function is available and about charges, if applicable. -
Page 48: Inbox
Inbox New SMS messages are signalled in the display by and saved in the inbox. Press the softkey under INBOX to read new SMS messages. Or BACK, to read SMS messages later. Once you have read the SMS messages, you can answer, forward, save or delete them or call the sender. -
Page 49: Templates
Ask your network operator for details of these service numbers. SMS send centre Select which service centre you want to use for sending SMS messages. * Your telephone is delivered with the 8-digit access number of Swisscom, 062 210 00, programmed. -
Page 50: Sms Mailbox
SMS mailbox Your telephone is set to enable all users to access all SMS messages. To enable each user to have his own private inbox you can set up three specific users, if necessary with PIN code protection. • Setting up SMS users 1. -
Page 51: Answer Machine (Classic A413 Only)
Answer machine (Classic A413 only) You can operate your answer machine: from the base station from the handset remotely from an external DTMF telephone Your telephone is delivered with the answer machine switched on (default setting). Operating the answer machine from the handset You can switch your answer machine on and off, listen to messages and program set- tings from any registered handset. -
Page 52: Recording/Playing Back An Outgoing Message
Answer machine (Classic A413 only) Recording/playing back an outgoing message You can replace the standard outgoing message with a personal one and revert to the standard message at any time. 1. Press the softkey under MENU, press to scroll to ANSWER MACHINE and press OK to confirm. -
Page 53: Message Playback
Answer machine (Classic A413 only) Message playback If you have new messages, the display shows and the key on the base station flashes respectively. 1. Press the softkey under MENU, press to scroll to ANSWER MACHINE and press OK to confirm. -
Page 54: Remaining Time
Answer machine (Classic A413 only) Remaining time To check whether your answer machine has sufficient capacity for recording messages, you can view the remaining recording time. VIP number* In the menu ANSWER MACHINE , scroll to VIP NUMBER and enter the number of the tele- phone from which you regularly remote-access your answer machine. -
Page 55: Listening Over The Base Station
Answer machine (Classic A413 only) Listening over the base station If the answer machine accepts a call, you can use to adjust the volume and listen to the caller while he is recording a message. To talk to the caller, press on the hand- set. -
Page 56: Remote Access
Answer machine (Classic A413 only) Remote access Remote access PIN You can operate your answer machine from any modern telephone by calling your number and entering your 4-digit remote access PIN. The preprogrammed PIN is 0000. To remote access your telephone you have to enter your personal SECURITY PIN in the menu... -
Page 57: Operating The Answer Machine From An External Telephone
Answer machine (Classic A413 only) Operating the answer machine from an external telephone 1. Dial your number. When you hear your outgoing message, press 2. Enter your 4-digit security PIN. If there are new messages, these are played back. You can remotely operate your answer machine using the following keys: return to main menu play messages delete all messages... -
Page 58: Settings
Settings Language Procedure: 1. Press the softkey under MENU. Press to scroll to LANGUAGE in the SETTINGS menu and press OK to confirm. 2. Set the preferred display language. Display texts will appear in the set language (EN, DE, FR, IT). Handset name To better distinguish between handsets, you can give each handset a name. -
Page 59: Telephony
• We recommend that you change the system PIN to protect your telephone against unauthorised access. • Attention: Please take good note of your new system PIN! If you forget it, Swisscom will need to intervene and will charge you for this service. -
Page 60: Pbx
Settings See “PBX access”. Range You can use up to 6 repeaters to extend the range and receiving power of your base sta- tion. The repeaters must first be registered and activated on the base station. Procedure: 1. Press the softkey under MENU. Press to scroll to RANGE in the... -
Page 61: Additional Handsets/Base Stations
Additional handsets /base stations Registering additional handsets You can register up to 6 handsets with the base station. The base station must be within range. Note If you purchase additional handsets for your base station, • the batteries must first be fully charged! •... -
Page 62: Pbx Access
PBX access Compatibility Your telephone is designed for use in the analog telephone network and can be operated on a PBX that supports DTMF dialling and flash signalling. Contact your network operator for further information. Exchange Access Code EAC You may need to enter an exchange access code (e.g. 0) to allow the public exchange to assign an external line for external calls or for calling back numbers in the calls list. -
Page 63: Maintenance
Maintenance Reset You can reset the telephone to default status as follows: Procedure: 1. Press the softkey under MENU. Scroll to MAINTENANCE in the SETTINGS menu. Press OK to confirm. 2. Select the handset or base station, press RESET and press OK to confirm. The default set- tings are restored. -
Page 64: Important Information
This device is designed for operation on the Swiss analog network. The declaration of conformity may be viewed at: www.swisscom.com under Online Shop, Telephones, Declarations of Conformity, or can be ordered from the following address: Swisscom Fixnet AG... -
Page 65: Guarantee
Important information Guarantee The guarantee period is 2 years from the date of purchase. In the event of repairs under guarantee, the defective product must be accompanied by a guarantee card completed and stamped by the sales outlet. The guarantee does not cover damage resulting from inappropriate use, normal wear and tear, or intervention by third parties. -
Page 66: Rechargeable Batteries
Defective batteries are not replaced free of charge. This applies to leased and purchased telephones. Help For general questions on products, services etc., contact the Swisscom information desk (freephone 0800 800 800). Cleaning – when necessary Clean the telephone with a slightly damp cloth or an antistatic cloth.
Need help?
Do you have a question about the Classic A313 and is the answer not in the manual?
Questions and answers