Intermec CK31 User Manual
Hide thumbs
Also See for CK31:
- Quick start manual (16 pages) ,
- Instructions (2 pages) ,
- Operator's manual (2 pages)
Table of Contents
Advertisement
Quick Links
Advertisement
Table of Contents
Troubleshooting

Related Manuals for Intermec CK31


Summary of Contents for Intermec CK31
- Page 1 User's Manual CK31 Handheld Computer...
- Page 2 Intermec. Information and specifications contained in this document are subject to change without prior notice and do not represent a commitment on the part of Intermec Technologies Corporation. © 2005 by Intermec Technologies Corporation. All rights reserved.
- Page 3 This page records changes to this document. The document was originally released as version 001. Version Date Description of Change 10/2005 Added new scanner options, new keypad options, updated information on Funk security and configuration, added new diagnostics, and added information on SmartSystems. CK31 Handheld Computer User’s Manual...
- Page 4 CK31 Handheld Computer User’s Manual...
-
Page 5: Table Of Contents
Patent Information ..................xiv Other Copyright Information..............xv Using the CK31 Handheld Computer ..........1 Introducing the CK31 Handheld Computer.............. 2 Features of Your CK31................2 What’s New? ......................4 Using the Battery....................... 4 Charging and Installing the Battery ............. 5 Maximizing Battery Life ................ - Page 6 Restoring Default Settings............36 Exiting Intermec Settings ............37 Configuring the CK31 With SmartSystems Console ......... 38 Synchronizing the CK31 System Time With a Time Server....... 38 Configuring the CK31 for Your Network ..............39 Configuring 802.11b/g Radio Communications........39 Configuring the Network Parameters for a TCP/IP Network ..
- Page 7 Developing Applications for the CK31 ..............66 Developing a New Application ..............66 Developing a Web-Based Application............67 Converting a Trakker Antares Application to a CK31 Application..... 67 Installing Applications on the CK31 ................ 68 Installing Applications Using ActiveSync ........... 69 Installing ActiveSync and Establishing a Partnership ....
- Page 8 Troubleshooting the CK31 ..................98 Calling Product Support................98 Problems and Solutions ................99 Problems While Operating the CK31............99 Problems While Configuring Security ............. 100 Problems With Wireless Connectivity ............. 101 Problems Transmitting Data Through the Serial Port......102 Problems While Scanning Bar Codes............
- Page 9 Contents Reprogramming the Keypad ..............123 Reprogramming the Keypad .................. 124 Changing the Functionality of Keypad Keys or Key Combinations..124 Creating Keypad Macros ................. 137 Index ......................... 143 CK31 Handheld Computer User’s Manual...
- Page 10 Contents CK31 Handheld Computer User’s Manual...
-
Page 11: Before You Begin
Your safety is extremely important. Read and follow all warnings and cautions in this document before handling and operating Intermec equipment. You can be seriously injured, and equipment and data can be damaged if you do not follow the safety warnings and cautions. -
Page 12: Safety Icons
Global Services and Support Warranty Information To understand the warranty for your Intermec product, visit the Intermec web site at www.intermec.com and click Service & Support > Service & Support. The Intermec Global Sales & Service page appears. From the Service & Support menu, move your pointer over Support, and then click Warranty. - Page 13 Web Support Visit the Intermec web site at www.intermec.com to download our current manuals in PDF format. To order printed versions of the Intermec manuals, contact your local Intermec representative or distributor.
-
Page 14: Who Should Read This Document
Who Should Read This Document? The CK31 Handheld Computer User’s Manual provides you with information about the features of the CK31 and how to install, operate, maintain, and troubleshoot the CK31. Before you install and configure the CK31, you should be familiar with your network and general networking terms, such as IP address. -
Page 15: Other Copyright Information
The owner of Regex++ has granted use of the software to anyone provided such use is accompanied by the following copyright and permission notice: Regex++, Index. (Version 3.31, 16th Dec 2001) © Copyright 1998-2001 Dr John Maddock CK31 Handheld Computer User’s Manual... - Page 16 Dr John Maddock makes no representations about the suitability of this software for any purpose. It is provided “as is” without express or implied warranty. CK31 Handheld Computer User’s Manual...
-
Page 17: Using The Ck31 Handheld Computer
Using the CK31 Handheld Computer Use this chapter to familiarize yourself with the CK31 Handheld Computer. In this chapter you will find these sections: • Introducing the CK31 Handheld Computer • What’s New? • Using the Battery • Using the Keypad •... -
Page 18: Introducing The Ck31 Handheld Computer
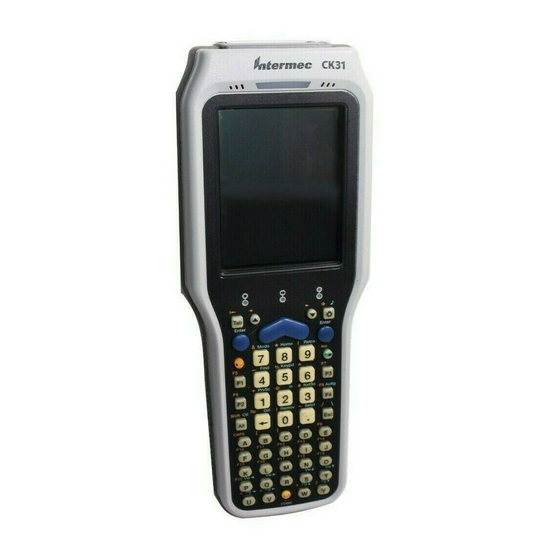
Chapter 1 — Using the CK31 Handheld Computer Introducing the CK31 Handheld Computer The Intermec CK31 is an ergonomically designed handheld ® ® computer built on the Microsoft Windows CE .NET operating system. It is a lightweight, easy-to-use, reliable computer that runs client/server applications and browser-based applications. - Page 19 For additional help using iBrowse, see the iBrowse User’s Guide (P/N 961-055-015). For a complete list of accessories, see “Accessories for the CK31” on page 111. CK31 Handheld Computer User’s Manual...
-
Page 20: What's New
10 minutes. If the battery light blinks or turns on solid, you cannot restore factory defaults or perform a warm or cold boot on your CK31 by using the I key. You must replace the battery with a fully charged battery before you can restore factory defaults or boot your CK31. -
Page 21: Charging And Installing The Battery
Attention: L’enlèvement de la batterie principale quand le bas de secours de batterie ou les affichages en critique bas d’icône sur le taskbar peut causer votre CK31 à la botte froide et de vous peut perdre des données. If you fail to replace the battery immediately, you may lose important data or applications. - Page 22 To charge the battery • Either insert the battery into the AC1 4-slot battery charger or place the CK31 with battery installed in the AC2 4-Bay Charging Dock, AC3 8-Bay Charging Dock, AD1 1-Bay Communications Dock, or AD2 4-Bay Communications Dock.
-
Page 23: Maximizing Battery Life
Checking the Battery Status The easiest way to tell the status of your battery is to look at the battery icon in the status bar of your CK31. If you do not see a battery icon, your battery has a good charge. -
Page 24: Using The Keypad
Characters Not Printed on the Keypad” on page 113. The CK31 supports TE 2000 VT100/220/320/340 and ANSI, TE 2000 5250, and TE 2000 3270. When you order the CK31 with a TE 2000 application, you must order the corresponding keypad overlay. Use the TE 2000 keypad overlays to enter the same keys that you can enter on a VT/ANSI keyboard, and IBM 5250 keyboard, or an IBM 3270 keyboard. - Page 25 Chapter 1 — Using the CK31 Handheld Computer Backlight Scan Enter Enter button Green Orange CAPS Shift Home & Alpha Power PROG 42-Key Large Numeric and Function Keypad: This keypad is designed for applications that enter mainly numeric data (0-9) and that need dedicated function keys (F1- F12).
- Page 26 Chapter 1 — Using the CK31 Handheld Computer Backlight Power Esc key ¦ Home ‘ “ Green CAPS Orange Space PROG 50-Key Full Alphanumeric Keypad: This keypad is designed for applications that enter mainly numeric data (0-9) and that may need to enter the entire alphabet.
-
Page 27: Using The Color-Coded Keys
. Using the Color-Coded Keys The keypad of the CK31 provides color-coded keys to let you access additional characters, symbols, and functions printed on the keypad overlay. Once you understand how to use the color- coded keys and key sequences, you will know how to access all of the additional features printed on the keypad overlay. -
Page 28: Capitalizing All Characters
Capitalizing All Characters To type all alphabetic characters as uppercase letters, you can enable the Caps Lock feature on the CK31 keypad. To enable Caps Lock 1 Press the orange B key. The B icon appears on the status bar. -
Page 29: Using The Power (I) Key
Chapter 1 — Using the CK31 Handheld Computer Using the Power (I) Key When you press the I key to turn off the CK31, you actually put the computer in Suspend mode. In Suspend mode, the CK31 continues to supply power to all memory, but turns off power to most hardware. - Page 30 4 Tap Disable to select it. 5 Save your changes and exit Intermec Settings. To change the I key behavior 1 From the Start menu, tap Intermec Settings. The Intermec Settings application appears. 2 Tap Device Settings > Keypad. The Keypad menu expands to show you the options.
-
Page 31: Using The Touch Screen
4 Save your changes and exit Intermec Settings. Using the Touch Screen The CK31 has a color touch screen display. The screen is 240 x 320 pixels. The desktop is 240 x 300 pixels and the taskbar is 240 x 20 pixels. In addition, the screen supports Unicode characters, user-programmable fonts, and bitmap graphics. -
Page 32: Using The Stylus
Chapter 1 — Using the CK31 Handheld Computer The desktop displays shortcuts to some of the applications installed on the CK31. The first time you turn on the CK31, the taskbar displays the Start menu icon, the time, the keyboard icon, and the desktop icon. -
Page 33: Understanding The Screen Icons
The window positioning feature is turned on. The CK31 is connected using ActiveSync. Backup battery is low. Replace the battery or place the CK31 in a charger. Allow 15 minutes for the backup battery to recharge. Strong signal strength with the access point and security is enabled.* Medium signal strength with the access point and security is enabled.*... -
Page 34: Repositioning A Window
Chapter 1 — Using the CK31 Handheld Computer CK31 Screen Icons (continued) Icon Description No UDP Plus connection. For help, see “Configuring the Network Parameters for a UDP Plus Network” on page 41. UDP Plus is transferring data. UDP Plus is connected. -
Page 35: Calibrating The Screen
The calibration screen appears. 3 Follow the instructions to calibrate the screen. Understanding the Status Lights The status lights on the CK31 turn on to indicate the status of the battery, a successful decode of a bar code, or a user-defined function. -
Page 36: Understanding The Beeps
If the battery light comes on, check the taskbar to see which battery icon appears on it. Use the CK31 Screen Icons table on page 17 to help determine when you need to replace your battery. -
Page 37: Scanning Bar Codes
What It Means High beep You entered valid data or a valid command, the CK31 decoded a label, or the CK31 decoded the last row of a two-dimensional bar code. Three low beeps You entered or scanned an invalid command. -
Page 38: Scanning With The Integrated Laser Scanner Or 1D Linear Imager
The CK31 supports the scanning of 1D linear bar codes and 2D images depending on the scanner model in your CK31. Plus, if you are using an integrated handle or a scanner attached to the serial port, the way you scan bar codes is different. -
Page 39: Scanning With A 2D Area Imager
2D bar code symbologies and supports omni- directional (360°) scanning. Omni-directional scanning means that you can position the CK31 in any orientation to scan a bar code label. Using the 2D area imager is very similar to taking a picture with a digital camera. - Page 40 The aiming beam is smaller when the imager is closer to the bar code and larger when it is further away. When the CK31 successfully reads a bar code label, you hear a high beep and the green Good Read light turns on briefly.
-
Page 41: Attaching A Scanner To The Serial Port
Attaching a Scanner to the Serial Port You can attach a scanner to the serial port of the CK31 if you order a serial adapter and a required cable. There are two serial adapters available to support decoded and undecoded scanners: •... -
Page 42: Verifying That Your Scanner Is Working
1 Connect a scanner to the DB9 connector on the serial adapter or cable. 2 Hook the serial adapter into the battery on the CK31 and then snap it into place or connect the AA2 cable to the serial adapter. - Page 43 Chapter 1 — Using the CK31 Handheld Computer To open ScanDemo 1 Double-tap the ScanDemo shortcut on the desktop. The ScanDemo application opens. 2 Scan a bar code label. For information on how to scan a bar code label, see “Scanning Bar Codes” on page 21. The...
-
Page 44: Installing The Sd Card
1 Press I to turn off the CK31. 2 Unscrew the two captive screws on the SD card door and remove the door. 3 Gently insert the SD card into the CK31 with the printed side facing the keypad and screen side of the CK31. CK31 SD card 4 Push the card into the slot until it latches in place. - Page 45 3 Push in on the SD card until you hear it unlatch. The card should eject far enough to easily remove it from the CK31. 4 Remove the SD card from the CK31. 5 Replace the door and attach it with the two captive screws.
- Page 46 Chapter 1 — Using the CK31 Handheld Computer CK31 Handheld Computer User’s Manual...
-
Page 47: Configuring The Ck31
Configuring the CK31 Use this chapter to understand how to configure the CK31 to communicate in your network. In this chapter, you will find these sections: • How to Configure the CK31 Parameters • Configuring the CK31 for Your Network •... -
Page 48: How To Configure The Ck31 Parameters
Use Intermec Settings Use Intermec Settings on the CK31 to set most parameters. Configuring the CK31: The CK31 provides several ways for you to configure the communications, device, and imaging parameters. CK31 Handheld Computer User’s Manual... -
Page 49: Configuring The Ck31 With Setup Assistant
Chapter 2 — Configuring the CK31 Configuring the CK31 With Setup Assistant When first setting up the CK31, use Setup Assistant to set or enable basic network parameters and connect your CK31 to the network. Setup Assistant guides you through setting the following basic network parameters: •... -
Page 50: Configuring The Ck31 With Intermec Settings
Chapter 2 — Configuring the CK31 Configuring the CK31 With Intermec Settings Use Intermec Settings to configure the CK31 and view system information. You can access Intermec Settings while running any application. To open Intermec Settings 1 Tap the Start icon or press C and then B. The Start menu appears. - Page 51 CD that ships on the inside front cover of this user’s manual. Intermec Settings Menus: Use this diagram to help navigate through the Intermec Settings application. This diagram should only be used as a guide; it does not accurately represent all of the information you will see on your screen.
-
Page 52: Restoring Default Settings
• Tap File > Save Settings • Press Alt F and then press Enter Restoring Default Settings You can restore the CK31 to factory default settings from Intermec Settings. For a complete list of the default settings, see “Default Configuration” on page 118. -
Page 53: Exiting Intermec Settings
Chapter 2 — Configuring the CK31 3 Select Yes. The Restore Defaults dialog box appears. 4 Tap OK. The CK31 erases the registry and then performs a cold boot. When the CK31 is done booting, the calibration screen appears. 5 Follow the instructions on the screen to calibrate your stylus. -
Page 54: Configuring The Ck31 With Smartsystems Console
SmartSystems-enabled. The SmartSystems Console displays all of the CK31s in your network. In the console, you can right-click a CK31 and a menu appears. To configure the CK31, choose Intermec Settings from the menu. The console is part of SmartSystems Foundation and is available from the Intermec web site. -
Page 55: Configuring The Ck31 For Your Network
Chapter 2 — Configuring the CK31 Configuring the CK31 for Your Network The CK31 is a versatile handheld computer that you can easily add to your wired or wireless data collection network. You can connect your CK31 to your network using: •... -
Page 56: Configuring The Network Parameters For A Tcp/Ip Network
Chapter 2 — Configuring the CK31 Configuring the Network Parameters for a TCP/IP Network In a TCP/IP network, the CK31 communicates with a host computer directly using TCP/IP. The access point acts as a bridge to allow communications between the wired network and the wireless network. -
Page 57: Configuring The Network Parameters For A Udp Plus Network
Chapter 2 — Configuring the CK31 2 Make sure that your CK31 is talking to the network and that the network can see your CK31. 3 Configure security. For help, see “Configuring Security” on page 46. The easiest way to configure the network parameters on the CK31 is to use Intermec Settings. -
Page 58: Configuring Bluetooth Communications
• Controller IP address • IP settings (if not using DHCP) • Network port 2 Make sure that your CK31 is talking to the network and that the network can see your CK31. 3 Configure the security. For help, see “Configuring Security”... -
Page 59: Configuring Ethernet Communications
OK. 10 Tap Finish!. Configuring Ethernet Communications You can use the CK31 directly in an Ethernet network if you have ordered the Ethernet option on your CK31 and you insert it into an AD1 or AD2 Communications Dock. The communications dock has an Ethernet connector that allows the CK31 to communicate with your Ethernet network. -
Page 60: Configuring Serial Communications
Chapter 2 — Configuring the CK31 3 Make sure that your CK31 is talking to the network and that the network can see your CK31. Host Ethernet CK31 CK31 CK31 CK31s in an Ethernet Network Configuring Serial Communications The CK31 has a serial port to transfer data to and receive data from another device via RS-232 communications. - Page 61 DB9 to DB9 serial adapter cable. Insert the CK31 into the dock. 3 Turn on the CK31. 4 Make sure that your CK31 is talking to the network and that the network can see your CK31. CK31 Handheld Computer User’s Manual...
-
Page 62: Configuring Security
Chapter 2 — Configuring the CK31 Configuring Security The CK31 provides four types of security for your wireless network: • Wi-Fi Protected Access (WPA) • Wi-Fi Protected Access 2 (WPA2™) • 802.1x • WEP This section explains how to configure security on your wireless CK31. -
Page 63: Selecting A Profile For Funk Security
Selecting a Profile for Funk Security You can define up to four profiles for Funk security. Different profiles let your CK31 communicate in different networks without having to change all of your security settings. For example, you may want to set up one profile for the manufacturing floor and one for the warehouse. -
Page 64: Selecting Microsoft As Your Security Choice
CK31 for your new security choice to take effect. 6 Tap Yes. 7 Save your settings. 8 Warm boot your CK31 by pressing and holding the I key for five seconds. Using WPA Security Wi-Fi Protected Access (WPA) is a strongly enhanced, interoperable Wi-Fi security that addresses many of the vulnerabilities of Wired Equivalent Privacy (WEP). -
Page 65: Configuring Wpa Security With Funk Security
• an access point with an 802.11b/g radio that supports WPA. • a CK31 with the 802.11b/g radio and the 802.1x/WPA security option. The CK31 also supports Wi-Fi Protected Access 2 (WPA2) if you are using Funk security. - Page 66 Note: You must have the date on the CK31 set correctly when you enable Validate Server Certificate. If you choose TLS: a Load a user and root certificate on your CK31. For help, see “Loading a Certificate” on page 59. b For Validate Server Certificate, choose Yes and press Enter.
-
Page 67: Configuring Wpa Security With Microsoft Security
0x for a total of 66 characters. The value must match the key value on the access point. The passphrase must be from 8 to 63 characters. After you enter a passphrase, the CK31 internally converts it to a pre-shared key. - Page 68 Chapter 2 — Configuring the CK31 If you choose TLS: a Select Properties and tap the Run App button. The Auth. Settings dialog box appears. b From the Auth. Settings box, tap the Select button. c Select your certificate from the list and press Enter. The User Logon dialog box appears.
- Page 69 0x for a total of 66 characters. The value must match the key value on the authenticator. The passphrase must be from 8 to 63 characters. After you enter a passphrase, the CK31 internally converts it to a pre-shared key.
-
Page 70: Using 802.1X Security
1.80 or later as an authentication server. For help, see the system manual for your access point. • an access point with an 802.11b/g radio. • a CK31 with an 802.11b/g radio and the 802.1x/WPA security option. Configuring 802.1x Security With Funk Security 1 Make sure you have configured the communications and radio parameters on your CK31. -
Page 71: Configuring 802.1X Security With Microsoft Security
For Validate Server Certificate, choose Enabled and press Enter. If you choose TLS: a Load a user and root certificate on your CK31. For help, see “Loading a Certificate” on page 59. b For Validate Server Certificate, choose Yes and press Enter. - Page 72 Chapter 2 — Configuring the CK31 b From the Auth. Settings box, choose the Select button. c Select your certificate from the list and press Enter. The User Logon dialog box appears. d Enter a User Name and a Domain.
-
Page 73: Using Leap Security
• a RADIUS server. • Cisco access points. LEAP security is not supported with Microsoft security. To enable LEAP security on your CK31 1 Make sure you have selected Funk as your security choice. 2 Make sure you have configured the communications and radio parameters on your CK31. -
Page 74: Using Static Wep Security
8 Select User Password, type a user password, and then press Enter. 9 Exit Intermec Settings. Using Static WEP Security The CK31 uses the Wired Equivalent Privacy (WEP) protocol to add security to your wireless network based on the 802.11b standard. To use WEP security, you need: •... -
Page 75: Configuring Static Wep Security With Microsoft Security
CA, you can use the Import Root or User Certificates programs to load the certificates. Note: Do not cold boot the CK31. Cold booting the computer resets the time and date. CK31 Handheld Computer User’s Manual... - Page 76 Chapter 2 — Configuring the CK31 To load certificates on the CK31 if you are using Active Directory 1 Configure the network and radio settings for the CK31 to communicate with your certificate authority or establish an ActiveSync connection with the CA.
- Page 77 Chapter 2 — Configuring the CK31 To load certificates on the CK31 if you are using a third-party CA 1 From the Configuration Utility, select Communications > 802.11 Radio > Certificates. 2 Select Import Certificates and tap the Run App button. The certificates application appears.
-
Page 78: Disabling Security
13 Tap OK or press Enter to close the Success message box. 14 Configure your CK31 for WPA, WPA2, or 802.1x security. Disabling Security If you choose not to use security with your wireless network, you can disable it on the CK31. - Page 79 Chapter 2 — Configuring the CK31 4 For Data Encryption, choose Disabled. 5 Close Intermec Settings. CK31 Handheld Computer User’s Manual...
- Page 80 Chapter 2 — Configuring the CK31 CK31 Handheld Computer User’s Manual...
-
Page 81: Developing And Installing Applications
• Developing Applications for the CK31 • Installing Applications on the CK31 • Launching Your Application Automatically • Setting or Changing the CK31 Password • Backing Up Your Files • Upgrading Your CK31 CK31 Handheld Computer User’s Manual... -
Page 82: Developing Applications For The Ck31
Developing a New Application Use the Intermec resource kits to develop new applications to run on the CK31. The Intermec resource kits are a library of C++ and .NET components grouped by functionality that you can use to create applications for the CK31. The resource kits... -
Page 83: Developing A Web-Based Application
The CK31 does not support all Trakker Antares functions. You may need to rewrite parts of your application when converting it for use on the CK31. See the resource kit for a list of functions that are not supported. You need these hardware and software components to use the resource kit: •... -
Page 84: Installing Applications On The Ck31
If you have an SD card inserted in your CK31, it appears as the SDMMC Disk folder. This folder is the recommended location for placing your application install files. -
Page 85: Installing Applications Using Activesync
ActiveSync is a free application available from the Microsoft web site. To establish a partnership between your PC and the CK31, you will need: • a USB cable or a female-to-female null modem serial cable. - Page 86 Chapter 3 — Developing and Installing Applications 2 Connect the AD1 to your PC with the USB or serial cable. 3 If you are using a serial cable, from the CK31 Start Screen tap My Computer and then choose Program Files > ActiveSync Serial.
-
Page 87: Using Activesync To Copy Files And Install Applications
CK31. Using ActiveSync to Copy Files and Install Applications You can use ActiveSync to copy files to the CK31 and to install applications. Use the following procedures to learn how to copy files and install applications on the CK31 using ActiveSync. - Page 88 5 Place the cursor in the SDMMC Disk or CK_FFS folder of your CK31, right-click, and click Paste. The file has now been copied to the CK31 and you can see it using My Computer on the CK31. 6 Navigate to your application file and run it.
-
Page 89: Installing Applications Using Your Sd Card
Chapter 3 — Developing and Installing Applications Installing Applications Using Your SD Card If you have an SD card for your CK31, this is the best place for you to install applications. To install applications using the SD card 1 If you are using an SD card reader, remove the SD card from the CK31 and place it in the reader. -
Page 90: Installing Applications Using Wavelink Avalanche
Installing Applications Using Wavelink Avalanche You can use the Wavelink Avalanche device management system to install applications on all of your wireless CK31s. The CK31 ships with the Avalanche Enabler already loaded on it. Each time the Avalanche Enabler is activated (typically on a warm boot), the CK31 attempts to connect to the Avalanche Agent. -
Page 91: Launching Your Application Automatically
Setting or Changing the CK31 Password When you initially start the CK31, there is no password to protect access to the CK31. Anyone can turn on the CK31 and access all of the information and tools loaded on it. When you... -
Page 92: Backing Up Your Files
8 Close the Control Panel. Backing Up Your Files The CK31 makes it easy for you to make a backup copy of all files you have installed or modified on the computer that are not already located in the SDMMC Disk or CK_FFS folders. When you make a backup copy of the file system, the CK31 saves the file system to a folder called Persistent Copy. -
Page 93: Upgrading Your Ck31
1 Tap the Start icon or press C and then B. The Start menu appears. 2 Select Intermec Settings. 3 From Intermec Settings, select Device Settings > File Backup. 4 Select Backup Files Location and choose the location where you want your files to be backed up. -
Page 94: Upgrading The Operating System Using An Sd Card
You can use any file transfer method (ActiveSync, FTP server, and so on) to copy the upgrade files to your SD card. Intermec recommends using an SD card reader. Note: If you are using an SD card reader to copy files to your SD card, see “Installing the SD Card”... -
Page 95: Upgrading Your Ck31 Using Smartsystems Console
Note: Make sure the CK31 has completely loaded all of the upgrade files before you remove the SD card, warm boot, or cold boot the computer. 6 Perform a cold boot on the CK31. For help, see “Cold Booting the CK31” on page 105. Upgrading Your CK31 Using SmartSystems Console You can use the SmartSystems Console to upgrade the operating system on your CK31. - Page 96 6 From within the SmartSystems Console, locate the device upgrade you want to install. 7 Drag-and-drop the device upgrade onto each CK31 you want to upgrade. SmartSystems Console will tell you that it is installing the upgrade on your CK31.
-
Page 97: Running Diagnostics
Running Diagnostics The CK31 provides these diagnostic tests for troubleshooting. Diagnostic Test Page Number 802.11 Information Authentication Information Battery Information Boot Code Version Configuration Table CPU Monitor CPU Registers Display Test Installed Fonts Intermec Value Version Keypad Test LED Test... -
Page 98: Using Diagnostics On The Ck31
• Hardware • Software • System Use the Hardware diagnostics menu to run tests on the CK31 or view system information. For example, you can run an LED test to determine if your CK31 lights are working correctly. Use the Software diagnostics menu to view the version of your operating system, the bootcode version, and Intermec Value Add (IVA) information. -
Page 99: 802.11 Information
SSID, the radio signal strength indicator (RSSI), the channel, and the MAC address of the connected access point. To open the 802.11 Information diagnostic • From the Start menu, tap Programs > Intermec Diagnostics > System > 802.11 Information. Sample Screen Authentication Information Use the Authentication Information diagnostic to see the state of your security authentication. -
Page 100: Battery Information
Chapter 4 — Running Diagnostics Sample Screen Battery Information Use this diagnostic to view information on the CK31 main battery, backup battery, and AC power status. You can also use this screen to see the current volts and charging status. -
Page 101: Boot Code Version
The Boot Code Version diagnostic displays the version of boot code loaded on your CK31. To open the Boot Code Version diagnostic • From the Start menu, tap Programs > Intermec Diagnostics > Software > Boot Code Version. Sample Screen... -
Page 102: Cpu Monitor
The CPU Monitor displays the activity of the CPU by using bars in a graphical icon. To open the CPU Monitor diagnostic • From the Start menu, tap Programs > Intermec Diagnostics > System > CPU Monitor. The CPU Monitor icon ( ) appears on the taskbar. -
Page 103: Display Test
Sample Screen Display Test Use the Display Test to make sure that every pixel on the CK31 screen is working correctly. For example, you may want to test the screen if you do not see complete characters on the screen. -
Page 104: Installed Fonts
Chapter 4 — Running Diagnostics Installed Fonts Use this screen to view all of the fonts installed on your CK31. You can press the number associated with a font to see an example of how the font appears on the screen. For example, press 1 to see how Lucida Console looks on the screen. -
Page 105: Keypad Test
You can also test to make sure the keypad is operating correctly. To open the Keypad Test diagnostic • From the Start menu, tap Programs > Intermec Diagnostics > Hardware > Keypad Test. Sample Screen... -
Page 106: Led Test
LED Test Use the LED Test to make sure that your LEDs (lights) are operating correctly. The LED Test turns the lights on the CK31 on in this sequence: Good Read light, the user-defined lights, Ready-to-Work indicator, and then the System Status light. The lights blink one time each and then they blink five times each. -
Page 107: Network Test
If you receive a result other than , the test failed. ping OK To open the Network Test diagnostic • From the Start menu, tap Programs > Intermec Diagnostics > System > Network Test. Sample Screen Operating System Version Use the OS Version diagnostic screen to view the operating system software version loaded on the CK31. -
Page 108: Ping Utility
If you receive a result other than , the test failed. ping OK To open the Ping Utility diagnostic • From the Start menu, tap Programs > Intermec Diagnostics > System > Ping Utility. Sample Screen CK31 Handheld Computer User’s Manual... -
Page 109: Radio Driver Version
Sample Screen RAM Information Use the RAM Information diagnostic to see how much RAM and flash memory is available on the CK31. You can also see the Flash Part ID. To open the RAM Information diagnostic • From the Start menu, tap Programs > Intermec Diagnostics >... -
Page 110: Ram Monitor
Use the RAM Monitor to see a graphical representation of RAM usage. To open the RAM Monitor diagnostic • From the Start menu, tap Programs > Intermec Diagnostics > System > RAM Monitor. The RAM Monitor icon ( ) appears on the taskbar. -
Page 111: Sound Test
The Sound Test can also help you choose a beeper volume and frequency that you can hear in your working environment. When you select the test, the CK31 sounds a series of beeps from the default beep through the entire range of quiet to loud beeps. - Page 112 Chapter 4 — Running Diagnostics CK31 Handheld Computer User’s Manual...
-
Page 113: Troubleshooting And Maintaining The Ck31
Use this chapter to solve problems you may encounter while using the CK31. You will also find information on booting the computer and routine maintenance. If you have any problems using the CK31, look in this chapter to find a possible solution. This chapter consists of the following sections:... -
Page 114: Troubleshooting The Ck31
Chapter 5 — Troubleshooting and Maintaining the CK31 Troubleshooting the CK31 Use this chapter to troubleshoot some common problems you may experience with your CK31. If you cannot find the answer to your problem in the “Problems and Solutions” section, you may need to call Product Support. -
Page 115: Problems And Solutions
The CK31 appears to be locked up • Wait at least 10 seconds and try again. If the CK31 is still and you cannot enter data. connecting to the Intermec Application Server or the host, it ignores any input from the keypad or scanner. -
Page 116: Problems While Configuring Security
You receive a message saying “The The date and time on the CK31 are not saved through a cold server certificate has expired or your boot. You need to re-enter the date and time and then save your system date is incorrect”... -
Page 117: Problems With Wireless Connectivity
“Keep Alive” message (if possible) from send or receive messages over the the host so that the TCP session is maintained while a CK31 network. is suspended. The network connection icon is in... -
Page 118: Problems Transmitting Data Through The Serial Port
• Make sure the CK31 is connected to the PC, host computer, or RS-232 serial device using the appropriate cable adapter and null modem cable. • If the CK31 is in a communications dock, make sure that the communications dock is connected to the serial device using the appropriate cable. -
Page 119: Problems While Scanning Bar Codes
Good Read light does CK31 to use continuous/edge triggering. If you not turn off. configure the CK31 for level triggering and the Good Read light remains on, there may be a problem. Press the Scan button or pull the trigger again without scanning a bar code label. -
Page 120: Booting The Ck31
Intermec Settings to enable 1D Omni-directional scanning. Booting the CK31 You seldom need to warm or cold boot the CK31. The CK31 uses the configuration currently saved in flash memory during the boot process. You need to boot the CK31 when an application is locked up and will not respond, when you upgrade the firmware, or when you reflash the computer. -
Page 121: Warm Booting The Ck31
To warm boot the CK31 • Press and hold I for 5 seconds. The CK31 tells you it is performing a warm boot and the screen comes back up to the start screen. -
Page 122: Cleaning The Scanner Window And Screen
à zéro le bouton. Replace the battery. The battery light on the CK31 blinks three times and the CK31 starts the power on sequence. Note: Date and time settings are not saved through a cold boot. -
Page 123: Specifications
Specifications CK31 Handheld Computer User’s Manual... -
Page 124: Physical And Environmental Specifications
Appendix A — Specifications Physical and Environmental Specifications Use this section to locate technical information about the CK31 and its available features and options. Physical Dimensions Length: 23.4 cm (9.22 in) Width: 9 cm (3.54 in) Thickness: 5.3 cm (2.07 in) Weight: 594 g (20.8 oz) - Page 125 55 mil code 19.1 to 126 cm 7.5 to 49.0 in 55 mil code, retroreflective 105 to 151 cm 41.0 to 59.0 in 100 mil code, retroreflective 113 to 227 cm 44.0 to 89.0 in CK31 Handheld Computer User’s Manual...
- Page 126 Reading distance on the 1D line Density Density Symbology (mm) (mil) (mm) (mm) (inch) (inch) Code 39 11.8 15.7 0,33 mm/ 13 mils/ 100% contrast 100% contrast 0,33 mm/ 13 mils/ 25% contrast 25% contrast CK31 Handheld Computer User’s Manual...
-
Page 127: Accessories For The Ck31
*Code 39 retroreflective Accessories for the CK31 You can use these accessories (sold and ordered separately) with the CK31. To order accessories, contact your local Intermec sales representative. 073573 Power Supply Use the 073573 power supply to provide power for the communications docks and chargers. - Page 128 The holster and belt provide an easy way for you to carry the CK31 while not using it. The holster and belt support either right or left-handed use and you can use it to carry a CK31 with or without a handle.
-
Page 129: Typing Characters Not Printed On The Keypad
Undecoded Serial Adapter (P/N 075509) The undecoded serial adapter converts the 26-pin serial port on the CK31 into a DB9 (9-pin) male serial connector that you can connect to an undecoded scanner. Typing Characters Not Printed on the Keypad The keypads uses hidden key sequences to access characters not printed on the keypad overlay. - Page 130 Not hidden > B and then Not hidden Not hidden C and then 9 Not hidden Not hidden C and then Tab Not hidden Not hidden C and then Right Enter Not hidden Not hidden CK31 Handheld Computer User’s Manual...
- Page 131 C key and then O B and then C and then P Not applicable C and then Q Not applicable C and then R Not hidden C and then T Not applicable C and then Right Enter Not hidden CK31 Handheld Computer User’s Manual...
- Page 132 C and then R C and then Alpha Not hidden C and then Tab Not hidden < B and then Not hidden > B and then Not hidden C and then Right Enter Not hidden CK31 Handheld Computer User’s Manual...
-
Page 133: Default Settings
Default Settings CK31 Handheld Computer User’s Manual... -
Page 134: Default Configuration
Default Configuration Use the following tables to see the default configuration settings of the CK31. If you restore the CK31 to factory default settings, it will use these values. The tables are organized according to the options in Intermec Settings. For detailed information on most of the commands available in Intermec Settings, see the Intermec Computer Command Reference Manual (P/N 073529). - Page 135 Image Dimension Top Position Bottom Position Aimer LED Duration 0 ms Sticky Aimer LED Duration 0 ms Decode Security Settings Default Value Consecutive Data Validation Identical Consecutive Timeout 300 ms Different Consecutive Timeout 0 ms CK31 Handheld Computer User’s Manual...
- Page 136 IP Settings DHCP Enabled DHCP Client Identifier Null Primary DNS 0.0.0.0 Secondary DNS 0.0.0.0 Primary WINS 0.0.0.0 Secondary WINS 0.0.0.0 Bluetooth Settings Default Value Power Class of Device Unavailable 0.16 Radio Unavailable Device Address Text string CK31 Handheld Computer User’s Manual...
- Page 137 Default Device Settings Configuration Device Settings Default Value Date and Time Date Tuesday, January 06, 2015 Time Time of current update Adjust for Daylight Time Enabled Beeper Volume Very high Number of Good Read Beeps CK31 Handheld Computer User’s Manual...
- Page 138 Screen Rotation Disable Keypad Adjust Beeper Volume Enable Task Manager Enable Configure Boot Functionality Warm boot Power Management User Idle 1 minute System Idle 1 minute Suspend 1 minute Backup Files Location Flash File System CK31 Handheld Computer User’s Manual...
-
Page 139: Reprogramming The Keypad
Reprogramming the Keypad CK31 Handheld Computer User’s Manual... -
Page 140: Reprogramming The Keypad
Appendix C — Reprogramming the Keypad Reprogramming the Keypad You can use the reprogrammable keypad utility of the CK31 to: • change the functionality of keypad keys or key combinations. • create keypad macros. Navigating Through the Reprogrammable Keypad Utility... - Page 141 The Key Reprogram Feature dialog box appears. 4 Tap Yes. 5 Press Ctl Alt Shift U. The reprogrammable keypad utility appears. Programming a Unicode Character You can program any Unicode character to any key or modified key combination. CK31 Handheld Computer User’s Manual...
- Page 142 Shift to access the reprogrammed key, you select Shift. You do not need to select a modifier or function key. 5 Press Enter. The Key Response dialog box appears. 6 Select Unicode Character and press Enter. The Unicode dialog box appears. CK31 Handheld Computer User’s Manual...
- Page 143 1 Start the reprogrammable keypad utility. 2 Press the key you want to reprogram twice. The hexadecimal scan code for the key appears in both fields. 3 Press Enter. The select modifiers dialog box appears. CK31 Handheld Computer User’s Manual...
- Page 144 Shift. You do not need to select a modifier or function key. 5 Press Enter. The Key Response dialog box appears. 6 Select Reprogram VKEY and press Enter. The Virtual Key (VKEY) dialog box appears. 7 Select the Entry Mode for the VKEY character. CK31 Handheld Computer User’s Manual...
- Page 145 • Contrast Key • Volume Key • Mouse Key Toggle • Rotate Display • Insert VKey • LWIN VKey (Menu launch on CK31) • Delete VKey • Backtab VKey • Pan Mode Toggle • High Contrast Toggle (Accessibility changes to system colors) •...
- Page 146 For example, if you want to press Shift to access the reprogrammed key, you select Shift. You do not need to select a modifier or function key. 5 Press Enter. The Key Response dialog box appears. CK31 Handheld Computer User’s Manual...
- Page 147 1 Start the reprogrammable keypad utility. 2 Press the key you want to reprogram twice. The hexadecimal scan code for the key appears in both fields. 3 Press Enter. The select modifiers dialog box appears. CK31 Handheld Computer User’s Manual...
- Page 148 Shift to access the reprogrammed key, you select Shift. You do not need to select a modifier or function key. 5 Press Enter. The Key Response dialog box appears. 6 Select Run Program and press Enter. The application dialog box appears. CK31 Handheld Computer User’s Manual...
- Page 149 2 Press the key you want to reprogram twice. The hexadecimal scan code for the key appears in both fields. 3 Press Enter. The select modifiers dialog box appears. 4 Press Enter. The Key Response dialog box appears. CK31 Handheld Computer User’s Manual...
- Page 150 For help restoring defaults, see “Restoring Default Settings” on page To remove all reprogramming modifications 1 Press Ctl Alt Shift D. The Remove all keypad modifications dialog box appears. CK31 Handheld Computer User’s Manual...
- Page 151 3 Tap Yes or No. You will hear a beep when your changes are successful. To remove one reprogramming modification 1 Press Ctl Alt Shift D. The Remove all keypad modifications dialog box appears. 2 Tap No. The next dialog box appears. CK31 Handheld Computer User’s Manual...
- Page 152 Enter. You will hear a beep when your changes are successful. Finding the Registry Entries for Keypad Changes The CK31 provides registry files for each keypad change you make. These files are located at: \CK_FFS\KeypadMods\KeypadModxxxx.reg Each modification has its own entry. To combine entries, copy all the keys into a single registry file and combine identical keys to contain the data from both files.
-
Page 153: Creating Keypad Macros
Before you can record a macro, you need to enable the keypad macro utility. To enable the keypad macro utility 1 Double-tap My Computer. 2 Double-tap the Windows folder. 3 From the Windows folder, double-tap FilterKeysToggle.exe. The Key Reprogram Feature dialog box appears. CK31 Handheld Computer User’s Manual... - Page 154 1 Start the keypad macro utility. 2 Press the key you want to activate the macro twice. The hexadecimal scan code for the key appears in both fields. 3 Press Enter. The select modifiers dialog box appears. CK31 Handheld Computer User’s Manual...
- Page 155 Delay. If you select Timed, the key response delay matches the timing of the key press. If you select Manual, you need to enter the time for the delay. 7 Press Enter. The macro entry dialog box appears. CK31 Handheld Computer User’s Manual...
- Page 156 To remove all macros 1 Press Ctl Alt Shift C. The Remove all keypad macros dialog box appears. 2 Tap Yes. A dialog box appears asking if you want to remove the entry from permanent storage. CK31 Handheld Computer User’s Manual...
- Page 157 Enter. You will hear a beep when your changes are successful. Finding the Registry Entries for Keypad Macros Registry files for each keypad macro are provided for you. These files are located at: \CK_FFS\KeypadMods\KeypadModxxxx.reg CK31 Handheld Computer User’s Manual...
- Page 158 [HKEY_LOCAL_MACINE\HARDWARE\DEVICEMAP\KEYBD] "ScancodeFilterArray"=hex:\ 0d,00,05,00,06,00,06,00,00,00 "KeyMacro0x50d"=hex:\ 0a,00,00,00,00,00,00,00,\ 0a,f0,00,00,a0,00,00,00,\ 11,00,00,00,19,00,00,00,\ 11,f0,00,00,6c,00,00,00,\ 19,00,00,00,19,00,00,00,\ 19,f0,00,00,6b,00,00,00 Your combined reg file should look like this: "ScancodeFilterArray"=hex:\ 08,00,0d,00,06,00,06,00,00,00, 0d,00,05,00,06,00,06,00,00,00 "KeyMacro0xd08"=hex:\ 08,00,00,00,00,00,00,00,\ 08,f0,00,00,7a,00,00,00,\ 10,00,00,00,19,00,00,00,\ 10,f0,00,00,01,00,00,00,\ 18,00,00,00,19,00,00,00,\ 18,f0,00,00,6e,00,00,00 "KeyMacro0x50d"=hex:\ 0a,00,00,00,00,00,00,00,\ 0a,f0,00,00,a0,00,00,00,\ 11,00,00,00,19,00,00,00,\ 11,f0,00,00,6c,00,00,00,\ 19,00,00,00,19,00,00,00,\ 19,f0,00,00,6b,00,00,00 CK31 Handheld Computer User’s Manual...
-
Page 159: Index
Index CK31 Handheld Computer User’s Manual... - Page 160 3270/5250 TE keypads, typing hidden developing new, 66 characters, 115 developing with SDK, 66 4-bay battery charging dock, AC2 installing on the CK31, 68 accessory, 112 installing using Avalanche, 74 4-bay communications dock, described, installing with ActiveSync, 69 installing with FTP server, 73...
- Page 161 68 802.1x security, 54 using to upgrade the operating system, troubleshooting, 100–101 CK31 parameters, 32 CCX v2.0 compliance, 3 LEAP security, 57 certificates, loading for security, 59 parameters, 32 changing a password, 75 security, 46 CK31 Handheld Computer User’s Manual...
- Page 162 RAM Monitor, 94 using Setup Assistant, 33 SD Card Memory Test, 94 contacting Intermec by phone, xi Sound Test, 95 copy files to CK31 using ActiveSync, 71 using, 82 copyright information, xiii diagram, Intermec Settings, 35 dimensions, physical, 108 Monitor, diagnostics screen, 86...
- Page 163 113 menu structure, illustrated, 35 holster and belt accessory, 112 navigating within, 36 host computer not receiving data, opening on the CK31, 34, 99 troubleshooting, 101 Intermec Value Version, diagnostics humidity, specifications, 108 screen, 88 international keypads...
- Page 164 MAC address, viewing, 90 parameters, configuring CK31, 32 macros passphrase creating keypad, 124, 137 setting for Funk WPA-PSK, 51 enabling the keypad utility, 137 setting for Microsoft WPA-PSK, 53 recording, 138 password removing, 140 changing, 76 setting, 75 CK31 Handheld Computer User’s Manual...
- Page 165 Persistent Copy folder, backing up files, 76 keypad macros, 141 physical registry, erasing, 36 dimensions, 108 remapping keys, 133 specifications, 108 remotely managing the CK31, using Ping command Avalanche, 74 using to test network communications, removing keypad macros, 140 using to test network connection, 91...
- Page 166 Setup Assistant, using to configure keypad, using, 8 CK31, 33 Terminal Emulation Programmer's signal strength, icons, 17 Guide, 3 SmartSystems Console technical support, accessing on web, xi using to configure the CK31, 38 telephone support, xi CK31 Handheld Computer User’s Manual...
- Page 167 15 lost network connection after V, W suspend, 101 vehicle cradle accessory, 113 operating the CK31, 99, 100 Virtual Key (Vkey) preventive maintenance, 106 selecting an entry mode, 128 scanning bar codes, 103 program to any key or key combination,...
- Page 168 Index wireless WPA-PSK communications configuring with Microsoft, 53 configuring, 39 configuring with Funk, 51 troubleshooting, 101 WPA-802.1x security configuring with Funk, 49 configuring with Microsoft, 51 CK31 Handheld Computer User’s Manual...
- Page 169 Corporate Headquarters 6001 36th Avenue West Everett, Washington 98203 U.S.A. tel 425.348.2600 fax 425.355.9551 www.intermec.com CK31 Handheld Computer User's Manual *075207-002* P/N 075207-002...
Need help?
Do you have a question about the CK31 and is the answer not in the manual?
Questions and answers