Table of Contents
Advertisement
Quick Links
Advertisement
Chapters
Table of Contents

Related Manuals for Kodak PS50 Series


Summary of Contents for Kodak PS50 Series
- Page 2 his product contains portions of imaging code owned and copyrighted by Pegasus Imaging Corp., Tampa, FL, (www.pegasustools.com). ALL RIGHTS RESERVED...
-
Page 3: User Precautions
Remove the power cord from the wall outlet before moving the scanner. • Follow the Kodak recommended cleaning procedures. Do not use air, liquid or gas spray cleaners. These cleaners displace dust, dirt and debris to another location within the scanner, which may cause the scanner to malfunction. - Page 4 EMC statements United States: This equipment has been tested and found to comply with the limits for a Class B digital device pursuant to Part 15 of the FCC rules. These limits are designed to provide reasonable protection against harmful interference in a residential installation.
-
Page 5: Table Of Contents
INTRODUCTION INSTALLATION SCREEN DESCRIPTIONS SCANNING PHOTOS MAINTENANCE ACHIEVING GOOD QUALITY IMAGES TROUBLESHOOTING APPENDICES A - C... - Page 6 Supporting documentation .............. 1-2 Accessories..................1-2 What’s in the box ................1-3 Scanner components ..............1-4 Thank you for purchasing a Kodak Picture Saver Scanning System PS50. The Kodak Picture Saver Scanning System allows you to easily digitize and enhance photos and can also be used as a general office document scanner.
-
Page 7: Supporting Documentation
Scanning Systems PS50/PS55/PS80 — allows you to scan pages from your photo albums or scrapbooks without removing the photos from the page or removing the page protector. When using the Kodak Legal Flatbed Accessory or the Kodak A3 Flatbed Accessory the software will identify and select separate images within the original flatbed scanned image. -
Page 8: What's In The Box
Before you begin open the box and check the contents: • Kodak Picture Saver System Scanner • Pre-separation pad, for use in document scanning • Kodak Picture Saver Standard Separation Module • USB 2.0 cable • Power supply • AC power cord bundles •... -
Page 9: Scanner Components
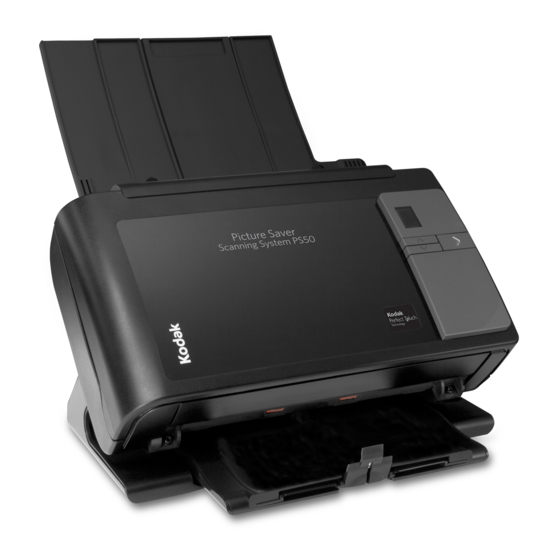
Scanner components Front view The illustration below shows the PS50 Scanner. Input tray Scanner cover Function window Start button Scroll buttons Output tray Scanner cover — provides access to internal components; such as, the imaging area and the feed and separation modules. Input tray —... - Page 10 Do not blow air into the camera. See Chapter 7, Troubleshooting. Closed imaging area — for optimum image quality, keep the imaging area clean. This area can be cleaned using the Kodak-approved cleaning supplies. See Chapter 5, Maintenance. Separation module release lever — push this lever down to release the separation module for cleaning or replacement.
- Page 11 Rear view Power port USB port Routing channel Security Power switch lock port Power port — connects the power to the scanner. USB port — connects the scanner to the PC. Routing channel — allows you to secure the USB cable and power cord to protect them when the scanner is moved.
- Page 12 • Remove any USB software dongle connected to the PC. • An Internet connection is necessary to complete Product Registration. NOTE: If an Internet connection is not available, contact Kodak Support (refer to Chapter 7, “Contact Information”). A-61760 September 2012...
-
Page 13: Installation Notes
Installing and/or upgrading the Kodak All In One Home Center Software on the same PC with the Kodak Picture Saver System Application may remove the PS50 registry entries. This will prevent the Kodak Picture Saver System Application software from running. The product registration screens may be displayed instead of the application splash screen. - Page 14 Saver System application shortcut will be placed on your desktop. 9. Restart the PC. 10. The Kodak Picture Saver Scanning System has a fixed screen size of 1024 x 768. You may want to change the taskbar properties by unselecting "Keep the taskbar on top of other windows." This will keep the taskbar from covering the lower portion of the application when the screen resolution is set at 1024 x 768.
-
Page 15: Connecting The Power Cord And Usb Cable
Connecting the power cord When the Picture Saver System Software has been installed, connect and USB cable the power supply, power cord and USB cable to the scanner. Refer to the illustration below for making proper connections. Make sure the power outlet is located within 1.52 metres (5 feet) of the scanner and is easily accessible. -
Page 16: Turning On The Scanner
7. Secure the power cord and USB cable into the routing channel on the back of the scanner. Turning on the 1. If your scanner has a toggle power switch, momentarily press the toggle button on the back of the scanner to turn the scanner on; scanner otherwise press the button on the back of the scanner to the On (I) position. -
Page 17: Turning The Scanner Off With The Toggle Power Switch
Off (O) position. off with the rocker power switch Starting the 1. Turn on any Kodak flatbed accessories before starting the application. application software 2. Double-click on the application shortcut on your desktop or select Start>Programs>Kodak>KODAK Picture Saver System>Picture... -
Page 18: Screen Descriptions
Kodak Picture Saver Scanning System. NOTE: Some of the screens and options described in this chapter are only available if you have the Kodak Photo Selector Accessory installed and enabled. All screens within the Kodak Picture Saver Scanning System provide the following icons: About: displays the software version and copyright information. - Page 19 Customer Order When you launch the Picture Saver System Software, the Customer Order Information screen will be displayed. Information screen Customer Information Order # (required) — enter any text you want to add for your own reference or select a previous order by clicking on the drop-down arrow. This text is appended with the date and time for new orders.
-
Page 20: Scan Images Screen
Batch Scan — scans batches of photos using the Picture Saver System Scanner and displays the Scan Viewer screen. Flatbed Scan — if an optional Kodak A3 or Legal Flatbed is attached, this button will be displayed. Photos will be scanned from the flatbed and the Scan Viewer screen or the Photo Selector screen (if installed and enabled) will be displayed. - Page 21 Image Cleaner Tool — when checked, the Picture Saver System will make every attempt to eliminate any streaks in the image during the scanning process. Applying the Image Cleaner Tool does not slow down the scanning process. Frequently streaks in images are caused because the scanner has accumulated dust and dirt.
- Page 22 Scan Images screen When you click Batch Scan or Flatbed Scan on the Scan Images screen, full size 1-up images will be displayed in the Scan Viewer (continued) screen as the photos are being scanned. After the batch is scanned, the Scan Viewer screen will close and the photos will be rearranged and displayed in the order they were scanned.
- Page 23 KODAK Perfect Touch progress bar is displayed at the top of the screen. • KODAK Perfect Touch is applied to all images in the current batch. This Batch • Image: displays the number of the first image shown in the 16-Up Display window.
-
Page 24: Photo Selector Screen
Photo Selector If you have the Kodak Photo Selector Accessory, when you click Flatbed Scan or Redo Flatbed Scan the Photo Selector screen will be screen displayed. NOTE: This option must be enabled on the Scan Settings screen. See the section “Scan Settings screen” later in this chapter for more information. - Page 25 Blue selection frame — outlines the borders of a photo after scanning. When you click on an individual image selection, the blue selection frame will turn yellow and the Delete button will become active. Yellow selection frame — when you click on an individual image selection, the blue selection frame will turn yellow and the Delete button will become active.
-
Page 26: Scan Viewer Screen
Scan Viewer screen When you click Batch Scan, Flatbed Scan, Redo Batch or Redo Flatbed Scan or Redo Scan, the Scan Viewer screen will be displayed. The screen will display images one at a time while scanning, then close automatically when scanning is completed. Pause Display/Continue Display —... -
Page 27: Scan Settings Screen
20 seconds to allow more time to insert the next photo or document into the current batch. Flatbed Scan Mode — this option is only visible if you have the Kodak Photo Selector Accessory. • Enable Photo Selector — check this option to enable the Photo Selector Accessory. - Page 28 Output Media — determines whether files are partitioned to fit onto a CD or DVD based on file size. • Prompt for Media: if selected, you will be asked to select KODAK Picture CD, CD or DVD output after scanning is complete.
-
Page 29: Enhance Picture Screen
Enhance Picture When you click on a thumbnail on the Scan Images screen, the image will be displayed in the Enhance Picture screen. screen Original Image/Enhanced Image — the Original Image window displays the image as it was scanned. When you select one of the Enhanced Image icons (e.g., Red Eye), the changes will be displayed in the Enhanced Image window. - Page 30 This option applies to black and white and color images scanned as color. Photo Selector — if you have the Kodak Photo Selector Accessory, this option will be available. When selected, displays the Photo Selector screen.
-
Page 31: Order Preview Screen
By default, the maximum folder size is 550 MB for KODAK Picture CD, 650 MB for CDs and 4.4 GB for DVDs. If a customer order contains more images than can fit on the CD or DVD, multiple folders will automatically be created while scanning. -
Page 32: Preview Details Screen
Preview Details When you click Next on the Scan Images screen, the Preview Details screen is displayed. The customer can manually rotate an image from screen this screen or click on a individual image to display the Enhance Picture screen. The Enhance Picture screen allows image editing. See the next section for more information. - Page 33 NOTE: Auto rotate is slower for grayscale images. Therefore, it is recommended that you scan black and white photos as color images and use grayscale scanning for exception processing if color scan results are not what you desired. This Order — provides a summary of the images within this order. •...
-
Page 34: Order Summary & Creation Screen
If you do start another scan session, the Customer Order Information screen will be displayed. You can output the order by selecting Burn CD/DVD, Burn KODAK Picture CD or Copy To. NOTE: Some of these buttons may be disabled if you do not have permission to burn CDs and DVDs. -
Page 35: Burn Cd Or Burn Dvd
Burn CD or Burn DVD The Burn CD/DVD dialog box will be displayed allowing you to burn this order to a CD or DVD. You can also add other files or folders to the same CD or DVD. The folder for each order will remain on the hard drive in the order directory, by default C:\Scanned_Pictures. - Page 36 • Verification after burning is complete: you can select None (no verification will take place) or select a Quick or Full verification process that the data was burned successfully. • Burn/Cancel — click this button to start or cancel a burn. Cancelling a burn in progress may result in an unusable CD/DVD.
- Page 37 Kodak Picture CD. The folders for each order will remain on the hard drive in the order directory, by default C:\Scanned_Pictures. NOTE: If the order is too large to fit on a single Kodak Picture CD, the system will partition the order to fit on multiple media, labeled FD_01, FD_02.
-
Page 38: Copy To
• Close media: is checked and may not be unchecked. This will finalize the Kodak Picture CD to play in other PCs and supported DVD players. • Eject when finished: if checked, will automatically eject the Kodak Picture CD when burning is complete. -
Page 39: Scanning Photos
4 Scanning Photos Contents Getting your scanner ready to scan ..........4-1 Getting your photos ready to scan ..........4-3 Handling guidelines................. 4-5 Scanning your photos ..............4-6 Getting your scanner Even though your scanner can be tilted to an upward and downward position, it is strongly recommended that you scan your photos in the ready to scan downward position. - Page 40 3. Adjust the side guides (by sliding them in or out) to accommodate the size of the photos you are scanning. 4. Adjust the input tray. Adjust the output tray to accommodate your scanning needs. • The output tray can be extended to accommodate photos up to 14 inches in length.
- Page 41 Getting your photos 1. When organizing your photos for scanning, stack the photos so the edges are aligned and centered in the input tray. This allows the ready to scan feeder to introduce photos into the scanner one at a time. 2.
- Page 42 NOTE: If you want to keep your photos in a specific order, do the following: Take your photos and place them face up on the table. Take the first batch from the top of this stack and place them face up in the scanner.
-
Page 43: Achieving Good Quality Images
• Handle photos with care! Be sure your hands are clean or wear clean white cotton gloves. Avoid touching the photographic surface. • Fragile or precious photos should be scanned using the Kodak A3 Flatbed Accessory or Kodak Legal Flatbed Accessory to eliminate the risk of damage from automated handling. - Page 44 PC. 1. Double-click on the Picture Saver System Software shortcut on the desktop, or select Start>Programs>Kodak>KODAK Picture Saver System>Picture Saver System PS50. A splash screen will be displayed while the system initializes; then the Customer Order Information screen will be displayed.
- Page 45 4. Select Continue.The Scan Images screen will be displayed. The Scanning Completed button will be active if the order already contains photos to allow you to proceed to the following screens. 5. Place a batch of photos in the scanner’s input tray (for a Batch Scan) or as a single photo on the flatbed platen (for a Flatbed Scan).
- Page 46 Scanning will start when the lamps are ready (usually within a few seconds). NOTES: • If you are using an optional Kodak Legal Flatbed or Kodak A3 Flatbed, the photo must always be placed face down on the platen.
- Page 47 When the Scan Viewer screen is closed, the Scan Images screen will be displayed. NOTE: If you are using the Kodak Photo Selector Accessory and are scanning photos using the flatbed, the Photo Selection screen will be displayed. Proceed to the next step if you are using the Photo Selector Accessory, if not proceed to Step 10.
- Page 48 Scan. The rescanned images will be displayed on the screen in place of the previous batch. • If you want to edit an individual image (e.g., rotate, delete, KODAK Perfect Touch, etc.), click on the image you want to enhance. The Enhance Picture screen will be displayed. 4-10...
- Page 49 • Redo scan may be used to replace a multi-feed image with images from multiple photos. 12. Make any desired changes, then click Scanning Completed. The message Are you done scanning this order? will be displayed. 13. Click Yes. The Order Preview screen will be displayed. 14.
- Page 50 The Preview Details screen will be displayed. 15. From the Preview Details screen you can make any final changes. When finished, click Continue. The Order Preview screen will be displayed. 16. If you want to review the contents of the folder one more time before finishing your order, select the desired folder, otherwise, click Continue.
- Page 51 • If you want to burn a data CD or DVD, click Burn CD/DVD and make your selections on the Burn CD/DVD screen. • If you want to burn a Kodak Picture CD, click Burn KODAK Picture CD and make your selections on the Burn CD/DVD screen.
- Page 52 When you are finished, the message Do you want to start a new Kodak Picture Saver System Scan Session? will be displayed. If you want to start a new scan session, click Yes. Otherwise, click No to close the Kodak Picture Saver System Software.
-
Page 53: Maintenance
5 Maintenance Contents Opening the scanner cover............. 5-1 Cleaning procedures............... 5-2 Cleaning the rollers ..............5-2 Cleaning the separation module..........5-3 Cleaning the feed module ............5-4 Vacuuming the scanner.............. 5-5 Cleaning the imaging area ............5-6 Running a transport cleaning sheet..........5-6 Replacement procedures ............... -
Page 54: Cleaning Procedures
“Supplies and consumables” at the end of this chapter provides a listing of the supplies required to clean your scanner. IMPORTANT: Use only non-flammable cleaners such as those provided through Kodak Parts Services. Do not use household cleaners. Allow surfaces to cool to ambient temperature before use. -
Page 55: Cleaning The Separation Module
Cleaning the separation The separation module should be removed from the scanner for best module cleaning results. 1. Push the separation module up to snap out and lift it out of position. 2. Manually rotate and wipe the separation module tires with a roller cleaning pad. -
Page 56: Cleaning The Feed Module
Cleaning the feed module • When removing or cleaning the feed module, it may be easier to access the feed module if you remove the input tray. To remove the input tray, gently push the input tray to the left or right to release the pin from the slot, and lift it out of position. -
Page 57: Vacuuming The Scanner
5. Using a vacuum or cleaning pad, remove dust and debris from the feed module area. 6. Reinstall the feed module by aligning the pins and pushing it toward the left to fit it into position. Be sure the gears are aligned and it snaps into place. -
Page 58: Cleaning The Imaging Area
Cleaning the imaging area 1. Wipe the upper and lower imaging area using a “Step 1” Brillianize Detailer wipe. Be careful not to scratch the imaging area when cleaning. 2. Wipe the upper and lower imaging area again using the “Step 2” Brillianize Detailer wipe to remove any debris and polish the surface. -
Page 59: Replacement Procedures
Replacement Kodak Scanners use replaceable tires that can feed a wide range of document types, sizes and thicknesses. Tire life and performance will procedures vary based on the customer’s document set, the frequency of cleaning the paper path and tires, and following the recommended schedule for changing tires. - Page 60 2. Holding onto the separation module, rotate the release lever back so you can access the separation roller. CAUTION: Use caution as the release lever is spring-loaded and will snap back if you do not hold it in place. 3. Remove the separation roller from the separation module housing. 4.
-
Page 61: Replacing The Pre-Separation Pad
Replacing the pre- If you have the optional document separation module for the Kodak separation pad Picture Saver System Scanner and if you need to install or replace the pre-separation pad, follow these steps. 1. Remove the separation module from the scanner by following the steps previously described in “Replacing the separation module and... -
Page 62: Replacing The Feed Module And Tires
Replacing the feed module 1. Push against the raised edge of the feed module cover and lift it up and tires and out of position NOTE: The paper present sensor is located to the left of the feed module. Be careful not to damage the paper present sensor when removing or cleaning around the feed module. - Page 63 3. Remove each core assembly by lifting up and out of position and slide each tire off of the core. 4. Install each new tire by gently pulling it over the core and replace the core assembly in the feed module. NOTE: You may need to slide the shaft to the right or left so the core fits properly within the feed module housing IMPORTANT:Do not overstretch the tire;...
-
Page 64: Adjusting The Pre-Separation Roller Tension
Kodak Gentle Photo Separation Module 169 5097 Kodak Picture Saver Standard Separation Module 196 0426 Kodak Digital Science Roller Cleaning Pads (qty 24) 853 5981 Kodak Digital Science Transport Cleaning Sheets (qty 50) 169 0783 Brillianize Detailer Wipes / for Kodak Scanners... -
Page 65: Scanning Environment
6 Achieving Good Quality Images Contents Scanning environment ..............6-1 Handling photographs..............6-1 Keeping your scanner clean ............6-3 Photo scanning ................6-4 Reducing streaks ................6-4 Banding................... 6-5 Scanning Dirt and dust can hinder photo scanning operations by adding streaks to digital images. - Page 66 • Curled or folded edges on the end of photos being scanned may cause a jam and/or a tear in the photo. It is recommended that you scan these types of photos facedown or on one of the Kodak Flatbed accessories.
-
Page 67: Keeping Your Scanner Clean
Keeping your For best scanning results it is suggested that you frequently perform a quick cleaning sequence in between your routine, thorough cleaning scanner clean procedures. This level of cleaning can be done frequently, perhaps as often as every 100 prints or when streaks appear on an image(s). Refer to Chapter 5, Maintenance for detailed cleaning procedures. -
Page 68: Photo Scanning
• Place your photos face-up in the input tray. This orientation minimizes scratching of the print emulsion. • The Kodak Picture Saver System Scanner is shipped with the Kodak Picture Saver Standard Separation Module and with the pre- separation pad un-installed. If you encounter problems when feeding... -
Page 69: Banding
If streaking is still apparent in your images, clean the open imaging guide area in your scanner. Using an anti-static brush (similar to the brush shown in the illustration below), gently brush the imaging guide area to remove dust and debris. Use a Brillianize Detailer Wipe to clean the closed imaging guide. -
Page 70: Problem Solving
7 Troubleshooting Contents Problem solving ................7-1 Installation issues................7-3 Application issues ................7-3 Conflicts with other applications............7-3 Application configuration..............7-4 Data removal................... 7-5 Error codes ..................7-6 LED codes ..................7-9 Log files..................7-10 Contacting Service................ 7-10 Problem solving Occasionally you may encounter a situation with your scanner where it may not function properly. - Page 71 Problem Possible Solution Make sure that: Scanner will not scan/feed photos • the power cord is plugged securely into the back of scanner and the wall outlet. • the power supply, green LED is lit. • the power switch is on. •...
-
Page 72: Installation Issues
Picture Saver Scanning System. This may cause functions (Kodak Perfect Touch, Rotate and Auto-Rotate) to not work properly. Turn off watched folder and backup synchronization functionality for other image products when scanning photos or uninstall the products. -
Page 73: Application Configuration
Windows operating system. You can change the location for the output JPG files (Target_Path) and adjust the folder size for burning CDs, Kodak Picture CDs or DVDs. The maximum folder size can be changed by specifying a new value for the CDFolderSize, PCDFolderSize and DVDFolderSize parameters in the PrintScan.ini file. -
Page 74: Data Removal
Interactive Users. Data removal It is the responsibility of the operators of the Kodak Picture Saver Scanning System to backup or delete customer orders and files from the hard drive as needed. Deleting files using the delete options on the... -
Page 75: Error Codes
Error codes Use the table below as a guide to check possible solutions to problems you may encounter when using the Kodak Picture Saver Scanning System. Error Code Message Description Access to destination folder XXXX could not Verify that there is a valid Target_Path for the scanned be set exiting the application. - Page 76 Verify that you have a good internet connection. Retry Registration was not completed successfully. Photo Selector Accessory Registration. If the problem Refer to the Kodak Picture Saver Scanning persists, contact Kodak Service. System User Guide Chapter 7 for more information.
- Page 77 5001 Unhandled exception Contact Kodak Service. 5002 Argument error Reinstall the Kodak Picture Saver Scanning System and Photo Selector Accessory. If the problem persists, contact Kodak Service. 5003 Unable to segment images If the problem persists, contact Kodak Service.
-
Page 78: Led Codes
TWAIN drivers could not be started. Please Reinstall the Kodak Picture Saver Scanning System. 9003 retry. If this error persists, please contact Refer to the section entitled, “Installing the Kodak driver support with error code 900X. software” in Chapter 2. 9004 Could not find a Kodak scanner. -
Page 79: Log Files
Log files The Kodak Picture Saver Scanning System PS50 creates an error log file in the scan output folder (c:/Scanned_Pictures): • Error log — PS50ErrorLog.txt contains a running list of any error conditions and may be used to diagnose problems with the system. -
Page 80: Specifications
This appendix provides scanner specifications and system requirements. Scanner Type/Speed The Kodak PS50 Scanner is a duplex scanner which provides scanning at up to 50 4x6 photos per minute in color at 300 dpi in landscape mode. Scanning Technology CCD type... - Page 81 - Windows 7, 64-bit, Service Pack 1 - Windows 8 • The Kodak Picture Saver Scanning System is not officially supported on non-native Windows PCs including running Windows operating system in a virtual machine or dual boot. Only limited technical support is available for these environments with no guarantees.
-
Page 82: Limited Warranty For Kodak Scanners
(including breakage of a connector, cover, glass, pins, or seal); (c) from service, modification or repair not performed by Kodak or a service provider authorized by Kodak or by tampering, use of counterfeit or other non-Kodak components, assemblies, accessories, or modules;... -
Page 83: How To Obtain Limited Warranty Service
(800) 822-1414. Kodak also provides a variety of service programs that may be purchased to assist with the use and care of the Kodak Scanner. Kodak is committed to providing its customers with quality, performance, reliability and service under the Limited Warranty. -
Page 84: Depot Service
Scanners must obtain a Return Material Authorization number (“RMA”) by calling (800) 822-1414, and within ten (10) business days from the date of issuance of the RMA must return the Kodak Scanner to the address designated in the RMA at the end user’s own expense and risk. - Page 85 Website: www.Kodak.com/go/docimaging For U.S. Service, Repair and Technical Assistance by Telephone: Telephone technical support is available Monday-Friday between the hours of 8 a.m. to 5 p.m. (local time) excluding Kodak holidays. Phone: (800) 822-1414 For Technical Documentation and FAQ’s available 24 hours a day: Website: www.Kodak.com/go/docimaging...
- Page 86 Kodak's option either (a) the repair or replacement of the Software or any media not meeting Kodak's "Limited Warranty" that is returned to Kodak or your dealer with a copy of your receipt, or (b) the return of the price you paid for the Software, provided you have proof of the purchase price you paid.
- Page 87 Government is subject to restrictions as set forth in subdivision (c)(1)(ii) of The Rights in Technical Data and Computer Software clause DFAR 252.227-7013 or such other applicable government or agency regulation providing equivalent protection. Contractor / manufacturer is Eastman Kodak Company, 343 State Street, Rochester, New York, 14650. A-61760 September 2012...
Need help?
Do you have a question about the PS50 Series and is the answer not in the manual?
Questions and answers