Table of Contents
Advertisement
Advertisement
Table of Contents

Related Manuals for John Lewis JLBIDO913


Summary of Contents for John Lewis JLBIDO913
- Page 1 Built in double oven JLBIDO913 User manual...
-
Page 2: Table Of Contents
Contents Safety information End time Time Children and vulnerable people safety How to use the clock functions General Safety Switching on Keep Warm Child safety device Safety instructions Activating the child safety device Installation Cancelling the child safety device Button lock Electrical connection Activating the button lock Cancelling the button lock... - Page 3 What to do if… Installation Electrical Installation GETTING THINGS READY CHOICE OF ELECTRICAL CONNECTION Disposal Repairs - after sales service Built in double oven user manual...
-
Page 4: Safety Information
Safety information Before the installation and use of the appliance, carefully read the supplied instructions. The manufacturer is not responsible if an incorrect installation and use causes injuries and damages. Always keep the instructions with the appliance for future reference. Children and vulnerable people safety Warning! Risk of suffocation, injury or permanent disability. - Page 5 • Before maintenance cut the power supply. • Do not use harsh abrasive cleaners or sharp metal scrapers to clean the glass door since they can scratch the surface, which may result in shattering of the glass. • To remove the shelf supports first pull the front of the shelf support and then the rear end away from the side walls.
-
Page 6: Safety Instructions
Safety instructions • Make sure not to cause damage to the mains Installation plug and to the mains cable. Contact the Service or an electrician to change a damaged mains cable. Warning! Only a qualified person • Do not let mains cables to come in touch must install this appliance. -
Page 7: Care And Cleaning
Care and Cleaning • Do not let the appliance stay unattended during operation. • Deactivate the appliance after each use. Warning! Risk of injury, fire or • Be careful, when you open the appliance door damage to the appliance. while the appliance is in operation. Hot air can release. -
Page 8: Disposal
Disposal Warning! Risk of injury or suffocation. • Disconnect the appliance from the mains supply. • Cut off the mains cable and discard it. • Remove the door catch to prevent children and pets to get closed in the appliance. Built in double oven user manual... -
Page 9: Product Description
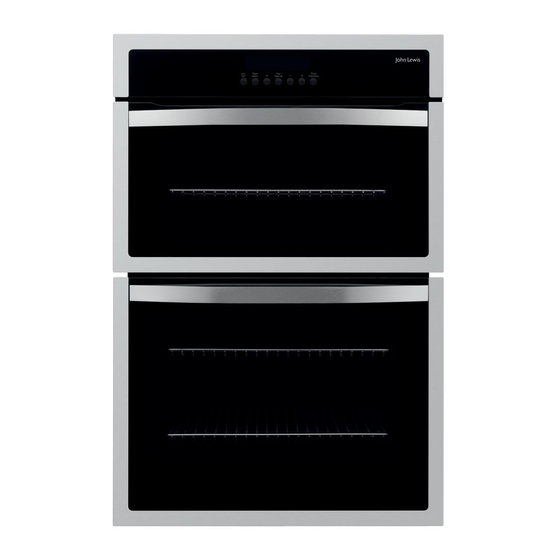
Product description General overview 1. Control panel 2. Top oven handle 3. Top oven 4. Main oven handle 5. Main oven Control Panel Overview 1. Display 2. Function keys Built in double oven user manual... -
Page 10: Oven Accessories
Oven accessories 3 oven shelfs Oven grill shelf Anti stick meat/Drip pan Built in double oven user manual... -
Page 11: Before First Use
Before first use Rating plate has cooled. During the cooling down period the cooling fan may switch on and off. This is situated on the front frame of the Warning! Always allow the appliance and can be seen upon opening the cooling fan to cool the appliance door. -
Page 12: Setting The Time
Do not use baking trays larger than 30cm x Remove all accessories and the slide-in grids 35cm (12” x 14”) as they will restrict the and clean with warm water and washing-up circulation of heat and may affect performance. liquid. Wipe the floor of the oven clean with warm Setting the Time washing-up solution and dry. -
Page 13: Operation
Operation The Electronic Oven Control • The Operating time display shows how long the oven has been operating. This display can only be seen if none of the clock functions Countdown , Cook time or End time are set. • The oven light is switched on as soon as an oven function is selected. -
Page 14: Selecting An Oven
functions see the relevant table in the Operation Changing the oven temperature chapter. Press the button, to raise or lower the temperature. Selecting an oven The setting changes in steps of 5°C. Switch on the appliance using the On/Off button. Press the "... -
Page 15: Selecting An Clock Function
Put the food in the oven. Selecting an clock function Press the " TIME FUNCTIONS " button repeatedly until the desired clock function is flashing. For further information check section "Clock Function" Cooling fan The fan switches on automatically in order to keep the appliance’s surfaces cool. -
Page 16: Main Oven
Oven function Application Conventional Cooking This form of cooking gives you the opportunity to cook without the fan in operation. It is particularly suitable for dishes, which require extra base browning such as pies, quiches and flans. Gratin's, lasagne and hot pots which require extra top browning also cook well in the conventional oven. -
Page 17: Countdown
Oven function Application Fan defrosting For defrosting e. g. flans and gateaux, butter, bread, fruit or other frozen foods. Light Using this function you can light up the oven interior, e.g. for cleaning. Keep Warm Suitable for heating and keeping the food warm. Bottom heat For baking cakes with crispy or crusty bases. -
Page 18: Cook Time
Set the desired cooking time using the Checking the time set or remaining button (max. 09.59 hours). Press the Selection button repeatedly, until the appropriate clock function flashes and the time set or remaining is Cook time lights up. displayed. When the time has elapsed, “00.00”... -
Page 19: Switching On Keep Warm
Press the " TIME FUNCTIONS " button Using the End time function, set the repeatedly until the symbol Keep Warm time at which the dish should be ready, appears in the display. for example: 14:05. Press the button. “00:30:” appears in Cook time and End time light up. -
Page 20: Cancelling The Button Lock
Oven Automatic cut-out Select the oven function. Press and hold the " TIME FUNCTIONS " buttons at the same time, until If the oven not switched off after a “LOC” appears in the display. certain time, or if the temperature is The button lock is now engaged. -
Page 21: Tips, Tables And Advice
Tips, tables and advice Baking Baking tins Oven levels • Baking tins made from dark-coloured metal • Baking with Conventional Cooking is only with Teflon coating are suitable for baking possible on one level. using Conventional Cooking. • When baking with Fan Cooking one to two •... -
Page 22: Roasting
• If you cannot find the settings for a certain • If required, turn the roast after 1/2 - 2/3 of recipe, look for similar items. the cooking time. • The baking time can be 10-15 minutes longer • Use the cooking juices to baste large roasts when baking cakes on trays or in tins on and poultry several times during the cooking multiple levels. - Page 23 Hints and tips when using the top one shelf, this will allow the heat to circulate freely for the best cooking results. oven • When batch baking one type of food, e.g. Victoria sandwich cakes, those of similar size • Arrange the shelves in the required positions will be cooked in the same time.
-
Page 24: Top Oven - Full Width Grilling
Top Oven - Full Width Grilling Adjust shelf position and grill pan grid to suit different thicknesses of food Grill Time Food (mins in total) Bacon Rashers 5- 6 Beefburgers 10 - 20 Chicken Joints 20 - 40 Chops - Lamb 15 - 25 - Pork 20 - 25... - Page 25 Temperature Approx Cook Time Food Shelf Position [°C] (mins) - Small & Queen 160 - 170 18 - 25 - Sponges 160 - 175 20 - 30 - Victoria Sandwich 160 - 170 18 - 25 - Madeira 140 - 150 75 - 90 - Rich Fruit 140 - 150...
-
Page 26: Main Oven - Fan Grilling
Temperature Approx Cook Time Food Shelf Position [°C] (mins) Yorkshire Pudding: - Large 200 - 210 25 - 40 - Individual 210 - 220 15 - 25 Roasting Meat, Poultry See roasting chart. Main Oven - Fan Grilling Beef Type of meat Quantity Heating Level... -
Page 27: Main Oven - Full Width Grilling
Lamb Type of meat Quantity Heating Level Temperature Time Function (°C) (h:min) Roast lamb, leg of lamb 1 - 1.5 kg Turbo Grill 150 - 170 1:15 - 2:00 Saddle of lamb 1 - 1.5 kg Turbo Grill 160 - 180 1:00 - 1:30 Game Type of meat... -
Page 28: Main Oven - Fan Cooking
Grill Time Food (mins in total) - Lamb 15 - 25 - Pork 20 - 25 Fish - Whole 10 -12 Trout/ Makarel Fillets - Plaice/Cod 4 - 6 Kebabs 12 - 18 Kidneys - Lamb/Pig 6 - 10 Sausages 20 - 30 Steaks - Rare... -
Page 29: Main Oven - Fan Cooking
Temperature Approx Cook Time Food [°C] (mins) - Choux 180 - 190 30 - 40 - Shortcrust 180 - 190 25 - 35 - Flaky 180 - 190 30 - 40 - Puff Follow manufacturer´s instructions; Reduce the temperature for Fan oven by 20°C Plate Tarts 180 - 190... - Page 30 Temperature Approx Cook Time Food Shelf Position [°C] (mins) Bread 200- 220 30 - 35 Cakes: - Small & Queen 170 - 180 18 - 25 - Sponges 170 - 180 20 - 25 - Madeira 150 - 160 60 - 75 - Rich Fruit 140 - 150 120 - 150...
-
Page 31: Care And Cleaning
Care and cleaning Warning! When cleaning, the Important! When using oven sprays, appliance must be switched off please follow the manufacturer's and cooled down. instructions exactly. Make sure that no visible remaining detergents are left after the cleaning with oven spray! Warning! Cleaning the appliance with a steam jet or high-pressure Accessories... -
Page 32: Removing The Side Rails
After long periods of use, the catalytic coating may become slightly discoloured. This has no effect on the catalytic properties. Side rails The side rails on the right and left-hand side of the oven interior can be removed for the purpose of cleaning the side walls. -
Page 33: Oven Door Glass
Remove the glass cover with the help of a small, blunt object (e.g. a teaspoon) and clean it. If necessary: replace halogen oven light bulb. Order the replacement light bulb from the Customer Care Department (see section "Service/Customer Care Department"). Use the same lamp type. -
Page 34: Cleaning The Glass Door Panels
90° Loosen the clamp levers on both door Hold the glass panels on their upper side hinges (A) completely. and one after the other pull them up and out of their retainers. Close the oven door to the first open position (approx. - Page 35 Hold the door strip (B) on both sides, align it with the inner edge of the door and press the door strip (B) into the upper edge of the door. Open the door as far as it will go. 90° Fold the clamp levers on both door hinges (A) down into their original position.
-
Page 36: Cleaning Materials
water. To prevent streaking, finish with a soft cloth. Stainless Steel cream cleaners are abrasive and should be avoided as they may dull the surface finish. Any spillage on the stainless steel finish must be wiped off immediately. Warning! Do not attempt to remove any of the control knobs from the appliance as this may cause damage and is a safety... -
Page 37: Cleaning Between The Outer And Inner Door Glass
• Abrasive cleaning pads, scorers and steel wool pads. • Chemical oven pads or aerosols. • Rust removers. • Bath/Sink stain removers. Cleaning between the outer and inner door glass The door glass is removable for cleaning. Clean the outer and inner glass using hot soapy water or hob cleaner may be used. -
Page 38: What To Do If
What to do if… Please carry out the following checks on your Warning! Repairs to the appliance before calling a Service Engineer. It appliance must only be carried may be that the problem is a simple one which out by qualified service you can solve yourself without the expense of a engineers. - Page 39 Problem Possible Solution The oven fan is noisy. Check that the oven is level. Check that the shelves and bakeware are not vibrating in contact with the oven back panel. The oven temperature is too high or Check that the recommended temperatures and shelf positions are too low.
-
Page 40: Installation
Installation • The set-up of the electrical installation is combined with appliances from the same arranged so that the appliance can be isolated manufacturer. from the mains with a minimum 3 mm all-pole The use of heat protection strips is prohibited contact separation. - Page 41 874-879 90° Built in double oven user manual...
-
Page 42: Electrical Installation
2x 3,5x25 Electrical Installation a) By connecting to a cooker point (having a double pole isolating switch with at least 3mm contact separation in all poles and • Enquiries regarding the installation of the neutral) and protected with a fuse or cooker point, if required, should be made to miniature circuit breaker at your mains fuse your Regional Electricity Company to ensure... - Page 43 A) Cooker Point B) Hob C) Oven It is good practice to : – Fit an Earth Leakage Circuit Breaker to your house wiring. – Wire your appliance to the latest IEE regulations. Built in double oven user manual...
-
Page 44: Disposal
Disposal The symbol on the product or on its packaging indicates that this product may not be treated as household waste. Instead it should be taken to the appropriate collection point for the recycling of electrical and electronic equipment. By ensuring this product is disposed of correctly, you will help prevent potential negative consequences for the environment and human health, which could otherwise be caused by... -
Page 45: Repairs - After Sales Service
An authorised service engineer should service and information contained within this instruction this product, and only genuine spare parts manual, the next step is to contact John Lewis should be used. Under no circumstances should technical support on: you attempt to repair the appliance yourself. - Page 46 John Lewis, Stratford (Opening 2011) John Lewis, Cribbs Causeway 0117 959 1100 John Lewis at home, Swindon 01793 733180 John Lewis at home, Croydon 020 8662 4730 John Lewis, Trafford 0161 491 4040 John Lewis, Edinburgh 0131 556 9121 John Lewis at home, Turnbridge Wells...
- Page 47 Built in double oven user manual...
- Page 48 892957118-B-022013...
Need help?
Do you have a question about the JLBIDO913 and is the answer not in the manual?
Questions and answers
My bottom oven has suddenly stopped working whole in use. F8 came up on the control panel. What does that mean.