Table of Contents
Advertisement
Advertisement
Table of Contents

Related Manuals for John Lewis JLBIDO913


Summary of Contents for John Lewis JLBIDO913
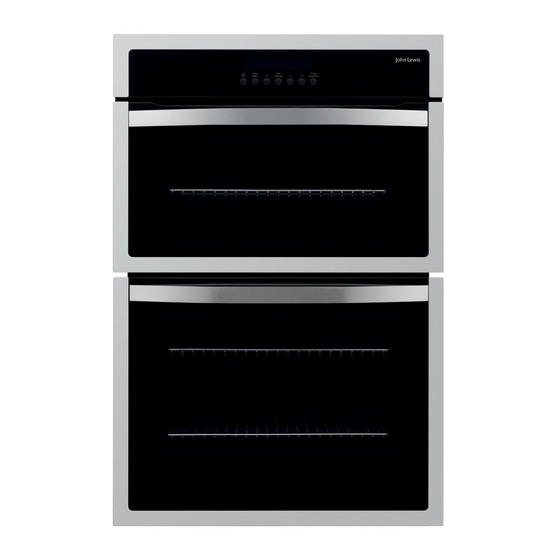
- Page 1 JLBIDO913 Built in double oven Instruction manual...
-
Page 2: Safety Information
These warnings have been provided in the interest of safety. You MUST read them carefully before installing or using the appliance. If you are unsure of the meanings of these warnings contact the John Lewis branch from which you purchased the appliance. -
Page 3: During Use
During use Warning! Never leave the appliance unattended when the oven door is open. • This appliance is not intended to be operated by means of an external timer or separate remote control system. • This appliance has been designed for domestic use to cook edible foodstuffs only and must not be used for any other purposes. -
Page 4: Table Of Contents
Preparing to use your appliance Cookware Setting the Time Initial Cleaning Operation The top oven Double oven operation Selecting an oven Child safety device Tips, tables and advice Roasting Top Oven - Full Width Grilling Top Oven - Conventional Cooking... -
Page 5: Product Description
Product description General overview Control Panel Overview Display Function keys Control panel Top oven handle Top oven Main oven handle Main oven... -
Page 6: Oven Accessories
Oven accessories 3 oven shelfs Oven grill shelf Before first use Rating plate This is situated on the front frame of the appliance and can be seen upon opening the door. Alternatively the rating plate may also be found on the back or top of some models (where applicable). -
Page 7: Control Panel Indicator Neons
The cooling fan The cooling fan comes on immediately the top oven or grill is switched on. It may run on after the ovens are switched off until the appliance has cooled. During the cooling down period the cooling fan may switch on and off. Warning! Always allow the cooling fan to cool the appliance down before switching off the electrical supply to... -
Page 8: Operation
Important! Always grill with the door closed. Double oven operation The appliance has two ovens. Press the relevant button on the control panel to switch between top and bottom oven mode. Some of the heating and electronic functions may not be available in the top oven. -
Page 10: Heat Indicator
Cooling fan The fan switches on automatically in order to keep the appliance’s surfaces cool. When the oven is switched off, the fan continues to run to cool the appliance down, then switches itself off automatically. Top oven Oven function Light Conventional Cooking... -
Page 11: Main Oven
Main oven Oven function Fan cooking Conventional Cooking Pizza setting Slow Cook Fan Grilling Full width grilling Half width grilling Fan defrosting Light Keep Warm Bottom heat Warning! Always grill with oven door closed Application The fan function is particularly suitable for cooking larger quantities of food. -
Page 12: How To Use The Clock Functions
Clock Functions Time Cook time End time Countdown TIME FUNCTIONS button Selection button (Plus) Selection button (Minus) Countdown To set a countdown. A signal sounds after the time has elapsed. This function does not affect the functioning of the oven. Cook time To set how long the oven is to be in use. -
Page 13: Changing The Time
When the time has elapsed, an audible signal sounds for 1 minute. “00.00” and Countdown flash. To stop the flashing and the audible signal: Press any button. Cook time 1. Select the oven function and temperature. 2. Press the "TIME FUNCTIONS" button repeatedly until Cook time 3. -
Page 14: Child Safety Device
Keep Warm The Keep Warm function keeps your prepared dish warm for 30 minutes, after the baking or roasting process is completed. This is helpful, for example, if your guests are late. Pre-condition for Keep Warm: Set temperature is above 80°C Switching on Keep Warm 1. -
Page 15: Oven Automatic Cut-Out
2. Press the "TIME FUNCTIONS" button repeatedly until the symbol Keep warm appears in the display. 3. Press the button. “00:30:” appears in the display. 4. As soon as the oven function is completed, a signal sounds and Heat +Hold starts. The oven function set runs at 80°C for 30 minutes. -
Page 16: Roasting
1 cake in cake tin, e.g. oven level 2 tray, e.g. oven levels 1 and 3 Baking tins • Baking tins made from dark-coloured metal with Teflon coating are suitable for baking using Conventional Cooking. • For baking using the Fan Cooking function, baking tins made of shiny light-coloured metal are suitable. -
Page 17: The Grill
• We recommend roasting leaner cuts in a roasting pan with a lid. The meat will be more succulent. • All types of meat which are supposed to be browned or form a crust or crackling can be roasted in a roasting pan without a lid. -
Page 18: Top Oven - Full Width Grilling
• The material and finish of the baking tray and dishes used affect base browning. Enamelware, dark, heavy or non-stick utensils increase base browning. Shiny aluminium or polished steel trays reflect the heat away and give less base browning. • Because of the smaller cooking space and lower temperatures, shorter cooking times are sometimes required. -
Page 19: Top Oven - Conventional Cooking
Food Bacon Rashers Beefburgers Chicken Joints Chops - Lamb - Pork Fish - Whole Trout/ Makarel Fillets - Plaice/Cod Kebabs Kidneys - Lamb/Pig Sausages Steaks - Rare - Medium - Well Done Toasted Sandwiches Top Oven - Conventional Cooking Shelf Positions are not critical but ensure that oven shelves are evenly spaced when more than one is used (e.g. - Page 20 Food - Victoria Sandwich - Madeira - Rich Fruit - Gingerbread - Meringues - Flapjack - Shortbread Casseroles: - Beef/Lamb - Chicken Convenience Foods Fish Fish Pie (Potato Topped) Fruit Pies, Crumbles Milk Puddings Pasta Lasagne etc. Pastry: - Choux - Eclairs, Profiteroles - Flaky/Puff Pies Shortcrust:...
-
Page 21: Main Oven - Fan Grilling
Food - Large - Individual Roasting Meat, Poultry Main Oven - Fan Grilling Beef Type of meat Pot roast Topside beef or fillet - rare - medium - well done 1) Pre-heat oven Pork Type of meat Shoulder, neck, ham Pork chop Meatloaf 750 g - 1 kg... -
Page 22: Main Oven - Full Width Grilling
Lamb Type of meat Roast lamb, leg of lamb Saddle of lamb Game Type of meat Saddle of hare, leg of hare Loin of Game Leg of Game 1) pre-heat oven Poultry) Type of meat Poultry pieces Half chicken Poultry Duck Goose Turkey... -
Page 23: Main Oven - Fan Cooking
Food Chicken Joints Chops - Lamb - Pork Fish - Whole Trout/ Makarel Fillets - Plaice/Cod Kebabs Kidneys - Lamb/Pig Sausages Steaks - Rare - Medium - Well Done Toasted Sandwiches Main Oven - Fan Cooking Shelf Positions are not critical but ensure that oven shelves are evenly spaced when more than one is used (e.g. -
Page 24: Main Oven - Fan Cooking
Food Fruit Pies, Crumbles Milk Puddings Pastry: - Choux - Shortcrust - Flaky - Puff Plate Tarts Quiches/Flans Scones Roasting: Meat and Poultry Main Oven - Fan Cooking Meat Beef/ Beef boned Mutton/ Lamb Pork/ Veal/ Ham Chicken Turkey/ Goose Duck Pheasant Rabbit... -
Page 25: Main Oven - Conventional Cooking
Main Oven - Conventional Cooking Food Biscuits Bread Cakes: - Small & Queen - Sponges - Madeira - Rich Fruit - Christmas Fish Fruit Pies, Crumbles Milk Puddings Pastry: - Choux - Shortcrust - Flaky - Puff Plate Tarts Quiches/Flans Scones Roasting: Meat and Poultry... -
Page 26: Removing The Side Rails
Caution! Do not use scourers, sharp tools or rinsing devices to clean the appliance. Do not use scourers or metal scrapers to clean the glass oven door, as these could scratch the surface. This could cause the glass to shatter. The outside of the appliance •... -
Page 27: Replace The Side Rails
Replace the side rails Important! Important The rounded ends of the guide bars must point to the front. To install, first insert the rails in the holes at the back (1) and then lower into position at the front and press into place (2). Oven back lamp (for selected models only) Warning! Risk of electric shock! -
Page 28: Replacing The Side Oven Lamp/Cleaning The Glass Cover (For Selected Models Only)
replace with a 40 Watt, 230V, 300°C heat-resistant oven light bulb . 3. Refit the glass cover. Replacing the side oven lamp/Cleaning the glass cover (for selected models only) 1. Take out the left-hand side rails. 2. Remove the glass cover with the help of a small, blunt object (e.g. -
Page 29: Replacing The Glass Door Panels
3. Close the oven door to the first open position (approx. 45°). 45° 4. Hold the door strip (B) on the upper side of the oven door on both sides and press this inwards in order to loosen the seal. Then pull the door strip upwards and off. -
Page 30: Cleaning Materials
On the open side of the door strip (B) there is a guide bar (C). This must be pressed between the outer side of the door and the corner (D). The seal (E) must audibly click into place. 3. Open the door as far as it will go. 4. -
Page 31: Cleaning The Outside Of The Appliance
Cleaners that contain bleach should not be used as they may dull the surface finishes. Harsh abrasives and scourers should also be avoided. Cleaning the outside of the appliance Do not use abrasive cleaning materials e.g. abrasive cream cleaners, wire wool pads or scourers on painted or printed finishes as damage may occur. -
Page 32: What To Do If
What to do if… Warning! Repairs to the appliance must only be carried out by qualified service engineers. Considerable danger to the user may result from improper repairs. In the case of misuse the visit by the Customer Care Department technician or the repair may be chargeable, even during the warranty period. - Page 33 Problem The oven fan is noisy. The oven temperature is too high or too low. Possible Solution Check that the oven is level. Check that the shelves and bakeware are not vibrating in contact with the oven back panel. Check that the recommended temperatures and shelf positions are being used.
-
Page 34: Installation
Installation • The set-up of the electrical installation is arranged so that the appliance can be isolated from the mains with a minimum 3 mm all-pole contact separation. Suitable isolation devices include, for example, circuit breakers, fuses (screw type fuses are to be removed from the holder), RCDs and contactors. - Page 35 90°...
-
Page 36: Electrical Installation
2x 3,5x25 Electrical Installation • Enquiries regarding the installation of the cooker point, if required, should be made to your Regional Electricity Company to ensure compliance with their regulations. • The appliance socket switch should be outside the cabinet but within 2m of the appliance to make it accessible to switch off the appliance in case of an emergency. -
Page 37: Disposal
Disposal The symbol on the product or on its packaging indicates that this product may not be treated as household waste. Instead it should be taken to the appropriate collection point for the recycling of electrical and electronic equipment. By ensuring this product is disposed of correctly, you will help prevent potential negative consequences for the environment and human health, which... -
Page 38: Repairs - After Sales Service
Repairs - after sales service Your appliance comes with a three year warranty. If it is not working correctly; consult the fault finding guides within this instruction book (Something not working). If a fault occurs which you can not resolve through following the advice and information contained within this instruction manual, the next step is to contact our extended warranty... - Page 39 Belgique/België/Belgien eská republika Danmark Deutschland Eesti España France Great Britain Hellas Hrvatska Ireland Italia Latvija Lietuva Luxembourg Magyarország Nederland Norge Österreich Polska Portugal Romania +32 2 363 04 44 +420 261302111 +45 70 11 74 00 +49 180 32 26 622 +37 2 66 50 030 +34 902 11 63 88 08 44 62 26 53...
- Page 40 Schweiz - Suisse - Svizzera Slovenija Slovensko Suomi Sverige Türkiye Россия Україна +41 62 88 99 111 +38 61 24 25 731 +421 (02) 32141334 www.electrolux.fi +46 (0)771 76 76 76 +90 21 22 93 10 25 +7 495 937 7837 +380 44 586 20 60 Industriestrasse 10, CH-5506 Mägenwil...
- Page 44 John Lewis Partnership 171 Victoria Street London SW1E 5NN www. johnlewis.com 892930026-I-102009...
Need help?
Do you have a question about the JLBIDO913 and is the answer not in the manual?
Questions and answers