
Related Manuals for Kanguru U2-DVDDUPE-S


Summary of Contents for Kanguru U2-DVDDUPE-S
- Page 1 Kanguru Optical Duplicator User Guide Models: U2-DVDDUPE-S, DVDDUPE-SHD, NET-DVDDUPE-S and BR-DUPE Copyright 2012, All Rights Reserved.
- Page 2 Kanguru Solutions will not be held responsible for any illegal use of this product nor any losses incurred while using this product. The user himself is responsible for the copyright laws, and is fully responsible for any illegal actions taken.
-
Page 3: Table Of Contents
Table of Contents Table of Contents Chapter 1. Introduction ....................5 1.1 Package Contents ..................5 Chapter 2. Getting to Know Your Kanguru Duplicator ..........6 2.1 Hardware Setup ..................6 2.2 Things to remember ..................6 2.3 System Overview ..................7 2.4 LCD Panel ....................8 2.5 LCD Display ....................9... - Page 4 Chapter 5. Troubleshooting ..................60 Chapter 6. Error Codes ....................62 Chapter 7. RMA Procedure ..................67 Appendix A: Hidden Advanced Setup Menu ...............68 Appendix B: Kanguru Media Manager for Windows ..........70 Appendix C: Copy Connect for Mac ................72 Appendix D: Duplicator Network Center ..............78...
-
Page 5: Chapter 1. Introduction
○ Use the Hard Drive as the source drive in place of any DVD-RW drive 1.1 Package Contents Please check that all of the following items came included with your Kanguru Duplicator. If any of the following items are missing, please call Kanguru Solutions’ Tech Support department at: (508) 376-4245, extension 2 and replacement parts will be shipped to you ASAP. -
Page 6: Chapter 2. Getting To Know Your Kanguru Duplicator
• In order to operate the Kanguru Duplicator as a standalone unit (no connection to the computer), make sure that the unit is not connected to a PC via USB. For more information please see section “3.15 USB/External Connection”... -
Page 7: System Overview
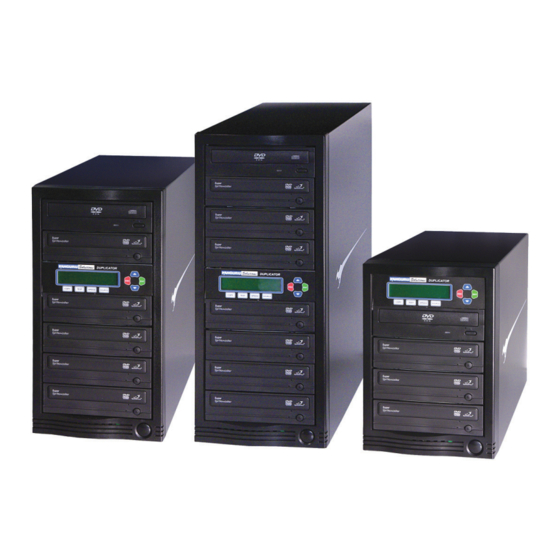
System Overview 2.3 System Overview Front Back Note: 1 to 11 model shown with HDD Front 1. Optical Disc Writers (Referred to as “Writer” throughout this manual) 2. LCD Screen 3. Power On/Off Button 4. Optical Disc Reader (Referred to as “Reader” throughout this manual) 5. -
Page 8: Lcd Panel
LCD Panel 2.4 LCD Panel DUPLICATOR COPY TEST SPEED SOURCE : Up (Menu/Option Scroll Up) : Down (Menu/Option Scroll Down) : Enter, Forward, OK, Execute : Escape, Back, Cancel : Copy process shortcut button : Test process shortcut button : Change burn speed shortcut button : Change source location shortcut button... -
Page 9: Lcd Display
Menu level 1. Copy Function Note: When the Menu level displays Kanguru Solutions, it means you are currently in the Main menu level. While the Kanguru Duplicator is executing certain functions (i.e. Copy, Compare, Copy & Compare, Test, Test & Copy, Edit Audio Tracks, Erase) the LCD will display the operating screen. One of two screens will be displayed depending on whether or not you specified a Counter. -
Page 10: Chapter 3. Using Your Kanguru Duplicator
Kanguru Duplicator models with Blu-ray support can read and write BD-R and BD-RE formats which offer up to 25GB of storage capacity on a single sided BD disc and record at speeds of up to 6x. Kanguru recommends using either Sony, Philips, Panasonic or LG brands of BD media. -
Page 11: General Operations
General Operations 3.2 General Operations This section will go over some basic operations that can be applied to more than one function. 3.2.1 Entering Names and Numbers Some functions will require you to enter a name or a number. To enter an alphanumeric character: 1. -
Page 12: Shortcut Buttons
Shortcut Buttons 3.2.3 Shortcut Buttons There are 4 shortcut buttons (COPY, TEST, SPEED, SOURCE) that can be found on the LCD Panel (see section “2.5 LCD Display” on page 9). These shortcut buttons allow you to quickly access the Duplicator’s most commonly used functions. Note: The shortcut buttons can only be accessed while the Duplicator is in the Main Menu level. -
Page 13: The Main Menu
3.3 The Main Menu Turn on the Kanguru Duplicator by pressing the Power On button. Wait for a moment to allow the system to boot up. Once the system has booted up, press the UP and DOWN button to navigate the Main Menu. -
Page 14: Copy
1. From the Main Menu, press the UP or DOWN button Kanguru Solutions to navigate to Copy. Press the ENT button to enter the 1. Copy Copy menu. - Page 15 Copy Note: The “7” indicates that there are seven discs recognized Preparing : by the Writers. The actual quantity may be different 7 Discs Detected : Go? depending on the number of discs you have inserted. 4. When the number of discs detected matches the number of blank discs you inserted, press the ENT button.
-
Page 16: Making Copies From An Existing Hard Drive Partition
(see section “3.10 Select Source” on page 30). 1. From the Main Menu, press the UP or DOWN button Kanguru Solutions to navigate to Copy. Press the ENT button to enter the 1. - Page 17 Copy 4. Insert discs into the drives. After you’ve loaded the drives with discs, close the trays and allow 5 - 10 seconds for the system to detect them. If either of the preparation screens are displayed for more than 2 minutes after you have inserted your discs, please check the quality of the discs.
-
Page 18: Compare
The reason for performing this Compare operation is to ensure that all of your copies contain data identical to the master. 1. From the Main Menu, press the UP or DOWN button to Kanguru Solutions navigate to Compare. Press the ENT button to enter the 2. Compare Compare menu 2. - Page 19 Compare After 2 to 5 seconds of processing time, the Compare Progress screen will appear. Note: It is normal to see the progress indicator stay at 0-10% Comparing... 4012MB and 100% for approximately 30 seconds to one minute for 401MB duplication.
-
Page 20: Copy & Compare
Copy process has completed a Compare process is automatically run in order to ensure that the data copied over successfully. 1. From the Main Menu, press the UP or DOWN button to Kanguru Solutions navigate to Copy & Compare. Press the ENT button to 3. Copy & Compare enter the Copy &... - Page 21 Copy & Compare After 2 to 5 seconds of processing time, the Copy Progress screen will appear. Note: It is normal to see the progress indicator stay at 0-10% Copying... 4012MB and 100% for approximately 30 seconds to one minute for 401MB duplication.
-
Page 22: Test
Test menu. For more information, please see section “2.4 LCD Panel” on page 8. 1. From the Main Menu, press the UP or DOWN button to Kanguru Solutions navigate to Test. Press the ENT button to enter the Test 4. - Page 23 Empty drives will also not be ejected automatically. Note: If one of the Writer drives consistently produces failures, it may be a sign that the drive is faulty. In this case, please contact Kanguru Technical Support at 508-376-4245. 6. Terminate the current job.
-
Page 24: Test & Copy
1. From the Main Menu, press the UP or DOWN button to Kanguru Solutions navigate to Test & Copy. Press the ENT button to enter 5. Test & Copy the Test &... - Page 25 Test & Copy After 2 to 5 seconds of processing time, the Test Progress screen will appear. Note: It is normal to see the progress indicator stay at 0-10% Testing... 4012MB and 100% for approximately 30 seconds to one minute for 401MB duplication.
-
Page 26: Mix Audio Tracks
Note: Please do this cautiously; if any of the audio CD tracks you wish to mix are not readable due to scratches or poor quality, the blank CD-R media will be ruined. 1. From the Main Menu, press the UP or DOWN button to Kanguru Solutions navigate to Mix Audio Tracks. Press the ENT button to 6. Mix Audio Tracks enter the Mix Audio Tracks menu. - Page 27 Mix Audio Tracks 4. Press the UP or DOWN button to navigate through each track on the audio CD. Press the ENT button to select the track you want to include on your mix. Once a track is selected, you will see an asterisk symbol Total: 0 0m : 00s ) appear to the left of the track number.
-
Page 28: Mixing Through The Hard Drive
CD tracks are successfully transferred to the hard drive. 1. From the Main Menu, press the UP or DOWN button to Kanguru Solutions navigate to Mix Audio Tracks. Press the ENT button to 6. Mix Audio Tracks enter the Mix Audio Tracks menu. - Page 29 Mix Audio Tracks 5. Once you have finished selecting the tracks for this Audio Total: 6 26m : 17s CD, press the UP or DOWN button until you see the Are Are you done? you done? screen. Press the ENT button to confirm your selection.
-
Page 30: Select Source
Select Source menu. For more information, see section “2.4 LCD Panel” on page 8. 1. From the Main Menu, press the UP or DOWN button to Kanguru Solutions navigate to Select Source. Press the ENT button to enter 7. -
Page 31: Erase
• Quick Erase - Erases the index of the rewritable disc only, not the data section. Quick Erase takes less time to complete than Full Erase. 1. From the Main Menu, press the UP or DOWN button Kanguru Solutions to navigate to Erase. Press the ENT button to enter the 8. Erase Erase menu. - Page 32 Erase 7. Once the Erase process has been completed, you will see the following screen. • PASS 7 - number of discs successfully erased. Pass 7 Fail 0 • FAIL 0 - number of discs that failed to erase. Waiting for RW Discs • ( 7 ) - number of discs erased for this job so far.
-
Page 33: Job Counter
Counter” on page 11). You can turn the Job Counter On or Off. The default setting is On. 1. From the Main Menu, press the UP or DOWN button to Kanguru Solutions navigate to Job Counter. Press the ENT button to enter 9. -
Page 34: Setup
Setup 3.13 Setup The Setup Menu contains settings that will allow you to modify how the Kanguru Duplicator operates. The original settings are already configured for optimal performance, and typically do not need to be changed. From the Main Menu, press the UP or DOWN button Kanguru Solutions to navigate to Setup. -
Page 35: Select Burn Speed
Select Burn Speed 3.13.1 Select Burn Speed The Select Burn Speed setting allows you to adjust the duplication speed for various duplication job types. The Burn Speed is set to Max (the optimal speed for each format) by default. However, if your master or blank discs are of poor quality, you may want to reduce the duplication speed to reduce failure rate and improve the duplication quality. -
Page 36: Duplication Mode
Duplication Mode 3.13.2 Duplication Mode The Duplication Mode setting is for Kanguru Duplicator systems with a hard drive installed. If you purchased a Kanguru Duplicator with a hard drive installed, the Duplication Mode setting allows you to select how you want to make disc to disc duplications. -
Page 37: Language
Language / Read Error Skip 3.13.3 Language The Language setting allows you select which language your system displays. The available languages are: English, Spanish, Japanese, French, Italian, Portuguese, German, Catalan and Swedish. The default language is English. 1. From the Setup Menu, press the UP or DOWN button to Setup navigate to Language. -
Page 38: Cd Writing Mode
CD Writing Method 3.13.5 CD Writing Mode The CD Writing Mode setting allows you to select the CD writing method. The default setting is Disc at Once. There are two CD Writing Mode settings: • Disc at Once - all tracks are recorded without the laser ever stopping, and the disc is closed. It is strongly advised to leave this setting as Disc at Once. -
Page 39: Max Audio, Vcd & Cdg Speed
Max Audio, VCD & CDG Speed / Button Sound 3.13.6 Max Audio, VCD & CDG Speed The Max Audio, VCD & CDG Speed setting allows you to adjust the maximum duplication speed for Audio and Video CDs. Audio CDs and video CDs do not have internal error checking capability, so duplicating at too high of a speed may cause frequent errors. -
Page 40: Startup Menu Item
Startup Menu Item / DVD+R Compatibility Mode 3.13.8 Startup Menu Item The Startup Menu Item setting allows you to choose which menu you would like to see first when you turn on the system. You can select Copy, Compare, Copy & Compare, Test, Test & Copy or Auto Copy to be the Startup Menu Item. -
Page 41: Isrc
ISRC / Disable Drives 3.13.10 ISRC The ISRC setting allows you to turn the ISRC function On or Off. Turning On ISRC allows the system to copy the ISRC information from an audio CD. ISRC (International Standard Recording Code) is the serial number for audio tracks that uniquely identifies a music recording. -
Page 42: Overburn
Overburn / Select Loading Drive 3.13.12 Overburn Overburning is the process of recording data past the normal size limit. Many disc manufacturers extend the recordable area on a disc, leaving a small margin of extra recordable area along the outer edge. The Overburn setting allows you to turn On or Off the ability to burn to the overburn area on a disc. -
Page 43: Advanced Setup
Advanced Setup 3.13.14 Advanced Setup The Advanced Setup menu contains advanced settings that allow you to view and modify how the Kanguru Duplicator operates. The original settings are already configured for optimal performance and typically do not need to be changed. -
Page 44: Disc Info
Disc Info 3.13.14.1 Disc Info The Disc Info function allows you to view and identify the information encoded within your media. The Disc Info function provides you with information about a disc’s format, capacity, manufacturer ID as well as the media’s writing speed. This information is useful when troubleshooting with a technician. Note: Limited information will be displayed for media in a Reader drive. -
Page 45: System Info
System Info / Device Info 3.13.14.2 System Info The System Info function allows you to view information pertaining to your Kanguru Duplicator system. This information is useful when troubleshooting with a technician. 1. From the Advanced Setup Menu, press the UP or DOWN Advanced Setup button to navigate to System Info. -
Page 46: Load Defaults
Load Defaults 3.13.14.4 Load Defaults The Load Defaults function will allow you to reset all of the system’s settings back to the original, factory default settings. You can perform this function if your system is acting abnormally. 1. From the Advanced Setup menu, press the UP or DOWN Advanced Setup button to navigate to Load Defaults. -
Page 47: Bootup Password
Enter PWD screen. You will have to enter ] OK? the correct Bootup Password before you are allowed to operate the Duplicator. Note: If you forgot your Bootup Password, please contact Kanguru Solutions Technical Support at 508- 376-4245. - Page 48 Bootup Password Changing the Bootup Password 1. From the Advanced Setup menu, press the UP or DOWN Advanced Setup button to navigate to Bootup Password. Press the ENT 5. Bootup Password button to enter the Bootup Password menu. 2. Press the UP or DOWN button to select Change Password. Bootup Password 2.
-
Page 49: System Counter
The Update Firmware function will allow you to update your system’s firmware version. We strongly suggest that you do not upgrade your system’s firmware unless specifically instructed to do so by a Kanguru Solution’s Technician. For more information, please contact Kanguru Solutions Technical Support at 508-... -
Page 50: Auto Copy
Copy menu. For more information, please see section “2.4 LCD Panel” on page 8. 1. From the Main Menu, press the UP or DOWN button to Kanguru Solutions navigate to Auto Copy. Press the ENT button to begin 11. Auto Copy the Auto Copy process. -
Page 51: Usb/External Connection
The USB/External Connection setting allows you to turn the USB port (or Ethernet port on Network models) on the back of the Kanguru Duplicator On or Off. When turned On, the system can be connected to a computer. If your Duplicator came with a hard drive, you will be able to access the Duplicator’s hard drive from your computer. -
Page 52: Hard Drive Setup
3.16 Hard Drive Setup (hard drive models only) If you purchased a Kanguru Duplicator with a hard drive, the Hard Drive Setup menu will allow you to manage your hard drive as well as any images and partitions saved on the hard drive. -
Page 53: Select Partition
Select Partition 3.16.1 Select Partition The Select Partition setting allows you to select a partition/image to be used as the default partition. 1. From the Hard Drive Setup menu, press the UP or Hard Drive Setup DOWN button to navigate to Select Partition. Press the 1. -
Page 54: Load Partition
Load Partition 3.16.2 Load Partition The Load Partition function will guide you through loading an image of a Master disc into one of the hard drive partitions. 1. From the Hard Drive Setup menu, press the UP or Hard Drive Setup DOWN button to navigate to Load Partition. -
Page 55: Rename Partition
Rename Partition 3.16.3 Rename Partition The Rename Partition function allows you to rename an existing partition/image on the hard drive. 1. From the Hard Drive Setup menu, press the UP or Hard Drive Setup DOWN button to navigate to Rename Partition. Press 3. -
Page 56: Delete Partition
Delete Partition 3.16.4 Delete Partition The Delete Partition function allows you to delete an existing image/partition on the hard drive. 1. From the Hard Drive Setup menu, press the UP or Hard Drive Setup DOWN button to navigate to Delete Partition. Press the 4. -
Page 57: Partition Info
Partition Info 3.16.5 Partition Info The Partition Info function allows you to view additional information for all existing partitions/images stored on the hard drive. This information includes disc type, capacity, etc... 1. From the Hard Drive Setup menu, press the UP or Hard Drive Setup DOWN button to navigate to Partition Info. -
Page 58: Format Hard Drive
Format Hard Drive 3.16.6 Format Hard Drive The Format Hard Drive function allows you to re-format the internal hard drive. WARNING! During the formatting process, all of the data stored on the hard drive will be permanently erased. Please use this function with caution. 1. -
Page 59: Chapter 4. Warranty And Tech Support
Please refer to the RMA Procedure section of this manual if your duplicator needs servicing. Kanguru Solutions does not offer money back returns on its duplicator product lines due to the unique nature of the product. All units will be fully supported under manufacturer’s and/or extended warranty plans. -
Page 60: Chapter 5. Troubleshooting
Your master disc may be on an unsupported brand of media. Try a different brand of master disc. See section “3.1 Compatible Media” on page 10 for a list of media that Kanguru Solutions recommends for use with the Duplicator. - Page 61 Technician. Please contact Kanguru Solutions Tech Support if you think you need to upgrade your firmware. System fails to upgrade This could be due to a more serious issue. Contact Kanguru Tech firmware. Support immediately at 508-376-4245. In order to load data from your computer to your Duplicator, you Can I load data directly must first install the provided Kanguru Media Manager software.
-
Page 62: Chapter 6. Error Codes
This typically happens when you have recently replaced a Writer drive. Contact Tech Support. Description: The master disc and targets (blanks) are not of the same format. The Kanguru Duplicator can’t cross copy across different media formats. Targets & Master Not Compatible! - Page 63 1. When the error code occurs during the Compare process, the size of the master disc and the successfully copied disc(s) is different. The Kanguru Duplicator can’t cross copy across different media formats. 2. When the error code occurs during a Copy related process, the capacity of the blank disc(s) is less than the data size of the master disc.
- Page 64 Error Codes Error Error Message Description & Recommended Solutions Code Description: The master disc is copy-protected. Master Disc is Possible Solution: CSS Protected! This master disc contains copy-protection. Please try a different master disc without any copy-protection. Description: The target (blank) disc(s) are detected but can not be identified. Bad Discs! Possible Solution: Please double check the blank disc(s) quality.
- Page 65 Error Codes Error Error Message Description & Recommended Solutions Code Description: The image name entered has already been used in the system. Redundant Name Possible Solution: Please enter a different image name, or rename the existing file name which is in conflict before you re-enter this name. Description: The system is not able to format the hard drive.
- Page 66 Error Codes Error Error Message Description & Recommended Solutions Code Description: An error occurred during the mixing process of your audio CD. Copy Audio Error Possible Solution: Try different master or blank discs. Description: The Master Disc is not an Audio CD when preparing the mixing process.
-
Page 67: Chapter 7. Rma Procedure
All Duplicators being serviced MUST BE PACKED IN THE ORIGINAL PACKAGING. If you do not have your original packaging, you can purchase replacement packaging for $25.00 from Kanguru’s Tech Support Department. Kanguru Solution’s warranty will not be honored in the event that a duplicator is received improperly packaged, altered, or physically damaged. -
Page 68: Appendix A: Hidden Advanced Setup Menu
If you are not familiar with these features, please do not use them without first contacting Kanguru Solutions. In order to access these functions, press and hold the ESC button for approximately 5 seconds. Release the ESC button and then quickly press and hold the ENT button for approximately 3 seconds then release. - Page 69 Appendix A: Advanced Setup Menu 7. Speed Mode - A Writer drive’s default burning strategy is often designed for a single drive environment, which is not always suitable for a multiple drive writing environment like duplication. Therefore, we include an internal burning strategy database in our controller that contains our latest complete up- to-date media testing results specifically designed for the duplication environment.
-
Page 70: Appendix B: Kanguru Media Manager For Windows
Next button. 5. You will be prompted for a Product Key. The Product Key can be found on the back of you Kanguru Duplicator. Enter your Name, Company Name (optional) and Product Key into the appropriate fields and then click on the Next button. - Page 71 Kanguru Media Manager. If you try to access the Duplicator’s hard drive through your computer before installing the Kanguru Media Manager, your computer will not be able to recognize the file format and you will be prompted to format the hard drive. Do not format the hard drive; doing so will erase any data stored on the hard drive.
-
Page 72: Appendix C: Copy Connect For Mac
Appendix C: Copy Connect for Mac (Hard Drive models only) Like the Kanguru Media Manager, the CopyConnect software needs to be installed on your Mac in order for it to recognize the Kanguru Duplicator’s hard drive through the USB connection. - Page 73 Appendix C: CopyConnect for Mac 4. Open the MacFUSE (Tuxera) folder and then double-click on MacFUSE.pkg. Follow the installer instructions to install MacFUSE. Note: You may see the following message prior to installation. Please click Continue to start the installer.
- Page 74 Appendix C: CopyConnect for Mac 5. Once MacFUSE has been installed, go back to the root directory and open the fuse-ext2 folder. Double-click on fuse-ext2.pkg and follow the installer instructions to install MacFUSE. Note: You may see the following message prior to installation. Please click continue to start the installer.
- Page 75 After you have successfully installed the CopyConnect applications onto your Mac, you can now copy or save DVD image files to the Kanguru Duplicator’s hard drive through your computer. Warning! Do not try to access the Duplicator’s hard drive through your computer before you have installed CopyConnect.
- Page 76 Appendix C: CopyConnect for Mac 6. Once you have successfully established a connection with the Duplicator’s internal hard drive, browse and select the .dmg or .iso disc image file from the left window. 7. Select Dup (For Data) as the Destination Folder Content. 8.
- Page 77 Appendix C: CopyConnect for Mac 9. When the transfer has completed, you will see the image file available in the right window. Note: If you don’t see the image file in the right window, click on the Refresh button. 10. After you have finished transferring your image files, click on the Disconnect button. You will receive the message “Disconnected Successfully!”.
-
Page 78: Appendix D: Duplicator Network Center
Appendix D: Duplicator Network Center (Network models only) The Kanguru Duplicator Network Center software needs to be installed on a PC in order to be able to access the duplicator’s internal hard drive through your local area network. Once installed, you will be able to conveniently transfer files to and from the duplicator’s internal hard drive from your PC over a network... - Page 79 Appendix D: Duplicator Network Center Using the Duplicator Network Center Software Once your Duplicator has been setup and connected to your LAN, you can begin using the Duplicator Network Center software to transfer files to and from the Duplicator’s internal hard drive over your network. 1.
-
Page 80: Troubleshooting
Duplicator’s hard drive is Install Kanguru Media Device successfully but my formatted with a proprietary Manager and reboot your computer asks me to format file system that requires computer. the hard drive when I click Kanguru Media Manager to on it. be installed. - Page 81 Kanguru Solutions 1360 Main Street Millis, MA 02054 www.kanguru.com 07.05.12 V3.1 © 2012 Kanguru Solutions Legal terms and conditions available at www.kanguru.com. Please review and agree before use. Thank you.
Need help?
Do you have a question about the U2-DVDDUPE-S and is the answer not in the manual?
Questions and answers