
Subscribe to Our Youtube Channel
Related Manuals for Kanguru KCLONE-5HD-SATA


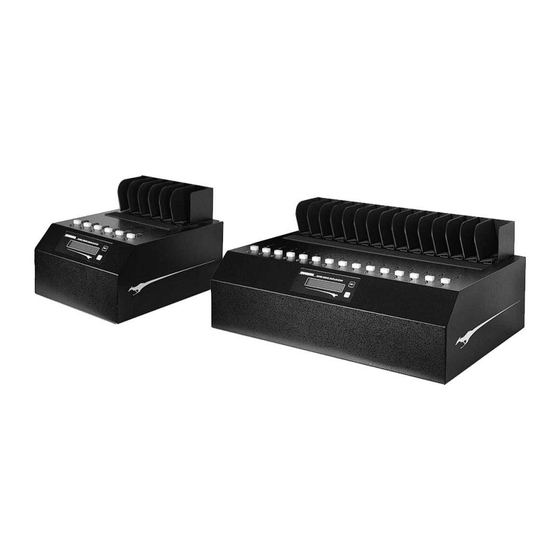
Summary of Contents for Kanguru KCLONE-5HD-SATA
- Page 1 KanguruClone 5HD & 14HD - SATA User Manual Model no.: KCLONE-5HD-SATA & KCLONE-14HD-SATA Copyright 2014, All Rights Reserved.
- Page 2 Kanguru Solutions will not be held responsible for any illegal use of this product nor any losses incurred while using this product. The user himself is responsible for the copyright laws, and is fully responsible for any illegal actions taken.
-
Page 3: Table Of Contents
Table of Contents Table of Contents 1. INTRODUCTION.....................5 1.1 Package Contents ..................6 1.2 Specifications ..................6 1.3 Parts and Functions..................7 1.4 Hardware Setup ..................9 1.5 Function Tree Diagram ................10 2. THE USER INTERFACE ................11 2.1 The Menus ....................12 2.1.1 The Main Menu ................12 2.1.2 The Setup Menu ................12 2.1.3 The Advanced Setup Menu ............12 3. - Page 4 Table of Contents 7. THE SETUP MENU ..................25 7.1 Set Copy ....................25 7.2 Set Compare ....................25 7.3 HDD Wipe ....................26 7.4 Button Sound ...................27 7.5 Show EXE Time ..................27 7.6 Select Image File ..................27 7.7 Delete Image File ..................28 7.8 Diagnostic Setup ..................28 8.
-
Page 5: Introduction
√ IDE hard drives supported with adapters (sold separately) √ One-year Standard Warranty: This system comes complete with a one-year parts and 90 day labor warranty. One-year and two-year extended warranties available, contact Kanguru sales for more information. √ Clones any operating system: including DOS, Win98, Win2K, Win NT, Win XP, Win Vista, Win 7, Linux, Mac and many more. -
Page 6: Package Contents
Package Contents / Specifications 1.1 Package Contents If any of the following items are missing, please call Kanguru Solutions’ Tech Support department at: (508) 376-4245, extension 2 and replacement parts will be shipped to you ASAP. • KanguruClone Hard Drive Duplicator unit with internal power supply • Power cable... -
Page 7: Parts And Functions
LCD screen RUN button Rear View Ventilation fan Light tower connection Power supply switch Power cable connection Serial connection (for Kanguru use only) 14HD Light tower connection Serial connection (for Kanguru use only) Power supply switch Ventilation fan Power cable connection... -
Page 8: Top View
Parts and Functions Top View Hard drive tray Target SATA ports Source SATA port Target power port Source power port Green LED indicator Green LED indicator Red LED indicator Red LED indicator 14HD Hard drive tray Target SATA ports Source SATA port Target power port Source power port Green LED indicator... -
Page 9: Hardware Setup
Hardware Setup 1.4 Hardware Setup 1. Place the KanguruClone where there is proper ventilation. Avoid using the KanguruClone in environments with high temperatures. 2. Before plugging in the AC Power Cable, please make sure that the voltage is adjusted to the same as your local voltage 110V/220V. -
Page 10: Function Tree Diagram
Function Diagram 1.5 Function Tree Diagram MAIN COPY MENU SETUP MENU SMART SET COPY SET SMART CHECK DEVICE INFO BRIEF SET COMPARE SET WRITE TEST SYSTEM INFO RESIZE HDD WIPE SET READ TEST SET TO DEFAULT FULL BTN. SOUND ADV. BRIEF MODE RATIO SHOW EXE TIME BRIEF IMMEDIATE... -
Page 11: The User Interface
The User Interface 2. THE USER INTERFACE Kanguru Solutions designed the KanguruClone’s menu system with the professional in mind. The menu system is fast, responsive, and easy to navigate. This means fewer key presses are needed to achieve a desired action. -
Page 12: The Menus
The Menus 2.1 The Menus There are three tiers to the duplicator user interface: Main menu, Setup menu and Advanced Setup menu. 2.1.1 The Main Menu The Main menu contains the main duplication operations: FULL, SMART, BRIEF, RESIZE, VERIFY, ERASE and LOAD. The duplicator will start in this menu by default. • Tap the ‘SET’... -
Page 13: Duplication Modes
Duplication Modes 3. DUPLICATION MODES The KanguruClone can clone hard drives in one of five ways: SMART mode, BRIEF mode, RESIZE mode, FULL mode and RATIO mode. After duplication has been completed you can configure the duplicator to automatically compare the date on the Source drive with the data on the Target drives to ensure that the all data was copied successfully. -
Page 14: Resize
Duplication Modes 3.3 Resize RESIZE mode is used to copy between Source and Target drives of different capacities. The Resize mode allows for copying from a smaller capacity Source to larger capacity Target drives. Resize copy supports the following file systems: FAT, FAT32, NTFS. If the Source is not formatted as a supported file system then the duplicator will automatically switch to FULL mode. -
Page 15: Defining Copy And/Or Compare
Defining Copy and/or Compare 4. DEFINING COPY AND/OR COMPARE Before performing a duplication, take a moment to define the SET COPY and SET COMPARE options under the SETUP menu. These options will tell the duplicator how the FULL, SMART, BRIEF and RESIZE modes will operate. 4.1 Set Copy Functionality When enabled FULL, SMART, BRIEF and RESIZE modes will execute a Copy process. -
Page 16: Duplication
Duplicating From a Master HDD 5. DUPLICATION The KanguruClone HDD Duplicator can operate in either one of two duplication methods: • With a Master HDD as the source • With a Storage Center as the source Both methods are described in the following sections. 5.1 Duplicating From a Master HDD Using a Master HDD as the Source is the simplest and most convenient way to perform the duplication process. - Page 17 Duplicating From a Master Hard Drive 3. Once all connected disks have been detected and initialized, the duplication process begins. During duplication the screen will display the following information: # of targets Copy mode Size of Source data Transfer rate Data copied % completed WARNING! Do not remove any drives while they are in use.
-
Page 18: Duplicating From A Storage Center
Duplicating From a Storage Center 5.2 Duplicating From a Storage Center The KanguruClone hard drive duplicator allows you to turn a standard hard drive into a Storage Center. You can load images of your Master HDDs directly to the Storage Center providing you with a convenient way to store common Source files. -
Page 19: Duplicating An Image File Stored On A Storage Center
Duplicating From a Storage Center 3. Tap the ‘RUN’ button. The duplicator will initialize the disks and then ask you to input a name for the image file. Up to 999 files can be stored in the Storage Center (depending on the capacity of the hard drive). - Page 20 Duplicating an Image Stored on a Storage Center 4. Tap the ‘RUN’ button to change the SEL IMG FILE option. a) The file name consists of three digits. The digit furthest to the right will be blinking, indicating that it is currently selected. Tap the ‘RUN’ button to increase the digit by one. b) Tap the ‘SET’...
-
Page 21: Other Operations
Other Operations / Verify 6. OTHER OPERATIONS Besides the Copy and Compare modes, the KanguruClone Hard Drive Duplicator has several additional operations that are incredibly useful, including: VERIFY, ERASE and LOAD. 6.1 Verify VERIFY will check all connected hard drives and determine if they are readable. The verification operation will check any hard drive connected to a Target port and verifies that all sectors on the hard drive are readable. -
Page 22: Erase / Wipe
Note: You can configure the Kanguru Clone Hard Drive duplicator to run a Wipe instead of an Erase. Although the data is removed through the Erase operation, the data may still be retrievable with the right tools. -
Page 23: Diagnostic
Diagnostic 6.3 Diagnostic The Diagnostic feature allows you to run tests to verify the health of your target hard drives. If you are experiencing a high rate of failures duing the duplication process, there could be something mechnically malfunctioning with your hard drives and the Diagnostic functions are a simple way to verify the health of your drives. -
Page 24: Load
Load 6.4 Load LOAD allows you to store an image of a hard drive to a Storage Center. A Storage Center is a hard drive that has been formatted to store hard drive images. The Storage Center allows you to quickly and conveniently access common duplication projects. For information on formatting a hard drive as a Storage Center see section 8.20 Format Source on page 36. -
Page 25: The Setup Menu
The Setup Menu / Set Copy / Set Compare 7. THE SETUP MENU To enter the SETUP menu, from the Main menu hold the ‘SET’ button. Once you have entered the SETUP menu: • Tap the ‘SET’ button to navigate the different menu options. • Tap the ‘RUN’... -
Page 26: Hdd Wipe
HDD Wipe 7.3 HDD Wipe The HDD WIPE option allows you to enable or disable the WIPE operation. When enabled, the ERASE operation in the Main menu will change to the WIPE operation (see section 6.2 Erase / Wipe on page 22). The Wipe operation ensures that the hard drive is completely erased and that the data is unrecoverable. -
Page 27: Button Sound
Button Sound / Show EXE Time / Select Image File 7.4 Button Sound The BTN. SOUND option allows you to enable or disable the audible tone that sounds when you tap or hold a button. Tap the ‘RUN’ button to change this option’s setting. • [ ٭... -
Page 28: Delete Image File
Delete Image File / Diagnostic Setup 7.7 Delete Image File DEL IMG FILE is used for deleting an image file that has been saved to a Storage Center. To delete an image file: 1. From the SETUP menu, tap the ‘SET’ button to navigate to the DEL IMG FILE option. 2. -
Page 29: The Advanced Setup Menu
The Advanced Setup Menu / Device Info / System Info 8. THE ADVANCED SETUP MENU The ADVANCED SETUP menu provides you with extra options and operations for the advanced user. The ADVANCED SETUP menu can be accessed from the SETUP menu. From the SETUP menu, tap the ‘SET’... -
Page 30: Set To Default
Set to Default 8.3 Set to Default SET TO DEFAULT allows you to restore all settings back to their factory default values. To reset your duplicator to its original default configuration: 1. From the ADVANCED SETUP menu, tap the ‘SET’ button to navigate to the SET TO DEFAULT function. -
Page 31: Advance Brief Mode
Advanced Brief Mode 8.4 Advance Brief Mode The Brief copy mode is usually the fastest duplication method available. However Brief mode only supports a handful of file systems. The ADV. BRIEF MODE operation allows you to execute a Brief copy of unsupported file systems. The Advance Brief copy mode requires a hard drive formatted as a Storage Center. -
Page 32: Brief Immediate
Brief Immediate / Advanced Resize / Set Write Pattern / Transfer Size 8.5 Brief Immediate If you are experiencing issues when running Brief Copy, you can disable the Brief Immediate function which may improve the chance of a successful duplication. Tap the ‘RUN’ button to change this option’s setting. -
Page 33: Select Source
Select Source / HPA Check / No Capacity Check 8.9 Select Source The Select Source option allows you to change which port is set as the Source port. This feature allows you to continue duplicating in the rare situation where the original Source port is no longer functioning correctly. -
Page 34: Max Udma Mode
Max UDMA Mode / Skip Read Error / Source Power Off / Load Full Image 8.12 Max UDMA Mode The MAX UDMA MODE option allows you to configure the maximum transfer speed allowed. Tap the ‘RUN’ button to change this option. The MAX UDMA MODE can be set as 0 – 6. The MAX UDMA MODE is set to 6 by default. -
Page 35: Set Ratio Head
Set Ratio Head / Set Ratio Tail / Most Varied Capacity 8.16 Set Ratio Head Note: The SET RAT. HEAD option configures the way that Ratio copy operates (see section 3.5 Ratio on page 14). Ratio copy duplicates only a percentage of the Master hard drive. The SET RAT. HEAD option allows you to define a percentage of a Master hard drive to be duplicated, from the beginning of the hard drive up to the defined percentage. -
Page 36: Need Resize
Need Resize / Format Source 8.19 Need Resize Note: The NEED RESIZE option configures the way that the Smart copy operates (see section 3.1 Smart on page 13). When you execute a Smart copy operation, the system will check the capacity between the Source and all connected Target drives. -
Page 37: Total Copy Count
8.22 Update Firmware The UPDATE FIRMWARE function allows you to upgrade your Kanguru Hard Drive Duplicator to the latest firmware version. Warning! Do not attempt to update your duplicator’s firmware unless specifically instructed to do so by a Kanguru Technician. -
Page 38: Burn In
Burn In 8.23 Burn In The BURN IN function allows the system to perform a Copy, Compare, Verify, Erase or Load function continuously to stress test for endurance, reliability and stability. To perform a continuous burn in test: 1. From the ADVANCED SETUP menu, tap the ‘SET’ button to navigate to the BURN IN option. 2. -
Page 39: Error Code List
Error Code List 9. ERROR CODE LIST The Error Code List can give you some information to help you understand any problems that occur during duplication. Error Code Problem Description ATA command interface error (read/write error) Check Target speed error Compare error Data transfer error ATA command, uncorrectable error (erase error) -
Page 40: Faq
10. FAQ Q: Do all Target hard drives have to be the same capacity? Same Brand? A: If you select Full copy or Brief copy, the Target hard drives must have the same capacity as the Master hard drive. The hard drive brand is not important but capacity must be identical. Q: Can I clone a smaller capacity Master drive to larger capacity Target drives? A: Yes, use the “RESIZE COPY“... -
Page 41: Troubleshooting
Try to identify the faulty hard drive unstable or operates very that is affecting the other hard and replace as needed. slowly. drives, causing slow operation. Only use the cables provided The cables do not meet the by Kanguru Solutions with the UDMA standards. KanguruClone. -
Page 42: Warranty Information
This product carries a 1 year* limited warranty on the power supply, controller, and all internal components. The warranty does not cover any IDE, SATA, or Power cables. Kanguru Solutions is not responsible for any damages incurred in the shipping process. Any claims for loss or damage must be made to carrier directly. -
Page 43: Technical Support
“tracking” feature to verify “proof of delivery.” The customer is responsible for shipping charges when returning a product. Shipping back to the customer is covered by Kanguru Solutions during the first 90 days of purchase. After 90 days of purchase the customer is responsible for shipping both ways. - Page 44 Kanguru Solutions 1360 Main Street Millis, MA 02054 www.kanguru.com 11.07.14 V1.4 © 2014 Kanguru Solutions Legal terms and conditions available at www.kanguru.com. Please review and agree before use. Thank you.
Need help?
Do you have a question about the KCLONE-5HD-SATA and is the answer not in the manual?
Questions and answers