Table of Contents
Advertisement
Advertisement
Table of Contents

Subscribe to Our Youtube Channel
Related Manuals for Nady Systems UHF-3


Summary of Contents for Nady Systems UHF-3
- Page 1 UHF-3 Single Channel UHF DigiTRU Diversity Wireless System...
- Page 2 This manual will first list the features of the UHF-3 and then will take you step by step to show you how to operate your new system. After reading the receiver instructions, turn to the section of the booklet that covers the type of transmitter used with your new system.
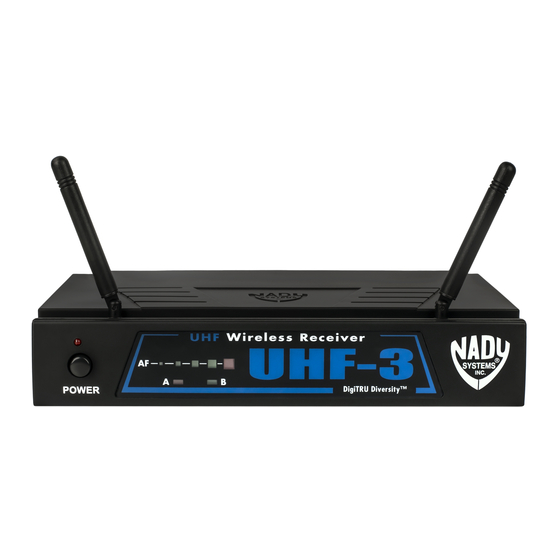
- Page 3 (at 90 degrees from each other). For maximum range, it is always best to maintain a line of sight (no obstructions) between the receiver antennas and The UHF-3 receiver is equipped with a 5 segment LED AF LEVEL DISPLAY (14). the transmitter at all times whenever possible.
- Page 4 The microphone is now ready to use. The A and/or B DIVERSITY LED INDICATORS (13) on the UHF-3 receiver should now be lit, indicating a received signal from the transmitter. When ready to speak, slide the audio MUTE SWITCH (19) to the ON position.
- Page 5 (Note: Turning down the gain too much can compromise the signal-to-noise and is not recommended.) The UHF-3 receiver is equipped with a 5 segment LED AF LEVEL DISPLAY (14). Occasional flickering of the top AF Peak LED indicator on loud inputs to the The UHF-3 receiver is equipped with a 5 segment LED AF LEVEL DISPLAY (14).
- Page 6 TRANSMITTERS UB-3 Bodypack: 3.5mm locking mini-jack, 3-way select Audio Inputs switch for inputs: instrument, headworn mic, or lavalier mic UH-3 Handheld: Integral Nady DM-10D neodymium dynamic cartridge Controls UB-3: POWER/MUTE ON/OFF, INSTRUMENT/ HEADWORN MIC/LAV MIC, INPUT LEVEL UH-3: POWER/MUTE ON/OFF LED Indicator UB-3: Bicolor, Unit “ON”...
- Page 7 (International) For service, please contact the Nady distributor in your country through the dealer from whom you purchased this product. Nady Wireless Systems are type accepted under FCC rules parts 90, 74 and 15. The device complies with RSS-210 of Industry & Science Canada. Operation is subject to...
Need help?
Do you have a question about the UHF-3 and is the answer not in the manual?
Questions and answers