Table of Contents
Advertisement
Quick Links
T W O - W A Y L C D A U T O M A T I C / M A N U A L
T R A N S M I S S I O N R E M O T E S T A R T E R W I T H
F U L L A L A R M S Y S T E M
PS-7870TWE-FM
Once the battery is weak, the LCD remote will display a battery low voltage icon
and an "L-BAT" indication with 2 beeps to warn the user to charge it.
INDUSTRY CANADA USER NOTICE:
Operation is subject to the following two conditions: (1) this device may not cause interference, and (2) this device must
accept any interference, including interference that may cause undesired operation of the device.
To reduce potential radio interference to other users, the antenna type and its gain should be so chosen that the
equivalent isotropically radiated power (EIRP) is not more than that required for successful communication.
NOTE: The manufacturer is not responsible for any radio or TV interference caused by unauthorized modifications to
this equipment. Such modifications could void the user's authority to operate the equipment.
Doc#: 110922
Rev:1.9
User Guide
It is the responsibility of the vehicle operator to ensure their vehicle
is parked in a safe and responsible manner.
1. a) Manual transmission: When leaving the vehicle, it is the user's
responsibility to ensure that the gearshift lever is in the NEUTRAL
position and the parking brake is engaged in order to avoid accidents
upon remote starting.
b) Automatic transmission: When leaving the vehicle, it is the user's
responsibility to ensure that the gearshift lever is in "Park" in order to
avoid accidents upon remote starting.
(Note: Make sure that the automatic vehicle cannot start in "Drive".)
2. It is the user's responsibility to ensure that the remote starter is
disabled or put into valet mode before servicing.
Battery Low Voltage Warning
Designed & engineered in Canada
© 2011
WARNING !
- PS-7870TWE-FM -
-PGa+FcN-
Canada
Advertisement
Table of Contents

Subscribe to Our Youtube Channel
Related Manuals for Directed Electronics PS-7870TWE-FM


Summary of Contents for Directed Electronics PS-7870TWE-FM
-
Page 1: User Guide
NOTE: The manufacturer is not responsible for any radio or TV interference caused by unauthorized modifications to this equipment. Such modifications could void the user's authority to operate the equipment. Doc#: 110922 Rev:1.9 © 2011 - PS-7870TWE-FM - -PGa+FcN- Canada... -
Page 2: Table Of Contents
Table of Contents GOVERNMENT REGULATIONS ........................... 4 INTRODUCTION WITH SMARTSTART™ ....................4 VEHICLE PRESETS ............................... 5 ................................5 EATER & H ......................5 INDSHIELD IPERS ADIO EADLIGHTS USING THE TRANSMITTER ..........................5 LCD R ............................ - Page 3 What is EncryptR™ Technology? EncryptR™ employs proprietary encryption software that sends unique codes from the remote starter to the ADS-TB or ADS-AL-CA bypass module that cannot be replicated or reversed with hi-tech equipment. The EncryptR™ communication exchanged between the remote starter and the ADS bypass module is best described as a “secret handshake”...
-
Page 4: Government Regulations
Government regulations This device complies with part 15 of the FCC Rules. Operation is subject to the following two conditions: (1) This device may not cause harmful interference, and (2) this device must accept any interference received, including interference that may cause undesired operation. This equipment has been tested and found to comply with the limits for a Class B digital device, pursuant to part 15 of the FCC Rules. -
Page 5: Vehicle Presets
Vehicle Presets Heater When leaving the vehicle it is recommended to preset the accessory controls in preparation for the next remote start. Settings for the blower motor (fan) should not be left on HIGH. It is recommended to leave the settings on LOW or MEDIUM instead. Windshield Wipers, Radio & Headlights ... -
Page 6: Lcd Transmitter Basic Confirmations
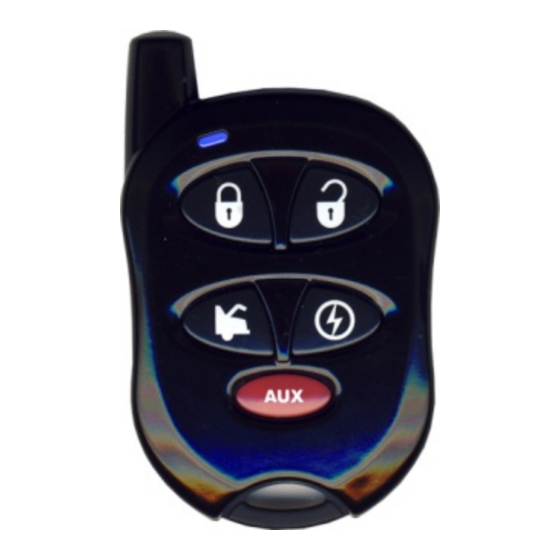
Side view: Function Button: Turns the backlight ON. Enters Programming mode. Charger port: The battery charger plugs into this port. CAUTION!! DO NOT USE A CHARGER OTHER THAN THE ONE SUPPLIED. The functions of the 1-way transmitter are as follows: LOCK: Locks the doors, arms the system and arms the STARTER KILL (if installed). -
Page 7: Backlight
Back light On for 2 seconds Press and release the quickly See Cold Weather Mode section Cold weather 1 beep , then (page-16) See Vale mode section Combo Valet 1 beep (page-13) See Panic Mode section Panic None 1 beep (page-15) Backlight ... - Page 8 Press button to move up in the menu or button to move down in the menu. Press button to select the option you would like to adjust Press button to increase the value or to activate or deactivate a function or toggle through the selection.
- Page 9 Once the selection is done, press Choose ON/OFF, then press and hold until; i. The icon appears/disappears to confirm Combo Valet activation/deactivation. ii. The icon appears/disappears to confirm Valet start activation/deactivation. iii. The icon appears/disappears to confirm Valet Alarm activation/deactivation. Time start function: This feature is used to remote start the car at a pre-programmed time.
-
Page 10: Remote Starting Your Vehicle
and press , then set the minutes and press Temperature display TEMP Can be set to read the temperature in Celsius (CTEMP) or Fahrenheit (FTEMP) (10) Language display LANGU Can be set to either English or French (11) Side button function: The side button can be programmed as: Panic button;... -
Page 11: Remote Starting
2. With the engine running, apply the parking 2. With the engine running, apply the parking brake once and release the brake pedal. brake twice within 10 sec. 3. Within 20 sec. of engaging the parking 3. Make sure to release the brake pedal. The parking lights will flash 3 times quickly brake, press and hold and remain lit. -
Page 12: Arming And Disarming Of The System
Note: On some Push-To-Start (PTS) vehicles, no takeover is possible as pressing the brakes will shut the engine down. Please talk to your technician to determine if the “Takeover mode” can be set for your vehicle. Arming and disarming of the System The Alarm can be configured by the installer either to Passive Mode (so as to arm automatically) or Active Mode (so as to require the user’s intervention for arming). -
Page 13: Remote Starter Features
SHOCK ALARM + SHOCK 60 seconds IGNITION ALARM + real time NONE 60 seconds The user can press the button to stop the alarm (unless TWO-STAGE Mode has been programmed – one press then only mutes the siren; the user needs to press twice in order to disarm the system). -
Page 14: Valet Mode
When re-entering the vehicle, the user must reinsert the key into the ignition and turn it to the ON position (not Crank) without pressing on the brake. Once the key is in the ON position, press on the brake pedal to put the transmission in gear. - Page 15 The LED on the antenna will stay ON indicating that the vehicle has successfully entered Combo Valet. Using the PUSH-BUTTON SWITCH (Valet Switch Mode): Insert the ignition key into the ignition switch and turn the key to the ON position Within 5 seconds, press the push-button switch until the parking lights flash 3 times.
-
Page 16: Panic Mode
To take the system out of Combo Valet, Valet Start or Valet Alarm Long menu version: Through Advanced Options, first press to select MENU (page-6) Choose VALET and press iii) Press to toggle between three kinds of Valet Modes: (1) CMVLT = Combo Valet (Starter and Alarm are disabled) (2) VLTST = Valet Start (Only the starter is disabled) (3) VLTAM = Valet Alarm (Only the alarm is disabled) Once the selection is done, press... -
Page 17: Extended Run Time
• Start the engine remotely. • Turn the ignition key to the IGNITION ON (RUN) position. • Or by using the remote as so: 2-way remote • Through advance function remote’s menu (page-6), select L-01. Press and hold the button until the icon will disappear on the display. -
Page 18: Temperature Request (Ifacc-Temp -101 Installed )
Temperature Request (If ACCTemp101 installed) The user can request the temperature in the vehicle if a Temperature Sensor Module (ACC-Temp- 101) is installed: • Through the remote’s advanced function menu (page-6), select L-01. • Immediately press the button and hold it until the temperature is displayed on the LCD screen. -
Page 19: Ignition -Controlled Door Locks
IgnitionControlled Door Locks This is an added security feature. If your Remote Car Starter was installed with the Ignition- Controlled Door Locks option, the doors will automatically lock as soon as the ignition key is turned to the IGNITION ON (RUN) position while the brakes are pressed. The remote car starter will also lock any door that was unlocked and opened (then closed) the next time the brake pedal is pressed (only when doors are monitored). -
Page 20: Engine Run Time
1-way remote: 1. Rapidly press AUX twice. While the remote’s LED is flashing, press to remote start the vehicle. Note: The AUX 2 output can be activated by pressing the button. Engine Run Time If you have a gas engine, your remote starter can be programmed to run the engine for 3, 15, or 25 minutes (15 minutes by default). -
Page 21: Arming
• Open Zone Notification (the system will warn for doors opened up to 10 seconds after arming). • No Chirp (the vehicle will not chirp under any circumstance). Arming Arming of the system can be program by your installer into 4 different options. By default, your system is programmed to “passive arming –... -
Page 22: Multi - Car Operation
Horn timing adjustments How to lock the programming mode During installation, for the “programming mode locked” feature to take effect, the installer must successfully remote-start the vehicle. Programming mode can be locked through the following actions: Arm the system by pressing lock. If the system is programmed to the default passive arming, the system will automatically lock the programming mode as soon as Starter Kill becomes active (after 60 seconds). -
Page 23: Multi-Level Features (Default State)
MultiLevel Features (default state) The multi-level features allow you to access different features of your vehicle or of a second car by pressing the button once, twice or three times. For convenience purpose, the order of LEVELS and MENU can be re-arranged through FBPRO setting (page-7) Features: •... -
Page 24: Troubleshooting Transmitting Range
Troubleshooting Transmitting Range Many factors may affect the operating range of the transmitter. Some of these are: • The condition of the battery in the transmitter. • The operating environment (for example: downtown radio-frequency noise, airports, cellular phone towers…) • Metal: any type of metal will affect operating range. This includes the vehicle itself. •...
Need help?
Do you have a question about the PS-7870TWE-FM and is the answer not in the manual?
Questions and answers