Table of Contents
Advertisement
Quick Links
Advertisement
Table of Contents

Related Manuals for Clarke Woodworker CMS254


Summary of Contents for Clarke Woodworker CMS254
- Page 1 CMS254 COMPOUND MITRE SAW © 0604 OPERATING & MAINTENANCE INSTRUCTIONS...
-
Page 2: Cont Specifications
Part Number ..........6500785 Please note that the details and specifications contained herein, are correct at the time of going to print. However, CLARKE International reserve the right to change specifications at any time without prior notice. Always consult the machine’s data plate... -
Page 3: Table Of Contents
Thank you for purchasing this CLARKE 254mm (10”) Compound Mitre Saw which is designed for use by tradesmen in a light commercial environment. Before operating the Mitre Saw please read this leaflet thoroughly and carefully follow all instructions. This will ensure the safety of yourself and that of others around you, and you can also look forward to the saw giving you long and satisfactory service. -
Page 4: Safety Precautions
SAFETY PRECAUTIONS GENERAL SAFETY RULES FOR OPERATING MACHINERY WARNING: As with all machinery, there are certain hazards involved with their operation and use. Exercising respect and caution will considerably lessen the risk of personal injury. However, if normal safety precautions are overlooked or ignored, personal injury to the operator or damage to property, may result. - Page 5 11. REMOVE ADJUSTING KEYS AND WRENCHES. Form the habit of checking to see that keys and adjusting wrenches are removed from the machine before switching on. 12. DRUGS, ALCOHOL, MEDICATION. Do not operate machine while under the influence of drugs, alcohol or any medication. 13.
-
Page 6: Additional Precautions For Mitre Saws
10. Use ONLY approved replacement saw blades. Contact your local CLARKE dealer for advice. The use of inferior blades may increase the risk of injury. 11. DO NOT saw any material that does not have a flat surface on which to bear. -
Page 7: Electrical Connections
ELECTRICAL CONNECTIONS Connect the mains lead to a standard, 230 Volt (50Hz) electrical supply through an approved 13 amp BS 1363 plug, or a suitably fused isolator switch. WARNING! THIS APPLIANCE MUST BE EARTHED IMPORTANT: The wires in the mains lead are coloured in accordance with the following code: Green &... -
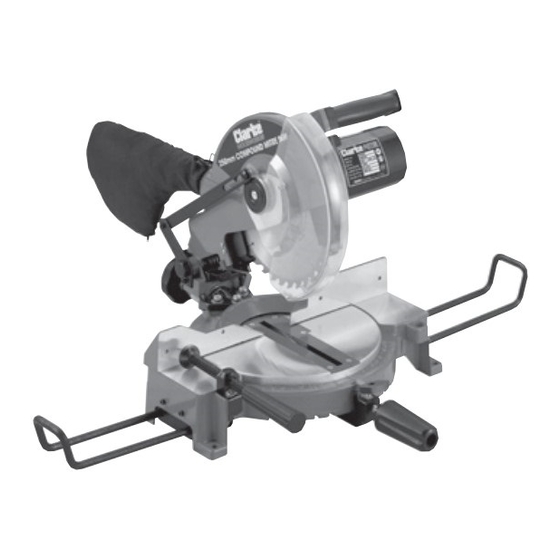
Page 8: Principle Parts
PRINCIPAL PARTS OF THE SAW Fig 1... -
Page 9: Features
FEATURES As its’ name implies, the machine is a Bevel/Mitre Saw, capable of straight cross cutting, and cutting bevels and mitres, or a combination of the two. The main arm, or Cutting Fig 2 Head, carries the motor and the tungsten carbide saw blade. -
Page 10: Assembly
On receipt inspect the machine to ensure that all parts are accounted for and that no damage was incurred during transit. Any deficiency or damage should be reported to your CLARKE dealer immediately. The main body of the saw is fully assembled and adjusted at the factory. -
Page 11: Operation
Enter the screw with washer down though the hole in the bed (See Fig.5, and B, Fig.3), and screw on the clamp from below by a few turns, open channel upwards. Slide the work support into place between the underside of the bed and the clamp and tighten the screw. -
Page 12: Mitre Cutting
Allow the blade to reach full speed. If any unusual sounds or vibrations occur, release the Trigger immediately and investigate the cause. When satisfied, move the Head Release Lever, (C fig.7 and also shown in fig.10), sideways with the fingers of your right hand, and gently lower the head so that the blade comes into contact with the workpiece. -
Page 13: Bevel Cutting
C. Straight Bevel Fig. 9 Cutting As with Mitre Cutting, this is a cross cutting operation, except that the blade is not perpendicular to the table, (see fig. 10). Ensure the Table is set so that the table pointer lines up with the zero on the scale on the bed. -
Page 14: Maintenance
Should the motor not function normally, it is possible that it has become clogged with saw dust, in which case, it will be necessary to disassemble the motor in order to clean the various components. Contact your CLARKE dealer for advice. 2. Changing the Saw Blade IMPORTANT: Exercise extreme care when handling the saw blade. - Page 15 4. Remove the outer flange followed by the blade. 5. Replace in reverse order, ensuring the tips of the blade point downwards at the front. 3. Renewing Motor Brushes Fig. 14 Eventually, the motors’ carbon brushes will need replacing. This task may be carried out quickly and easily as follows.
-
Page 16: Adjustments
ADJUSTMENTS Ref: Fig 16 It may be necessary from time to time, to check various settings and make appropriate adjustments. Fig. 16 a. Squareness of Blade It is first of all most important to check that the blade is exactly perpendicular to the table. -
Page 17: Parts And Service
PARTS AND SERVICE CONTACTS For Spare Parts and Service, please contact your nearest dealer, or CLARKE International, on one of the following numbers. PARTS & SERVICE TEL: 020 8988 7400 PARTS & SERVICE FAX: 020 8558 3622 e-mail as follows: PARTS: Parts@clarkeinternational.com... -
Page 18: Maximum Cutting Sizes
PARTS DIAGRAM... -
Page 19: Parts List
PARTS LIST No. Description Part No. No. Description Part No. Flat Hd Screw DQ410101006 Table DQ0352410104 Stop DQ0351310201 DQ0301020219 Upper Guard DQ0351320101 Table Locking Handle DQ0301020214 M16 Lock Nut DQ410151010 DQ0351310302 Flat Washer DQ412011039 Rivet DQ410503001 Lock Pin DQ0351310601 Scale DQ0352415001 O-ring DQ441010006... - Page 20 cont. No. Description Part No. No. Description Part No. Pan Hd Screw DQ410131020 101 Power Cord DQ0351320701 Spring DQ0301030902 102 Terminal Block DQ451050002 Lower Guard DQ0351310202 103 Pan Hd Screw DQ410251001 Plate DQ0301030310 104 Ext Tooth Washer DQ412041002 Carriage Hd Screw DQ410031001 106 Hex Wrench DQ0301020316...
Need help?
Do you have a question about the Woodworker CMS254 and is the answer not in the manual?
Questions and answers