Table of Contents
Advertisement
Quick Links
908 Canada Court
City of Industry, CA 91748 U.S.A.
Phone: 626.964.7873 or 800.346.6668 Fax: 626.964.7880
www.unicomlink.com
e-mail: info@unicomlink.com
©UNICOM 2003. UNICOM and "A Network Systems Solution" are trademarks of UNICOM Electric, Inc.
All rights reserved. Specifications subject to change without notice.
Rev: 07.01
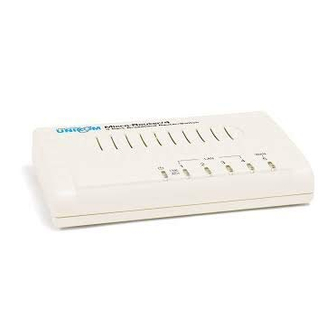
Micro-Router/4 & 7
Broadband Router / Ethernet Switch
4 Port FEP-72104T
7 Port FEP-72107T
U
SER'S
FEP-72107T Shown
M
ANUAL
Advertisement
Table of Contents

Related Manuals for UNICOM FEP-72104T


Summary of Contents for UNICOM FEP-72104T
- Page 1 City of Industry, CA 91748 U.S.A. Phone: 626.964.7873 or 800.346.6668 Fax: 626.964.7880 SER’S ANUAL www.unicomlink.com e-mail: info@unicomlink.com ©UNICOM 2003. UNICOM and “A Network Systems Solution” are trademarks of UNICOM Electric, Inc. All rights reserved. Specifications subject to change without notice. Rev: 07.01...
-
Page 3: Table Of Contents
Quick Find (Network Address Translation) An IETF standard that allows an organization to present itself to the Internet with for the easiest setup, go to page 11 far fewer IP addresses than there are nodes on its internal network. The NAT technology, which is typically implemented in a router, converts the private IP for Advanced setup, go to page 16 addresses (such as in the 10.0.0.0 range) of the node on the internal private... - Page 4 Time Zone Setting ....19 GLOSSARY LAN Configuration ..... . . 20 (Domain Name System) Setup DHCP server.
-
Page 5: Package Contents
Physical Specifications Package Contents Package contents include the following: Standards: IEEE802.3 10Base-T IEEE802.3u 100Base-TX with Auto Negotiation Micro-Router (Either 4 Port of 7 Port) IEEE802.3x Flow Control for full duplex and back Quick Start Guide pressure for half duplex Full User’s Guide Connectors: LAN: (4) or (7) RJ-45 Ports with N-way auto negotiation DC Power Adapter... -
Page 6: Introduction
Introduction 1) Ensure all connections are snug. Unable to access the 2) Ensure your Ethernet cables are working Congratulations on your purchase of UNICOM’s Micro-Router/4 or 7. internet properly. These Broadband Routers/Fast Ethernet Switches are the perfect option 3) Click Advanced,... -
Page 7: Software Features
Troubleshooting Software Features This section is intended to help you solve the most common problems Management Web based management. encountered with the Micro-Router Series Router/Switches. Configuration file backup and restore. Firmware upload. Back to factory default Problem Corrective Action NAT Technology Support 256 connection No LEDs light when Multimedia applications support. -
Page 8: Hardware Description
Hardware Description Configuration In the Configuration window, users can reset the Router to its default This Section describes the Router hardware and provides a physical and setting, backup the Router configuration, and restore the previously functional overview. saved configuration. The physical dimensions of both routers are: 145mm x 26mm x 85mm (L x W x H) Top View The upper view of the Micro-Routers consists of one 10/100Mbps WAN... -
Page 9: Led Indicators
This window allows users to upgrade the router’s firmware via an upload. TCP/IP software. Virtually all computers using a Windows, Macintosh, 1. Download the most current firmware upgrade from Unicom’s Linux, or Unix operating system have the necessary software. Check to website. -
Page 10: Hardware Setup
1. Once you confirm the proper software is installed, set the TCP/IP turn, a device can leave a network smoothly and automatically when it is setting to "Using DHCP Server" or something similar. Proceed to no longer in use. Hardware Setup. UPnP configuration interface 1. -
Page 11: Web Management
You can use a browser to connect to your Router for management and configuration. The following steps show the login to the Router. Using a Web Browser to configure your Router Unicom recommends the following browsers for best results. Windows (Internet Explorer 5.0 or higher) (Netscape 6.0 or higher) Macintosh OS 9 and OS X (Netscape 7.0 or higher) -
Page 12: Logout The System
Now you will see the Change the Password screen. At this time Unicom 18. Active: Enables this Filter Rule. recommends you change the password. The password can be numbers or 19. IP Protocol: Refers to the upper layer protocol, ex: TCP is 6, UDP letters in any combination. -
Page 13: Wizard Setup
12. Click button. Apply TCP/IP Filter The TCP/IP filter allows you to base the rule on the fields in the IP and Wizard Setup the upper layer protocol. TCP/IP filter has a default filter rule. The Wizard Setup provides the fastest way to configure the Micro-Router. 13. -
Page 14: Changing The Password
Ethernet - encapsulation choice 1 • Ethernet: Also called Dynamic TCP/IP. If you are connected to an ISP that automatically assigns a DNS address, use this choice. Most newer ISPs use this type of system. • Service Type: Select the service type. 4. - Page 15 Filter Configuration This configuration allows users to filter the incoming data packets. There are two types of filters – a Generic filter and a TCP/IP filter. You can PPP over Ethernet - encapsulation choice 2 configure up to eight different filter sets ( four Generic and four TCP/IP) •...
- Page 16 3. Route Name: Assign a name to this routing path that describes or identifies the route. If the route name is left blank, the route will be deleted. 4. Active: Enables the routing. You can unmark the active checkbox to disable the routing but the routing rule will still remain in the system route table.
- Page 17 2. Active: Enable this mapping rule by marking the check box. 3. Name: Give a name to this mapping. 4. Start Port: The start of mapping port, ex: 20. 5. End Port: The end of mapping port, ex: 25. End port can be same as start port.
-
Page 18: Default Settings
Default Settings The default Router configuration is as follows: • IP address: 192.168.1.1 • Password: root • Subnet mask: 255.255.255.0 • DHCP Server (LAN): Enable • DHCP Client (WAN): Enable • Filter (WAN): Web service If you want to reset to the default configuration, press the "Default Configure system MAC address. -
Page 19: System Configuration
System Configuration In the System configuration, users can configure general system information, DDNS, change the password, and configure system date and time. General Settings In the General settings, users can configure System Name and Domain Name. Click the button to clear the fields. Reset WAN Interface Configuration User must configure WAN interface for accessing Internet connection. -
Page 20: Password Setting
5. User: When updating the information to an ISP DNS, the ISP • Idle Timeout: The time before disconnect. The default value is 300 needs a User ID to verify the account. seconds (5 min). 6. Password: When updating the information to an ISP DNS, the ISP PPTP - encapsulation choice 3 needs a password to verify the account. -
Page 21: Time Zone Setting
Ethernet Time Zone Setting - encapsulation choice 1 • Ethernet: Also called Dynamic TCP/IP. If you are connected to an ISP that automatically assigns a DNS address, use this choice. Most newer ISPs use this type of system. • Service Type: Select the service type. Users can configure the system time and date in this section. -
Page 22: Lan Configuration
LAN Configuration LAN Setting Users must configure the LAN interface for a network connection. The Users can configure the DHCP server and the LAN interface in this LAN interface has a default value but can be reconfigured if necessary. section. LAN interface must be configured for network access. 1.
Need help?
Do you have a question about the FEP-72104T and is the answer not in the manual?
Questions and answers