Table of Contents
Advertisement
Advertisement
Table of Contents
Troubleshooting

Related Manuals for LightSpeed Technologies Redcat


Summary of Contents for LightSpeed Technologies Redcat
- Page 1 Classroom Audio System U s e r M a n u a l...
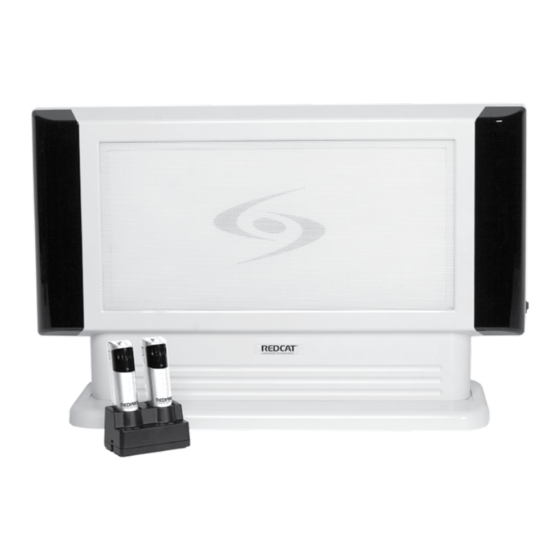
- Page 2 As the teacher speaks into the REDMIKE™ classroom microphone, his or her voice is transmitted to the REDCAT and then amplified through the built-in flat panel speaker. The REDCAT system is fully integrated and includes a receiver/amplifier, infrared sensors, flat panel speaker and the REDMIKE classroom microphone.
-
Page 3: Safety Instructions And Certifications
—This 10. Damage Requiring Service Lightspeed product should be serviced REDCAT is manufactured using lead-free only by qualified service personnel. processes and is free of other materials The user should not attempt to service harmful to the environment. It conforms to the most stringent new European guidelines for this Lightspeed product. -
Page 4: Table Of Contents
......... SECTION 4: Troubleshooting, Daily Use and Warranty Troubleshooting Guide ..................Daily Use Instructions ................... Tips on Classroom Audio ..................Warranty Statement ..................... System Specifications ..................Individual Components and Optional Accessories ..........User Notes ....................... REDCAT User Manual | iii... -
Page 5: Section 1: System Overview
R E D C A T U s e r M a n u a l SECTION 1 System Overview 1 | REDCAT User Manual... -
Page 6: System Components
LT-71 Optional HM-70 REDMIKE™ Classroom Handheld Microphone Microphone and Charging Cable Helpful Hint Keep ALL packaging materials. If the system must be returned, using the original packing material will be quick, convenient and prevent damage. REDCAT User Manual | 2... -
Page 7: Side Panel Controls And Connections
Channel B. Rotating the knob clockwise increases volume level. This 7. POWER Switch/Indicator: switch is used to turn the REDCAT ON or OFF. The POWER light will glow RED when the system is on. These lights will 8. IR Indicators: glow RED when the corresponding microphone is turned on. -
Page 8: Rear Panel Controls And Connections
R E D C A T U s e r M a n u a l REAR PANEL CONTROLS AND CONNECTIONS Cutaway grip for 1. CARRYING INSET: moving or carrying the REDCAT. The sliding 2. 8-BAND GRAPHIC EQUALIZER: controls adjust the levels of the various audio frequencies. -
Page 9: Redmike Controls And Connections
Lightspeed AA These CHARGER CONTACTS (+ -): rechargeable sensing battery contacts interface with the charging (part # BA-NH2A27). tabs in the BC-RMCC cradle charger for daily charging. Simply place the REDMIKE in the charger. 5 | REDCAT User Manual... -
Page 10: Attaching The Lanyard To Redmike
Insert at the bottom of the foam holder. 2. POSITION THE REDMIKE the REDMIKE with lanyard Slip around the neck. Adjust the neck strap so the top of the microphone rests just below your collarbone. REDCAT User Manual | 6... -
Page 11: Cradle Charger Controls And Connections
(paper insulator may not have been completely removed.) A blinking Green LED means a non- Lightspeed battery has been installed (possibly an alkaline battery). Connect the DC DC POWER PORT: power cord here. 7 | REDCAT User Manual... -
Page 12: Optional Lt-71 Lightmic Controls And Connections
BLUE when the LT-71 glow RED to indicate charging. is powered ON, RED when being charged. External Microphone Input (MIC): Use the 3.5mm MIC jack for the optional TK-250 headset microphone (part# MC-TK250LTM). REDCAT User Manual | 8... -
Page 13: Optional Hm-70 Handheld Controls And Connections
Power/Charge Indicator: adjustment should be necessary. light glows RED when the HM-70 is powered ON, GREEN when charging. Plug Charger Input (CHARGER): the charging cable from the charger into this jack for daily charging. 9 | REDCAT User Manual... -
Page 14: Section 2: Set-Up
R E D C A T U s e r M a n u a l SECTION 2 Set-up REDCAT User Manual | 10... -
Page 15: Unpacking Your System
R E D C A T U s e r M a n u a l 1. UNPACKING YOUR SYSTEM Ensure that you have received all of the components of your system. REDCAT™ Infrared Receiver/Amplifier w/Table Stand and Power Supply REDMIKE™Classroom Charging Cradle and Power Supply... -
Page 16: Determine Set-Up Method
R E D C A T U s e r M a n u a l 2. SETTING UP THE REDCAT DETERMINE SET-UP METHOD The REDCAT is shipped with a table stand connected and ready for use. Alternatively, the table stand can be used as the wall mount bracket. Advantages of either include: Tabletop (recommended): •... -
Page 17: Wall-Mount Set-Up
• Height 6–8 feet high REMOVE THE BASE/WALL BRACKET the bottom of the REDCAT where it meets the base. 1. Grip REDCAT off the base clearing the three guides, then lift clear. 2. Slide 13 | REDCAT User Manual... -
Page 18: Mount Base/Wall Bracket
R E D C A T U s e r M a n u a l SETTING UP THE REDCAT (cont’d) MOUNT BASE/WALL BRACKET Ensure proper orientation of the bracket as shown in the illustration. the base/wall bracket against 2. Place the wall and use a level to confirm the positioning is straight. -
Page 19: Audio Integration
Audio Out VGA Out IR Transmission Audio Out Video Out Audio In DVD/VCR REDCAT The REDCAT is designed to integrate with multiple audio sources allowing other instructional technologies to be clearly heard throughout the classroom. 15 | REDCAT User Manual... -
Page 20: Connectiong External Audio Sources
R E D C A T U s e r M a n u a l AUDIO INTEGRATION (cont’d) Below are instructions on how to connect an external audio device like a TV, VCR, DVD, MP3 or computer directly into the REDCAT. 1. Turn Computer or... -
Page 21: Connecting The Power Supply
AC power cord. Connect the AC power cord into 1. Locate the DC power supply. the power supply into the REDCAT base as shown. If desired, remove the 2. Place plastic cover of the included Velcro strip and attach the supply to the Velcro for a more secure fit. -
Page 22: Section 3: System Operation And Optional Features
R E D C A T U s e r M a n u a l SECTION 3 System Operation and Optional Features REDCAT User Manual | 18... -
Page 23: Initial Set-Up: Redmike
The RED LED on the switch will glow. 2. Turn on the REDMIKE. The CH A/B GREEN LED on the REDCAT will light to indicate an IR signal is being received. 3. Slip the REDMIKE with lanyard around the neck and position the top of the microphone just below the collarbone. -
Page 24: Initial Set-Up: Optional
R E D C A T U s e r M a n u a l INITIAL SET-UP: OPTIONAL LT-71 1. Ensure the REDCAT in ON. The RED LED on the switch will glow. 2. Turn on the LT-71 and set the operating channel to “B”. -
Page 25: Initial Set-Up: Optional
R E D C A T U s e r M a n u a l INITIAL SET-UP: OPTIONAL HM-70 1. Ensure the REDCAT is ON. The RED LED on the switch will glow. 2. Turn on the HM-70 by sliding the switch to the top position. -
Page 26: Charging The Redmike
• REDMIKE incorporates alkaline protection into the microphone design. Replacement AA NiMH batteries may only be purchased through Lightspeed technologies (part # BA-NH2A27). • A blinking LED indicates a charging error (see page 7). Be sure to use a Lightspeed rechargeable sensing battery. REDCAT User Manual | 22... -
Page 27: Charging The Optional
Microphones can be left in the charger for up to two weeks without degradation to battery life • A full charge will be attained in 8-10 hours • Fully charged Lightspeed microphones will last over 7 hours 23 | REDCAT User Manual... -
Page 28: Charging The Optional
GREEN light will turn off when fully charged. Helpful Hint Do not attempt to charge alkaline batteries. They can overheat and expand, creating a significant hazard and damaging the LT-71 and HM-70. (This is not covered by the warranty.) REDCAT User Manual | 24... -
Page 29: Output To Assistive Listening Device (Ald)
REDCAT. the REDCAT and 5. With ALD turned on, speak into the REDMIKE and slowly adjust the ALD volume control until the appropriate audio level is attained in the ALD’s receiver headphones. 25 | REDCAT User Manual... -
Page 30: Using The Redmike To Amplify External Audio Equipment
CH A does not have to be adjusted. It’s easy to determine which REMEMBER: REDMIKE is set to Channel B by speaking into the mic and watching which set of LED’s glow on the side of the REDCAT. your laptop, 2. Plug AUDIO INPUT... -
Page 31: Section 4: Troubleshooting, Daily Use And Warranty
R E D C A T U s e r M a n u a l SECTION 4 Troubleshooting, Daily Use and Warranty 27 | REDCAT User Manual... -
Page 32: Troubleshooting Guide
The REDMIKE requires the Lightspeed signal is being received at • Confirm BA-NH2A27 rechargeable sensing the REDCAT. The IR signal light will battery for proper charging. The LT-71 be GREEN indicating a signal is being & HM-70 require NiMH AA rechargeable received. -
Page 33: Daily Use Instructions
R E D C A T U s e r M a n u a l DAILY USE INSTRUCTIONS 1. TURN ON THE REDCAT the power is switched on. Ensure 2. POSITION THE REDMIKE the REDMIKE from the Remove charging cradle and place it around your neck. -
Page 34: Tips On Classroom Audio
Repair by other than Lightspeed or its authorized service agencies will void this guarantee. Information on authorized service agencies is available from Lightspeed Technologies, Inc. Our Service Department (800.732.8999, 5 a.m. – 5 p.m., PST) will handle all your repair/replacement needs. REDCAT User Manual | 30... -
Page 35: System Specifications
Audio Distortion ........... < 1 % Built-in Microphone ..........Unidirectional Electret Battery Power (1-year warranty) ......2 AA NiMH Rechargeable Dimensions (W x D x H) ........2.25” x 2.25” x 8.75” Weight ..............7.36 oz. 31 | REDCAT User Manual... -
Page 36: Individual Components And Optional Accessories
CA-RCA6 6’ dual RCA audio cable CA-RCA24 24’ dual RCA audio cable CA-MSC3535 3.5mm to 3.5mm stereo audio cable CA-MMC2535 Audio patch cable (2.5mm to 3.5mm mono) BA-NH1 AA Rechargeable battery (for LT-71 and HM-70) REDCAT User Manual | 32... -
Page 37: User Notes
R E D C A T U s e r M a n u a l USER NOTES Record your system serial numbers and purchase information. This is helpful when ordering additional components, accessories, and/or warranty service. Components Serial Number REDCAT Microphones Purchase Information Your School/Organization District Purchase Date Invoice 33 | REDCAT User Manual... - Page 38 R E D C A T U s e r M a n u a l USER NOTES REDCAT User Manual | 34...
- Page 39 R E D C A T U s e r M a n u a l USER NOTES 35 | REDCAT User Manual...
- Page 40 R E D C A T U s e r M a n u a l USER NOTES REDCAT User Manual | 36...
- Page 41 R E D C A T U s e r M a n u a l USER NOTES 37 | REDCAT User Manual...
- Page 42 OfficePlus LLC Tel : +971 2 6767019 Post Box 43683 Fax : +971 2 6762739 Abu Dhabi, UAE video@officeplusuae.com www.officeplusuae.com Video : +971 2 6767699 OfficePlus LLC is the authorized partner for LightSpeed in UAE MN0095US01-1 Li gh tspe e d Te c hno l o g i e s, Inc . 11 5 0 9 S W H e rm an R d Tual at in, O R 9 7 0 6 2 www.
Need help?
Do you have a question about the Redcat and is the answer not in the manual?
Questions and answers