Table of Contents
Advertisement
Advertisement
Table of Contents
Troubleshooting

Related Manuals for LightSpeed Technologies 850iR


Summary of Contents for LightSpeed Technologies 850iR
- Page 1 850iR Classroom Audio System U s e r M a n u a l...
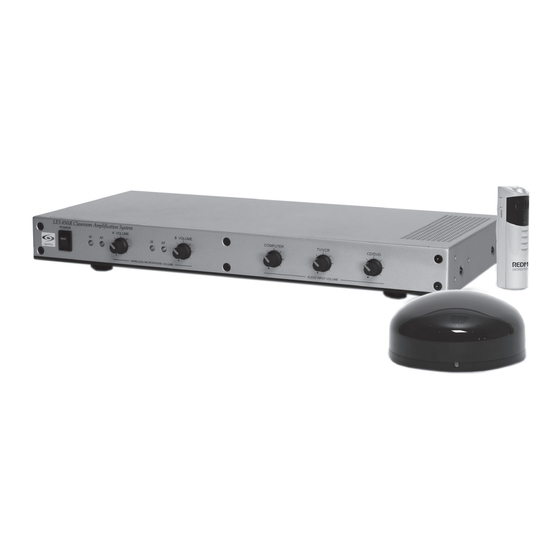
- Page 3 850iR infrared receiver/amplifier, REDMIKE classroom microphone, SR-70F infrared sensor and speaker package. The 850iR is a two-channel receiver amplifier that allows the use of up to two microphones simultaneously and up to three additional audio input sources (such as TV, VCR, DVD, CD, MP3, etc.).
-
Page 4: Safety Instructions And Certifications
It conforms to the polarized plug with an extension cord, most stringent new European guidelines for receptacle or other outlet unless the blades consumer products (RoHS). can be fully inserted to prevent blade exposure. ii | 850iR User Manual... -
Page 5: Table Of Contents
..............SECTION 5: Troubleshooting, Daily Use and Warranty Troubleshooting Guide ........................Daily Use Instructions ........................Tips on Classroom Audio ......................Warranty Statement ........................System Specifications ........................Individual Components and Optional Accessories ..............User Notes ............................850iR User Manual | iii... -
Page 6: Section 1: System Overview
8 5 0 i R U s e r M a n u a l SECTION 1 System Overview 1 | 850iR User Manual... -
Page 7: System Components
8 5 0 i R U s e r M a n u a l SYSTEM COMPONENTS LES 850iR Classroom Amplification System 850iR Infrared Receiver/Amplifier and Power Supply Sensor Cable SR-70F Infrared Sensor Charging Cradle and Power Supply REDMIKE ®... -
Page 8: Front Panel Controls
1. POWER Switch/POWER Indicator: flash green when audio (voice) This switch is used to turn the from the microphone is detected. 850iR ON (switch up), or OFF (switch down). When the POWER Controls the volume 4. A VOLUME: switch is in the ON position, the level of the teacher microphone POWER light will glow red. -
Page 9: Rear Panel Controls
3. As a page is broadcast, the sensor clip detects the audio signal though induction and immediately mutes the 850iR. 4. When the page is over, the audio to the 850iR returns to normal. (For full installation instructions refer to the install sheet included with the optional PageFirst sensor.) -
Page 10: Redmike Controls And Connections
YELLOW PROTECTIVE TAB: battery compartment door open to remove this disposable protective tab before use. NOTE: do not attempt to remove the tab without first opening the compartment door, as it may tear, leaving fragments. 5 | 850iR User Manual... -
Page 11: Cradle Charger Controls And Connections
A blinking Green LED means a non- Lightspeed battery has been installed (possibly an alkaline battery). Helpful Hint International Note: Appropriate power cord and adaptor are provided with all Lightspeed equipment. 850iR User Manual | 6... -
Page 12: Section 2: Installation
8 5 0 i R U s e r M a n u a l SECTION 2 Installation 7 | 850iR User Manual... -
Page 13: Unpacking Your System
8 5 0 i R U s e r M a n u a l 1. UNPACKING YOUR SYSTEM Ensure that you have received all of the components of your system. LES 850iR Classroom Amplification System 850iR Infrared Receiver/Amplifier and Power Supply REDMIKE® SR-70F Infrared Sensor and cable Classroom Microphone... -
Page 14: Location Of The Receiver/Amplifier
8 5 0 i R U s e r M a n u a l 2. LOCATION OF THE RECEIVER/AMPLIFIER • Before running wires to the 850iR or • A good location would be on any stable plugging in, find a suitable, stable bookcase or shelf within 6 feet of an location for the amplifier. -
Page 15: Ir Sensor Installation
8 5 0 i R U s e r M a n u a l 3. IR SENSOR INSTALLATION Sensor location is very important for optimum performance of the 850iR Classroom Audio System. • BEST: On the ceiling at or near the middle of the classroom. -
Page 16: Suspended Ceiling Mount
Route the wire back to the system, securing it along the way. the other end of the sensor cable 4. Connect to one of the sensor inputs on the back of the system. 11 | 850iR User Manual... -
Page 17: Speaker Installation
2. Follow 3. Return to this manual to complete the set up of your system. MCQ (x 1) NXQ (x 1) CNXQ (x 1) WMQ (x 4) DRQ (x 4) CNXQ (x 1) 850iR User Manual | 12... -
Page 18: Audio Integration
VGA Out Speaker(s) Video Out Audio Out Audio Out Video Out Audio In DVD/VCR 850iR The 850iR is designed to integrate with multiple audio sources allowing other instructional technologies to be clearly heard throughout the classroom. 13 | 850iR User Manual... - Page 19 2. Connect the audio source into the corresponding input jack on the rear panel of the 850iR. both the 850iR and audio source power on, adjust the 3. With corresponding volume control until the desired level is achieved. NOTE! Be careful to not to set the volume too high, as this can distort the speaker and potentially cause damage.
-
Page 20: Finalizing Connections
1. Ensure the power switch is in the “OFF” position and all front panel volume controls are turned fully counter-clockwise. LES 850iR Classroom Amplification System 2. Ensure speaker wire connections are secure and not frayed. Under normal conditions, each speaker volume control should remain in the center position. -
Page 21: Final Check
2. The amplifier packing material should be kept for warranty shipping purposes. 3. Proceed to initial set-up to test system performance. Leave microphones charging so they are ready for use. Microphones will need to be charged on a daily basis. 850iR User Manual | 16... -
Page 22: Section 3: Initial Set-Up, Charging And Additional Features
8 5 0 i R U s e r M a n u a l SECTION 3 Initial Set-up, Charging and Additional Features 17 | 850iR User Manual... -
Page 23: Initial Set-Up Of Redmike
The RED LED on the switch will glow. 2. Turn on the REDMIKE. The RED IR LED on the 850iR will light to indicate a signal is being received. 3. Slip the REDMIKE with lanyard around the neck and position the top of the microphone just below the collarbone. -
Page 24: Charging The Redmike
Replacement AA NiMH batteries may only be purchased through Lightspeed Technologies (part # BA-NH2A27). • A blinking LED indicates a charging or sensing error (see page 7.) Be sure to use a Lightspeed rechargeable sensing battery. 19 | 850iR User Manual... -
Page 25: Output To Personal Fm Transmitter
4. Adjust to maximum output. NOTE! This is to set the maximum allowable signal from the 850iR. the 850iR and ALD turned on, speak into the 5. With REDMIKE and slowly adjust the corresponding “ADJ” volume control until the appropriate audio level is attained in the ALD’s receiver headphones. -
Page 26: Using The Redmike To Amplify External Audio Equipment
The REDMIKE includes a 3.5mm audio input jack to connect to an audio source like a laptop or MP3 player. The REDMIKE will transmit the audio signal to be played through the system. LES 850iR Classroom Amplification System your system includes two 1. -
Page 27: Section 4: Optional Microphones And Accessories
8 5 0 i R U s e r M a n u a l SECTION 4 Optional Microphones and Accessories 850iR User Manual | 22... -
Page 28: Optional Redmike Vc Controls And Connections
CHARGER CONTACTS (+ -): battery compartment door open to interface with the charging tabs in the BC- remove this disposable protective tab RMCC cradle charger for daily charging. before use. Simply place the REDMIKE VC in the charger. 23 | 850iR User Manual... -
Page 29: Initial Set-Up Of Redmike Vc
Having the volume set too high will result in feedback and listener fatigue. NOTE: A nominal volume level must be set on the 850iR before adjusting controls on the REDMIKE VC. 5. The teacher can now use the controls on the REDMIKE VC to adjust the volume level from anywhere in the room. -
Page 30: Charging The Optional Redmike Vc
Replacement AA NiMH batteries may only be purchased through Lightspeed Technologies (part # BA-NH2A27). • A blinking LED indicates a charging or sensing error (see page 7.) Be sure to use a Lightspeed rechargeable sensing battery. 25 | 850iR User Manual... -
Page 31: Optional Lt-71 Controls And Connections
RED to indicate charging. The light glows Power/Charge Indicator: BLUE when the LT-71 is powered ON, RED when being charged. External Microphone Input (MIC): the 3.5mm MIC jack for the optional TK-250 headset microphone (part# MC- TK250LTM). 850iR User Manual | 26... -
Page 32: Initial Set-Up Of Optional
8 5 0 i R U s e r M a n u a l INITIAL SET-UP OF OPTIONAL LT-71 LES 850iR Classroom Amplification System 1. Turn the 850iR power switch to the ON position. The RED LED on the switch will glow. -
Page 33: Charging The Optional
Microphones can be left in the charger for up to two weeks without degradation to battery life. • A full charge will be attained in 8-10 hours. • Fully charged Lightspeed microphones will last over 7 hours. 850iR User Manual | 28... -
Page 34: Optional Hm-70 Controls And Connections
Power/Charge Indicator: adjustment should be necessary. light glows RED when the HM-70 is powered ON, GREEN when charging. Plug Charger Input (CHARGER): the charging cable from the charger into this jack for daily charging. 29 | 850iR User Manual... -
Page 35: Initial Set-Up Of Optional
8 5 0 i R U s e r M a n u a l INITIAL SET-UP OF OPTIONAL HM-70 LES 850iR Classroom Amplification System 1. Ensure the 850iR is ON. The RED LED on the power switch will glow. 2. Turn on the HM-70 by sliding the switch to the top position. -
Page 36: Charging The Optional
INPUT PAGING INPUT 24VDC Helpful Hint Do not attempt to charge alkaline batteries. They can overheat and expand, creating a significant hazard and damaging the LT-71 and HM-70. (This is not covered by the warranty.) 31 | 850iR User Manual... -
Page 37: Audio Integration For The Optional Ir Media Connector
Audio Out iR Media Connector Audio Out Video Out DVD/VCR 850iR The iRMC is designed to integrate with the 850iR and multiple audio sources, allowing other instructional technologies to be clearly heard throughout the classroom. 850iR User Manual | 32... -
Page 38: Initial Set-Up Of Optional Ir Media Connector
3. If the first two options do not give optimum volume level, the last place to adjust the volume LES 850iR Classroom Amplification System is the CH. B Volume on the 850iR. Helpful Hint If you adjust the CH B volume on the classroom audio system, you will also be changing the volume for your second microphone. -
Page 39: Section 5: Troubleshooting, Daily Use And Warranty
8 5 0 i R U s e r M a n u a l SECTION 5 Troubleshooting, Daily Use and Warranty 850iR User Manual | 34... -
Page 40: Troubleshooting Guide
No Sound From Speaker while charging so a full charge is attained. Full charge will last eight hours. • Turn the 850iR on. Confirm that the POWER • Inspect the battery contacts. Clean and light located on the front panel switch is on. -
Page 41: Daily Use Instructions
8 5 0 i R U s e r M a n u a l DAILY USE INSTRUCTIONS 1. TURN ON THE 850iR LES 850iR Classroom Amplification System the power is Ensure switched on. 2. POSITION THE REDMIKE the REDMIKE from the... -
Page 42: Tips On Classroom Audio
System components will be repaired or replaced at Lightspeed’s option. Rechargeable batteries and connecting cables are guaranteed for one (1) year. Warranty does not extend to finish, appearance, or malfunctions due to abuse or misuse. Repairs performed by other than Lightspeed Technologies will void this warranty. -
Page 43: System Specifications
Weight ................. 7.36 oz. IR SENSOR SPECIFICATIONS Working Range ..............Up to 1600 square feet per sensor Cable 50 ft., Plenum-rated Mounting ................Ceiling clip/Wall bracket Dimensions ................4.25” (Diam.) x 2.0” (H) Weight ................. 4.5 oz. 850iR User Manual | 38... -
Page 44: Individual Components And Optional Accessories
8 5 0 i R U s e r M a n u a l INDIVIDUAL COMPONENTS & OPTIONAL ACCESSORIES Part Number Description RX-850 Infrared receiver/amplifier/mixer PS-24V-2.5 Power supply/battery charger for 850iR IR-SR70F Infrared sensor with cable and wall or ceiling mounting bracket CA-PC50F Plenum sensor cable (50 ft.) REDMIKE classroom microphone BA-NH2A27... -
Page 45: User Notes
8 5 0 i R U s e r M a n u a l USER NOTES Record your system serial numbers and purchase information. This is helpful when ordering additional components, accessories, and/or warranty service. Components Serial Number 850iR Microphones Purchase Information Your School/Organization District Purchase Date Invoice 850iR User Manual | 40... - Page 46 8 5 0 i R U s e r M a n u a l USER NOTES 41 | 850iR User Manual...
- Page 48 AC-MN850 LIGHTSPEE D TECHN OL OGIE S 11509 SW HERMAN RO AD / T U AL ATI N, OR 9 706 2 TOLL F RE E: 800. 732. 89 99 / P H O NE: 5 03.68 4.55 38 / FAX: 50 3 .6 84 .31 9 7 LIGHTS PEED-TEK .C OM MN0044US01-3...
Need help?
Do you have a question about the 850iR and is the answer not in the manual?
Questions and answers