Alpine INA-W910R Owner's Manual
Advanced navi station
Hide thumbs
Also See for INA-W910R:
- Installation manual (13 pages) ,
- Owner's manual (3 pages) ,
- Installation manual (13 pages)
Table of Contents
Advertisement
FOR CAR USE ONLY/NUR FÜR AUTOMOBIL GEBRAUCH/POUR APPLICATION AUTOMOBILE UNIQUEMENT/PARA USO EN
AUTOMÓVILES/SOLO PER L'UTILIZZO IN AUTOMOBILE/ENDAST FÖR BILBRUK/ALLEEN VOOR GEBRUIK IN DE AUTO/ТОЛЬКО
ДЛЯ ИСПОЛЬЗОВАНИЯ В АВТОМОБИЛЯХ/DO UŻYCIA TYLKO W SAMOCHODZIE/ΓΙΑ ΡΗΣΗ Μ Ν ΣΕ ΑΥΤ ΚΙΝΗΤ
• OWNER'S MANUAL
Please read before using this equipment.
• BEDIENUNGSANLEITUNG
Lesen Sie diese Bedienungsanleitung
bitte vor Gebrauch des Gerätes.
• MODE D'EMPLOI
Veuillez lire avant d'utiliser cet appareil.
• MANUAL DE OPERACIÓN
Léalo antes de utilizar este equipo.
• ISTRUZIONI PER L 'USO
Si prega di leggere prima di utilizzare il
attrezzatura.
ALPINE ELECTRONICS MARKETING, INC.
1-1-8 Nishi Gotanda,
Shinagawa-ku,
Tokyo 141-0031, Japan
Phone 03-5496-8231
ALPINE ELECTRONICS OF AMERICA, INC.
19145 Gramercy Place, Torrance,
California 90501, U.S.A.
Phone 1-800-ALPINE-1 (1-800-257-4631)
1-888-NAV-HELP (1-888-628-4357)
ALPINE ELECTRONICS OF CANADA, INC.
777 Supertest Road, Toronto,
Ontario M3J 2M9, Canada
Phone 1-800-ALPINE-1 (1-800-257-4631)
1-888-NAV-HELP (1-888-628-4357)
ADVANCED NAVI STATION
INA-W910R
ALPINE ELECTRONICS OF AUSTRALIA PTY. LTD.
161-165 Princes Highway, Hallam
Victoria 3803, Australia
ALPINE ELECTRONICS GmbH
Wilhelm-Wagenfeld-Str. 1-3, 80807 München, Germany
ALPINE ELECTRONICS OF U.K. LTD.
Fletchamstead Highway, Coventry CV4 9TW, U.K.
Phone 0870-33 33 763
ALPINE ELECTRONICS FRANCE S.A.R.L.
(RCS PONTOISE B 338 101 280)
98, Rue de la Belle Etoile, Z.I. Paris Nord Il,
B.P. 50016, 95945 Roissy Charles de Gaulle
• ANVÄNDARHANDLEDNING
Innan du använder utrustningen bör du läsa
igenom denna användarhandledning.
• GEBRUIKERSHANDLEIDING
Lees deze aanwijzingen aandachtig alvorens
dit toestel te gebruiken.
• РУКОВОДСТВО ПО ЭКСПЛУАТАЦИИ
Прочтите настоящее руководство перед
началом использования оборудования.
• INSTRUKCJA OBSŁUGI
Prosimy zapoznać się z tą instrukcją przed
przystąpieniem do użytkowania urządzenia.
• ΕΓ ΕΙΡΙΔΙ
Παρακαλ ύμε δια άστε τ πριν
ρησιμ π ιήσετε τη συσκευή.
Phone 03-8787-1200
Phone 089-32 42 640
Alpine House
Cedex, France
Phone 01-48638989
R R
ΡΗΣΤΗ
ALPINE ITALIA S.p.A.
Viale C. Colombo 8, 20090 Trezzano
Sul Naviglio (MI), Italy
Phone 02-484781
ALPINE ELECTRONICS DE ESPAÑA, S.A.
Portal de Gamarra 36, Pabellón, 32
01013 Vitoria (Alava)-APDO 133, Spain
Phone 945-283588
ALPINE ELECTRONICS (BENELUX) GmbH
Leuvensesteenweg 510-B6,
1930 Zaventem, Belgium
Phone 02-725-13 15
Designed by ALPINE Japan
EN
DE
FR
ES
IT
SE
NL
RU
PL
GR
68-16909Z49-A
Advertisement
Table of Contents

Related Manuals for Alpine INA-W910R


Summary of Contents for Alpine INA-W910R
- Page 1 Si prega di leggere prima di utilizzare il Παρακαλ ύμε δια άστε τ πριν attrezzatura. ρησιμ π ιήσετε τη συσκευή. ALPINE ELECTRONICS MARKETING, INC. ALPINE ELECTRONICS OF AUSTRALIA PTY. LTD. ALPINE ITALIA S.p.A. 1-1-8 Nishi Gotanda, 161-165 Princes Highway, Hallam Viale C. Colombo 8, 20090 Trezzano...
-
Page 3: Table Of Contents
ENGLISH Contents RDS Operation Turning AF (Alternative Frequencies) On or Off .............21 Operating Instructions Receiving Traffic Information ......22 PTY (Programme Type) Tuning .....22 PRECAUTIONS Receiving Traffic Information While Playing CD or Radio ..........22 IMPORTANT INFORMATION, PLEASE Priority News ..........22 READ CAREFULLY BEFORE USING Displaying Radio Text ........22 THIS PRODUCT. - Page 4 Switching the Subtitles Display Setup (Subtitle Language) ........32 Display Setup Operation ........ 44 Switching from the disc menu ....... 32 Visual EQ Setting Operation ....... 44 About DivX ............ 32 Setting the Brightness of the Backlighting ..........45 Other Useful Features Adjusting the Minimum Level of Adjusting the Audio ........
- Page 5 IMPRINT Operation (Optional) BT Hands Free Calling Changing MultEQ mode ........ 50 Setup Before Using .........61 About BLUETOOTH ........61 Adjusting Sound Setting in Manual Mode ..50 Before Using Hands-Free Function .....61 Setting the MX Level (Media Xpander) ..50 How to connect to a BLUETOOTH Adjusting the Crossover Settings compatible device (Pairing) .....61...
- Page 6 SD Memory Video Remote Control Switching the SD Memory Video Screen ..70 Controls on Remote Control ......80 When Using the Remote Control ....81 Auxiliary Device (Optional) Battery Replacement ........82 Operating Auxiliary Devices (Optional) ..70 Information TUE-T200DVB Operation (Optional) About DVDs ...........
-
Page 7: Operating Instructions
INDEPENDENTLY DETERMINED HOW TO USE THE SOFTWARE In these cases, use your own personal judgment. IN THE DEVEICE, AND MS HAS RELIED UPON ALPINE TO • The map database is designed to provide you with route CONDUCT SUFFICIENT TESTING TO DETERMINE THAT THE suggestions, it does not take account of the relative safety of a SOFTWARE IS SUITALE FOR SUCH USE. - Page 8 Should you have any questions concerning this EULA, or if you • ALPINE, MS, Microsoft Corporation and their affiliates desire to contact ALPINE for any other reason, please refer to reserve the right to discontinue any Internet-based the address provided in the documentation for the DEVICE.
-
Page 9: End User License Agreement (Navteq)
LIMITED WARRANTY END USER LICENSE AGREEMENT NAVTEQ warrants that, subject to the warnings set out below, for (NAVTEQ) a period of 12 months after acquisition of your copy of the Database, it will perform substantially in accordance with NAVTEQ’s Criteria for Accuracy and Completeness existing on PLEASE READ THIS END USER LICENSE AGREEMENT the date you acquired the Database;... -
Page 10: Warning
• This software is designed for use exclusively in the INA-W910R. It cannot and may not be used in conjunction with other hardware. WARNING This symbol means important instructions. -
Page 11: Caution
Failure to do so may cause personal injury or damage to the KEEP THE VOLUME AT A LEVEL WHERE YOU CAN STILL product. Return it to your authorized Alpine dealer or the nearest HEAR OUTSIDE NOISES WHILE DRIVING. Alpine Service Centre for repairing. -
Page 12: Precautions
Damaged Disc Installation Location Do not attempt to play cracked, warped, or damaged discs. Playing Make sure the INA-W910R will not be installed in a location a bad disc could severely damage the playback mechanism. subjected to: • Direct sun and heat Maintenance •... -
Page 13: Discs Playable On This Unit
This ensures the focus of the (CD single) driver’s attention will be on the road and not on the INA-W910R. This has been done for the safety of the driver and passengers. Audio Processor Adjustments cannot be made if the car is moving. - Page 14 DVD player. size of the music file.* Hybrid Audio CD and Data (MP3/WMA/AAC) CD-R/RW discs: The INA-W910R can read either sector on the disc. Choose CD-DA to play the CD audio section or MP3/WMA/AAC to play Video CDs the MP3/WMA/AAC section.*...
- Page 15 • This unit is compatible with discs recorded in the standard DVD- Video formats. Alpine accepts no responsibility for lost data, etc., even if data, etc., • Note that discs not finalised (processed to enable to play on is lost while using this product.
- Page 16 Otherwise, the ©1993-2010 NAVTEQ. All rights reserved. display may be abnormal. In this case, please consult your Portions ©2010, Microsoft Corporation. All Rights Reserved. ALPINE dealer. For the operation on update, refer to ALPINE website.
-
Page 17: Getting Started
You can operate this unit from the vehicle’s control unit when Turn off the unit power, press RESET with a ballpoint pen or an Alpine Remote Control Interface Box (optional) is similar pointed object. connected. For details, contact your Alpine dealer. -
Page 18: Turning Power On Or Off
Turning Power On or Off Inserting/Removing the SD Memory Card Some of this unit’s functions cannot be performed while the vehicle is in Video data recorded in the SD memory card can be played back by the motion. Be sure to stop your vehicle in a safe location and apply the player built in this unit. -
Page 19: Adjusting The Volume
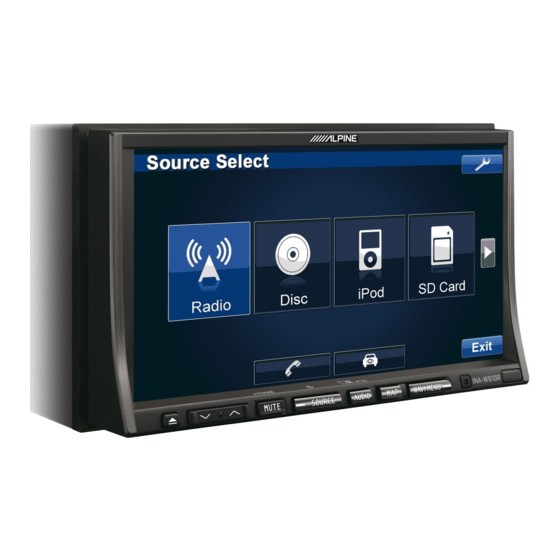
Displays the source selection list. Adjusting the Volume (The kind of source modes that are displayed varies depending on connection and setting). Changes to Setup Select screen. Adjust the volume by pressing Volume decreases/increases continuously by pressing and Touch [Radio]. holding The screen changes to the Radio mode main display. -
Page 20: Displaying The Numeric Keypad Input Screen
Displaying the Numeric Keypad Input Radio Screen The numeric keypad input screen is displayed when the DVD or Video Display example for FM Radio main screen CD mode is selected for searching a title or chapter, and also for entering a country code or password for the DVD setup item. Touch [10KEY] on the main source screen. -
Page 21: Presetting Stations Manually
Presetting Stations Manually RDS Operation Tune in a desired radio station you wish to store in Display example for RDS main screen the preset memory by manual or automatic seek tuning. Touch [P1/2] to change the function guide. Touch and hold any one of the preset buttons [P.SET 1] through [P.SET 6] for at least 2 seconds. -
Page 22: Receiving Traffic Information
• Refer to page 43 about “PI Seek Setting”, “Receiving RDS Regional Receiving Traffic Information While (Local) Stations”, “Switching the Display Language of PTY (Programme Type)” and “Setting PTY31 (Emergency Broadcast) Playing CD or Radio Reception”. The example explained here is how to receive the traffic information Receiving Traffic Information broadcast during CD playback. -
Page 23: Cd/Mp3/Wma/Aac
When a CD/MP3/WMA/AAC is inserted into the DISC SLOT 1 Touch [P1/2]* to change the function guide. of the INA-W910R, with the label side facing up, the unit 2 Touch [ ] and select the desired Repeat play. starts to play the CD/MP3/WMA/AAC. -
Page 24: Random Play)
What is WMA? M.I.X. (Random Play) WMA, or “Windows Media™ Audio,” is compressed audio data. WMA is similar to MP3 audio data and can achieve CD quality Touch [ ] during playback. sound with small file sizes. The tracks (files) on the disc will be played back in a random What is AAC? sequence. - Page 25 Media supported Terminology The media that this device can play back are CD-ROMs, CD-Rs, Bit rate CD-RWs, DVD-Rs and DVD-RWs. This is the “sound” compression rate specified for encoding. The Corresponding File Systems higher the bit rate, the higher the sound quality, but also the larger the files.
-
Page 26: Dvd/Video Cd
DVD/Video CD Playing a Disc INA-W910R has a built-in DVD player. When an optional Alpine DVD/ Display example for DVD Video main screen Video CD/CD player (or DVD changer) is connected to the INA-W910R, you can control it from the INA-W910R (except some operations). -
Page 27: If A Menu Screen Appears
Press SOURCE/ on the unit. Menu Operations The Source Select screen is displayed. 1 Touch any area on DVD mode screen to display the operation keys. Touch [Disc]. The display shows the DISC mode screen. Insert a disc with the label side facing up. The unit starts to play the disc. -
Page 28: Displaying The Top Menu Screen
Displaying the Menu Operation Mode Screen The numeric keypad input Touch [P1/2]* on the DVD mode main screen. screen The function guide changes. closes when the area is * The display differs, depending on the disc (mode). touched while Touch [MENU CONT]. displayed. -
Page 29: Fast-Forwarding/Fast-Reversing
Fast-forwarding/Fast-reversing Playing Still Frames (Pausing) DVD-Video, Video-CD, DVD-Audio (VCAP mode)*, DivX®: During playback, touch [ During playback, touch and hold [ ] (Fast- Touch [ ] to resume playback. reverse) or [ ] (fast-forward). When touched and held for more than 1 second, the disc is •... -
Page 30: Repeat Playback
VOFF mode* Repeat Playback The track is played repeatedly. The group is played repeatedly. Use this function to play the disc’s titles, chapters or tracks etc., repeatedly. The disc is played repeatedly. DVD Video When “VCAP” or “VOFF” is set in “Setting the DVD-Audio Touch [ Playback Mode”... -
Page 31: Searching Directly By Chapter, Track Or File Number
Searching Directly by Chapter, Track or Scroll to Move the Page Forward or File Number Backward Use this function to easily move to the beginnings of the chapters, tracks “Page” is a still image stored on a DVD-Audio disc. or files on the disc. Touch [P1/3] twice while playing a DVD-Audio disc Touch [P1/2]* in any mode other than stop mode. -
Page 32: Switching The Subtitles (Subtitle Language)
Switching the Subtitles (Subtitle About DivX Language) DivX® is a codec (software) programme to compress moving images while maintaining image quality using a highly advanced compression With DVDs on which multiple subtitle languages are recorded, the ratio and operating speed. subtitle language can be switched during playback;... -
Page 33: Other Useful Features
Touch [ ] of Bass/Treble to adjust screen..This item is controllable with the INA-W910R only..This item is available when the optional IMPRINT • Adjustment cannot be performed when Defeat is set to ON. - Page 34 Adjusting Bass/Treble Adjusting the Subwoofer Level When ON is set in “Subwoofer On and Off ”, the item is You can change the bass or treble frequency emphasis displayed. to create your own tonal preference. When an External Audio Processor is connected, the list is not Touch [ ] of Bass/Treble to adjust screen.
- Page 35 Adjusting Nav. Mix Level Adjust the distance (0.0 to 336.6 cm) of a desired speaker by touching the respective [ ] or [ ] Touch [ ] or [ ] of Nav. Mix Level to adjust the volume of button. navigation interruption.
-
Page 36: Storing Settings In The Memory
Adjusting the Frequency Turning Defeat ON or OFF Touch [ ] or [ ] of Freq. to adjust the frequency of the selected Touch [ ] or [ ] of Defeat to set to ON or OFF. band. Adjustable frequency bands: 63 Hz to 17.5 kHz (in 1/3 octave steps) Storing Settings in the Memory Band-1: 63 Hz~200 Hz (63 Hz) Band-2: 160 Hz~1 kHz (160 Hz) -
Page 37: Switching Display Modes
Display Example for Search Screen Switching Display Modes While your vehicle is parked, touch [WIDE] on the visual source screen. Each touch changes the display modes as follows: Mode 1 Mode 2 Mode 3 Mode 1 (WIDE) (CINEMA) (NORMAL) (WIDE) Select directly by touching [ ], and its track (or folder/file) is played back. -
Page 38: Setup
Setup DVD Setup DVD Setup Operation The Parking Brake must be engaged to access the DVD The numeric keypad input screen closes when the area mode screen. Attempting to access this screen while driving is touched while displayed. will display the warning-Can’t operate while driving. Numeric keypad input screen The numeric keypad is used if you want to play back in The DVD Setup operation can be carried out after removing the... -
Page 39: Setting Of The Audio Language
3 Touch the 4-digit country code. Use the following procedure to set the digital audio signal output from As for the country number, refer to “List of Country the INA-W910R. Codes” (pages 85, 86). 4 Touch [Enter] to memorize the code. - Page 40 Audio output/Optical digital audio output Disc Audio recording format Digital output setting Optical digital audio Analog audio output (DVD SETUP) output (Ai-NET, RCA output) Format LPCM 44.1/176.4kHz 16/20/24bit AUTO or LPCM 44.1kHz, 16bit, LPCM (CD-DA, 2ch (2ch Downmix) DVD-V, DVD-A) 48/96/192kHz 16/20/24bit AUTO or LPCM...
-
Page 41: Setting The Downmix Mode
TV monitor (rear monitor) being used. the disc, etc. This setting can also be applied for the INA-W910R. If the rear monitor is not connected, the screen setting is 16:9. Touch [Enter] to memorize the number. -
Page 42: Setting The Compressed File Playback Data
Setting the compressed File Playback Data Source Setup If a disc containing both a compressed video file and a compressed audio file is used, you have a choose to play back only a video or only Source Setup Operation audio. Setting item: DVD Play Mode Setting contents: Video / Audio Video:... -
Page 43: Radio Setup
Radio Setup USB Search “Radio Setup” is selected on the source setup main menu in step 4. “USB Search” is selected on the source setup main menu in step 4. Setting the USB Search Mode Adjusting Source Signal Levels The unit allows you to search for the USB Audio files by Tag If the difference in volume level between the CD and FM radio is information or Explorer (File Name) mode. -
Page 44: Display Setup
Adjusting Image Brilliance (Live Contrast) Display Setup The over brightness/darkness part of image will be adjusted to a proper brilliance automatically. Setting item: Live Contrast Display Setup Operation Setting contents: OFF / Low / High • You can adjust this setting in visual source mode by touching [ directly. -
Page 45: Setting The Brightness Of The Backlighting
Adjusting Tint of Picture Adjusting the Minimum Level of Backlight Further setting item: Tint Setting content: G15 ~ R15 You can adjust the brightness of the backlight (LOW). This function could be used, for instance, to change the screen brightness while Adjust the colour from G15 to R15. -
Page 46: General Setup
Sound (Beep) Guide Function General Setup Setting item: Beep Setting contents: OFF / ON General Setup Operation Activate the Sound Guide mode. OFF: Deactivate the Sound Guide mode. The sound guide beep will not be produced when a button is pressed/ touched. -
Page 47: Setting Security Code
Setting Security code System Setup You can set the system to be unusable without entering a password. When you set this setting to On and set a password, the password input is required when the system is connected to a battery and turned on for System Setup Operation the first time. -
Page 48: Setting The Camera Input
• The selected name is displayed on the Visual and Rear selection screen. After the adjustment is completed, touch [OK]. • Only when an Alpine TV tuner is connected, you can operate the displayed function guide from this unit. You can touch [Reset] during adjustment to return to the... -
Page 49: Setting The Picture Output
• For AUX2, this setting item is adjustable only when AUX2 IN is set to AUX. Setting the Picture Output Outputs the picture of the source selected on the INA-W910R connected to the rear monitor. Setting item: AUX Out Setting contents: OFF/ON OFF: The “Remote Sensor”... -
Page 50: Imprint Operation (Optional)
MultEQ mode is set to OFF (Manual Mode). Use steps 1 to 6 to select one of the Sound menu Alpine introduces IMPRINT - the world’s first technology that modes to modify. See the applicable section below for thoroughly eliminates in-car acoustic problems that normally degrade details about the selected item. -
Page 51: Adjusting The Crossover Settings (X-Over)
Touch [ ] or [ ] of the desired MX mode. Adjust the crossover to your preference. • Music source (such as CDs, iPod, etc.) level can be set. Selecting the Cut-Off Frequency MX CD (OFF, CD MX 1 to 3) Touch [ ] or [ ] of Freq., then select the cut-off frequency CD mode processes a large quantity of data. -
Page 52: Adjusting The Time Correction
Adjusting the Level Graphic Equalizer Adjustments (G-EQ) Touch [ ] or [ ] of Level, then adjust the HPF or LPF level. You can modify the equalizer settings to create a response curve more Adjustable output level: –12 to 0 dB. appealing to your personal taste. -
Page 53: Equalizer Presets (F-Eq)
Adjusting the Frequency Setting the Response Slope for the High Touch [ ] or [ ] of Freq. to adjust the frequency of the Range Speaker (TW Setup) selected band. Depending on the response characteristics of the speaker, care should be Adjustable frequency bands: 20 Hz to 20 kHz (in 1/3 octave steps) taken when setting the response slope of the high range speaker to Band-1: 20 Hz~80 Hz (63 Hz) -
Page 54: About Time Correction
These values are the time correction values for the different About Time Correction speakers. Setting these values to make each sound reach the listening position at the same time as the sound of other speakers. Time Correction Value List The distance between the listener and the speakers in a car vary widely due to the complex speaker placement. -
Page 55: About The Crossover
Adjusting to a frequency range outside that recommended may cause damage to the speakers. FLAT, 6, Rear high 20 Hz - 0 to For the recommended crossover frequencies of Alpine speakers, refer range ---- 12, 18, ---- 200 Hz 12 dB –... -
Page 56: External Audio Processor Operation (Optional)
Processor mode screen. Attempting to access this screen while driving will display the warning-Can’t operate while driving. Storing Settings in the Memory (page 61) (Storing all the settings and adjustments made on the INA-W910R (not only the above settings/adjusts) in Adjustment Procedure for Dolby the memory) Surround In case of combining the Automatic adjustments, etc. -
Page 57: Set Mx Mode Of The External Audio Processor
Setting Bass Focus Set MX Mode of the External Audio Using the previously specified delay number (time difference) Processor allows you to set a time difference between the front-rear/left- right speakers. Namely, it enables a time correction based on Before performing the operations below, set MX (Media Xpander) your preference. -
Page 58: X-Over Adjustment
Concrete examples X-OVER Adjustment Calculating the time correction value for the front left speaker on the diagram below. Setting item: X-Over Conditions: Distance between farthest speaker and listening position: Touch [ ] or [ ] of X-Over to select L+R or L/R. 2.25 m (88-3/4") L+R: Sets the same adjustment values for the left and right Distance between front left speaker and listening position:... -
Page 59: Phase Switching
Touch [ ] of P-EQ. Phase Switching The P-EQ list screen appears. Setting item: Phase Touch [ ] of the desired speaker (channel). The P-EQ adjustment screen appears. Switch the phase (0° or 180°) by touching [ ] or [ ] of the desired speaker. -
Page 60: Setting Of Dolby Digital
Adjusting the speaker levels (Output Level) Setting of Dolby Digital The test tones help to make the volume adjustments of the different speakers. When levels are equal, a strong sense of Setting item: Multi Ch Setup presence can be heard from the different speakers at the listening position. -
Page 61: Adjusting The Dvd Level
• Proper function of this unit with all BLUETOOTH compatible in “Setting the Speakers” (page 59). devices is not guaranteed. For handling of the BT compatible device, consult your ALPINE dealer or ALPINE website. • Depending on the surroundings, BLUETOOTH wireless connection Storing Settings in the Memory may be unstable. -
Page 62: Bluetooth Setup
Setting the BLUETOOTH Device • Set “Setting the Search Mode” (page 63) to Visible Mode ON to enable this unit to recognise a mobile phone. For mobile phone Select one of 5 connected BLUETOOTH compatible devices that passkey (passcode) input operation, refer to the mobile’s Owner’s you previously registered. - Page 63 For inputting the mobile phone’s passcode, refer to the mobile phone’s Owner’s Manual. For information to update your BLUETOOTH firmware, please visit your local Alpine web site or choose your country from Setting the Received Calls automatically (Auto Answer) Alpine Europe top page (http://www.alpine-europe.com).
-
Page 64: Hands-Free Phone Control
5 seconds. the time of printing. The telephone is redialed. Alpine reserves the right to change or modify any information or specifications without notice or obligation. Call Switching Operation While making a call, this function allows you to initiate the transfer of the audio between the mobile phone and the speakers in the car. -
Page 65: Call History
Redialing a Number in Dialed Numbers Call History History Call History is recorded for the last dialed/received/missed calls. There Previously dialed telephone numbers are stored in dialed numbers are various ways of making calls based on the “Call History”. The history. -
Page 66: Voice Dial Operation
Touch [Call] of the person name or the telephone The numeric keypad screen is displayed. Touch number you want to call from the Phone Book list. (input) the telephone number, and then touch [Call]. The call is placed. The call is placed. •... -
Page 67: Second Incoming Call Function
Second incoming call function Preset a number in the Phone Book (Shortcut dial) If a second call is received during a current call, you can have the first caller wait momentarily while you take the second call. When you are Numbers that you dial frequently can be as signed to preset for quick finished with one call, you can switch to the other one. -
Page 68: Camera Operation (Optional)
Touch any area of the screen to display the view details, refer to “Setting the Camera Input” (page 48). change function keys.* For the information of the Alpine camera, refer to the table below. Touch [Back], [Panorama], [Corner] or [Top] to Direct Camera RCA Camera choose the view angle. -
Page 69: Adjusting Alarm Volume (Hce-C300R Only)
Display example for sensitivity adjustment screen Adjusting Alarm Volume (HCE-C300R only) This operation can be performed only when the gear lever is in the reverse position (R). Make sure view change function is set to ON (page 48). Touch any area of the screen to display the view change function keys. -
Page 70: Sd Memory Video
To operate your devices connected to the AUX terminals on the rear WARNING panel of INA-W910R (AUX1 mode) or to the iPod (V)/AUX Input It is dangerous for the driver to watch the TV/Video connector by using an AV/RCA interface cable (sold separately) (AUX2 while driving the vehicle. -
Page 71: Tue-T200Dvb Operation (Optional)
INA-W910R if it is Ai-NET compatible. With a CD Changer connected When DVB-T is selected in “Setting the AUX Mode” (page 48), the to the Ai-NET input of the INA-W910R, the CD Changer will be source is displayed in Source selection screen. -
Page 72: Multi-Changer Selection (Optional)
Multi-Changer Selection (Optional) USB Memory/ When using KCA-410C (Versatile Link Terminal), you can connect two Portable audio changers. In changer mode, touch [CHG SEL] or press BAND player (Optional) on the remote control (sold separately) to select the next changer. To operate the selected changer, see “CD/MP3/WMA/ A USB memory or Portable audio player can be connected to this unit AAC”... -
Page 73: Playback
Touch [ ] or [ ] to select the desired track Hierarchy 1 (file). Hierarchy 2 Returning to the beginning of the current track (file): Touch [ USB Memory Fast backward: Hierarchy 3 Touch and hold [ Advancing to the beginning of the next track (file): Touch [ Fast forward: Touch and hold [... -
Page 74: Random Play Shuffle (M.i.x.)
Another search mode can be used for the same operation, although the hierarchy differs. The Shuffle function of the USB memory or Portable audio player is displayed as on the INA-W910R. Searching by artist name Touch [ ] after touching [P1/2]. -
Page 75: Alphabet Skip Function (Tag Search Mode Only)
• While in the search mode, you can jump to an assigned position by Selecting Playlist/Artist/Album/Genre/ touching the direct search bar for quick search. For details, refer to “Direct Search Function” (page 78). Composer (Tag search mode only) • After touching [ ] of ALL in the Tag search mode will play back all songs in the list when you are in a hierarchy with an asterisk “*”... -
Page 76: About Mp3/Wma/Aac File Of Usb Memory
About MP3/WMA/AAC File of USB iPod/iPhone Memory (Optional) Playing back MP3/WMA/AAC MP3/WMA/AAC files are prepared, then stored to a USB memory. A media player or jukebox can also be used to sync music to a portable device. Do not make a file’s playback time Connecting an iPod/iPhone more than 1 hour. -
Page 77: Setting The Ipod Control
• If a song is playing on the iPod/iPhone when it is connected to this Setting the iPod Control unit, it will continue playing after the connection. • If the artist, album or song name, created in iTunes, has too many characters, songs may not be played back when connected to this unit. -
Page 78: Direct Search Function
• If Video mode is selected, the Video playlists/Movies/Music Videos/ Direct Search Function TV Shows/Video Podcasts search mode may be used depending on the connected iPod/iPhone (Only for iPhone or iPod compatible Video). The unit’s direct search function can be used to search for an album, •... -
Page 79: Selecting Playlist/Artist/Album/Genre/Composer/Episode/Category
Display example for Albums search screen Random Play Shuffle (M.I.X.) The Shuffle function of the iPod is displayed as on the INA-W910R. Shuffle ALL ALL: All songs in the iPod are played back in random sequence. Any one song does not play back again until all songs have been played back. -
Page 80: Remote Control
Button Remote Control Radio mode: SEEK (DN) button CD/Changer mode: Press the button to go back to the beginning of the current track. Press and hold to fast Controls on Remote Control reverse. MP3/WMA/AAC iPod mode: Press the button to go back to the beginning of the current file. -
Page 81: When Using The Remote Control
SETUP Button DVD Video/Video CD: Not used. • When pressed and held in while in the AUDIO Button pause mode, the disc is played in slow DVD Video/Video CD/DivX mode: Switches audio. motion at 1/8th the normal speed. When BAND Button held in for 5 more seconds, the slow motion speed switches to 1/2 the normal Radio mode: Changes the band. -
Page 82: Battery Replacement
Battery Replacement Information Battery type: CR2025 battery or equivalent. Opening the battery case About DVDs Slide out the battery cover while firmly pressing in the direction of the arrow. Music CDs and DVDs have grooves (tracks) in which the digital data is recorded. -
Page 83: Terminology
* To enjoy DTS surround sound you need the separately sold DTS digital audio processor (PXA-H700, etc.). The DVD video software must also have a DTS sound track. The INA-W910R has a built-in DTS 2-channel audio decoder. Analogue audio outputs are available. -
Page 84: List Of Language Codes
List of Language Codes (For details, see page 39.) Abbreviation Code Language Abbreviation Code Language Abbreviation Code Language 6565 Afar 7369 Interlingue 8278 Kirundi 6566 Abkhazian 7375 Inupiak 8279 Romanian 6570 Afrikaans 7378 Indonesian 8285 Russian 6577 Amharic 7383 Icelandic 8287 Kinyarwanda 6582... -
Page 85: List Of Country Codes
List of Country Codes (For details, see page 39.) Country Abbreviation Code Country Abbreviation Code Country Abbreviation Code 6568 Andorra 6877 Dominica 7573 Kiribati 6569 United Arab Emirates 6879 Dominican Republic 7577 Comoros 6890 Algeria 7578 Saint Kitts and Nevis 6570 Afghanistan 6571... - Page 86 Abbreviation Code Country Abbreviation Code Country Abbreviation Code Country 8069 Peru 8374 Svalbard and Jan Mayen 8487 Taiwan, Province of China 8070 French Polynesia 8375 Slovakia 8490 Tanzania, United Republic of 8071 Papua New Guinea 8376 Sierra Leone 8565 Ukraine 8072 Philippines 8377...
-
Page 87: In Case Of Difficulty
- Allow enough time for the condensation to evaporate (about 1 hour). system is properly connected, or then consult your authorized • Ambient Temperature Alpine dealer. - Make sure the temperature inside the vehicle is between 0°C and 45°C (32°F and 113°F). - Page 88 - Cancel the parental lock or change the rating level. If the above mentioned solution does not solve the problem, Picture is unclear or noisy. consult your nearest Alpine dealer. • Disc is being fast-forwarded or fast-reversed. Unable to fast forward or backward the disc.
- Page 89 • Mechanism error. 1) Touch [Eject] of Disc on the Eject/Tilt screen and eject the disc. If not ejecting, consult your Alpine dealer. 2) When the error indication remains after ejecting, touch [Eject] of Disc on the Eject/Tilt screen again.
- Page 90 - Connect another USB memory/Portable audio player. • Malfunction in the CD Changer. - Consult your Alpine dealer. Press the magazine eject button • A USB device that is not supported by the unit is connected. and pull out the magazine.
-
Page 91: Specifications
Effective Number of Picture Elements 99.99% or more • There are no songs in the iPod/iPhone. Illumination System - Download songs to the iPod/iPhone and connect to the INA-W910R. FM TUNER SECTION Tuning Range 87.5 – 108.0 MHz Mono Usable Sensitivity 8.1 dBf (0.7 µV/75 ohms) - Page 92 BLUETOOTH SECTION CHASSIS SIZE BLUETOOTH Specification Bluetooth V2.0 Width 178 mm (7") Output Power +4 dBm Max. (Power class 2) Height 100 mm (3-15/16") Profile HFP (Hands-Free Profile) Depth 164.6 mm (6-1/2") HSP (Head Set Profile) • Due to continuous product improvement, specifications and design are subject to change without notice.
-
Page 93: Installation And Connections
Do not tap into these leads to provide power for this SYSTEMS TO MAKE GROUND CONNECTIONS. unit. When connecting the INA-W910R to the fuse box, make Bolts or nuts used for the brake or steering systems (or any other... -
Page 94: Installation
Remove the mounting sleeve from the main unit (see Installation “Removal” on page 95). The unit can be installed in the mounting sleeve in three positions by aligning its mounting holes (A to C) on the sides of the unit. Position A will be used in Caution most cases. - Page 95 (*) already attached to the To modify the face plate, consult your Alpine dealer. car’s chassis. If C is used, the face plate cannot be mounted. Consult your Alpine Attach the Original Mounting Bracket to each side of the dealer.
- Page 96 • The diagram and the fuse amperage shown above are in the case when INA-W910R is used individually. • If the switched power (ignition) lead of the INA-W910R is connected directly to the positive (+) post of the vehicle’s battery, the INA-W910R draws some current (several hundred milliamperes) even when its switch is placed in the OFF position and the battery may be discharged.
-
Page 97: Calibration When Connected To Hce-C300R
Continue with the following operations after performing step 4 in Calibration when connected to “Performing Calibration” of the owner’s manual of HCE-C300R. While doing such operations, touch the button on the screen to select HCE-C300R “CHANGE” or “DONE” to perform calibration on this unit. Touching [Corner] and [Back] on the screen of this unit performs the same Obstacle detection performance adjustment and guidance mark settings operation as pressing the switch which is supplied by HCE-C300R. -
Page 98: Connections
Connections Antenna ISO Antenna Plug REMOTE OUT To remote input lead (White/Brown) REMOTE IN To remote output lead (White/Brown) To plus side of the back lamp REVERSE signal lead of the car (Orange/White) CAMERA SW Not used (Black) GUIDE CONT To guide control input terminal (White/Green) To steering remote control... - Page 99 Use when the optional direct camera is connected. Make sure the connection is made to bare metal and is • When an Alpine rearview camera HCE-C300R is used, please make securely fastened using the sheet metal screw provided. sure to connect it to this unit via Direct CAMERA Input Connector.
- Page 100 Power Antenna Lead (Blue) Connect this lead to the +B terminal of your power antenna, if applicable. • This lead should be used only for controlling the vehicle’s power antenna. Do not use this lead to turn on an amplifier or a signal processor, etc.
-
Page 101: System Example
System Example Connect the Ai-NET compatible audio processor (Fiber optic digital compatible), DVD player and changer. Optical Digital Cable (KWE-610A) Fiber optic digital Input terminal (for head unit) Audio Processor (Ai-NET) Guide Control (Fiber optic digital compatible) (sold separately) Ai-NET Fiber optic cable digital Input... - Page 102 Ai-NET Connector Connect this to the output or input connector of other product equipped with Ai-NET. System Switch When connecting an equalizer or divider using Ai-NET feature, place the two switches in the EQ/DIV position. When no device is connected, leave the switches in the NORM position.
- Page 103 When Connecting External Equipment To Video Output terminal DVE-5027, etc. (sold separately) To Audio Output terminal Direct rearview camera HCE-C117D, etc. (sold separately) To Video Output terminal Camera with RCA video output (sold separately) To Audio Input terminal Rear monitor (sold separately) To Video Input terminal To Video Output terminal...
- Page 104 RCA Extension Cable (sold separately) Video/Audio Input Connectors YELLOW is for input video, RED is right and WHITE is left input the audio. AV/RCA interface cable (4-pole mini AV plug to 3-RCA) (sold separately) Usable 4-pole mini AV plug Wiring convention of this system is as follows: Audio L (White) Audio R (Red) Ground...
Need help?
Do you have a question about the INA-W910R and is the answer not in the manual?
Questions and answers