
Related Manuals for Xantrex Truecharge TC20+


Summary of Contents for Xantrex Truecharge TC20+
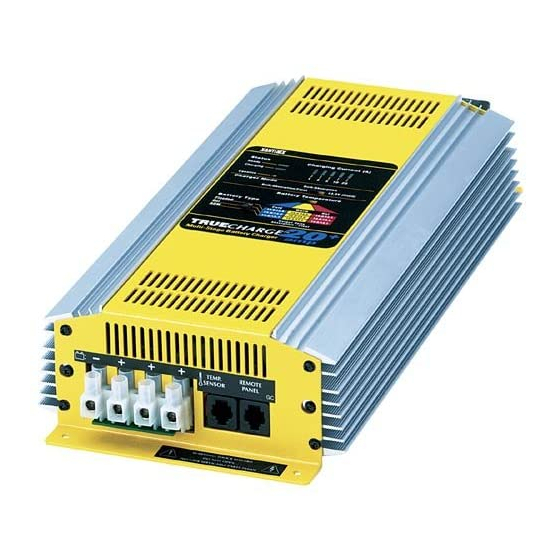
- Page 1 TC20+ TC40+ Owner’s Guide Xantrex Truecharge 20+/40+ Amp Multistage Battery Charger...
- Page 2 Truecharge 20+/40+ Amp Multistage Battery Charger Owner’s Guide...
-
Page 3: Contact Information
About Xantrex Xantrex Technology Inc. is a world-leading supplier of advanced power electronics and controls with products from 50 watt mobile units to 1 MW utility-scale systems for wind, solar, batteries, fuel cells, microturbines, and backup power applications in both grid-connected and standalone systems. Xantrex products include inverters, battery chargers, programmable power supplies, and variable speed drives that convert, supply, control, clean, and distribute electrical power. -
Page 4: About This Guide
Truecharge+. Audience The guide is written for anyone intending to install and operate a Truecharge+ battery charger. Xantrex recommends, however, that the product be installed by a certified technician or electrician. Organization This guide contains four chapters and four appendixes. - Page 5 Appendix D “Product and System Information” contains the Xantrex warranty for your product and return instructions. It also contains a place for you to record the serial number and date of purchase and other details of your battery charger.
-
Page 6: Table Of Contents
Contents Important Safety Instructions Explosive gas precautions - - - - - - - - - - - - - - - - - - - - - - - - - - - - - - - - - - - - - 1–x Precautions When Working With Batteries - - - - - - - - - - - - - - - - - - - - - - - - - 1–x 1 Introduction Truecharge+ Features - - - - - - - - - - - - - - - - - - - - - - - - - - - - - - - - - - - - - - - - 1–2... - Page 7 Contents Connecting to AC Wiring - - - - - - - - - - - - - - - - - - - - - - - - - - - - - - - - - - - 2–11 Grounding - - - - - - - - - - - - - - - - - - - - - - - - - - - - - - - - - - - - - - - - - - - - - 2–14 Installing Optional Accessories - - - - - - - - - - - - - - - - - - - - - - - - - - - - - - - - 2–14 Battery Temperature Sensor - - - - - - - - - - - - - - - - - - - - - - - - - - - - - - - - - 2–14...
- Page 8 Contents Maintenance Guidelines - - - - - - - - - - - - - - - - - - - - - - - - - - - - - - - - - - - - - - C–2 Preparation for Cleaning Batteries - - - - - - - - - - - - - - - - - - - - - - - - - - - - - - - C–3 Clothing- - - - - - - - - - - - - - - - - - - - - - - - - - - - - - - - - - - - - - - - - - - - - - - - C–3 Tools- - - - - - - - - - - - - - - - - - - - - - - - - - - - - - - - - - - - - - - - - - - - - - - - - - C–3...
- Page 9 viii...
-
Page 10: Important Safety Instructions
4. The charger is designed to be permanently connected to your AC and DC electrical systems. Xantrex recommends that all wiring be done by a certified technician or electrician to ensure adherence to the local and national electrical codes applicable in your application. -
Page 11: Explosive Gas Precautions
Ignition Protected. They may be installed in areas containing gasoline tanks and fittings which require Ignition Protected equipment. Xantrex recommends, nevertheless, that it is safest not to install electrical equipment in these areas. 3. To reduce the risk of battery explosion, follow these instructions and those published by the battery manufacturer and the manufacturer of the equipment in which the battery is installed. - Page 12 Important Safety Information 3. Wear complete eye protection and clothing protection. Avoid touching your eyes while working near batteries. 4. If battery acid contacts skin or clothing, wash immediately with soap and water. If acid enters your eye, immediately flood it with running cold water for at least twenty minutes and get medical attention immediately.
-
Page 14: Introduction
Introduction Chapter 1, “Introduction” introduces and describes features of the Truecharge+ multistage battery chargers. -
Page 15: Truecharge+ Features
Introduction Truecharge+ Features Truecharge+ is an advanced battery charger designed specifically for high performance, deep-cycle lead-acid batteries. It is smaller and lighter than many other chargers and can be installed or stored in small compartments. It has AC to DC isolation, a surge protector, and many other safety features which reduce potential shock and fire hazards. -
Page 16: Selector Switches
Truecharge+ Features Selector Switches Truecharge+ has selector switches for charge mode, battery type, and battery temperature setting. Charge mode The charge-mode switch allows you to select three-step charge, two-step charge or 13.5 volt fixed output modes. Refer to Appendix B, “Battery Charging”... -
Page 17: Fixed Voltage Mode
Introduction Fixed Voltage Mode The fixed voltage mode setting is meant to be used as a power supply or battery eliminator. It is not meant for charging batteries. The battery type, battery temperature, and equalize switches are all ignored in fixed voltage mode. - Page 18 Indicator Lights and Settings on the Front Panel Table 1-1 Truecharge+ front panel Panel Item Description Status indicator lights which indicate that batteries are charged and ready for use or that the batteries are being charged or equalized. Indicator lights which show the total charging current, in amps, into the three battery banks.
-
Page 19: How Truecharge+ Works
Introduction How Truecharge+ Works Truecharge+ changes the alternating current (AC) supply from the utility to the controlled low-voltage, direct current (DC) required to charge the battery by using high-frequency, switched-mode power conversion circuits. The high-frequency power conversion method is similar to that used in power supplies for computers and other electronic equipment. -
Page 20: Installing Truecharge
Installing Truecharge+ Chapter 2, “Installing Truecharge+” lists the materials you receive, provides site recommendations for installing Truecharge+, and provides the materials and procedures for its installation. The chapter also makes reference to the installation codes that may be applicable in your application, for example, the US National Electrical Code (NEC, NFPA 70), the Canadian Electrical Code (CEC, CSA C22.1), and the... -
Page 21: Materials List
Installing Truecharge+ Materials List Figure 2-1 Truecharge 20+ (left) and Truecharge 40+ (right) Contents The unit is packed with the following materials: • Owner’s Guide • Wiring cover with 2 blunt-tip screws and two lock washers • AC cable clamp •... -
Page 22: Location
This battery charger is Ignition Protected, so it can be installed in areas containing gasoline tanks or fittings which usually require Ignition Protected equipment. Xantrex recommends, however, that it is safest not to install electrical equipment in these areas. Close to AC Avoid the use of extended wire lengths if possible. - Page 23 Installing Truecharge+ t a t u s h a r g i n u r r e n t ( A a r g 1 3 5 1 0 2 0 l i z h a r g e r M o d e u l k / A b s o r p t i o...
-
Page 24: Wiring Requirements
Preparing for Installation Wiring Requirements Figure 2-2 depicts a typical configuration system for the Truecharge+ showing the AC and DC wiring and protection devices required for a successful installation. DC Wiring The DC wiring must meet the following requirements: • Length and size Wire Length maximum length... -
Page 25: Ac Wiring
Installing Truecharge+ AC Wiring Be sure that your AC wiring meets the following requirements before you install the Truecharge+: • Input wiring The AC input wiring for Truecharge+ should be three-conductor cable, providing a line, neutral, and ground conductor in an outer jacket. -
Page 26: Tools
Preparing for Installation Tools To mount and connect Truecharge+ you need: p a slot screwdriver with a maximum 3/16 in wide blade for the DC terminals p a No. 1 Phillips screwdriver for securing the AC wiring compartment cover p a wire stripper p the manufacturer's recommended crimp tool for any crimp terminals that are being used Materials... -
Page 27: Installing Truecharge
Installing Truecharge+ Installing Truecharge+ WARNING Shock and Energy Hazards Be sure to read the safety guidelines and pay attention to all cautions and warnings throughout the installation procedure. The installer is responsible for ensuring compliance with the installation codes for your particular application. Disconnect all sources of AC and DC power before proceeding. -
Page 28: Connecting Dc Wiring For A Single Battery Or Multiple Batteries
Installing Truecharge+ Connecting DC Wiring For A Single Battery Or Multiple Batteries WARNING Truecharge+ cannot be set to deliver different charging profiles at each output. Therefore all the batteries you are charging must be the same type, that is, all should be flooded, or all gel, or all AGM. - Page 29 Installing Truecharge+ To install the DC wiring: 1. Plan the route the DC wires will follow trying to make it as short as possible. Measure the required wire length, and cut the cables. Allow some extra length for connections and to provide slack in the wires. It is possible that the connection to the battery negative circuit may not actually be right at the battery.
-
Page 30: Connecting To Ac Wiring
Installing Truecharge+ 8. Before proceeding, carefully check the wiring polarity – make sure the positive on the charger is going to the positive on the batteries (fuse or breaker) and make sure the negative on the charger is going to the battery negative terminal (or engine negative bus or DC negative bus). - Page 31 Installing Truecharge+ 3. Route the wiring without connecting it to the AC source or to the charger yet. 4. Install the supplied cable clamp in the knock-out of your choice on the AC wiring compartment on the top end of the charger and tighten the locknut.
- Page 32 Installing Truecharge+ To connect AC wires with the crimp-on butt-splice connector: : You must exercise care when crimping butt-splice connectors. Note Use a crimp tool designed for this type of connector such as a Panduit, catalog number CT100, CT160, or CT 260. 1.
-
Page 33: Grounding
Installing Optional Accessories If you have purchased the accessories, you can also install the Battery Temperature Sensor (BTS) and the Remote Display Panel at this time. For maximum battery life, Xantrex strongly recommends the use of the BTS. Battery Temperature Sensor Purpose The BTS provides the charger with temperature information which overrides the temperature settings on the front panel. -
Page 34: Remote Display Panel
Installing Optional Accessories Effect on With the BTS, the charging setpoints are temperature-compensated up to charging 140 °F (60 °C). If the battery temperature exceeds 140 °F the charger stops charging. The BTS also provides more accurate compensation over a wider range of temperatures than the front panel temperature settings. For example, with the switch in the HOT position, the charger compensation is equivalent to the BTS compensation at 95 °F (35 °C). -
Page 36: Operation
Operation Chapter 3, “Operation” provides background information for charging batteries with Truecharge+ and procedures for charging and for equalizing batteries. Chapter 3 also explains how to calculate charging times, how generators affect Truecharge+ and explains how the front panel indicator lights are interpreted. -
Page 37: About Charging
Operation About Charging This section provides information about • calculating the charging time • effect of battery temperature on charging • indicator light activity during the charging process • using a generator to run Truecharge+ Charging Time Formula Charging time will depend on the capacity of your battery and on how deeply it is discharged.The following equation calculates an approximate charging time: Charging time = CAP x DOD... -
Page 38: Battery Temperature
You should consider purchasing a Xantrex battery temperature sensor if you expect wide temperature fluctuations. 3–3... -
Page 39: Using A Generator As Source Power
Many generators provide output voltage that is modified sine wave (MSW) rather than the true sine wave (TSW) that your utility provides. Xantrex does not recommend the use of Truecharge+ with MSW generators due to increased heating of the charger. -
Page 40: Charging Batteries
Charging batteries Activity Charger status Ready indicator is lit, The unit is either in float mode of three-step Charging indicator is not charging, monitor mode of two-step charging, or in fixed-voltage output mode. Rapid flashing of all Truecharge+ can’t respond to your request. indicator lights You may have pressed the equalization button for an inappropriate setting such as a... - Page 41 Operation 2. Set the Battery Type selector switch according to the table below. If your battery is then select Flooded (has removable caps Flooded intended for refilling) Any sealed type but AGM Absorbed glass mat 3. Set the Battery Temperature selector switch for the temperature of your battery as follows: If battery temperature is Select...
-
Page 42: Equalizing Flooded Batteries
Equalizing Flooded Batteries light on Truecharge40+) will light for most of the charging cycle. Near the end of the cycle, the charging current decreases and the other indicator lights illuminate in sequence. The charger pauses every 15 minutes for approximately 10 seconds to measure the battery voltage and to check for new or disconnected batteries. -
Page 43: Performing An Equalization
Recommended Xantrex recommends that you run a normal charge cycle on the batteries before you equalize them. While Truecharge+ will charge discharged batteries as part of the equalization cycle, it does not indicate when the charging has finished and the equalization begins. - Page 44 Equalizing Flooded Batteries Important Turn off or disconnect all loads on the battery during equalization. The voltage applied to the battery during equalization may be above the safe levels for some loads. Be sure to check battery electrolyte before and after equalization.
- Page 45 3–10...
-
Page 46: Maintenance And Troubleshooting
Maintenance and Troubleshooting Chapter 4, “Maintenance and Troubleshooting” provides information for maintaining and troubleshooting Truecharge+. -
Page 47: Care And Maintenance
Maintenance and Troubleshooting Care and Maintenance WARNING Risk of electrical shock Truecharge+ contains no user serviceable components. Do not attempt servicing unless you are a qualified technician or electrician. Contact your dealer or the manufacturer for service information. Cleaning Truecharge+ contains solid-state electronic components that require no maintenance. - Page 48 Troubleshooting Table 4-1 Indicator light sequences on Truecharge+ Display Condition Middle charging current indicator Truecharge+ is in over-temperature light blinks, all others are off shutdown due to excessive battery temperature. This shutdown only occurs if the BTS is installed. 4–3...
-
Page 49: Typical Problems
Maintenance and Troubleshooting Typical Problems This section lists typical problems you may have with the Truecharge+, suggests their causes, then offers possible solutions to the problems. Symptom Indicator lights do not turn on, or remain on, when charger is connected to an AC receptacle. Possible Cause Solution 1. - Page 50 Troubleshooting Symptom Charging light blinks but does not come on steadily. Other indicator lights are off. Possible Cause Solution 1. Battery voltage is too 1. Check battery. Do not charge a high (above 15.5 volts). battery rated at more than 12 volts nominal.
-
Page 52: A Specifications
Specifications Appendix A “Specifications” contains the Truecharge+ physical, electrical, AC input, and protection feature specifications. -
Page 53: Physical Specifications
Specifications Physical Specifications Dimensions in x 6 in x 2 385 mm x 172 mm x 70 mm Weight Truecharge 20+ 6.9 lbs (3.1 kg) Truecharge 40+ 7.4 lbs (3.3 kg) AC input connections Three color-coded No. 16 AWG wires (L, N, G) minimum 6 inches long in a separate AC wiring enclosure with provision for connection of a ½... - Page 54 Electrical Specifications Electrical Specifications Warm Cold Absorption voltage Flooded 14.0 14.4 14.8 VDC 13.8 14.2 14.6 VDC 14.0 14.3 14.6 VDC Warm Cold Float voltage at no load looded 13.1 13.5 13.9 VDC 13.4 13.8 14.2 VDC 13.1 13.4 13.7 VDC Equalize mode current Truecharge 20+ Truecharge 40+...
-
Page 55: Ac Input Specifications
Specifications AC Input Specifications Truecharge 20+ Truecharge 40+ AC input voltage range 90 – 135 VAC, 50/60 Hz Maximum AC input current at 6.5 A 12 A 90 VAC Typical AC input current at 4.6 A 8.5 A 120 VAC No-load AC power draw less than 3 watts less than 3 watts... -
Page 56: Approvals
Approvals Protection features Over-temperature Internal charger temperature is measured. Unit shuts down and restarts as follows: • Over-temperature shutdown at 62 °C • Over-temperature restart at 61 °C Current derating in Truecharge 20+ Truecharge 40+ ambient temperatures— 20 A at 30 °C to 10 A at 50 °C 40 A at 30 °C to 20 A at 50 °C automatic output Battery over-temperature... - Page 57 A–6...
-
Page 58: B Battery Charging
Battery Charging Appendix B “Battery Charging” describes the Truecharge+ multistage charging algorithm. -
Page 59: Charging Algorithms
Battery Charging Charging Algorithms Battery Type Truecharge+ charges lead-acid flooded, gel, and AGM (absorbed glass mat) batteries. Flooded “Flooded” batteries have removable battery caps for refilling with distilled water and testing the electrolyte. The sealed gel battery has its electrolyte is in the form of a gel rather than a liquid and does not require topping up. - Page 60 Charging Algorithms Bulk Charge In the first stage, known as the bulk charge, Truecharge+ delivers its full- rated output current.This constant current is delivered to the batteries until the battery voltage approaches its absorption voltage—typically around 14.4 volts for 12 volt batteries. The bulk charge stage restores about 75% of the battery’s charge.
-
Page 61: Equalization Charge
Battery Charging Absorption stage Float stage Bulk stage Charging started Constant voltage Constant voltage at the Float at Absorption voltage setting voltage setting DC Voltage Constant current at maximum charge rate Load current on demand DC Current Time Figure B-1 Three-stage charging profile Equalization Charge The equalization charge must be manually initiated because it is not required each time the battery is recharged. -
Page 62: C Battery Maintenance
Battery Maintenance Appendix C “Battery Maintenance” contains procedures for maintaining the battery enclosure, battery terminals and lugs, and battery cables. It also provides a list of the clothing, tools, equipment, and supplies you should have before you begin battery maintenance. -
Page 63: Maintenance Guidelines
Battery Maintenance Maintenance Guidelines WARNING Risk of acid burns Wear appropriate eye protection and rubber gloves when carrying out battery maintenance activities. WARNING Risk of fire, explosion, burns Use caution when wearing jewellery or working with metal tools around batteries. Do not allow any metal object to contact both battery terminals at the same time. -
Page 64: Preparation For Cleaning Batteries
Preparation for Cleaning Batteries Preparation for Cleaning Batteries The appropriate clothing, tools, equipment, and supplies are listed below. Gather what you need before beginning. Clothing Appropriate clothing could include old clothes, rubber boots, or old shoes. Battery acid is highly corrosive, so wear something you can live without just in case you splash some on yourself. -
Page 65: Maintaining And Cleaning
Battery Maintenance Maintaining and Cleaning Follow these procedures to maintain the • battery enclosure • battery terminal and lugs • cables WARNING Review the “Important Safety Instructions” on page ix before you begin. Battery Enclosure and Batteries Mix four ounces of baking soda with a gallon of fresh water and fill a spray bottle. -
Page 66: Cables
Maintaining and Cleaning Reconnect the battery cable terminals to the battery lugs and tighten to approximately 10–15 foot-pounds using the torque wrench. If you do not have a torque wrench, use an appropriate tool to tighten the bolts reasonably snug. Do not over-tighten. After tightening the cables, evenly coat all the exposed metal surfaces of the battery terminals and lugs with liquid neoprene. - Page 67 C–6...
-
Page 68: D Product And System Information
System Information Appendix D “Product and System Information” contains the Xantrex warranty for your product and return instructions. It also contains a place for you to record the serial number and date of purchase and other details of your battery... -
Page 69: Warranty
Xantrex reserves the right to use parts or products of original or improved design in the repair or replacement. If Xantrex repairs or replaces a product, its warranty continues for the remaining portion of the original Warranty Period or 90 days from the date of the return shipment to the customer, whichever is greater. - Page 70 Xantrex product specifications including high input voltage from generators and lightning strikes; c) the product if repairs have been done to it other than by Xantrex or its authorized service centers (hereafter "ASCs"); d) the product if it is used as a component part of a product expressly warranted by another manufacturer;...
-
Page 71: Disclaimer
APPLY TO THE PRODUCT SHALL BE LIMITED IN DURATION TO THE PERIOD STIPULATED UNDER THIS LIMITED WARRANTY. IN NO EVENT WILL XANTREX BE LIABLE FOR ANY SPECIAL, DIRECT, INDIRECT, INCIDENTAL OR CONSEQUENTIAL DAMAGES, LOSSES, COSTS OR EXPENSES HOWEVER ARISING WHETHER IN CONTRACT OR TORT INCLUDING WITHOUT... -
Page 72: Return Material Authorization Policy
Return Material Authorization Policy Return Material Authorization Policy Before returning a product directly to Xantrex you must obtain a Return Material Authorization (RMA) number and the correct factory "Ship To" address. Products must also be shipped prepaid. Product shipments will... - Page 73 Product and System Information If you are returning a product to a Xantrex Authorized Service Center (ASC) A Xantrex return material authorization (RMA) number is not required. However, you must contact the ASC prior to returning the product or presenting the unit to verify any return procedures that may apply to that particular facility.
-
Page 74: Information About Your Truecharge
Information about your Truecharge+ Information about your Truecharge+ Please record the following information when you unpack your Truecharge+unit. r Model Number r Serial Number r Purchased From r Purchase Date If you need to contact Customer Service, please gather the following information before calling.The information will assist the service representative in providing you with better service. - Page 75 Product and System Information D–8...
-
Page 76: Index
Index charging batteries, procedure for 3–5 charging current 1–2 absorption charge, battery activity charging indicator light, significance of during B–3 3–4 AC input specifications A–4 charging time, calculating 3–2 AC wiring requirements 2–6 charging too slow 4–5 AGM (absorbed glass mat) batteries B–2 charging, effect of battery temperature AGM batteries, selector switch for 1–3 sensor on 2–15... - Page 77 Index equalization charge B–4 equalization of batteries, understanding 3–7 maintaining batteries C–2 equalizing, procedure 3–9 maintaining the Truecharge+ unit 4–2 materials list 2–2 monitor mode 3–7 failure to operate 4–4 fan speed, change in speed of 3–7 fax number for Customer Service D–2 neoprene, liquid C–2 features 1–2 first aid 1–xi...
- Page 78 Index telephone number for Customer Service D–2 temperature switch description of 1–3 setting for charging 3–3 temperature, effect of in charging 3–3 terminals and lugs, maintenance of C–4 three-battery charging 1–2 three-stage charging algorithm explanation B–2 three-stage charging profile (diagram) B–4 tools, required for installation 2–7 troubleshooting, use of indicator lights in 4–2 two-stage charging, difference from three-stage B–...
- Page 80 Xantrex Technology Inc. Toll free 1 800 670 0707 Direct 1 360 925 5097 Fax 1 360 925 5143 CustomerService@xantrex.com www.xantrex.com...
Need help?
Do you have a question about the Truecharge TC20+ and is the answer not in the manual?
Questions and answers